


How to Add an MX Entry in cPanel
II. How to Create an Email Account in cPanel
III. How to Set a Default Address in cPanel
IV. How to Set Up an Autoresponder in cPanel
V. How to Set Up Email Forwarding in cPanel
VI. How to Set Up Email Filters in cPanel
VII. How to Enable Spam Protection in cPanel
VIII. How to Add an MX Entry in cPanel
IX. How to Use Webmail From Within cPanel
X. How to Change Your cPanel Password
XI. How to Update Your Contact Information in cPanel
XII. How to Change Your cPanel Theme
XIII. How to Change the Primary Language in cPanel
XIV. How to Add a Record With the DNS Zone Editor in cPanel
XV. How to Backup Your Website in cPanel
XVI. How to Use the Disk Space Usage Tool in cPanel
XVII. How to Create Additional FTP Accounts in cPanel
XVIII. How to Password Protect a Directory in cPanel
XIX. How to Use the IP Blocker in cPanel
XX. How to Set Up Hotlink Protection in cPanel
XXI. How to Create a Subdomain in cPanel
XXII. How to Create an Addon Domain in cPanel
XXIII. How to Create a Domain Alias in cPanel
XXIV. How to Set Up Domain Redirects in cPanel
XXV. How to Create a MySQL Database in cPanel
XXVI. How to Use the Index Manager in cPanel
XXVII. How to Create Custom Error Pages in cPanel
XXVIII. How to Set Up a Cron Job in cPanel
Managing the Domain Name System (DNS) for your server can be intimidating. Thankfully, cPanel has built-in tools to make this easy.
A part of these tools is the ability to add a mail exchange (MX) entry in cPanel. The MX record directs email to the mail server, indicating how messages should be routed in agreement with the Simple Mail Transfer Protocol (SMTP), which is the standard protocol for email. Setting a custom MX entry is useful if you want your email handled by another server or if you want to set up a backup email server.
In this tutorial, we will discuss how to add an MX entry in cPanel.
Requirements
- A server running cPanel.
- Login credentials for cPanel.
How to Add an MX Entry in cPanel
1. Login to cPanel.
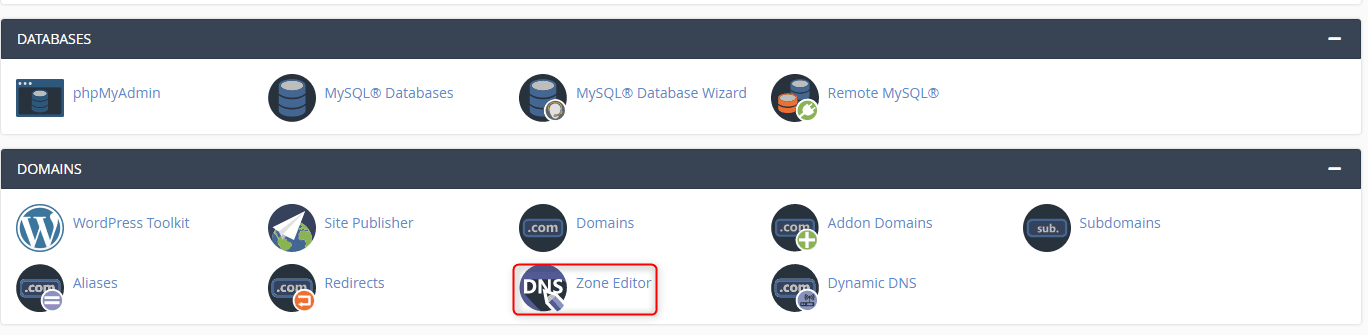
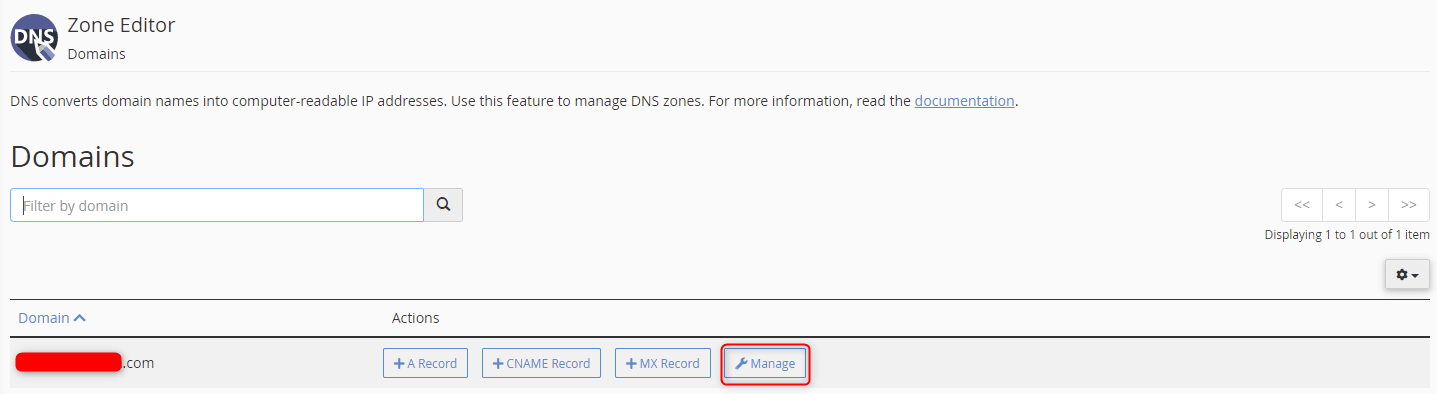
2. In the Domains section, click Zone Editor.
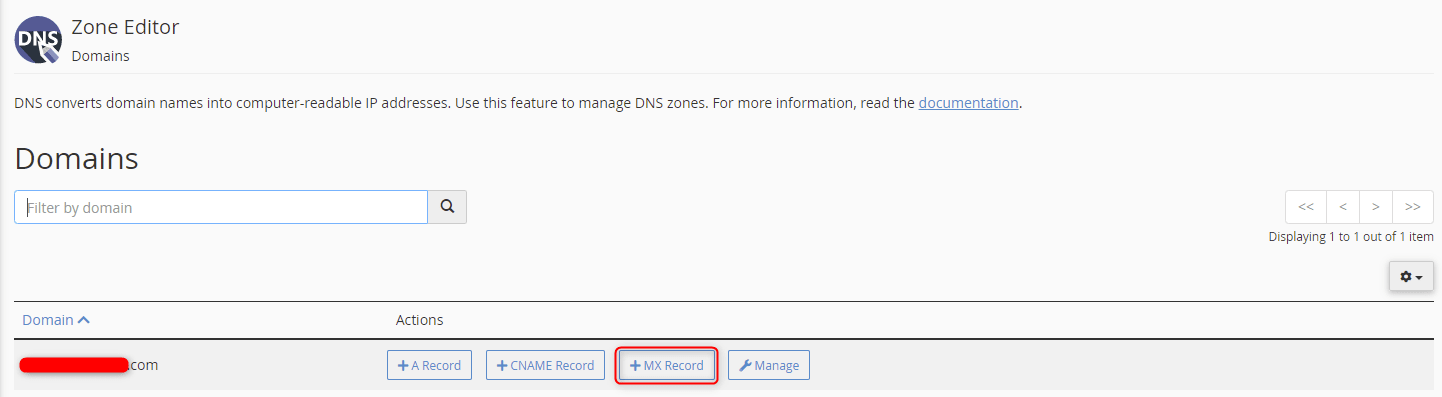
3. Next to the domain for which you wish to add the entry, click the +MX Record button.
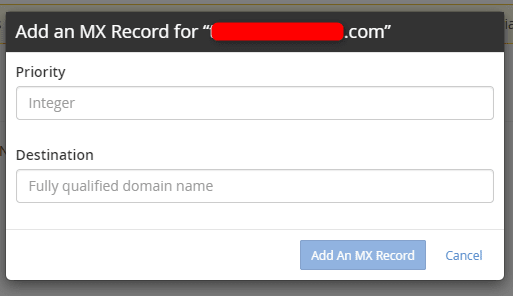
4. A dialog box will appear for adding an MX entry for the domain in cPanel. In the Priority field, type a priority where the lower value denotes higher priorities, and zero is the highest priority. In the Destination field, enter the desired domain or subdomain name. Once completed, click Add An MX Record.
5. A green confirmation appears at the top, right-hand corner of the screen, and you are taken back to the original Zone Editor page.

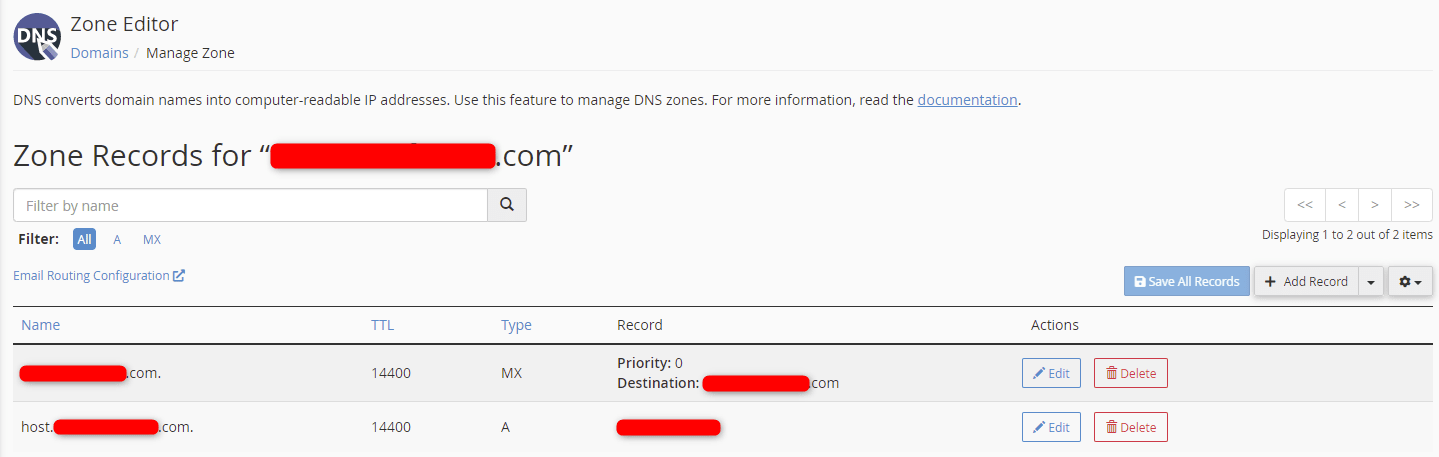
6. The MX entry has been added to cPanel. To view the DNS records for the given domain, click the corresponding Mange button.
The records can be edited or deleted from this view.
Wrapping Up
These steps on how to add an MX entry in cPanel allow you to manage your DNS more effectively. The MX record specifically ensures your email is routed to the email server from which you manage your email.
Of course, cPanel is available on Liquid Web’s VPS Hosting, Cloud Dedicated Servers, and Dedicated Servers. Contact our sales team to set up your cPanel server.
Check out the next tutorial in our cPanel series on How to Use Webmail From Within cPanel.
Related Articles:


About the Author: Ronald Caldwell
Ron is a Technical Writer at Liquid Web working with the Marketing team. He has 9+ years of experience in Technology. He obtained an Associate of Science in Computer Science from Prairie State College in 2015. He is happily married to his high school sweetheart and lives in Michigan with her and their children.


Our Sales and Support teams are available 24 hours by phone or e-mail to assist.
Latest Articles
In-place CentOS 7 upgrades
Read ArticleHow to use kill commands in Linux
Read ArticleChange cPanel password from WebHost Manager (WHM)
Read ArticleChange cPanel password from WebHost Manager (WHM)
Read ArticleChange the root password in WebHost Manager (WHM)
Read Article