
 Ronald Caldwell
 It is well known that website security is crucial. Securing the files behind the site is even more important. Even if your server security fails you and someone accesses your server, knowing how to password protect a directory in cPanel adds another level of security.
This guide will walk you through password protecting a cPanel file directory.
Requirements
For this tutorial, you need:
- A server running cPanel.
- Login credentials cPanel.
How to Password Protect a Directory in cPanel
1. Login to cPanel.

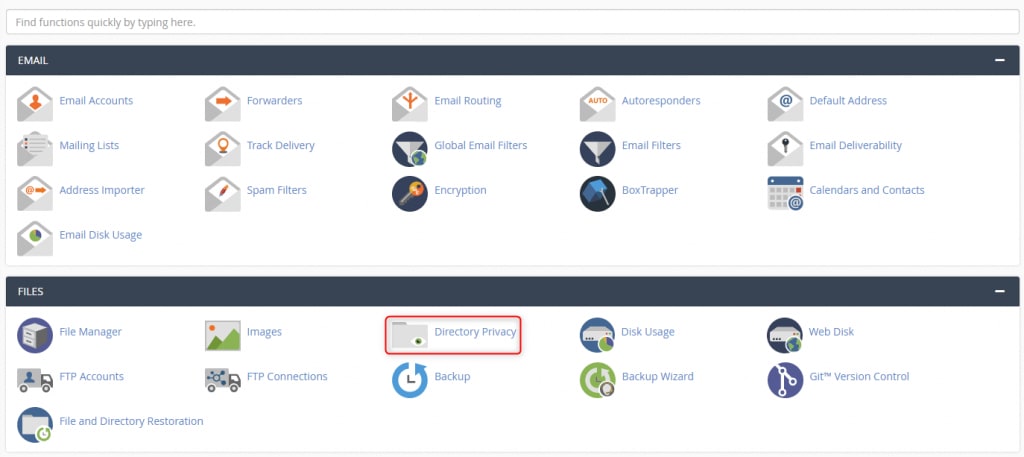
2. Click Directory Privacy.
3. Click Edit next to the folder you want to protect.

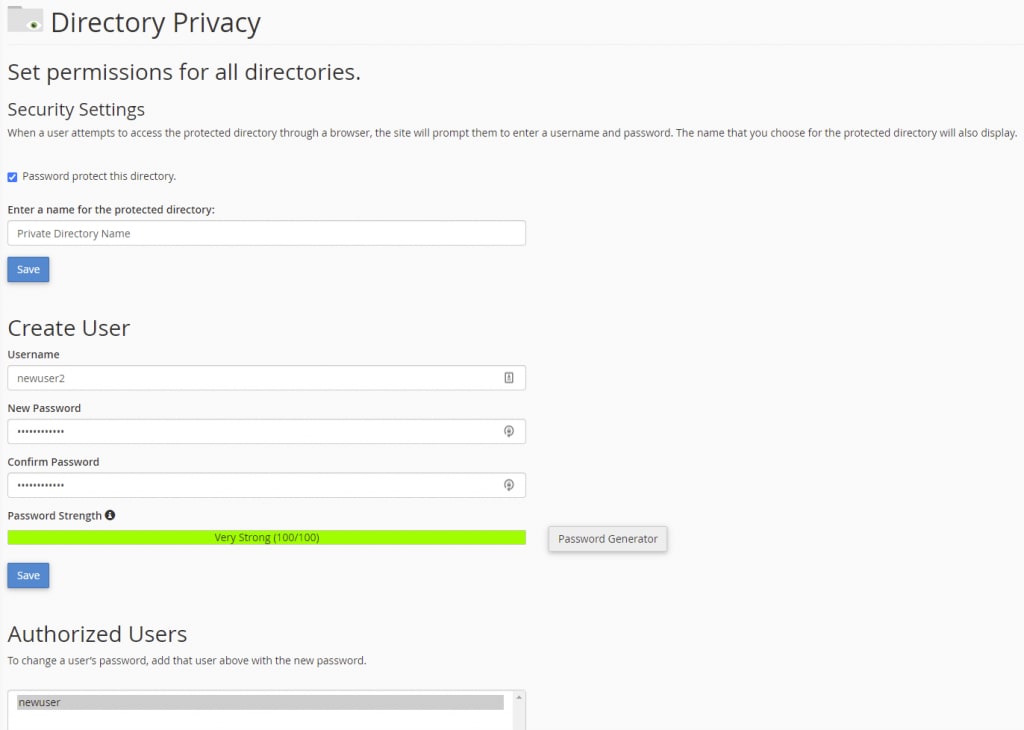
4. Click the checkbox next to Password protect this directory and enter a name for the protected directory. Once everything is selected and the name is entered, click Save.

5. A green confirmation message appears signifying the directory is protected, requiring a password to enter it via a web browser.

6. You must create at least one user and assign them a password for them to access the directory. Navigate back to the Directory Privacy page by clicking Go Back. A Create User area is now there to be completed.

7. Enter the Username and then the password twice to confirm it, and click Save. Another green confirmation appears.

8. Click Go Back to view the Authorized Users section that is now viewable.
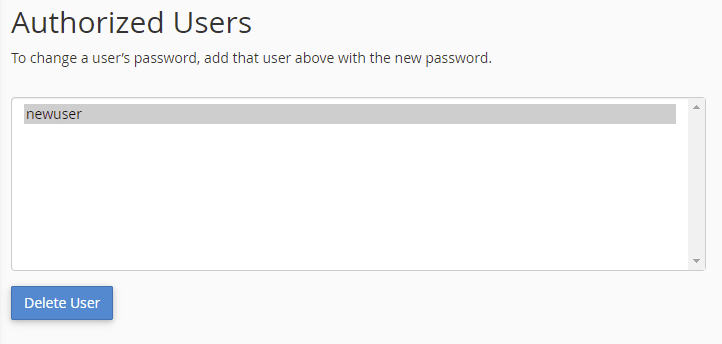
9. The protected directory now has one user who has access to it. Repeat this process for each additional user you want to grant access to.
10. The protected directory displays a Yes under the Private column.

Wrapping Up
Managing files and directories on your server can be time-consuming but are well worth the effort. Knowing how to password protect a directory in cPanel is the difference between a potential threat and a data breach.
Fortunately, Liquid Web’s 24/7/365 support for cPanel customers offers the help you need for these tasks should you run into issues. The managed experience on our VPS hosting, cloud servers, and dedicated servers with cPanel is just a call or chat away. Contact our sales team today to get started.