


How to Install Jenkins on AlmaLinux
Jenkins is an open-source continuous integration server. It is a tool for continuously compiling and testing software projects. In the field of Continuous Integration (CI), the concepts from CI are combined with those from Continuous Delivery (CD) — also known as Continuous Deployment — in the CI/CD pipeline. See our The Best DevOps Tools for Infrastructure Automation for more information about this growth area in advanced software development techniques.
Jenkins has the advantage of allowing developers to integrate changes into the application server's software easily. AlmaLinux is a Jenkins-compatible platform that ensures all Jenkins CI operations run smoothly and reliably. This article lets you understand how to install Jenkins on AlmaLinux with a minimal number steps.
Steps to Install Jenkins
To install Jenkins on AlmaLinux, you can follow the steps outlined in this article.
How to Install Jenkins — Prerequisites
- Operating System & Version: The OS must be AlmaLinux OS 8 for this tutorial.
- Linux Administrative Privileges: To log into the AlmaLinux 8 system, use the sudo command as root or as a user with administrative privileges.
- Minimum Hardware Requirements: You 2 GB of RAM and 10 GB free of disk space.
Step #1. Update Your System
Before installing and configuring Jenkins, ensure your system is up to date with the most recent version of the software packages. Execute these commands to have your AlmaLinux system updated to the most current versions of relevant software:
sudo dnf update
sudo dnf upgrade
Step #2. Add Jenkins Repository ("Repo")
To begin, execute the following command to enable the Extra Packages for Enterprise Linux (EPEL) repository:
sudo dnf install epel-releaseThe Jenkins project includes a repository for the Jenkins package. You must add the Jenkins repo and the GPG key because they are not added by default with AlmaLinux 8.
Execute the following command to add Jenkins repo into the AlmaLinux system:
sudo cusudo curl -o /etc/yum.repos.d/jenkins.repo https://pkg.jenkins.io/redhat-stable/jenkins.repoHere is the output:
~]# sudo curl -o /etc/yum.repos.d/jenkins.repo https://pkg.jenkins.io/redhat-stable/jenkins.repo
  % Total    % Received % Xferd  Average Speed   Time    Time     Time  Current
                                 Dload  Upload   Total   Spent    Left  Speed
100    85  100    85    0     0   3863      0 --:--:-- --:--:-- --:--:--  3863
To import the Jenkins GPG key into the AlmaLinux system, execute the following command:
rpm --import https://pkg.jenkins.io/redhat-stable/jenkins.io.keyYou can download metadata for all the packages by executing the following command:
sudo dnf makecacheHere is the output:
~]# sudo dnf makecache
AlmaLinux 8 - BaseOS                           42 kB/s | 3.8 kB     00:00
AlmaLinux 8 - AppStream                        52 kB/s | 4.1 kB     00:00
AlmaLinux 8 - Extras                           37 kB/s | 3.8 kB     00:00
Extra Packages for Enterprise Linux 8 - x86_64 44 MB/s |  16 MB     00:00
Jenkins-stable                                300 kB/s |  27 kB     00:00
Metadata cache created.
The command below can be run to ensure the new source list was added correctly:
sudo dnf repolist
Here is the output:
~]# sudo dnf repolist
repo id                                        repo name
appstream                                AlmaLinux 8 - AppStream
baseos                                   AlmaLinux 8 - BaseOS
epel                         Extra Packages for Enterprise Linux 8 - x86_64
extras                                   AlmaLinux 8 - Extras
jenkins                                     Jenkins-stable
If the Jenkins repo is not already enabled, you can enable the Jenkins repo by executing the following command:
sudo dnf repolist jenkinsHere is the output:
~]# sudo dnf repolist jenkins
repo id         repo name               status
jenkins       Jenkins-stable           enabled
Step #3. Install Java
Before installing Jenkins, Java must be installed on your Almalinux system because Jenkins is written in Java. To install Java, execute the following command:
sudo dnf install java-11-openjdk java-11-openjdk-develHere is the output:
~]# sudo dnf install java-11-openjdk java-11-openjdk-devel
AlmaLinux 8 - BaseOS                                                                                                                     3.2 MB/s | 6.1 MB     00:01
AlmaLinux 8 - AppStream                                                                                                                   22 MB/s |  12 MB     00:00
AlmaLinux 8 - Extras                                                                                                                      46 kB/s |  23 kB     00:00
Jenkins-stable                                                                                                                           495 kB/s |  27 kB     00:00
Dependencies resolved.
=========================================================================================================================================================================
 Package                                       Architecture               Version                                                    Repository                     Size
=========================================================================================================================================================================
Installing:
 java-11-openjdk                               x86_64                     1:11.0.20.0.8-3.el8                                        appstream                     472 k
 java-11-openjdk-devel                         x86_64                     1:11.0.20.0.8-3.el8                                        appstream                     3.4 M
To check the installed Java version, execute the following command:
java -versionHere is the output:
~]# java -version
openjdk version "11.0.20" 2023-07-18 LTS
OpenJDK Runtime Environment (Red_Hat-11.0.20.0.8-1) (build 11.0.20+8-LTS)
OpenJDK 64-Bit Server VM (Red_Hat-11.0.20.0.8-1) (build 11.0.20+8-LTS, mixed mode, sharing)
Step #4. Install Jenkins
With the previous steps completed, you are ready for the actual instructions on how to install Jenkins. To install Jenkins on your AlmaLinux system, execute the following command:
sudo dnf install jenkinsHere is the output:
~]# sudo dnf install jenkins
Last metadata expiration check: 0:00:59 ago on Mon 21 Aug 2023 05:37:38 AM UTC.
Dependencies resolved.
=========================================================================================================================================================================
 Package                                Architecture                          Version                                       Repository                              Size
=========================================================================================================================================================================
Installing:
 jenkins                                noarch                                2.401.3-1.1                                   jenkins                                 94 M

Transaction Summary
=========================================================================================================================================================================
Install  1 Package

Total download size: 94 M
Installed size: 94 M
Is this ok [y/N]: y
Downloading Packages:
jenkins-2.401.3-1.1.noarch.rpm                                                                                                            19 MB/s |  94 MB     00:05
-------------------------------------------------------------------------------------------------------------------------------------------------------------------------
Total                                                                                                                                     19 MB/s |  94 MB     00:05
Running transaction check
Transaction check succeeded.
Running transaction test
Transaction test succeeded.
Running transaction
  Preparing        :                                                                                                                                                 1/1
  Running scriptlet: jenkins-2.401.3-1.1.noarch                                                                                                                      1/1
  Installing       : jenkins-2.401.3-1.1.noarch                                                                                                                      1/1
  Running scriptlet: jenkins-2.401.3-1.1.noarch                                                                                                                      1/1
  Verifying        : jenkins-2.401.3-1.1.noarch                                                                                                                      1/1

Installed:
  jenkins-2.401.3-1.1.noarch

Complete!
To start and enable the Jenkins service, execute the following commands:
sudo systemctl start jenkins
sudo systemctl enable jenkins
Here is the output:
~]# sudo systemctl start jenkins
~]# sudo systemctl enable jenkins
Synchronizing state of jenkins.service with SysV service script with /usr/lib/systemd/systemd-sysv-install.
Executing: /usr/lib/systemd/systemd-sysv-install enable jenkins
Created symlink /etc/systemd/system/multi-user.target.wants/jenkins.service → /usr/lib/systemd/system/jenkins.service.
To check the Jenkins service status, execute the following command:
sudo systemctl status jenkinsHere is the output:
~]# sudo systemctl status jenkins
● jenkins.service - Jenkins Continuous Integration Server
   Loaded: loaded (/usr/lib/systemd/system/jenkins.service; disabled; vendor preset: disabled)
   Active: active (running) since Mon 2023-08-21 06:01:11 UTC; 19s ago
 Main PID: 24141 (java)
    Tasks: 52 (limit: 11968)
   Memory: 718.0M
   CGroup: /system.slice/jenkins.service
           └─24141 /usr/bin/java -Djava.awt.headless=true -jar /usr/share/java/jenkins.war --webroot=/var/cache/jenkins/war --httpPort=8080

Aug 21 06:00:40 ip-172-31-23-15.us-east-2.compute.internal jenkins[24141]: 2023-08-21 06:00:40.898+0000 [id=30]        INFO        jenkins.install.SetupWizard#init:
Aug 21 06:00:40 ip-172-31-23-15.us-east-2.compute.internal jenkins[24141]: *************************************************************
Aug 21 06:00:40 ip-172-31-23-15.us-east-2.compute.internal jenkins[24141]: Jenkins initial setup is required. An admin user has been created and a password generated.
Aug 21 06:00:40 ip-172-31-23-15.us-east-2.compute.internal jenkins[24141]: Please use the following password to proceed to installation:
Aug 21 06:00:40 ip-172-31-23-15.us-east-2.compute.internal jenkins[24141]: 6a6a6af5f3af42a2b1ab77d80a6bb9e5
Aug 21 06:00:40 ip-172-31-23-15.us-east-2.compute.internal jenkins[24141]: This may also be found at: /var/lib/jenkins/secrets/initialAdminPassword
Aug 21 06:00:40 ip-172-31-23-15.us-east-2.compute.internal jenkins[24141]: *************************************************************
Aug 21 06:01:11 ip-172-31-23-15.us-east-2.compute.internal jenkins[24141]: 2023-08-21 06:01:11.426+0000 [id=30]        INFO        jenkins.InitReactorRunner$1#onAttaine>
Aug 21 06:01:11 ip-172-31-23-15.us-east-2.compute.internal jenkins[24141]: 2023-08-21 06:01:11.487+0000 [id=22]        INFO        hudson.lifecycle.Lifecycle#onReady: J>
Aug 21 06:01:11 ip-172-31-23-15.us-east-2.compute.internal systemd[1]: Started Jenkins Continuous Integration Server.
Step #5. Configure Your Firewall
Jenkins listens on port 8080 by default. You must allow traffic on this port if your AlmaLinux system has a firewall. You can do this by executing the following commands:
sudo firewall-cmd --permanent --zone=public --add-port=8080/tcp
sudo firewall-cmd --reload
Here is the output:
~]# sudo firewall-cmd --permanent --zone=public --add-port=8080/tcp
success
~]# sudo firewall-cmd --reload
success
Step #6. Access Jenkins Web Interface
After the installation, go to http://your_server_ip:8080 in a web browser to view the Jenkins web interface.
Here is the output:
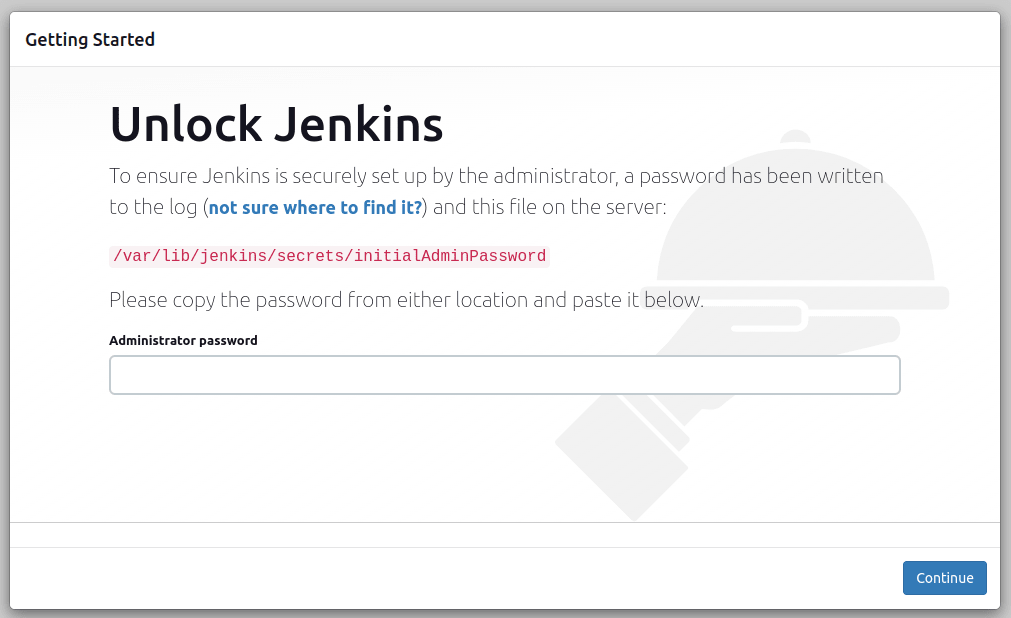
You must provide a password, which can be found in the file /var/lib/jenkins/secrets/initialAdminPassword.
To see the password, execute the following command:
sudo cat /var/lib/jenkins/secrets/initialAdminPasswordHere is the output:
~]# sudo cat /var/lib/jenkins/secrets/initialAdminPassword
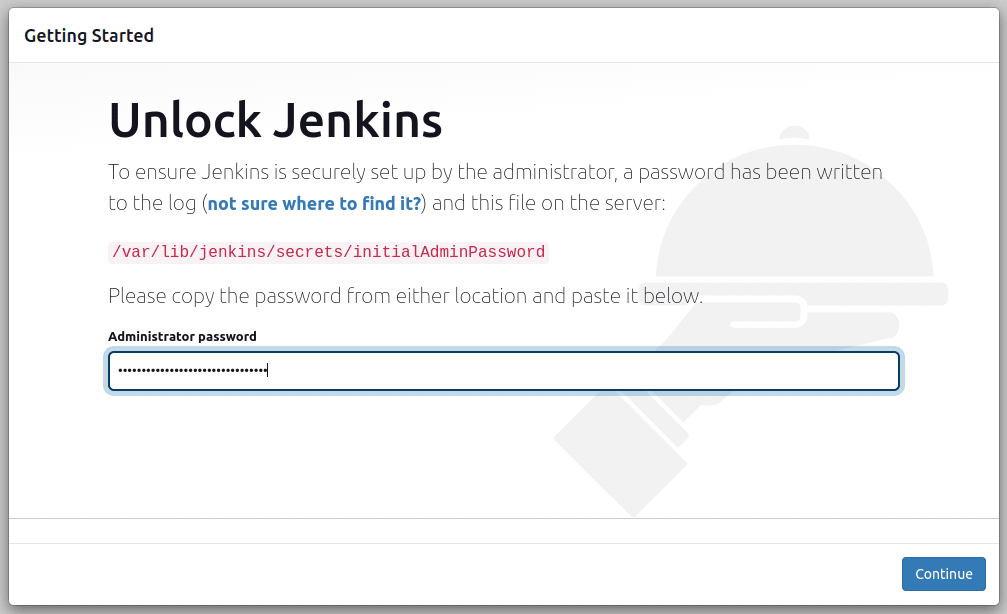
6a6a6af5f3af42a2b1ab77d80a6bb9e5Once you enter the Administrator password, click the Continue button:
The Customize Jenkins screen will be shown:
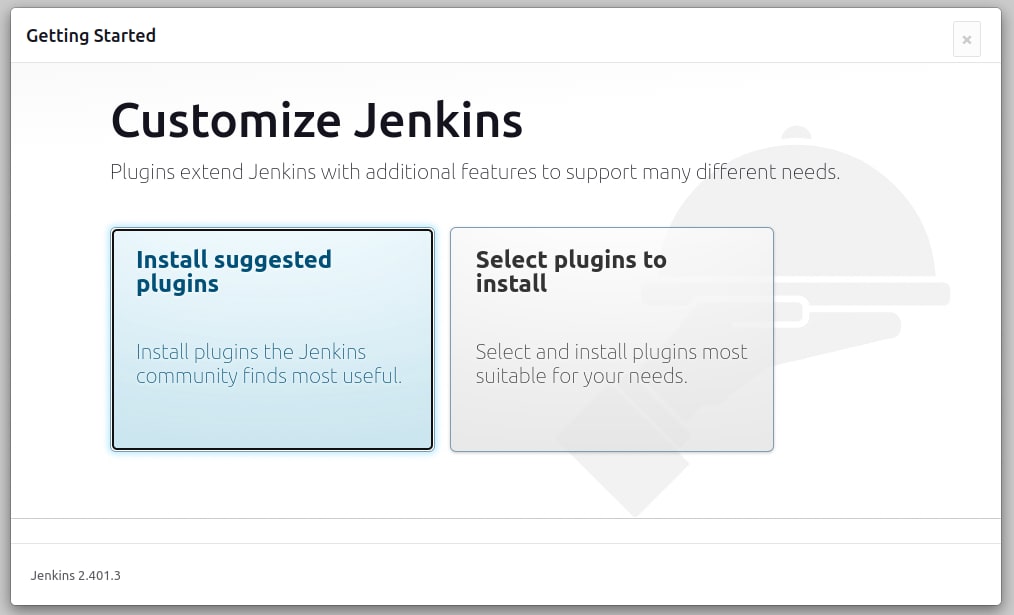
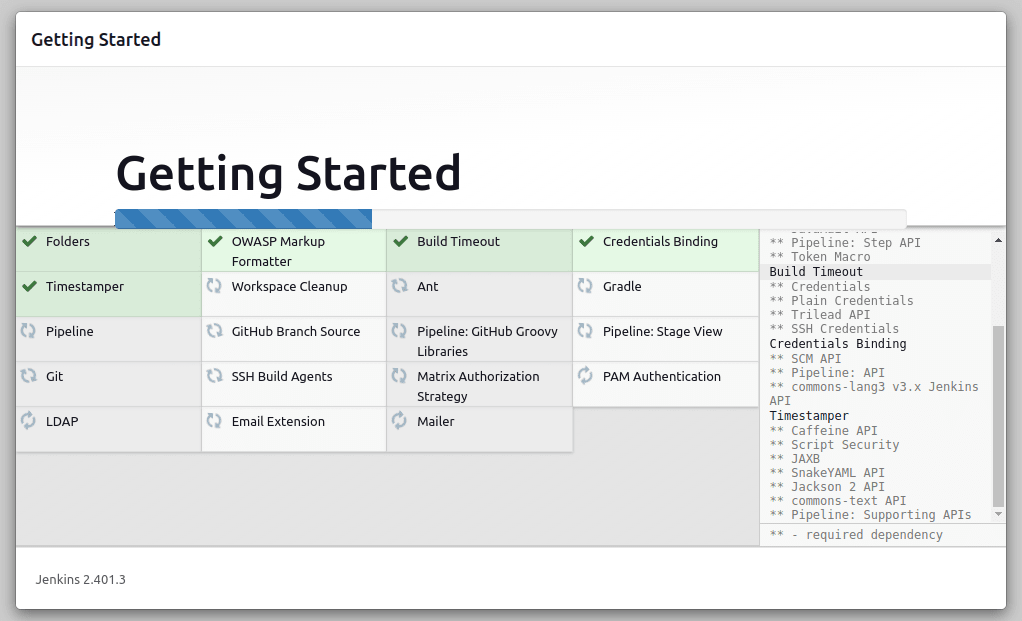
You can install the suggested plugins or select your own plugins in this window. We will proceed with installing the recommended plugins. You will notice that the installation will take a good amount of time to complete after it begins:
You must supply the administrator's Username, Password, Full Name, and email Address after the installation completes:
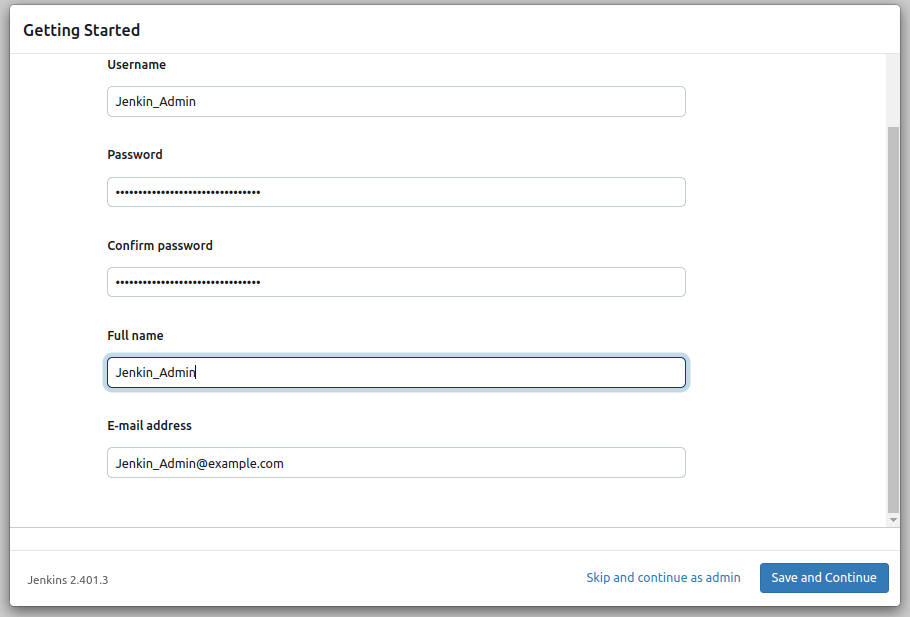
Click the Save and Continue button after entering the administrator's details:
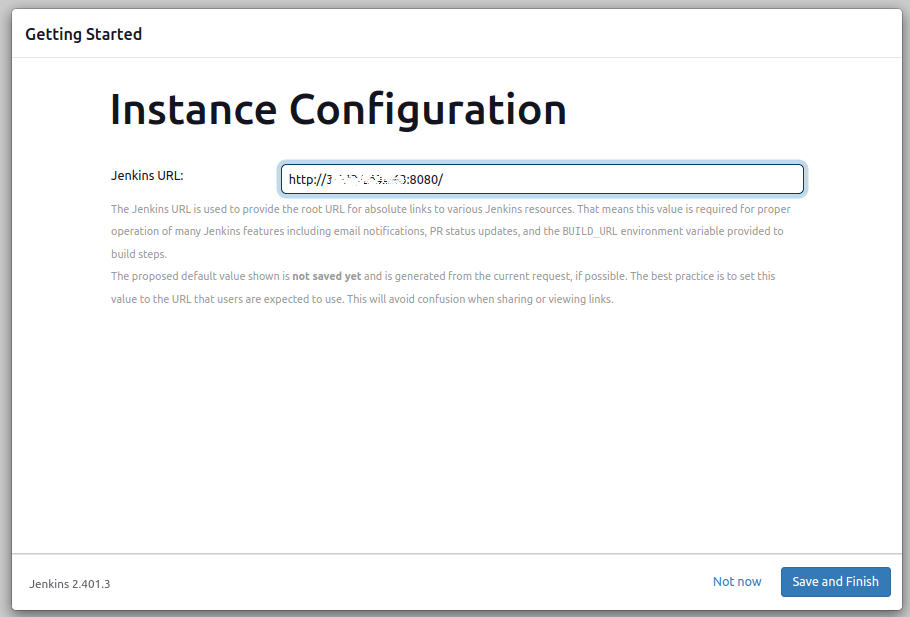
In this window, you can find your Jenkins URL. To save the changes, go to the bottom-right area of the window and click the Save and Finish button.
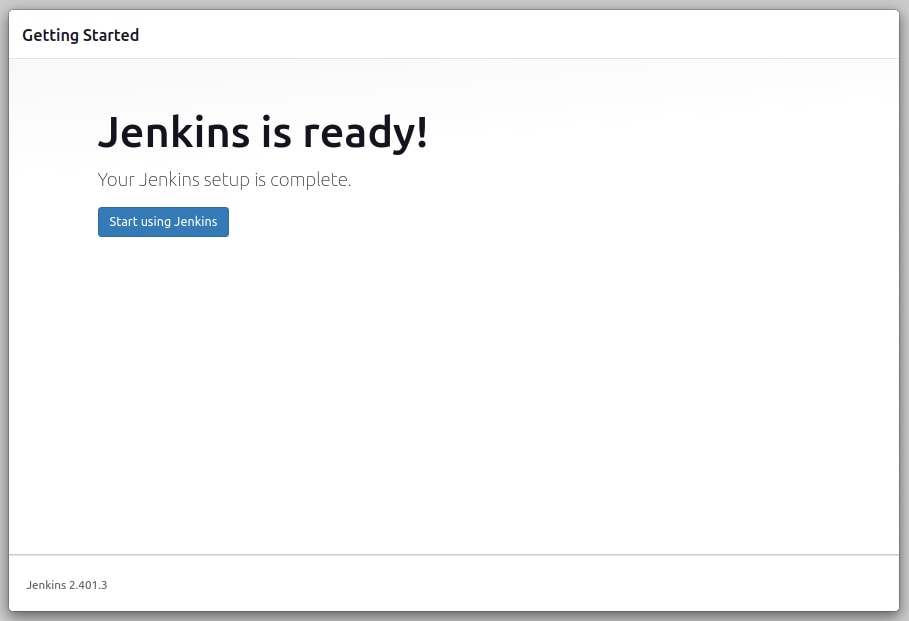
Congratulations on learning how to install Jenkins successfully! Jenkins is now ready for use. Click the Start using Jenkins button:
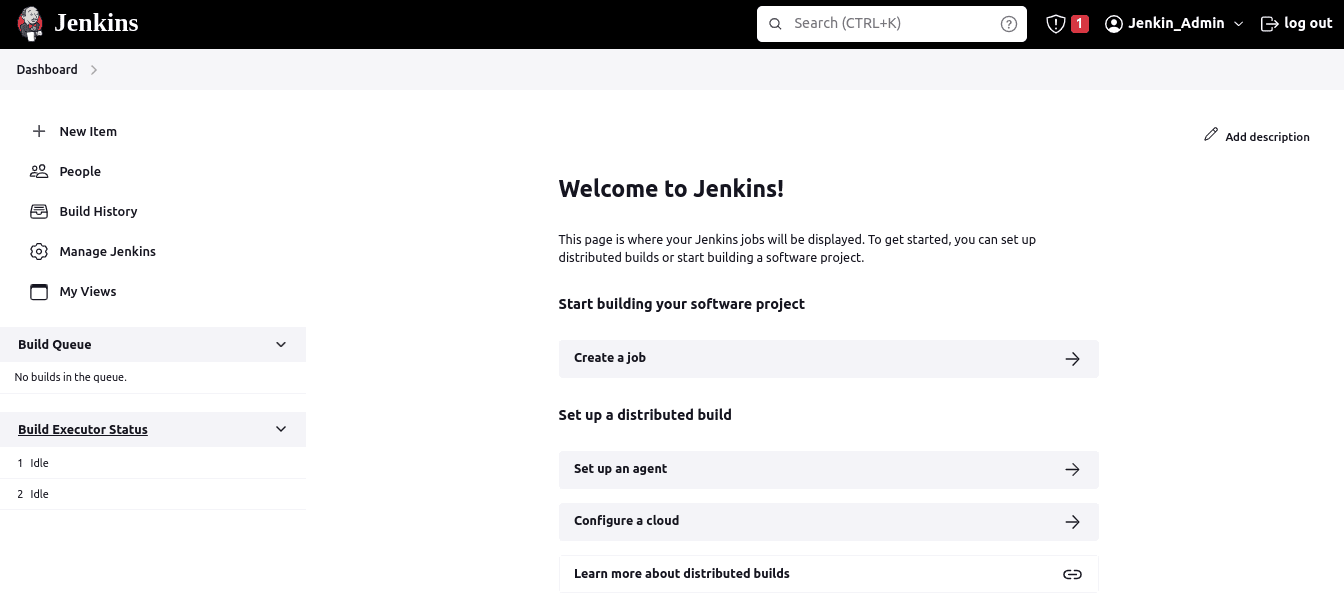
You have learned how to Install Jenkins on AlmaLinux! You can now see the Jenkins Dashboard:
Steps to Uninstall Jenkins
After learning how to install Jenkins, there may be a need to uninstall this software some point. To uninstall Jenkins on the AlmaLinux system, you can follow these steps.
Step #1. Stop the Jenkins Service
Before uninstalling Jenkins, you need to stop the Jenkins service:
sudo systemctl stop jenkinsStep #2. Remove the Jenkins Software
To uninstall Jenkins, removing the Jenkins software from your server, execute the following command:
sudo dnf remove jenkinsLeveraging Jenkins & Liquid Web Hosting Together
With this article's help, we hope you learned how to install Jenkins on AlmaLinux. Jenkins is a versatile automation tool that maintains its importance when used with AlmaLinux. It empowers developers to automate tasks, improve code quality, and accelerate software delivery, all while benefiting from the stability and performance of AlmaLinux as the underlying operating system.
If you're ready to take your web projects to the next level, Liquid Web hosting solutions will help you get there faster. Liquid Web provides various web hosting plans that can be combined with Jenkins on AlmaLinux. Using this solution, effective and efficient development workflows are feasible.
Furthermore, the help of our Jenkins AlmaLinux specialists on staff is always just a chat session or call away.
Related Articles:


About the Author: Mohammed Noufal
Mohammed Noufal is a B.Tech graduate with a decade of experience in server administration and web hosting. He is a father to two daughters and finds fulfillment in their growth. In his free time, he enjoys blogging, sharing experiences, and listening to music. With a strong technical background, family commitment, and creative outlets, he represents a well-rounded life journey.


Our Sales and Support teams are available 24 hours by phone or e-mail to assist.
Latest Articles
In-place CentOS 7 upgrades
Read ArticleHow to use kill commands in Linux
Read ArticleChange cPanel password from WebHost Manager (WHM)
Read ArticleChange cPanel password from WebHost Manager (WHM)
Read ArticleChange the root password in WebHost Manager (WHM)
Read Article