How to Update Reverse DNS in Manage
If you have a Storm VPS or a Liquid Web Dedicated server-based account and you want to update or modify the reverse DNS of your IP addresses, you can do so easily using your Manage account.
To begin, log in to your Manage account using your ID and password.
Once you are logged in, click on the Domains link in the left sidebar:

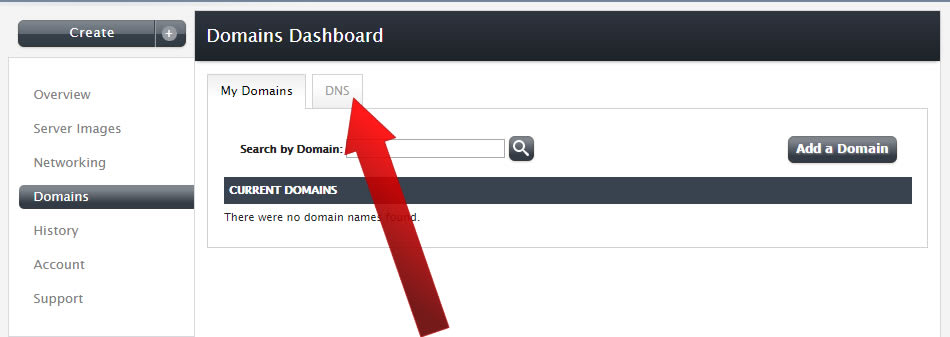
Then click on the DNS tab:

At the bottom of the page will be a Reverse DNS section. Select the server you wish to set reverse DNS for from the dropdown menu.

Then, click on Add next to the IP for which you'd like to add a Reverse DNS entry.

Add the hostname in the text box next to the server's IP and then, click the green checkbox:

At this point, you will receive a verification message asking you to confirm your choice. If everything looks correct, click on the Set Reverse DNS button.

You will receive a notification that your changes were saved.

Related Articles:

About the Author: David Singer
I am a g33k, Linux blogger, developer, student, and former Tech Writer for Liquidweb.com. My passion for all things tech drives my hunt for all the coolz. I often need a vacation after I get back from vacation....
Our Sales and Support teams are available 24 hours by phone or e-mail to assist.
Latest Articles
In-place CentOS 7 upgrades
Read ArticleHow to use kill commands in Linux
Read ArticleChange cPanel password from WebHost Manager (WHM)
Read ArticleChange cPanel password from WebHost Manager (WHM)
Read ArticleChange the root password in WebHost Manager (WHM)
Read Article


