
Installing Linux software from the command line can save you time, money, and make life easy — if you know what you’re doing! This article is a brief overview of how the command line operates on a RedHat or CentOS-based Linux distribution, or even within a server cluster.
Once we have learned how the command line works, we will move on to installing, removing, and updating our software packages via the command line with yum. To get started, let’s begin by making sure we understand what the command line does.
What is the Command Line?
The command line is a text-based interface that can be used to input instructions on a computer. A program called the bash shell usually provides the Linux command line. There have been multiple shells developed over time as Linux has grown. Red Hat Linux utilizes the GNU Bourne-Again Shell. This shell is also known as “bash.” Bash is an improved version of one of the most well-known shells used on UNIX like systems, the Bourne Shell (sh). When the bash shell is used to pass info between the user and the computer, it displays a symbol when it is awaiting a command from the user. This interface is called the shell prompt. When an average user starts a bash shell, the default prompt usually ends with a dollar sign $ character, but this can be modified to suit the user.

The dollar sign $ is replaced by the pound sign # if the shell is running as the root user. This symbol makes it apparent that it is a superuser shell, which can help to avoid accidents and mistakes on the accounts with elevated privileges.

Using bash to execute commands can be very robust. The bash shell also provides a useful scripting language that can support the automation of tasks. The shell even has additional capabilities that can help simplify or make operations that seem difficult in a graphical user interface (GUI) as simple as a single command.
Users access the bash shell through a terminal. A terminal provides a keyboard for user input and a display for output. On text-based installations, this can be on a Linux VPS server, a Linux dedicated servers physical console, the hardware keyboard, and the screen. Terminal access can also be configured through serial ports. Another way to access a shell is from a virtual console.
A Linux servers physical console supports multiple virtual consoles that act as separate terminals. Each virtual console supports an independent login session. If a graphical environment is available, it will run on the first virtual console. With a GUI running, you may access a virtual console by pressing Ctrl+Alt+F1 to go to the first console. You may use this combination, changing the F1 key out for F2 through F6, each representing their console.
How to Use the Shell?
The commands entered at the shell prompt must have three basic parts:
- A command to run
- Options to adjust the behavior of the command
- Arguments, which are targets of the commands
The command is the name of the program to run. It is usually followed by one or more options, which adjust the behavior of the command. The command options will start with either one or two dashes (e.g. -a or –all) to distinguish them from other arguments. Commands may also be followed by one or more arguments or flags, that often indicates a target that the command should affect. For example, the command:
usermod -L ge Has a command (usermod), an option (L), and argument flags (ge). The effect of this command is to lock the password on user Ge’s account.
To effectively use a command, you need to know what arguments, options, and flags it uses and in what order it expects them (the syntax of the command). Most commands have a –help option. This option causes the command to print a description of what it does, describes the command’s syntax, a list of the options it accepts, along with what they do.
If you are unsure how to operate a program and the –help option is not available, you may try the “man” page. The man page, also known as a manual page, provides an overview of the program, and its syntax. If we wanted to look at how the sudo command is used, we would type “man sudo” to get a manual page for the command sudo.
How to Access the Command Line in a Desktop Environment?
The desktop environment is the graphical user interface on a Linux system. The default desktop environment in RHEL is GNOME. It provides an integrated desktop for users and a unified development platform on top of a graphical framework provided by the X Window System. The GNOME Shell provides the core user interface functions for the GNOME desktop environment.
To get a shell prompt in GNOME, start a graphical terminal application.
We can select Applications → Utilities → Terminal
On the desktop, right-click or press the Menu key, and select “Open in Terminal” from the menu.
From the Activities Overview, select Terminal from the dash.
When a terminal window opens, a shell prompt displays for the user that started the graphical terminal program. The shell prompt and the terminal window’s title bar will indicate the current username, hostname, and working directory.
RPM and Software Packages
Red Hat developed the RPM Package Manager software, which provides a standard way to package software for distribution. Managing software in the form of RPM packages is much simpler than working with software that is extracted into a file system from an archive. The RPM software allows administrators to track which files are, or have been installed. It also checks to ensure supporting packages are present when the software is installed. Lastly, it identifies which dependencies need to be removed if a software package is uninstalled.
Information about installed packages is stored in a local RPM database on each system. All the software provided by Red Hat is implemented as an RPM package. RPM packages are usually named using a combination of the following info using this format:
name-version-release.architecture
When installing software from a repository, only the software name is required. Additionally, the software with the highest version will be installed. If there are several files within the same version, the software with the highest release number will be installed.
Each RPM software package is an archive made up of three components:
- The files installed by the packages
- Information (metadata) about the package – name, version, release, architecture
- A script which usually runs when the package is installed, updated, or removed
RPM packages are generally signed digitally by the group that packaged them. All software packages that come from a specific source are all signed with the same private GPG key. This way, if the software package is altered or corrupted in some way, the signature will no longer be shown as valid. This key signing allows the system to verify the integrity of the package before the installation begins.
The YUM Package Manager
The YUM command searches multiple repositories for software packages and any associated dependencies, so they can be installed together to reduce or eliminate and dependency issues.
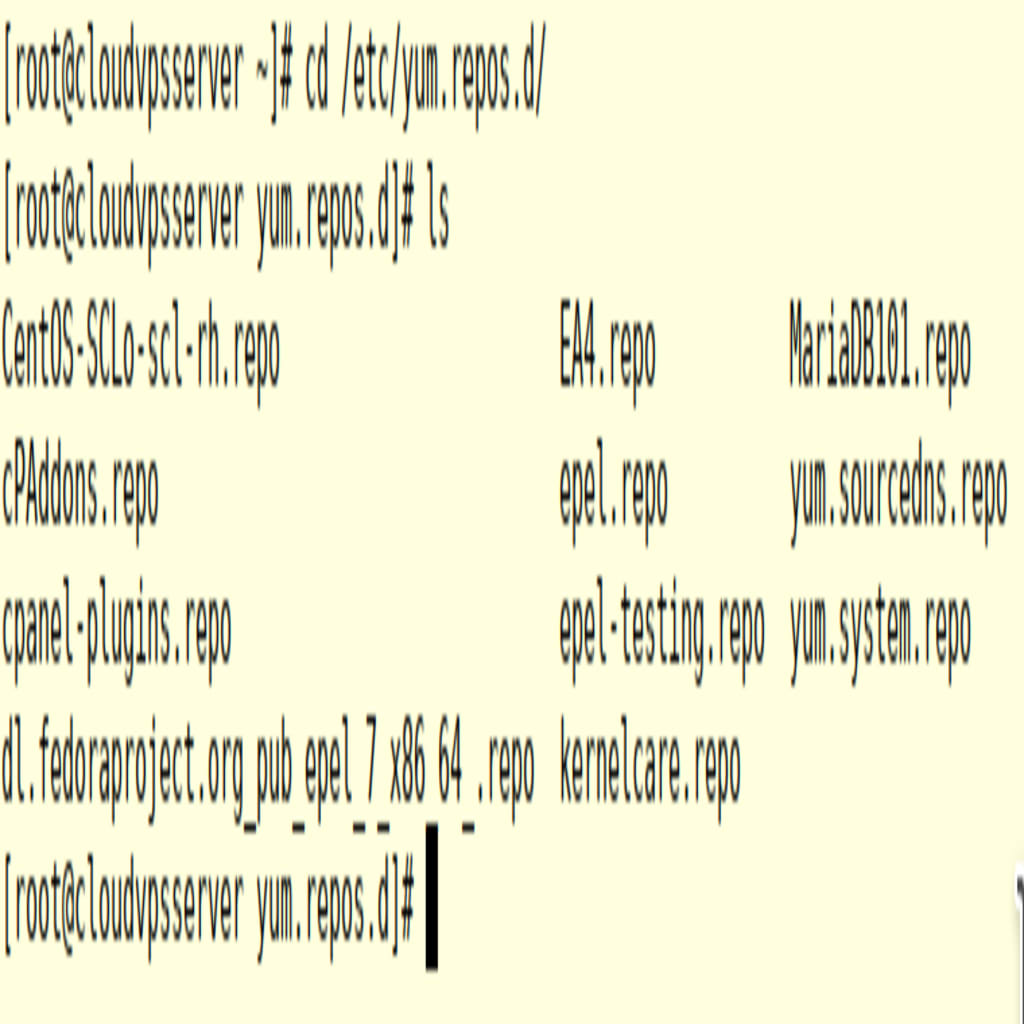
The main configuration file for yum is located at /etc/yum.conf with additional repository configuration files located in the etc/yum.repos.d directory. The yum command is used to list repositories, packages, and package groups:
Once a software package is installed, updates are checked against a repository during the daily update check. This allows for the RPM command to be used to query, update, install, and remove any outdated RPM packages.
Unfortunately, this check does not resolve dependencies automatically, and all software packages must be listed. Tools like YUM are essentially front-end applications for the RPM software and can be used to install an individual package or a collection of packages.
Managing Software Updates with YUM
Yum is a powerful command line tool that can be used to flexibly manage software packages.
Finding Software with YUM
yum help – display usage information
yum list – display installed and available packages.

Yum search KEYWORD – list packages by keywords found in the name and summary fields. To search for packages that have “web server” in their name, we can use search all:

yum info PACKAGENAME – gives detailed information about a package.

Yum provides PATHNAME – displays packages that match the path name specified. To find packages that provide /var/www/html directory use:

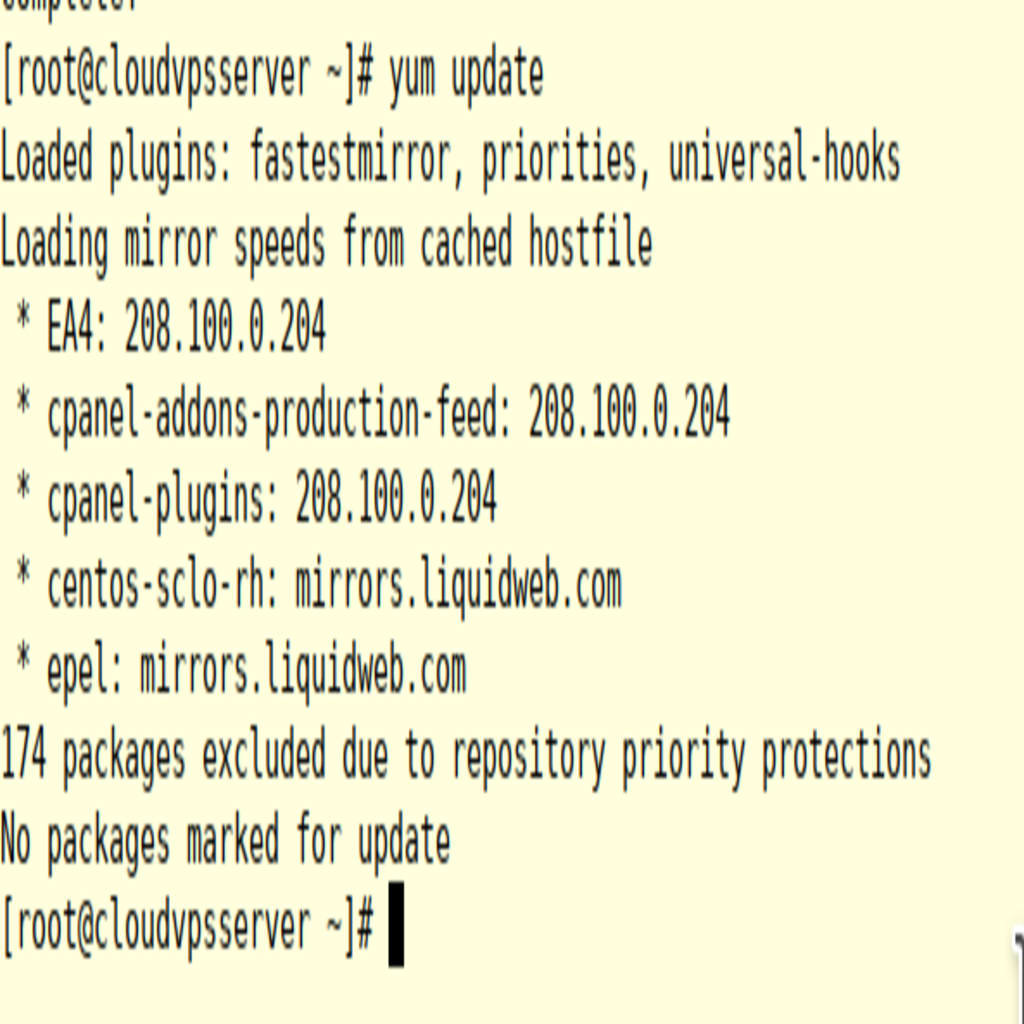
Before we begin to install a package, let’s first make sure our managed server’s system is up-to-date by issuing the command “yum update”.
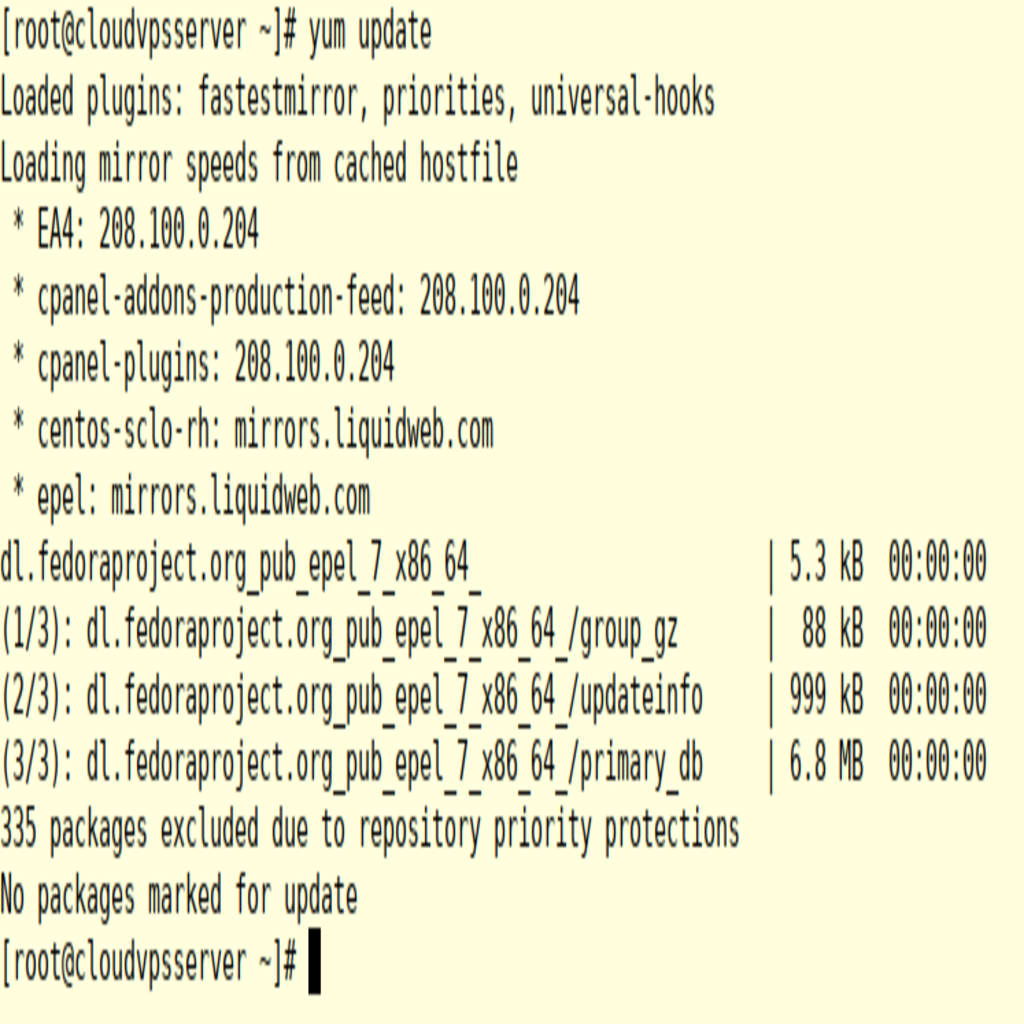
Now that we know our managed system is updated, let’s install our package.
yum install PACKAGENAMEThis command obtains and installs a software package, including all dependencies.

Next, we are asked if we want to install the package and dependencies. Type in ‘Y’ for yes, ‘N’ for NO
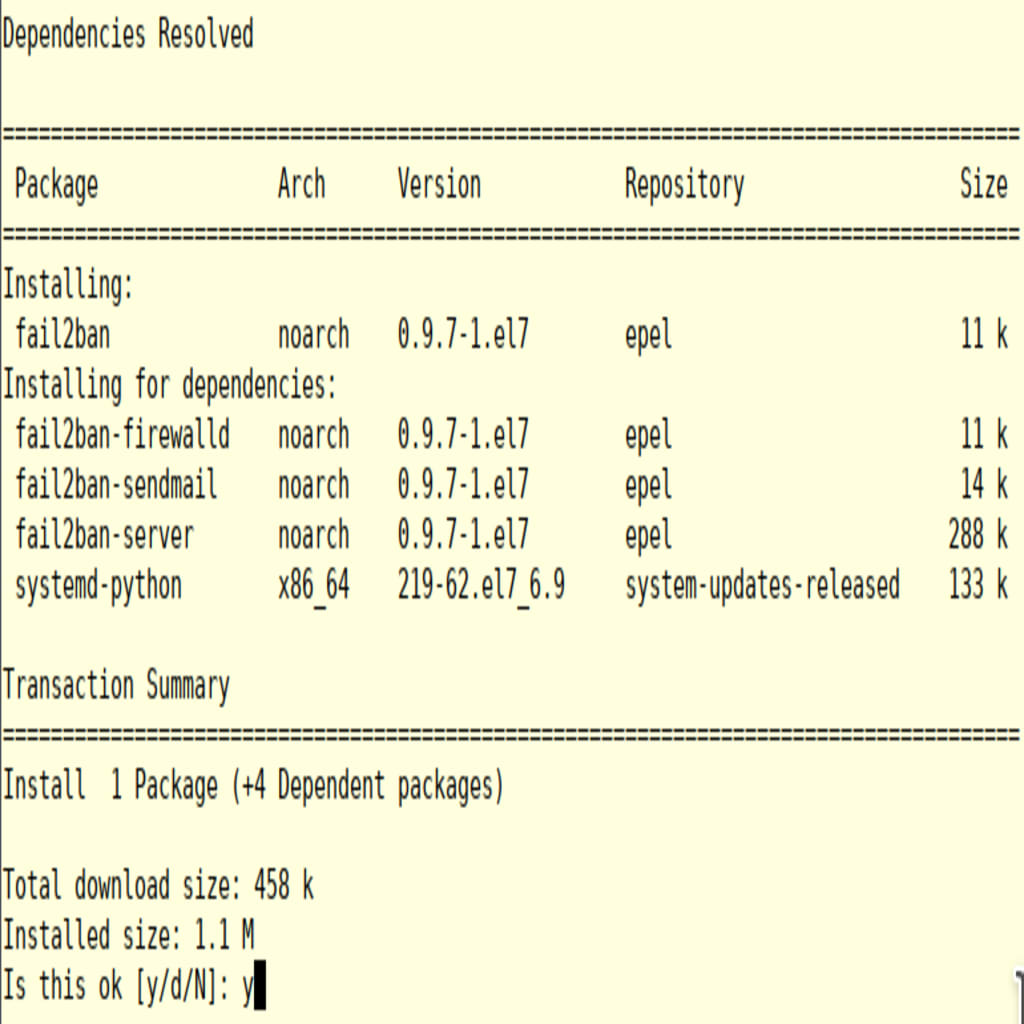
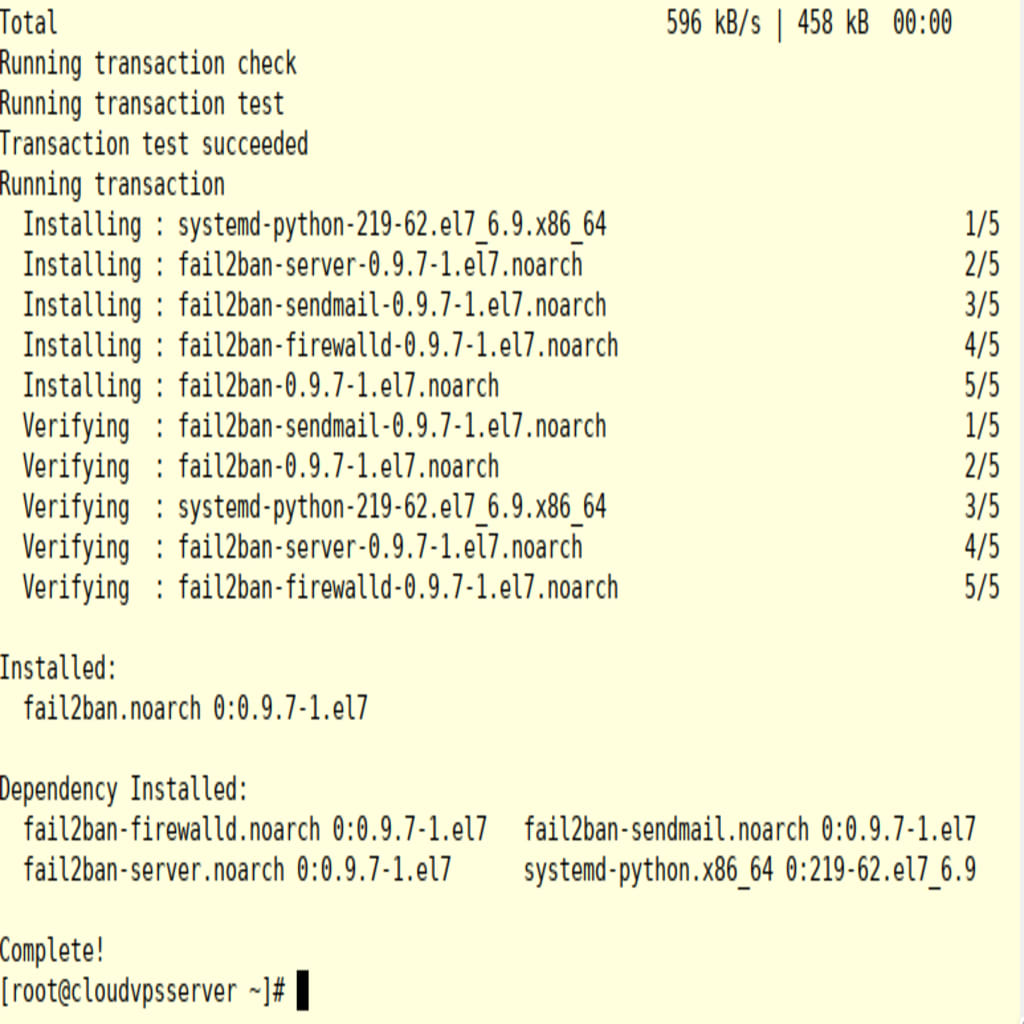
Yum now installs our package, fail2ban.
yum update PACKAGENAME This command obtains and installs the newest version of the software package, including all dependencies. With no PACKAGENAME specified, it will install all relevant updates for our cloud dedicated system.
Yum remove PACKAGENAMremoves an installed software package, including any supported packages:

Enabling YUM Software Repositories
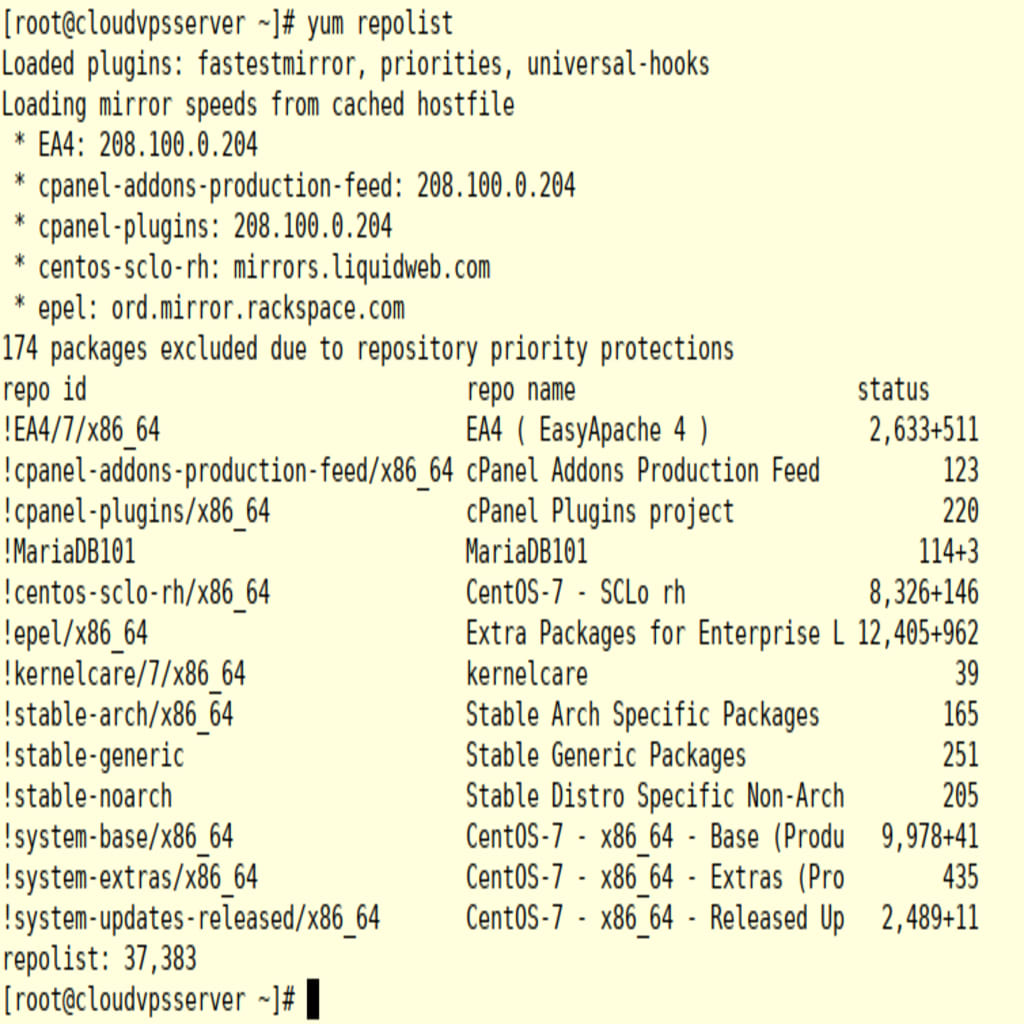
Registering a system to the subscription management service automatically configures access to the software repositories based on the attached subscriptions. To view all the available repositories, we can use
yum repolist all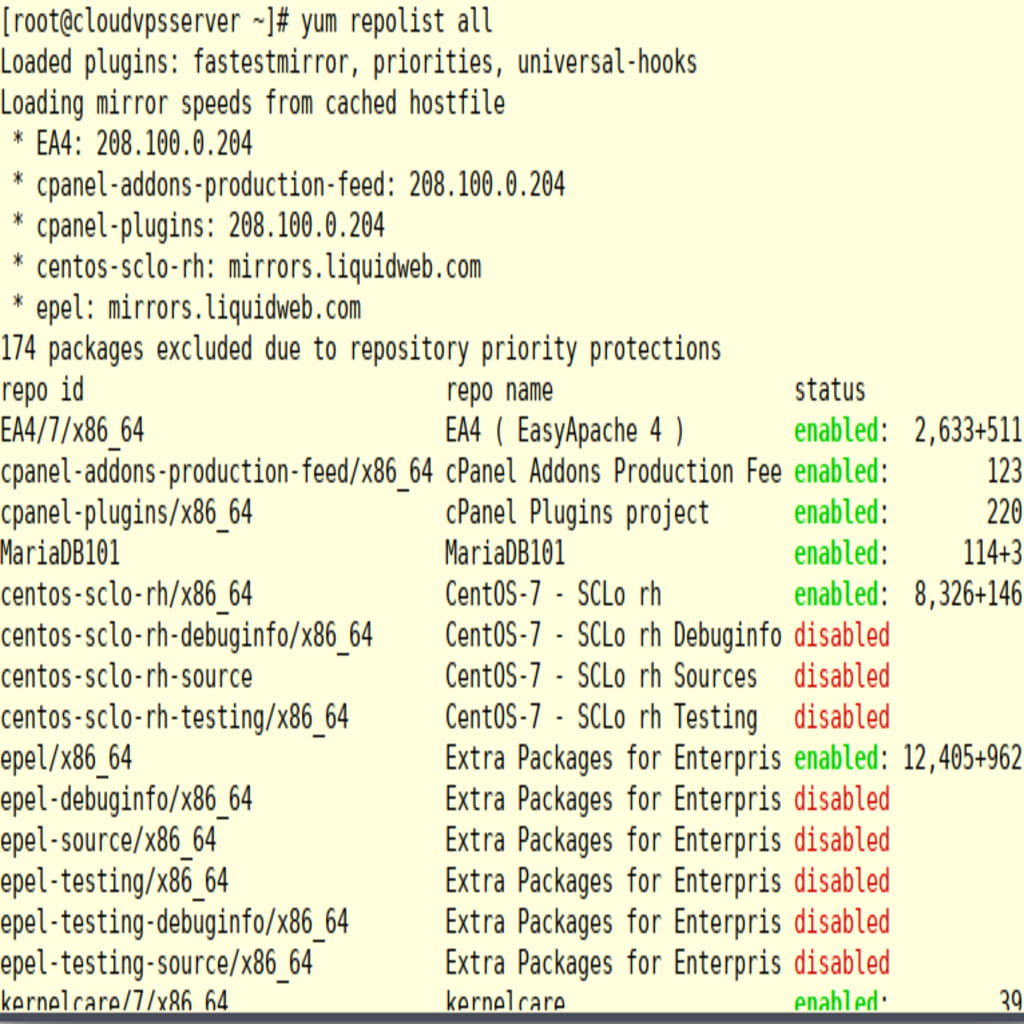
To enable a repository use yum-config-manager. This will enable or disable the parameters located in the /etc/yum.repos.d/redhat.repo file.
Enabling Third Party Software Repositories
Third-party repositories are directories of software package files provided by non-Red Hat sources, which can be accessed by yum from a website, FTP server, or locally. Yum repositories are used by non-Red Hat distributors of software, or for small collections of local packages. To enable third-party support, you must put the file in the /etc/yum.repos.d/ directory. If the URL for a yum repository is known, a configuration file can be created via
yum-config-manager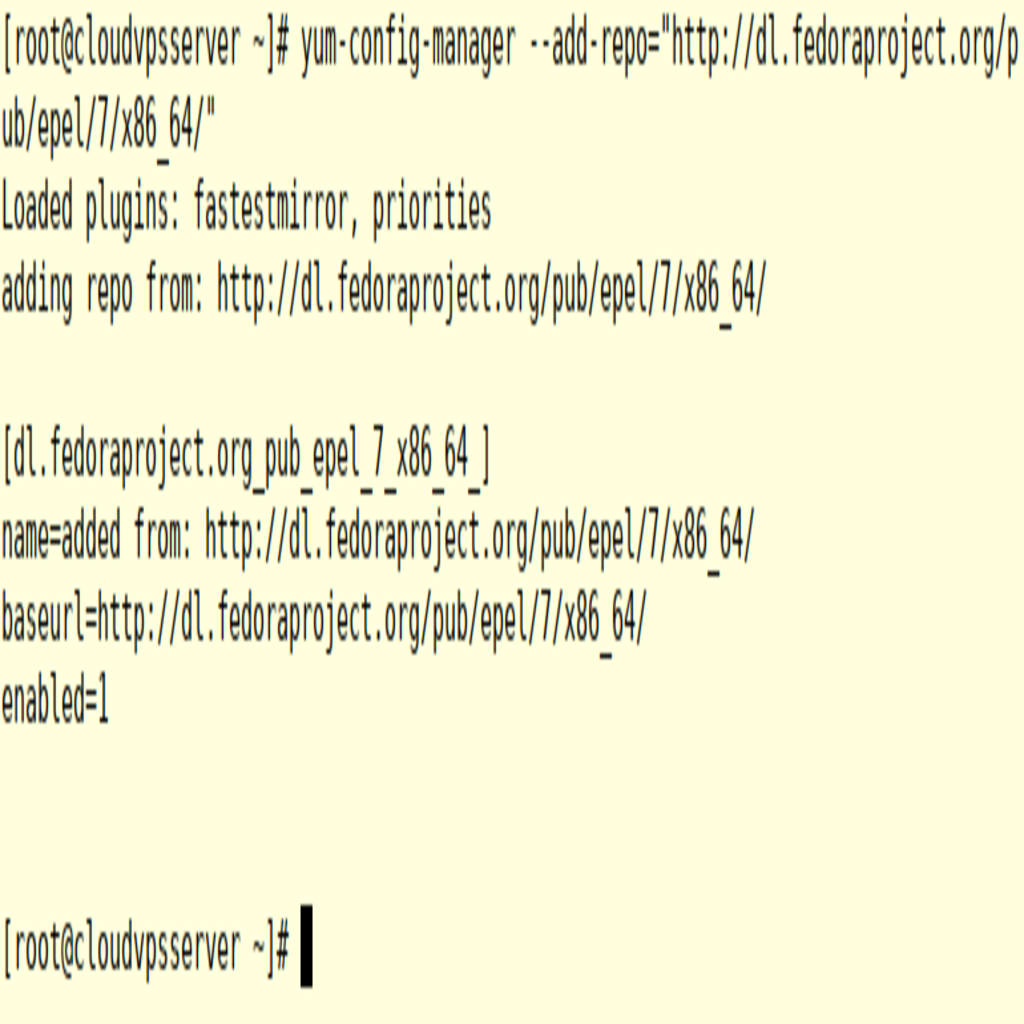
This will create a file in the /etc/yum.repos.d directory with the output shown above. This file can now be modified to provide a customized name and the location of the GPG key. Administrators should download the key to a local file rather than allowing yum to retrieve the key from an external source.
RPM Configuration For The Repository:
Some repositories provide a configuration file and GPG public key as part of an RPM package that can be downloaded and installed using yum localinstall.
Using YUM to Install Local Package Files
The command:
yum install PACKAGEFILE.rpm Can be used to install package files directly. It automatically downloads any dependencies the package has from any configured yum repositories.

In this example, we downloaded an rpm file and then used
yum localinstall to begin installing the file from our machine.
Get Started Today!
Our Support Teams are full of talented Linux technicians and System administrators who have intimate knowledge of multiple web hosting technologies, especially those discussed in this article.
If you are a fully managed VPS server, cloud server, VMware private cloud, VPS reseller server, or a dedicated server owner and you are uncomfortable with performing any of the steps outlined, we can be reached via chat or support ticket to assisting you with this process.