How to Install OBS on Linux, Windows and MacOS
What is OBS?

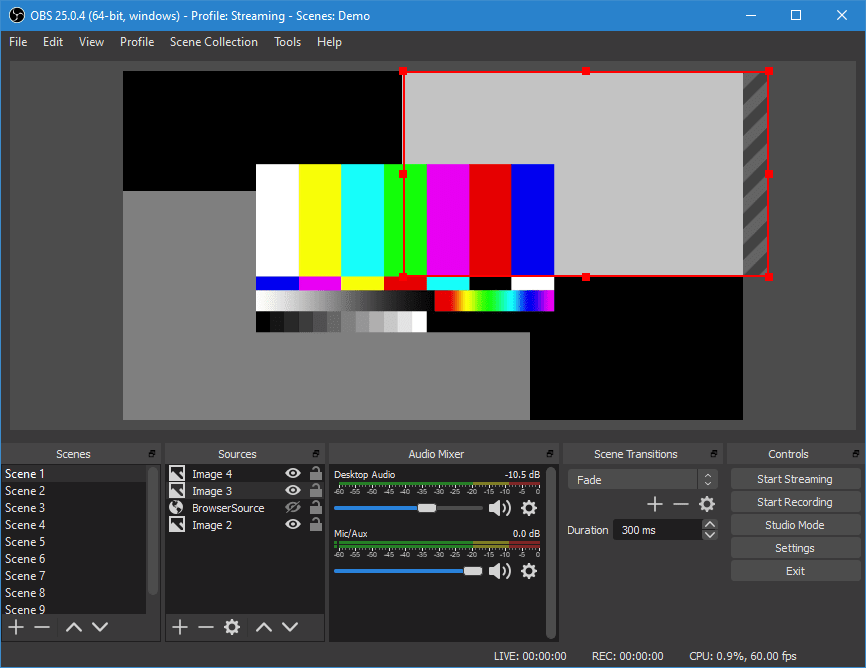
OBS (Open Broadcaster Software) is a free and open-source video recording and livestreaming software program that is written in C, C ++, and Qt and developed by the OBS project and a community of independent developers. It is mainly used for streaming and recording videos. It supports a wide range of plugins to extend the functionality of the program.
The transport of the OBS video is primarily accomplished using the RTMP (or Real Time Messaging Protocol) and as such, can be sent to any destination which supports RTMP, including many streaming websites like YouTube, Twitch, Instagram and Facebook.
OBS Studio is capable of using the x264 free software library, Intel Quick Sync Video, Nvidia NVENC and the AMD Video Coding Engine to encode video streams into the H.264/MPEG-4 formats, and the H.265/HEVC format. Multiple audio tracks can be encoded using any codecs and available in libavcodec/libavformat, as well as outputting a stream to a custom ffmpeg URL.
System Requirements
- An AMD FX series or Intel i5 2000-series processor (dual or 4-core preferable) or higher DirectX 10 capable graphics card
- At least 4 GB of RAM (recommended, but not necessary)
- Preferred: Hardware encoders are generally recommended for local recordings, but not necessarily streaming.
Windows:
- DirectX 10.1 compatible GPU
- Windows 7 SP1 or newer
MacOS:
- Intel CPU (PPC is not supported)
- OpenGL 3.2 compatible GPU
- macOS 10.12 or newer
Linux/Unix
- OpenGL 3.2 compatible GPU (run glxinfo | grep "OpenGL" in a terminal)
- X window system
Installing OBS on Ubuntu 18.04
Let’s begin by installing OBS on Ubuntu 18.04.
Update Server
First, we need to update our server packages by using the following command.
root@host [~]# apt update && apt -y upgrade
0 upgraded, 0 newly installed, 0 to remove and 0 not upgraded.
root@host [~]# /home/ellen#
Install FFMpeg
OBS requires an implementation of FFmpeg to be installed (FFmpeg is a set of software libraries that allows us to record, convert, and transfer audio, video recordings in various formats.) To initially verify if it is installed on our system, we will use the -version flag with the ffmpeg command.
root@host [~]# /home/ellen# ffmpeg -version
Command' ffmpeg' not found, but can be installed with:
apt install ffmpeg
root@host [~]# /home/ellen#
Let’s go ahead and install ffmpeg using the following command.
root@host [~]# /home/ellen# apt install ffmpeg
Reading package lists... Done
Building dependency tree
Reading state information... Done

The following additional packages will be installed:
  i965-va-driver libaacs0 libass9 libavcodec57 libavdevice57 libavfilter6
  libavformat57 libavresample3 libavutil55 libbdplus0 libbluray2 libbs2b0
  libchromaprint1 libcrystalhd3 libdc1394-22 libflite1 libgme0 libgsm1
  libmysofa0 libnorm1 libopenal-data libopenal1 libopenjp2-7 libopenmpt0
  libpgm-5.2-0 libpostproc54 librubberband2 libsdl2-2.0-0 libshine3
  libsnappy1v5 libsndio6.1 libsoxr0 libssh-gcrypt-4 libswresample2
  libswscale4 libva-drm2 libva-x11-2 libva2 libvdpau1 libx264-152 libx265-146
  libxvidcore4 libzmq5 libzvbi-common libzvbi0 mesa-va-drivers
  mesa-vdpau-drivers va-driver-all vdpau-driver-all
Suggested packages:
  ffmpeg-doc i965-va-driver-shaders libbluray-bdj firmware-crystalhd
  libportaudio2 sndiod libvdpau-va-gl1 nvidia-vdpau-driver
  nvidia-legacy-340xx-vdpau-driver

The following NEW packages will be installed:
  ffmpeg i965-va-driver libaacs0 libass9 libavcodec57 libavdevice57
  libavfilter6 libavformat57 libavresample3 libavutil55 libbdplus0 libbluray2
  libbs2b0 libchromaprint1 libcrystalhd3 libdc1394-22 libflite1 libgme0
  libgsm1 libmysofa0 libnorm1 libopenal-data libopenal1 libopenjp2-7
  libopenmpt0 libpgm-5.2-0 libpostproc54 librubberband2 libsdl2-2.0-0
  libshine3 libsnappy1v5 libsndio6.1 libsoxr0 libssh-gcrypt-4 libswresample2
  libswscale4 libva-drm2 libva-x11-2 libva2 libvdpau1 libx264-152 libx265-146
  libxvidcore4 libzmq5 libzvbi-common libzvbi0 mesa-va-drivers
  mesa-vdpau-drivers va-driver-all vdpau-driver-all
0 upgraded, 50 newly installed, 0 to remove and 0 not upgraded.
Need to get 32,3 MB of archives.
After this operation, 148 MB of additional disk space will be used.
Do you want to continue? [Y/n] Y

Fetched 32,3 MB in 3s (9.663 kB/s)
Extracting templates from packages: 100%
Selecting previously unselected package libva2:amd64.
(Reading database ... 157009 files and directories currently installed.)
Preparing to unpack .../00-libva2_2.1.0-3_amd64.deb ...

Setting up libpgm-5.2-0:amd64 (5.2.122~dfsg-2) ...
Setting up libx264-152:amd64 (2:0.152.2854+gite9a5903-2) ...
Setting up ffmpeg (7:3.4.6-0ubuntu0.18.04.1) ...
Processing triggers for libc-bin (2.27-3ubuntu1) ...
Processing triggers for man-db (2.8.3-2ubuntu0.1) ...
root@host [~]# /home/ellen#
Now, let’s check to ensure ffmpeg is installed and available using the ffmpeg command with the -version flag.
root@host [~]# /home/ellen# ffmpeg -version
ffmpeg version 3.4.6-0ubuntu0.18.04.1 Copyright (c) 2000-2019 the FFmpeg developers
built with gcc 7 (Ubuntu 7.3.0-16ubuntu3)
configuration: --prefix=/usr --extra-version=0ubuntu0.18.04.1 --toolchain=hardened --libdir=/usr/lib/x86_64-linux-gnu --incdir=/usr/include/x86_64-linux-gnu --enable-gpl --disable-stripping --enable-avresample --enable-avisynth --enable-gnutls --enable-ladspa --enable-libass --enable-libbluray --enable-libbs2b --enable-libcaca --enable-libcdio --enable-libflite --enable-libfontconfig --enable-libfreetype --enable-libfribidi --enable-libgme --enable-libgsm --enable-libmp3lame --enable-libmysofa --enable-libopenjpeg --enable-libopenmpt --enable-libopus --enable-libpulse --enable-librubberband --enable-librsvg --enable-libshine --enable-libsnappy --enable-libsoxr --enable-libspeex --enable-libssh --enable-libtheora --enable-libtwolame --enable-libvorbis --enable-libvpx --enable-libwavpack --enable-libwebp --enable-libx265 --enable-libxml2 --enable-libxvid --enable-libzmq --enable-libzvbi --enable-omx --enable-openal --enable-opengl --enable-sdl2 --enable-libdc1394 --enable-libdrm --enable-libiec61883 --enable-chromaprint --enable-frei0r --enable-libopencv --enable-libx264 --enable-shared
libavutil 55. 78.100 / 55. 78.100
libavcodec 57.107.100 / 57.107.100
libavformat 57. 83.100 / 57. 83.100
libavdevice 57. 10.100 / 57. 10.100
libavfilter 6.107.100 / 6.107.100
libavresample 3. 7. 0 / 3. 7. 0
libswscale 4. 8.100 / 4. 8.100
libswresample 2. 9.100 / 2. 9.100
libpostproc 54. 7.100 / 54. 7.100
root@host [~]# /home/ellen#
Next, we can move forward with installing OBS. First, we will need to add the corresponding repository from where the software will be downloaded and installed.
root@host [~]# /home/ellen# add-apt-repository ppa:obsproject/obs-studio Latest stable release of OBS Studio
 More info: https://launchpad.net/~obsproject/+archive/ubuntu/obs-studio
Press [ENTER] to continue or Ctrl-c to cancel adding it.

Hit:1 http://by.archive.ubuntu.com/ubuntu bionic InRelease
Hit:2 http://by.archive.ubuntu.com/ubuntu bionic-updates InRelease
Hit:3 http://by.archive.ubuntu.com/ubuntu bionic-backports InRelease
Get:4 http://ppa.launchpad.net/obsproject/obs-studio/ubuntu bionic InRelease [15,9 kB]
Get:5 http://security.ubuntu.com/ubuntu bionic-security InRelease [88,7 kB]
Get:6 http://ppa.launchpad.net/obsproject/obs-studio/ubuntu bionic/main i386 Packages [904 B]
Get:7 http://ppa.launchpad.net/obsproject/obs-studio/ubuntu bionic/main amd64 Packages [904 B]
Get:8 http://ppa.launchpad.net/obsproject/obs-studio/ubuntu bionic/main Translation-en [160 B]
Fetched 107 kB in 1s (84,8 kB/s)
Reading package lists... Done
root@host [~]# /home/ellen#
After adding the repository in Ubuntu, the package manager will need to be updated to ensure we have the latest packages available.
root@host [~]# /home/ellen# apt-get update
Hit:1 http://by.archive.ubuntu.com/ubuntu bionic InRelease
Hit:2 http://by.archive.ubuntu.com/ubuntu bionic-updates InRelease
Hit:3 http://by.archive.ubuntu.com/ubuntu bionic-backports InRelease
Hit:4 http://ppa.launchpad.net/obsproject/obs-studio/ubuntu bionic InRelease
Get:5 http://security.ubuntu.com/ubuntu bionic-security InRelease [88,7 kB]
Fetched 88,7 kB in 1s (76,6 kB/s)
Reading package lists... Done
Building dependency tree
Reading state information... Done
All packages are up to date.
root@host [~]# /home/ellen#
Install OBS
Now we can move forward with installing OBS.
root@host [~]# /home/ellen# apt install obs-studio
Reading package lists... Done
Building dependency tree
Reading state information... Done

The following additional packages will be installed:
  libcurl4 libdouble-conversion1 libfdk-aac1 libluajit-5.1-2
  libluajit-5.1-common libmbedcrypto1 libmbedtls10 libmbedx509-0 libqt5core5a
  libqt5dbus5 libqt5gui5 libqt5network5 libqt5svg5 libqt5widgets5
  libqt5x11extras5 libqt5xml5 libxcb-xinerama0 qt5-gtk-platformtheme
  qttranslations5-l10n
Suggested packages:
  qt5-image-formats-plugins qtwayland5
The following NEW packages will be installed:
  libcurl4 libdouble-conversion1 libfdk-aac1 libluajit-5.1-2
  libluajit-5.1-common libmbedcrypto1 libmbedtls10 libmbedx509-0 libqt5core5a
  libqt5dbus5 libqt5gui5 libqt5network5 libqt5svg5 libqt5widgets5
  libqt5x11extras5 libqt5xml5 libxcb-xinerama0 obs-studio
  qt5-gtk-platformtheme qttranslations5-l10n
0 upgraded, 20 newly installed, 0 to remove and 0 not upgraded.
Need to get 6.626 kB/14,4 MB of archives.
After this operation, 59,1 MB of additional disk space will be used.
Do you want to continue? [Y/n] Y

Setting up obs-studio (25.0.8-0obsproject1~bionic) ...
Processing triggers for desktop-file-utils (0.23-1ubuntu3.18.04.2) ...
Processing triggers for libc-bin (2.27-3ubuntu1) ...
Processing triggers for gnome-menus (3.13.3-11ubuntu1.1) ...
Processing triggers for hicolor-icon-theme (0.17-2) ...
Processing triggers for mime-support (3.60ubuntu1) ...
root@host [~]# /home/ellen#
Installing OBS on Windows 10
To begin, we will go to the OBS website and download the appropriate version for Windows x64. We need to select the full version to install OBS with all the associated libraries and codecs.
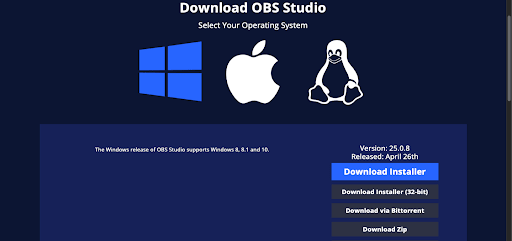
Once downloaded, run the windows executable to begin the installation. Follow the installation prompt and click the Next button.

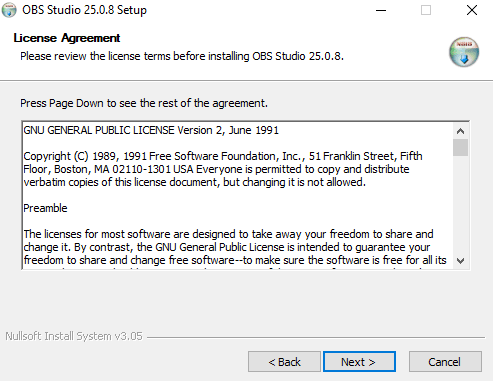
Accept to the license agreement and click Next.
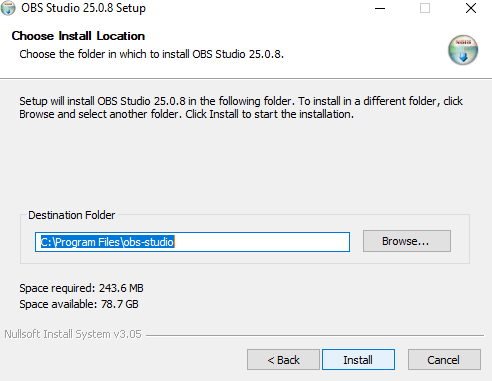
Select the location for the installation and then click the Install button.
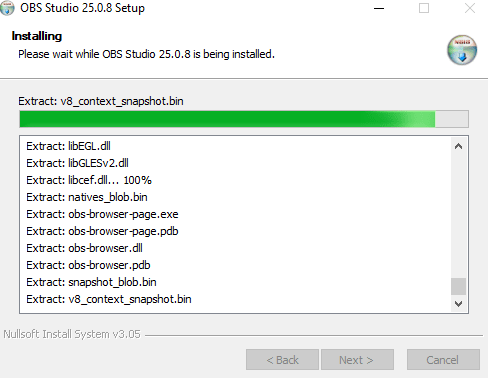
The installation will continue showing us its progress.
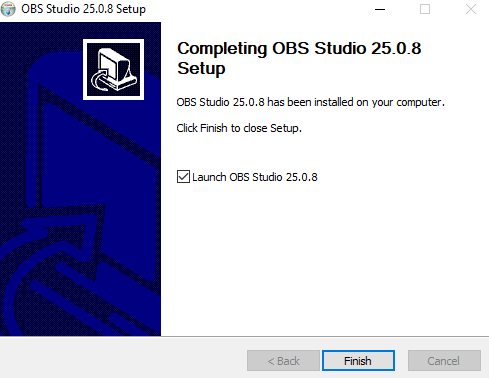
Once the final installation screen is seen, we can choose to either launch the software or simply click the Finish button to complete the set up.
Installing OBS on MacOS Catalina
The installation on the macOS is nearly identical to Windows. We begin by going to the OBS website, selecting and then downloading the suitable version for our MacOS.
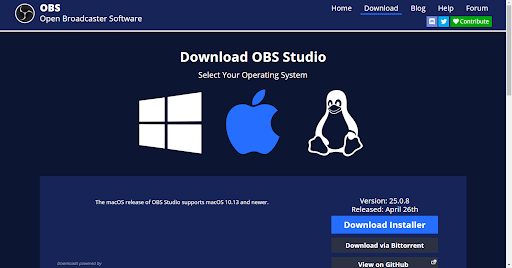
One the download completes, click the Start installation button
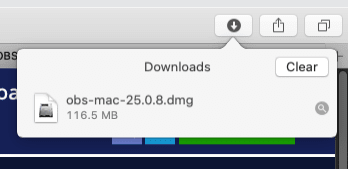
When complete, it will automatically unzip, and a new frame will open. Click on the icon at the bottom of the toolbar to begin the installation.
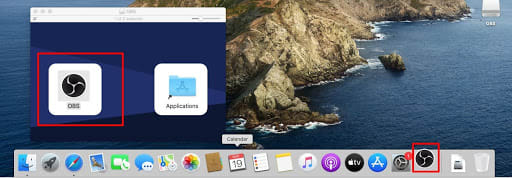
The installer will ask for permission to use the microphone and also offers to set up the necessary settings.
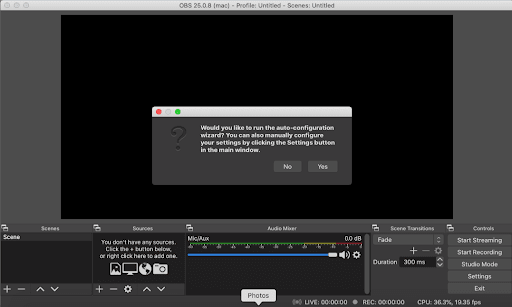
And that’s it. OBS is now installed.
Conclusion
In this tutorial, we learned what OBS is, how it works and how to install it on multiple OS versions. As you can see, OBS is a very versatile streaming software that is one of the most useful video streaming platforms.
Related Articles:

About the Author: Ellen Sletton
I'm 23 years old Linux Tech who always takes NO as Next Opportunity. Every day I'm trying to learn something new and share my knowledge with others. My free time I spend with my dog Emil or doing some UI/UX design or simply making an inspiring photo for my blog :) Sharing knowledge helps me generate new ideas and stay motivated.
Our Sales and Support teams are available 24 hours by phone or e-mail to assist.
Latest Articles
In-place CentOS 7 upgrades
Read ArticleHow to use kill commands in Linux
Read ArticleChange cPanel password from WebHost Manager (WHM)
Read ArticleChange cPanel password from WebHost Manager (WHM)
Read ArticleChange the root password in WebHost Manager (WHM)
Read Article


