How to Install ESXi 5.x or 6.x in VMware

What is ESXi vSphere?
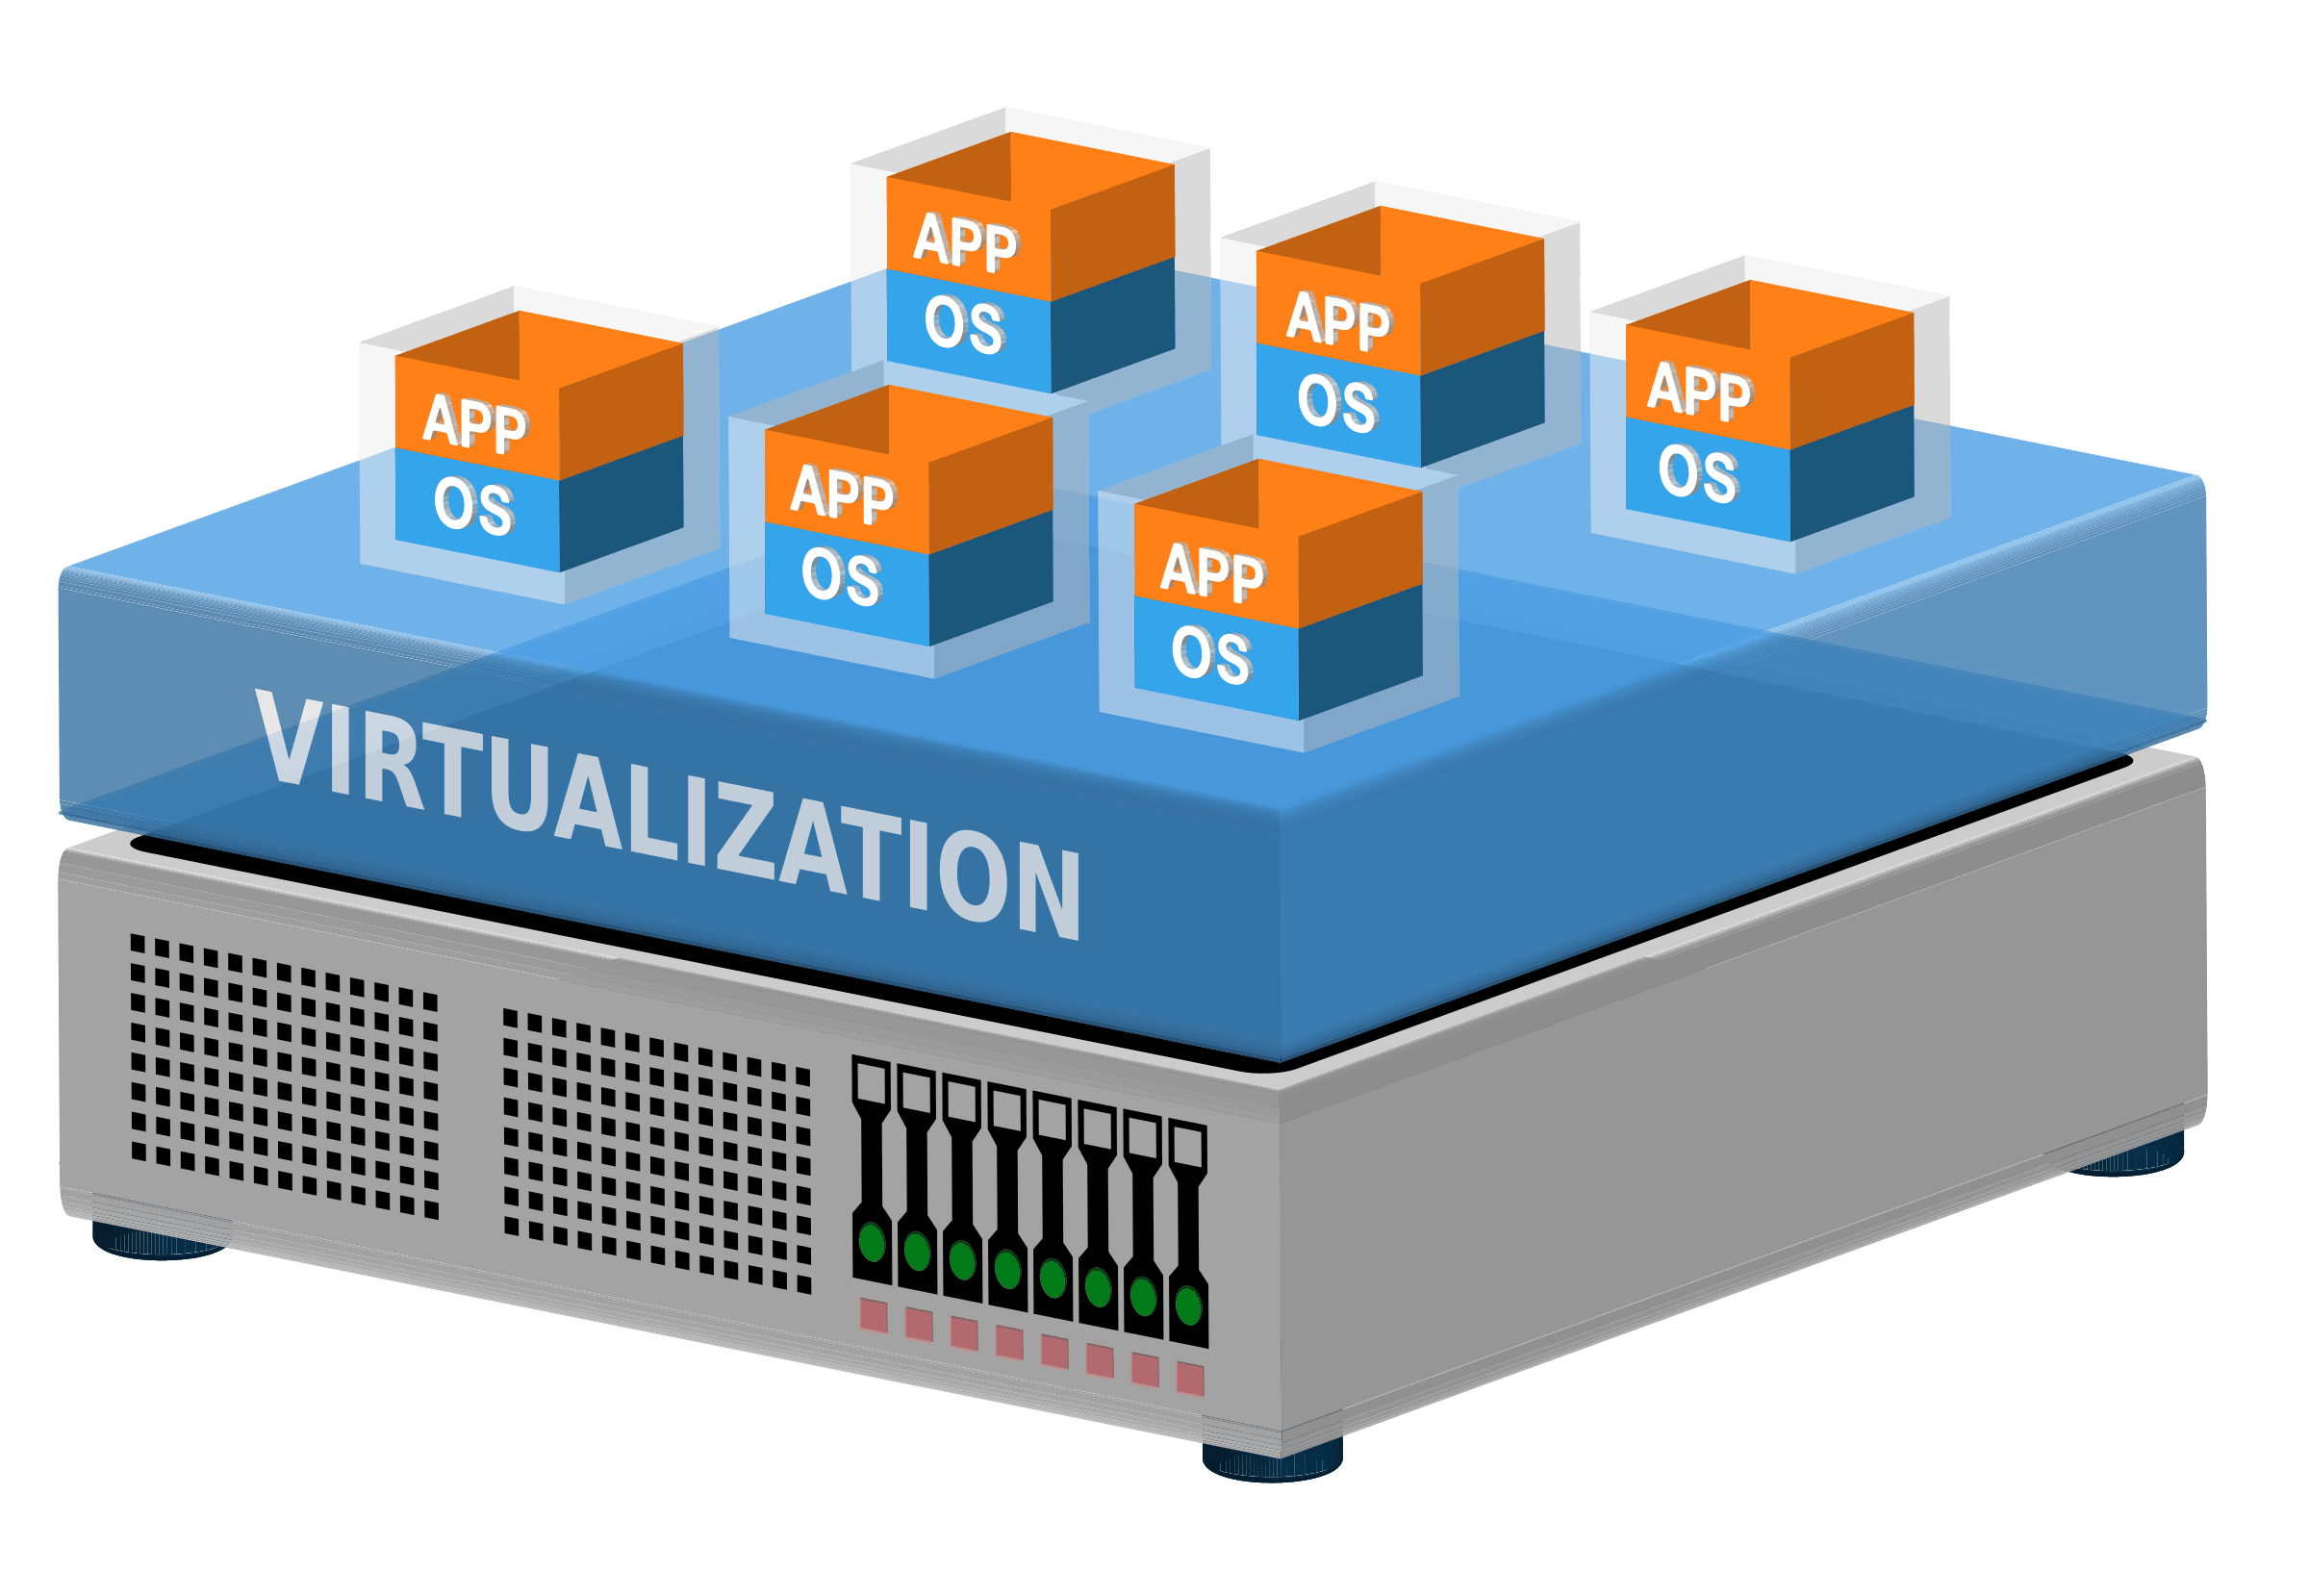
VMware vSphere is a virtualization platform that creates aggregated computing infrastructures consisting of networking resources, CPU, and storage out of data centers. The main elements of vSphere are vCenter Server and ESXi, formerly VMware vSphere Hypervisor. It is a bare-metal hypervisor installable directly on your server or Workstation.
ESXi is a Virtualization Platform
ESXi is part of VMware vSphere, one of the most well-known virtualization tools in the world. When VMware was creating vSphere, they kept in mind that millions of users would use it and that thousands of them would have different needs. That is why vSphere provides dozens of installation options and setups.
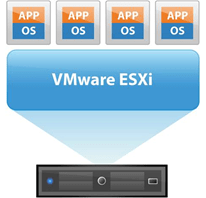
Two components of vSphere will always be the same. One is the vCenter Server, and the other is ESXi. ESXi is a virtualization platform used to deploy and run virtual machines. It’s important to understand that to deploy vSphere setup successfully, ESXi must be installed and set up properly on at least one host on your deployment.
This tutorial teaches how to install and configure VMware ESXi. The majority of VMware cloud product installations are targeting experienced Linux or Windows administrators. However, we will try to simplify the process as much as possible. If you are new to hypervisors like ESXi or VMware vSphere, this guide might be right for you.
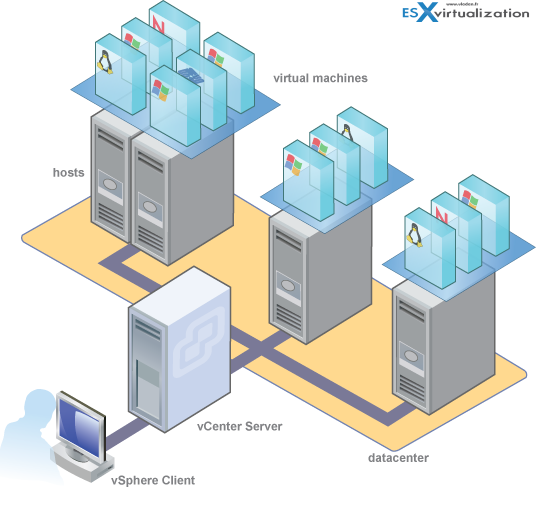
How to Install VMware ESXi and Configure
Like any other software, ESXi has some hardware requirements that need to be fulfilled to install it. Below you can find a short overview of hardware and system resources that you need to have at your disposal to install VMware ESXi 7.0, the latest released version:
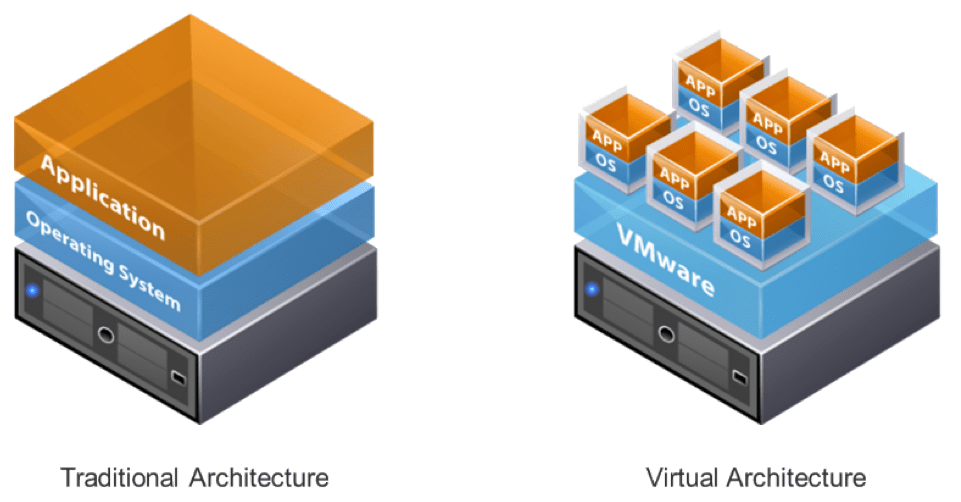
Prerequisites
- A host with at least 2 CPU cores. Check the VMware Compatibility Guide for a list of supported processors.
- NX/XD enabled in the BIOS of the CPU.
- Minimum of 4GB of RAM.
- Intel VT-x or AMD RVI enabled for x64 CPUs.
- At least one Ethernet controller with a minimum of 1Gb connection speed.
- A boot disk with at least 8GB of free space for USBs or SDs, or 32GB of free space for HDDs or SSDs.
If your system has all of the above requirements, begin the VMware ESXi installation by downloading the ESXi installer in the data center and cloud infrastructure list. Then choose between one of the three available options to install ESXi through VMware vSphere: Interactive, Scripted, or Auto-Deploy.
In this tutorial, we cover the interactive and scripted methods of installation. Auto Deploy is a moderately complicated solution, even though its name implies otherwise. That method is primarily used by highly experienced administrators who need to deploy hundreds of hosts with ESXi software.
Interactive ESXi Installation
Follow the steps below for interactive installation of ESXi.
- Copy the previously downloaded installer to a USB drive and restart the machine to install ESXi.
- Once the device starts booting, go into BIOS mode by pressing the designated key specific to your machine. The BIOS key depends on the motherboard manufacturer. In most cases, you will be able to enter BIOS mode by pressing F11 on your keyboard. Once you are in BIOS mode, set your machine to boot up from the USB that contains the ESXi installer.
- Select the drive on which you want to install ESXi and press enter on your keyboard. If you need more information about the drive on which you plan to install ESXi, you can press F1 on your keyboard for additional information.
- Choose the type of keyboard. You can change this directly at the console once the installation is completed.
- Provide the installer with the root password of the host. Just like a keyboard, this can be changed once you are done with the installation.
- Press enter to begin the installation process.
- When the installation is complete, remove the USB drive from your machine and press enter to reboot it again.
- Revert your boot order while still in BIOS mode to the drive that now has ESXi instead of the USB.
The interactive installation of VMware ESXi on your machine is complete! Now, let’s check out the scripted installation.
Unattended ESXi Installation
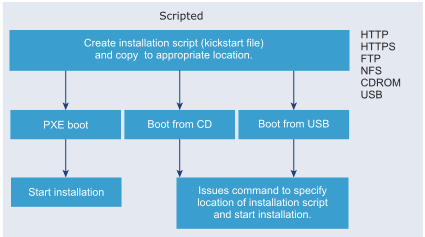
ESXi allows users to utilize a configuration script to implement multiple ESXi hosts. This approach is an efficient method to deploy multiple unattended installations. It also permits various setup strategies, including using FTP, CD, USB, and other media in the script. We can use this installation technique because it is designed by default to take advantage of this approach. The text file-based configuration file is called ks.cfg. It is located within the initial RAM disk. If needed, we can manually modify the location of the configuration file by editing the following option.
ks=file://etc/vmware/weasel/ks.cfgIf we initiate an installation via the script, the root password will always be the same, as shown below.
myp@ssw0rdRemember, we can only modify the script if it is not in use on the installation media. If we want to modify the installation script, we must use the supported commands. In most cases, the default script is used, but below are other options to consider.
This flag above will let us specify our own license key. The license key should be written in a standard format of four segments of five characters each similar to this: 12345-54321-12345-54321.
--esx=This flag is useful if you want to install ESXi on only one machine. Specify the machine’s IP address, and installation will be performed only on that one machine instead of all of them.
--ip=Use this flag when we need to remove existing partitions on the drives altogether.
--drives=By default, the script will install ESXi on the first available drive. With the command below, we can choose which disk or partition you want to use for the installation.
--ondisk =The Installation of ESXi via a scripted method is fairly uncomplicated.
Installation procedure
Boot the script installer.
- Once the installation window pops up, press Shift+O on your keyboard.
- Choose your boot option. Select either the default one or the script that you modified. Remember, as we stated above, the boot option will be in the following form:
ks=file://path/to/file - Hit the enter key on your keyboard to begin the installation process.
That’s all it takes to perform a scripted installation of ESXi.
Prerequisites to Install ESXi 5.x or 6.x in VMware Workstation
- Download VMware Workstation.
- Download the ESXi iso image from the official VMware website.
Creating ESXi virtual machine in VMware Workstation
Follow the next steps to install VMware ESXi vSphere on your VMware Workstation.
1. Open your VMware Workstation, click on Files, and then Add a new virtual machine.
2. Select Custom Install and click Next.
3. Select the ESXi version you will install from the drop-down menu and click Next.
4. Select Installer disk image file (iso), click Browse, find the VMware ESXi iso installation in the directory where you have downloaded it, select it, and click Next.
5. Name your virtual machine or leave the default name. Select the location where you want ESXi installed, or leave the default location and click Next.
6. Select the number of processors (the minimum requirements are two processors and one core, but you can add as many as you like), then click Next.
7. Select the memory size for your virtual machine (the minimum recommended is 4GB), and click Next.
8. In the Network Type Window, select Network address translation (NAT) and click Next. You can change this setting later.
9. Select Paravirtualized SCSI I/O controller type and click Next.
10. Select SCSI as a disk type and proceed by clicking Next.
11. Select Create a new virtual disk and click Next.
12. Specify the disk capacity. While the recommendation is 40 GB, you can assign more space. Select store virtual disk as a single file if you are not planning to move your virtual machine to another computer and click Next.
13. In the Specify disk file window, leave everything as default and click Next.
14. Select Power on this virtual machine after creation and click Finish.
Installing ESXi in VMware Workstation
Once your virtual machine is up and running, follow the next steps to finish the ESXi installation on your VMware Workstation.
1. When the Welcome to the VMware ESXi installation pops up, press Enter to continue.
2. Accept the end user license agreement by hitting the F11 key.
3. Select a disk where ESXi will be installed and hit Enter.
4. Choose your keyboard layout and hit Enter.
5. Enter your root password and securely store it. Press Enter.
6. Confirm the installation by pressing F11.
7. Once complete, you must remove the installation media. You can remove it by right-clicking on the VMware ESXi on the left side of the VMware Workstation window and clicking on removable devices / CD/DVD / Disconnect. After removing your installation media, go back to the virtual machine installation screen and hit Enter to reboot.
Configuring ESXi in VMware Workstation
After the reboot is complete and the ESXi virtual machine is running, note the IP address of the ESXi host server. Dynamic host configuration protocol (DHCP) assigns the IP address the VMware ESXiserver uses when it is initialized.
You can use the IP address assigned from DHCP, or as an alternative, you can set up a static IP addressof your choice by following these steps.
1. In the running ESXi virtual machine, press F2.
2. Enter your root passwordand hit Enter.
3. Use the arrow keys to select Configure Management Network and press Enter.
4. Select IPv4 Configuration and hit Enter.
5. Using the arrow keys, highlight Set static IPv4 address and network configuration and press the Space key to select it.
6. Enter your static IP address and Subnet Mask, and hit Enter
7. Navigate to DNS Configuration and press Enter.
8. Next, select Use the following DNS server address and hostname and press the Space key.
9. Insert your DNS server address and hit Enter.
10. Use the ESC key to go one step back and afterward hit the Y key to save changes and restart network management.
11. To log out, hit the ESC key and press the F12 key.
12. Shut down the ESXi server by pressing the F2 key.
13. Go back to the VMware Workstation and select VMware ESXi. Click on VMware ESXi virtual machine settings. Select Network Adapter on the left side of the screen and select Bridged: Connected directly to the physical network. Save the changes by clicking OK.
14. Finally, run the ESXi virtual machine from the VMware Workstation. After the server is up and running, navigate in your browser to the ESXi server's IP address and you can start managing your VMware ESXi vSphere server. For platform management, you can use Intelligent Platform Management Interface (IPMI) for managing and monitoring of your dedicated server independent of the operating system.
Conclusion
The installation of ESXi is pretty simple. If the default options are used, installation is more or less performed like any other software. It’s important to remember that this tutorial is meant for basic usage and installation of ESXi. Advanced ESXi installation options, used for more significant deployments, make this process a lot more complicated. Nevertheless, We hope this tutorial can assist you with the installation of ESXi on your new VMware system.
ESXi vSphere Hypervisor delivers hardware consolidation for higher capacity utilization, reduces the CapEX and OpEX, and in general, increases the efficiency of the used resources. Once you have installed ESXi on your server or VMware Workstation, you can log into that host and add as many virtual machines on top of it as your resources allow.
If you are considering an implementation of managed hosting for your business, you can check out the benefits of Liquid Web’s VMware Private Cloud.
Related Articles:
- What is SDDC VMware?
- Virtualization vs. Containerization — Comparing Differences
- Guide to Cloud Computing Projects: Definition & Project Ideas
- Onboard to Liquid Web: A Step-By-Step Guide to Migrating Your Data to a Virtual Server
- Cloud Servers vs Physical Servers: A Comparison
- What is Private Cloud Storage?

About the Author: Neil Golden
Neil contributed to solving the complex puzzle of evolution for a long time by obtaining his Ph.D. in Archaeology. These days, he digs the Linux servers in his role within the Liquid Web Monitoring Department instead of Paleolithic stone tools in the caves on archaeological sites. Instead of mammoths, he is now hunting for bugs on Linux servers. He has written numerous scientific and technical articles because writing is one of his biggest passions. In his free time, Neil composes music, reads novels, and travels the world.
Our Sales and Support teams are available 24 hours by phone or e-mail to assist.
Latest Articles
In-place CentOS 7 upgrades
Read ArticleHow to use kill commands in Linux
Read ArticleChange cPanel password from WebHost Manager (WHM)
Read ArticleChange cPanel password from WebHost Manager (WHM)
Read ArticleChange the root password in WebHost Manager (WHM)
Read Article


