


What is IPMI?
Customer Access with IPMI
Remote Desktop Protocol or SSH shell are great for managing your server remotely. But what if you need to do something outside the operating system, like changing network settings or adjusting the BIOS? Those tools cannot help you because they depend on the server’s operating system to function. Wouldn’t it be great to have KVM-like console access to your remote server? With IPMI, you can get browser based access independent of the operating system.
IPMI configuration requires an additional network interface on the server, as well as a baseboard management controller. Most of the leading hardware providers, including Dell, HP, Cisco, etc. provide IPMI solutions. The good news at Liquid Web is that all our Dedicated Servers have IPMI available at no extra cost! All you need to get started with IPMI for your Dedicated Server is to set up your free Liquid Web VPN account. Let’s look at the steps you need to take to get working with IPMI.
- Set up your free Liquid Web VPN account.
- Log in to your manage.liquidweb.com account to set up your first VPN user (additional users are available for a small monthly fee).
- Check out “How to Configure Your Liquid Web VPN” for detailed instructions on setting up your Liquid Web VPN account.
- Download and configure the VPN client.
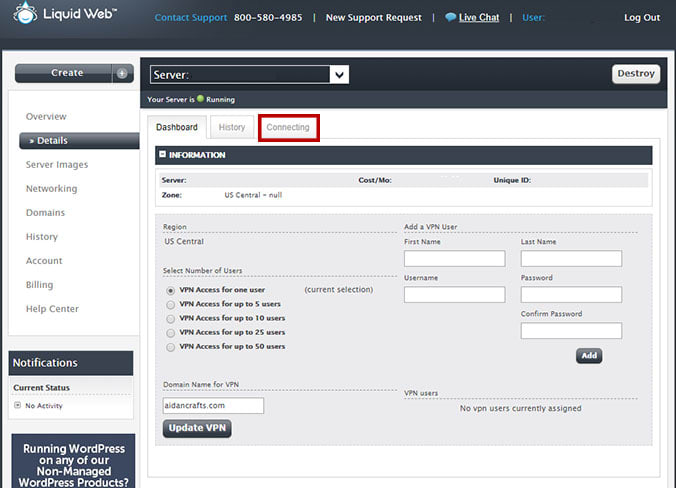
- Connecting to the Liquid Web VPN does require a standalone client, but there are great instructions on setting up a free client by following the Connecting link in your manage.liquidweb.com portal or using “Log In to Storm VPN using ShrewVPN on Windows 8, 8.1 & 10” in our Knowledge Base.
Opening the IPMI site
- Now that you’re connected to the VPN, open a web browser to your server’s IPMI address (IPs for IPMI will be in the 10.x.x.x range).
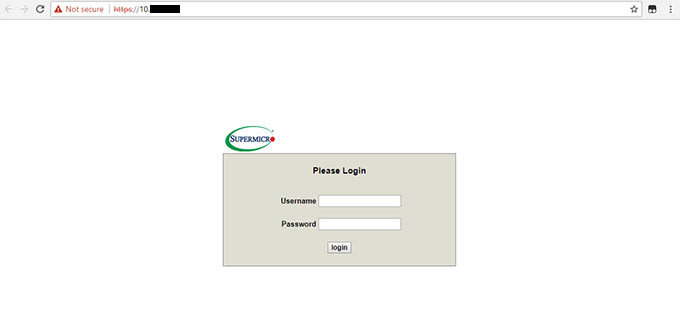
- Enter the Username and Password for IPMI for your server and click Login.
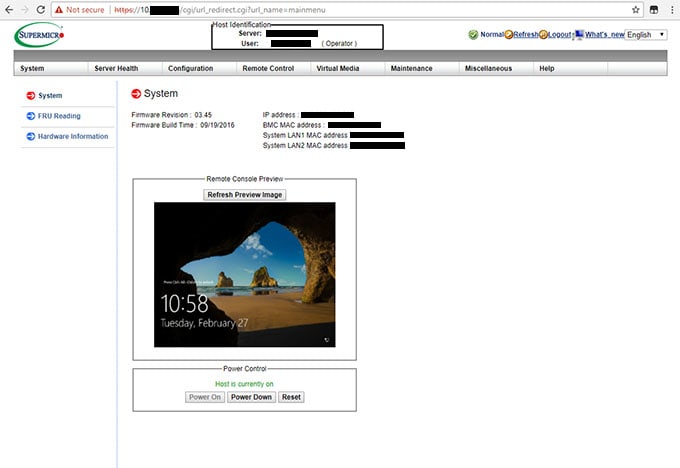
- The dashboard will provide details about the current state of the server, as well as a preview window of the server’s screen and buttons to start up, shut down, or reboot the server.
Opening an IPMI window
- To open an IPMI window that will allow you to interact with the server, double-click the preview image of the server’s screen.
- This will prompt you to download a small Javascript program called “Launch”.
- Double-clicking the Launch icon will open a Javascript window that will allow you log in to the server just like a Remote Desktop Connection.
Note:In order to fully utilize IPMI, you must have the Java Runtime Environment (JRE) installed on your local computer. You can get the latest JRE software at Java.com.
- Now that you have full access using IPMI, you can manage your server as if were located right in your own data center. If you have any issues connecting to the VPN or IPMI interfaces, simply open a ticket with the Liquid Web Heroic Support team!
Related Articles:


About the Author: Helpful Humans of Liquid Web


Our Sales and Support teams are available 24 hours by phone or e-mail to assist.
Latest Articles
How to use kill commands in Linux
Read ArticleChange cPanel password from WebHost Manager (WHM)
Read ArticleChange cPanel password from WebHost Manager (WHM)
Read ArticleChange cPanel password from WebHost Manager (WHM)
Read ArticleChange the root password in WebHost Manager (WHM)
Read Article