


Troubleshooting: Locked Out of RDP
How Do I Get Back Into RDP?
You may be working from a local machine that has an IP that is not scoped on that RDP port, making it impossible for you to gain remote access to add the IP address to the RDP rule’s scope. Do not fret; there is a simple and quick way to add your IP to the RDP scoping (or any other entities such as MySQL or MSSQL) right through your Plesk interface in your local browser. You can watch this video, or scroll down for step-by-step directions.

For security purposes, it is always recommended that you scope off your Remote Desktop Protocol (RDP) connection on your server. Putting a scope on the RDP rule in the Windows Firewall will allow only the indicated IP addresses to gain access to the server through Remote Desktop Protocol. The issue is that many of us do not have static IP addresses, but rather Dynamic IP addresses. This means that while once our IP address may be 120.32.111.01, it may change to something like 95.42.121.01 later. So if you were to add 120.32.111.01 to the RDP firewall for a customer or a system administrator, then you may need to add another rule for a different IP address.
Adding Your IP in Plesk
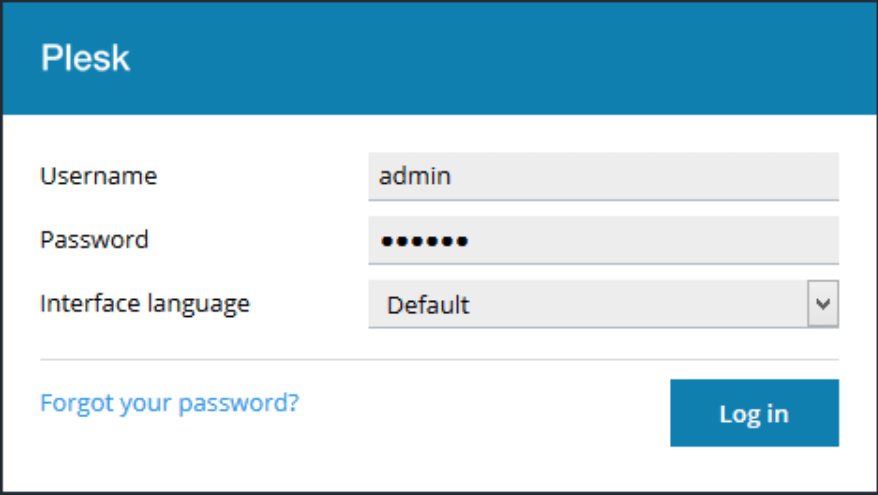
Step 1: Log in to Plesk
First, we need to make sure we know how to get to that Plesk login page. By default, the Plesk login page is https://<YourServerIP>:8443. For example, https://127.0.0.1:8443
We should arrive at a page with this in the center. Go ahead and type in Admin for the username and your password for Plesk. Usually, that password is set up by our team and is the default Server Administrator Password. Sometimes the username is Administrator, depending on a few variables. But one of the two usernames should be fine.
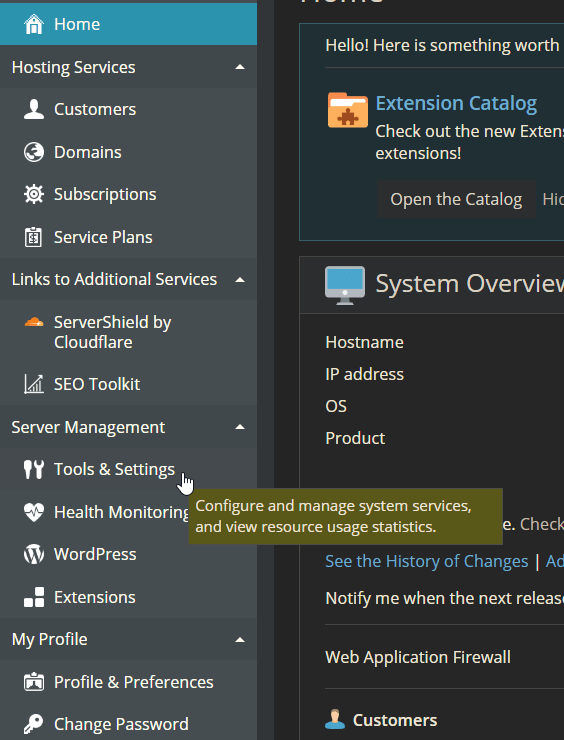
Step 2: Tools & Settings
The first thing we need to do after we log into Plesk through the previous page is to navigate to the Firewall Rules. Go ahead and click on Tools & Settings. It will be located in the right sidebar near the bottom as shown below.
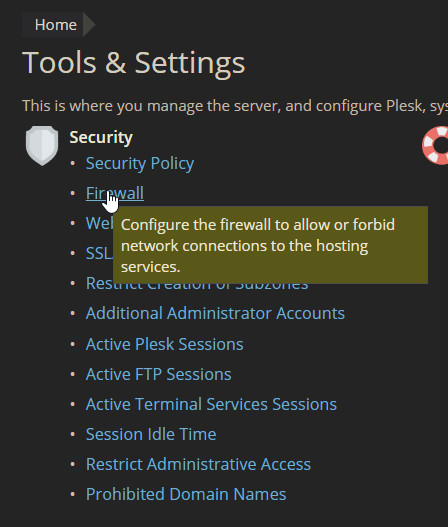
Step 3: Firewall
Once we pull up Tools & Settings go ahead and click on our destination, Firewall. You will find that option under the Security section. It will be the second option, just under Security Policy.
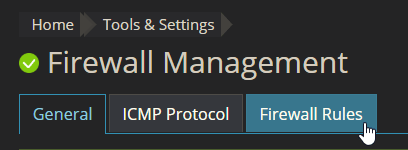
Step 4: Firewall Rules
After we are in the Firewall management, go ahead and click on Firewall Rules. This is where we will add the rule to allow a certain IP address to gain RDP access.
Step 5: Add a Firewall Rule
Under Tools, after going into the Firewall Rules, we will see the option labeled Add Firewall Rule. Go ahead and click on that, bringing us to our next step.

Step 6: Add Detail the New Rule
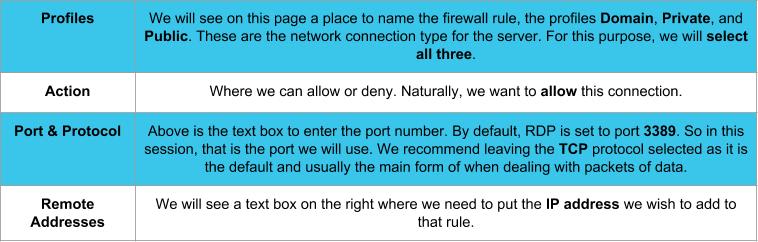
This is the page that we see after clicking on Add Firewall Rule. It can seem to be complicated and intimidating for some beginner level System Administrators, but it is simple.
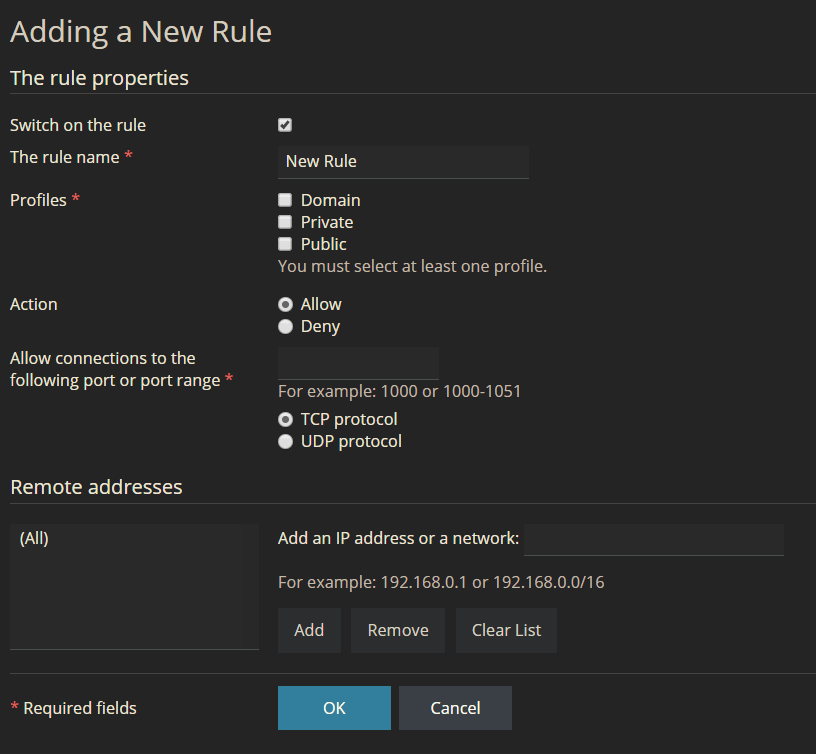
If you or your client are not sure what that IP address that needs RDP access is, Liquid Web has a great site to visit that will display your IP address.
While this particular example IP will not be the one that the customer or the System Administrator will see, (when visited on the local machine) the page will display the IP address that needs to be added to the rule for this RDP session to connect. That will be the only information that will be displayed on this page. Simply copy that IP address and use it in the instructions below.
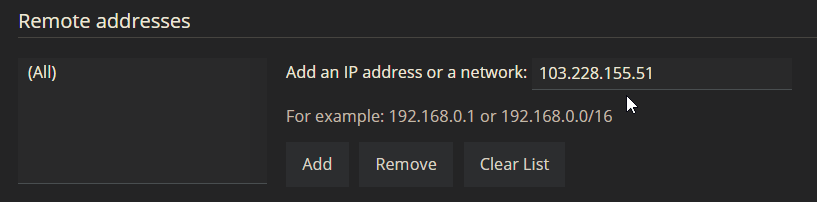
Once you enter the IP address into the text box under Remote addresses, you do need to click the ADD button before clicking on OK.
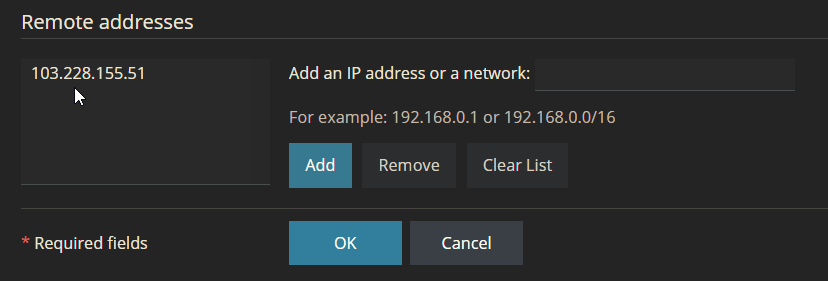
As mentioned above, after clicking the ADD button while the IP address is entered into the Add an IP address or a network text box, it will be placed into the left text box. After that step, you will then be able to click OK to apply this rule to the firewall for the server.
Step 7: Connect to RDP
The individual at that IP address can now access the server via RDP. If you would like to review an article explaining how to use Remote Desktop Connection, or if you need further assistance, you can locate more info at our internal help center after logging into your Liquid Web account.
Congratulations! You now know how to add an IP address to an RDP rule that will allow a user to connect if the RDP is scoped off to the public. This can be done many times. Although Plesk does not allow you to edit the rule, you will have to create a new one each time. But this shouldn’t cause any issues. Also, keep in mind that this method can be used for any port, including MySQL and MSSQL.
The Most Helpful Humans In Hosting™
We pride ourselves on being The Most Helpful Humans In Hosting™! Our support staff is always available to assist with any Dedicated, Cloud, or VPS server issues 24 hours a day, 7 days a week 365 days a year.
We are available, via our ticketing systems at support@liquidweb.com, by phone (at 800-580-4986) or via a LiveChat for whatever method you prefer. We work hard for you so you can relax.
Related Articles:


About the Author: Will Simon


Our Sales and Support teams are available 24 hours by phone or e-mail to assist.
Latest Articles
How to use kill commands in Linux
Read ArticleChange cPanel password from WebHost Manager (WHM)
Read ArticleChange cPanel password from WebHost Manager (WHM)
Read ArticleChange cPanel password from WebHost Manager (WHM)
Read ArticleChange the root password in WebHost Manager (WHM)
Read Article