How to Migrate a WordPress Site to cPanel
This tutorial will provide instructions on how to migrate a WordPress site from any other server or a local installation to a new cPanel & WHM server. Even if you’re not switching hosting plans, this can be useful if you’re developing a website on a different server from the production server.
This tutorial can help you migrate a WooCommerce store or transfer a WordPress blog to cPanel. If you’re looking to migrate a live WordPress website to a new server, expect brief downtime due to DNS changes since propagation of any DNS changes can take up to 24 hours.
Requirements
- A WordPress website on the source server.
- A cPanel hosting account on the destination server.
- An FTP client and FTP account set up.
- File manager on the source and destination servers.
- Access to phpMyAdmin on the source and destination servers.
How to Migrate a WordPress Site to cPanel
The migration process itself is not that complicated. Still, it consists of a series of steps that need to be completed before you can see your website up and running on the destination cPanel hosted server.
Step 1: Retrieve the Filesystem of the Site
WordPress installations have all of their files in a single directory. In this case, the directory is named html. Most file managers will allow you to download a compressed version of the directory. In addition, some will allow you to select a compression method. In this case, the choices are tar, tar.gz, or zip files.

Step 2: Download the WordPress Database Backup
The second important part of a WordPress installation is its database. To be able to migrate the WordPress website to a cPanel server, you’ll need to retrieve the database backup. First, you’ll need to access the phpMyAdmin on the source server.

You’ll need to select the correct database in the databases section on the left and click Export.

As you can see, there are two export methods. The Quick export method will be sufficient most of the time, and the format you’ll want will be SQL. Click the Go button to download the SQL file to your local machine.
Step 3: Upload the Filesystem to the Destination Server
Here, you’ll see how to upload a WordPress file to your server in cPanel. Depending on the size of your website, you’ll want to upload the compressed filesystem either via cPanel file manager or via FTP.
Step 3a: Upload via File Manager
You’ll need to log into your cPanel account, go to File Manager, and upload the archive containing the site’s file system you downloaded from the source server.

Step 3b: Upload via FTP
For this step, you’ll need an FTP username and password for your cPanel account, the hostname, and the FTP port. You’ll also need an FTP client like FileZilla, Cyberduck, or anything similar to allow you to upload data via FTP. This tutorial uses FileZilla, dragging and dropping the required file once connected to the destination server.

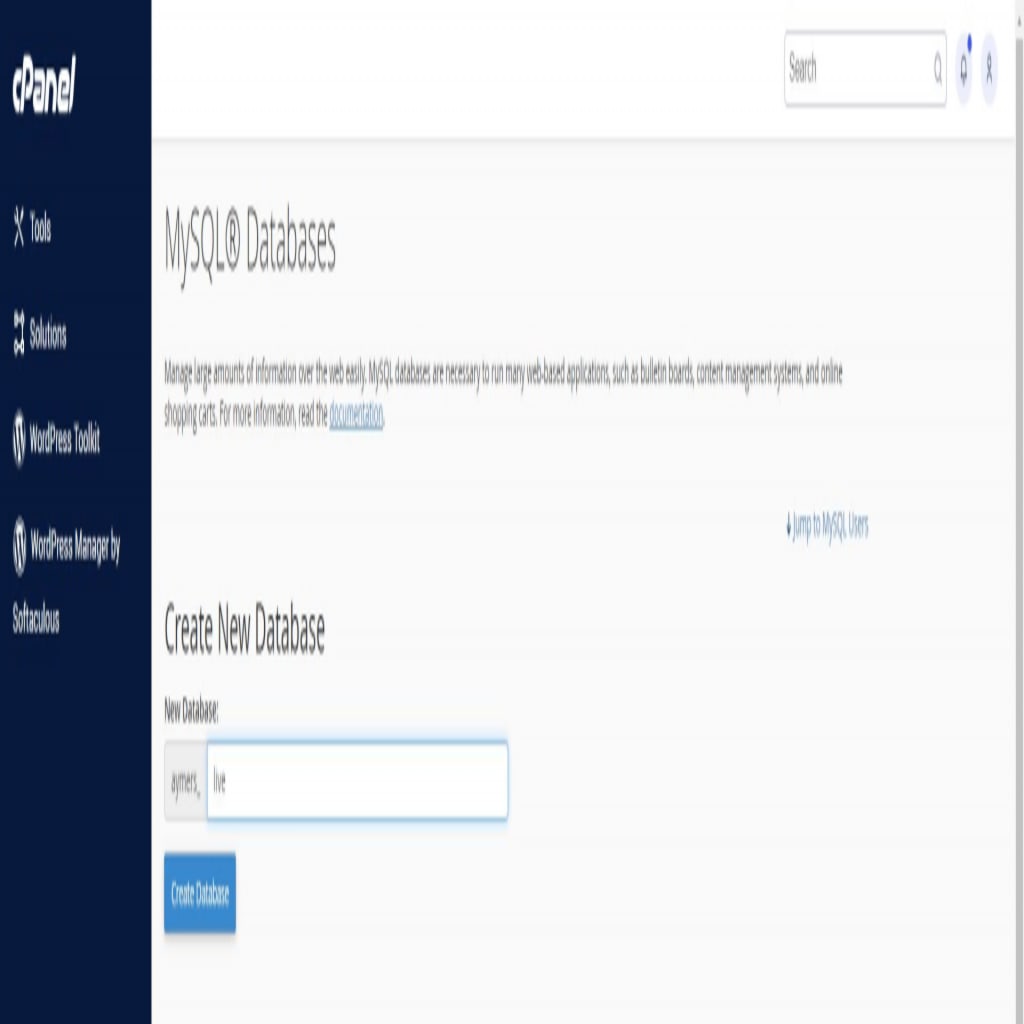
Step 4: Create a New Database and a MySQL Username
To be able to use the database, you’ll first need to create a new database in cPanel’s MySQL Databases section.
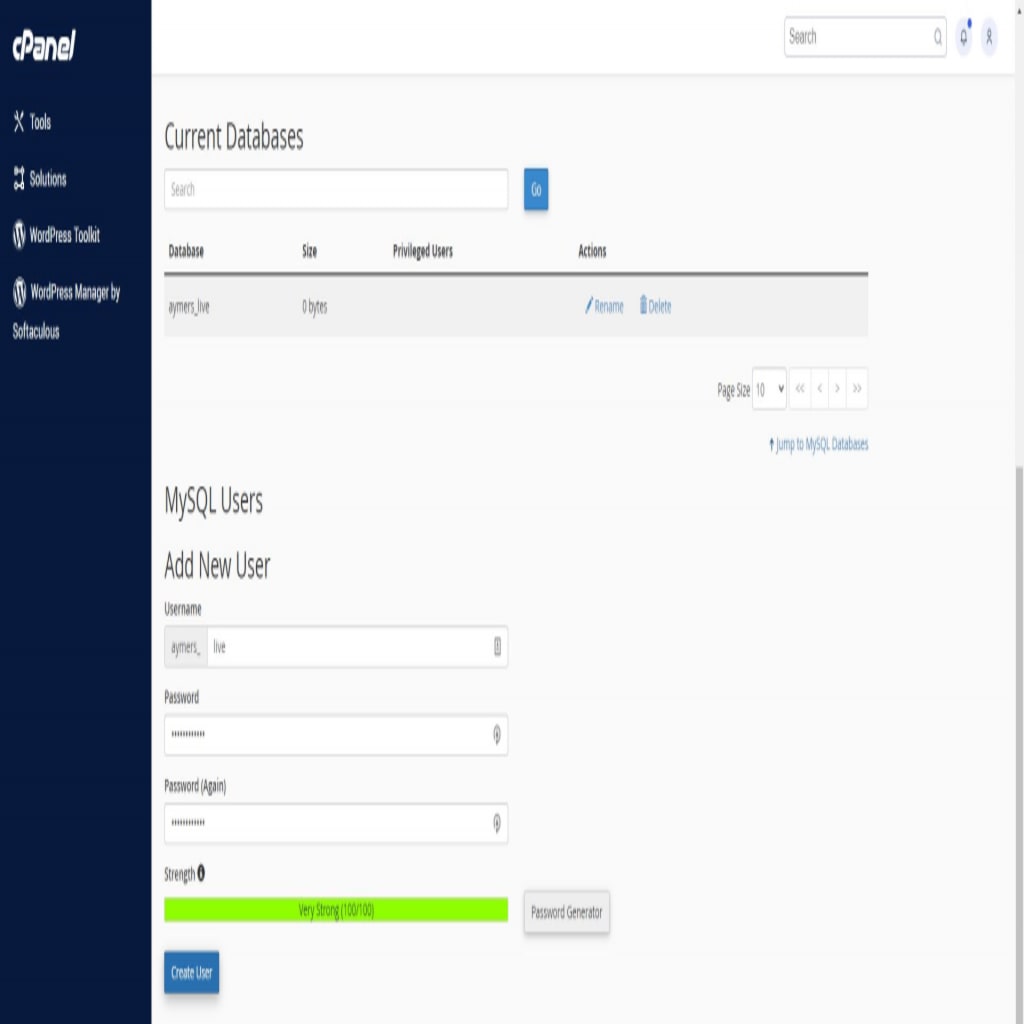
Now you’ll need to create appropriate database username.
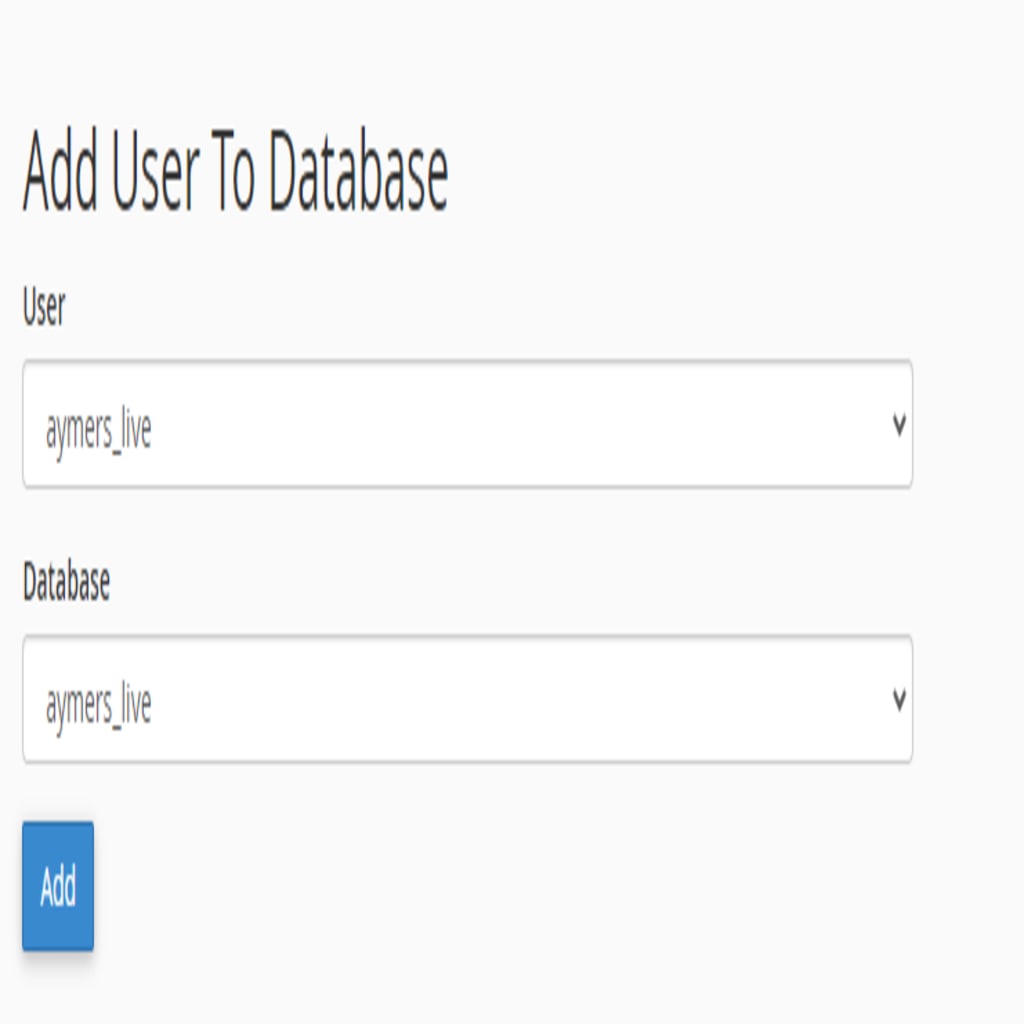
As the last part here, you’ll need to add the privileged user to the database.
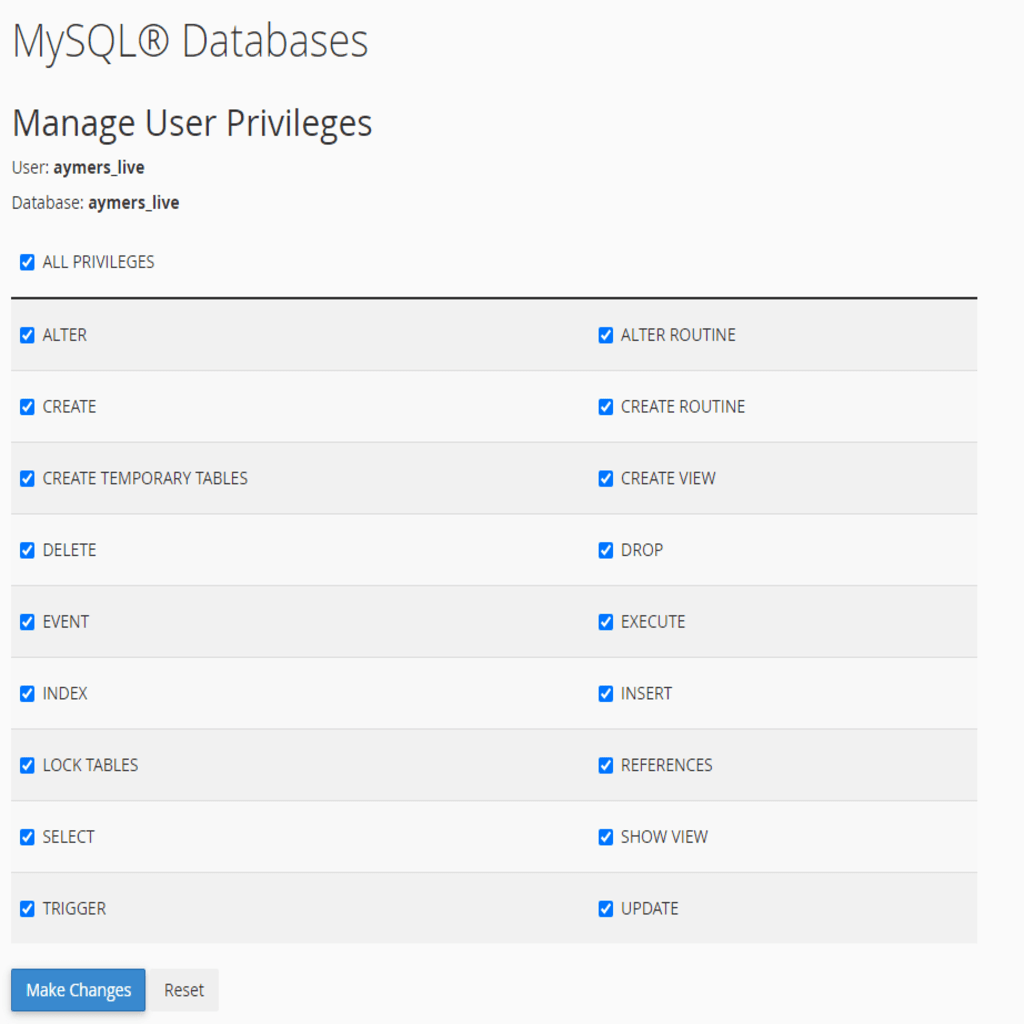
You’ll be prompted to select its privileges. For this tutorial, the user will have all privileges.
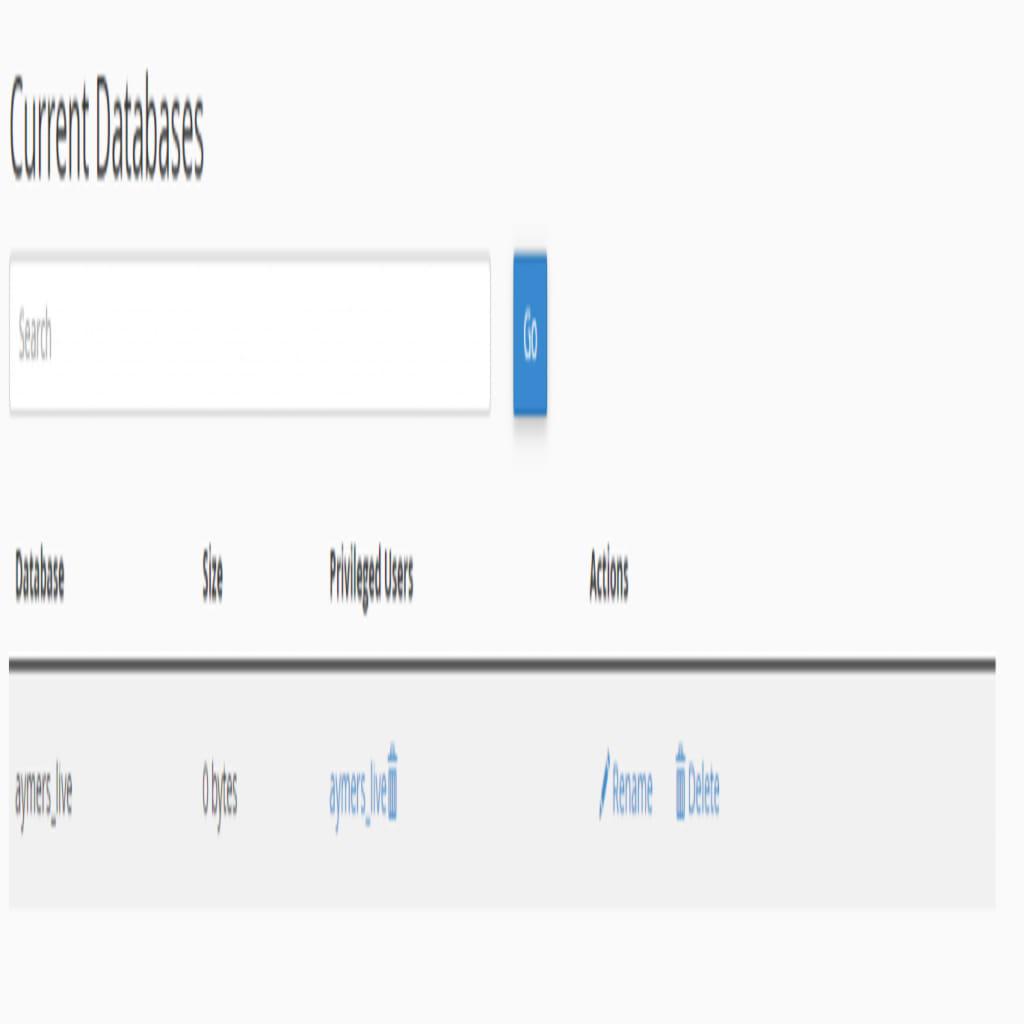
Now that you’ve mapped the user to the appropriate database, your database section should look something like this.
Step 5: Import the Database
If you have multiple cPanel accounts on the server, they’ll all have different names, and the prefixes for their MySQL databases will differ. To import the database, you’ll need to open the phpMyAdmin section of your cPanel account, select the correct database, and click Import. In the Import section, you’ll need to click the Choose File button, which will allow you to upload the correct SQL file you previously created on the source server.
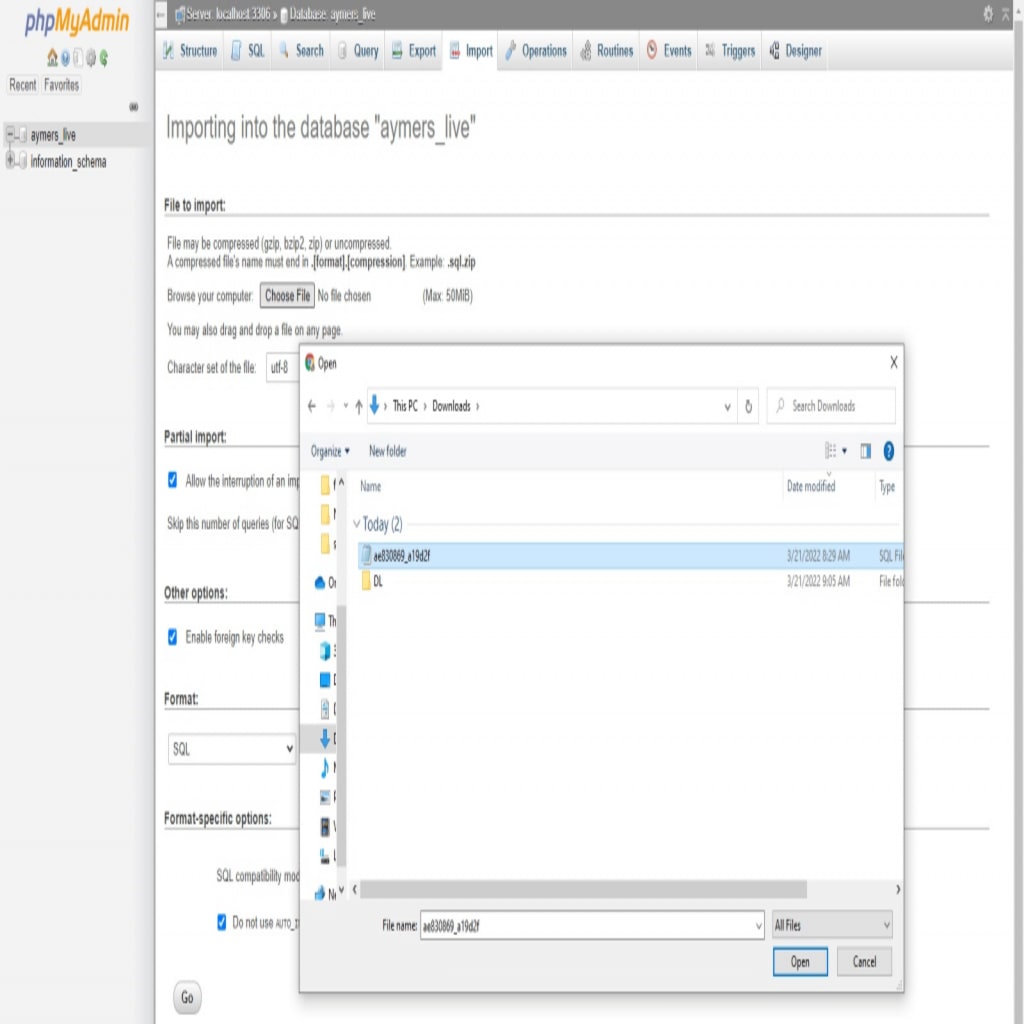
Click the Open button to import the tables into the new database.

Step 6: Extract the Filesystem
For your site to load normally, you’ll need to extract the compressed filesystem from Step 3. You can use cPanel’s file manager to extract the files.
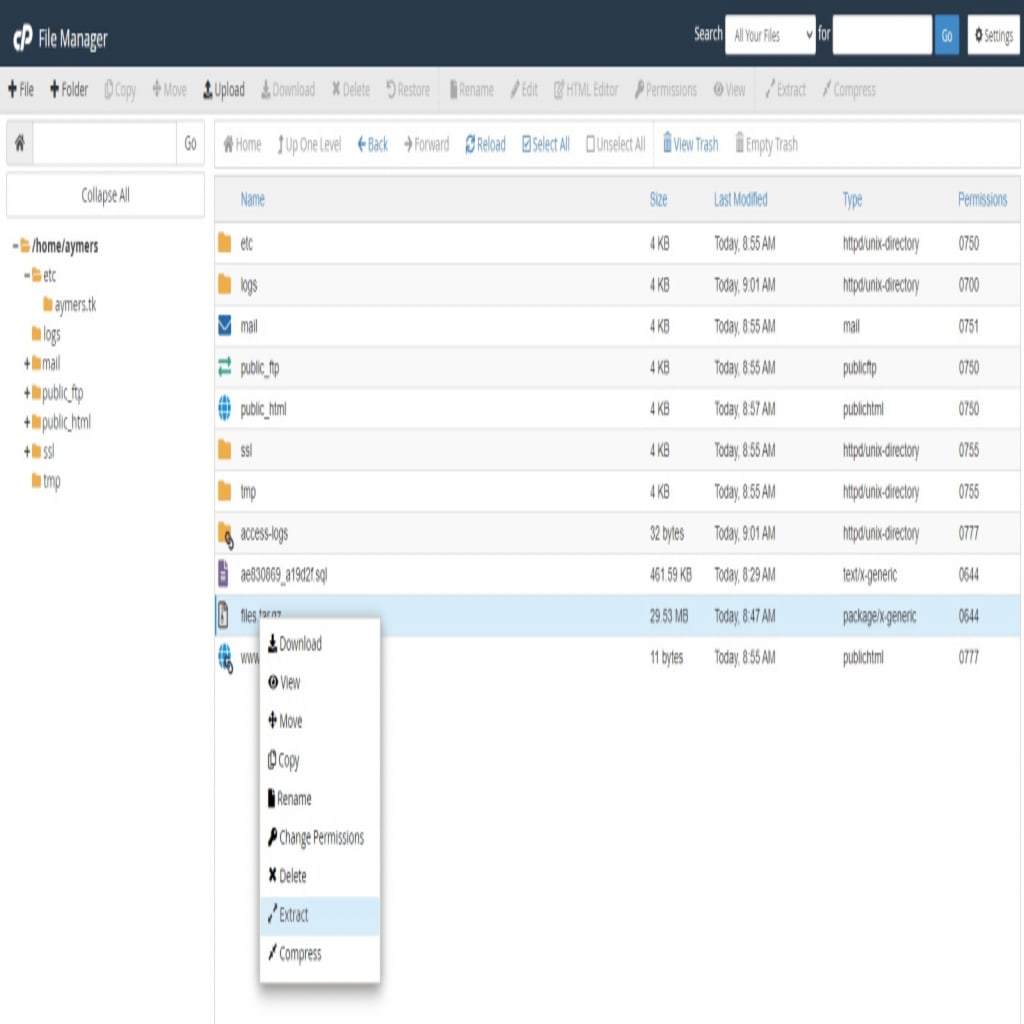
You’ll be prompted to select the location to which you want to extract the archive. Home directory will suffice in this case.

In cPanel’s case, the default document root for each site is the public_html directory. In this case, the compressed directory was named html and has retained that name after extraction. Therefore, it was renamed to public_html instead. You can rename the initial public_html directory to something else first.

Since there aren’t any public_html directories left, rename the directory from html to public_html.

Step 7: Update the Configuration File
Now that the filesystem and the database are in place, the only thing left to do is connect them. This is done using the wp-config.php file. When making any changes on the server, it’s always a good idea to make a backup of what will be modified. First things first – copy the initial wp-config.php file.
Now you can edit the actual wp-config.php file.
The main section you’ll need to modify here is the section containing database credentials. This is where you will need to define the db password as well as its name and username.

Step 8: Update the DNS
To be able to load the website from your new cPanel server, you’ll need to update its A record within its DNS zone.
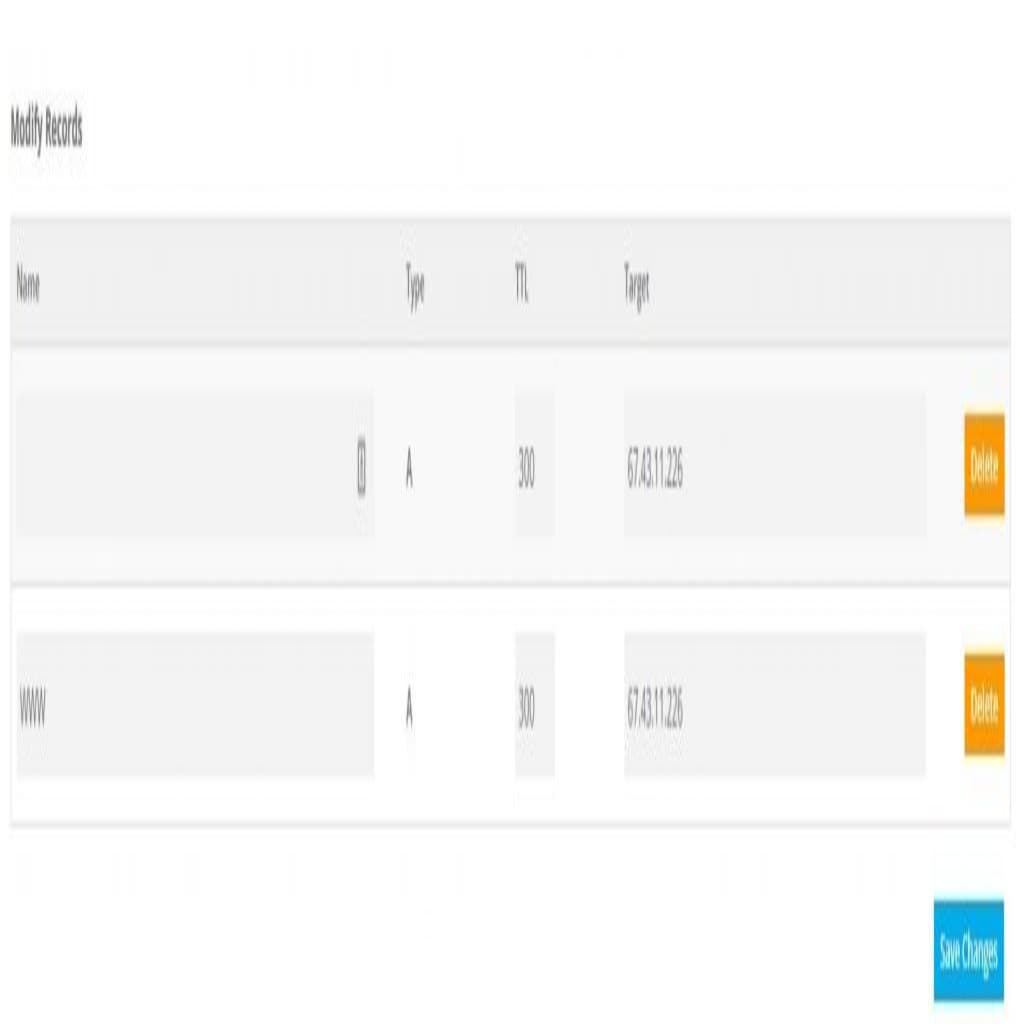
Once you save the changes, feel free to take a break as the DNS propagation is an automated process that will take at least a couple of hours to complete.
Wrapping Up
This tutorial walks through how to migrate a WordPress site to cPanel. Though most WordPress cloud hosting companies provide migration services, sometimes it’s more time-consuming to wait for their teams to complete your requests. While plenty of WordPress migration plugins exist for this purpose, this guide shows that moving your WordPress site does not have to be a complicated process.
Do you need cPanel hosting for your websites? Liquid Web offers VPS Hosting, Cloud Servers, and Dedicated Servers with cPanel. Contact our sales team today to get started and move your WordPress installation.