


How to Password Protect Folders in IIS and Plesk
Introduction
When reviewing your servers security, it is critical for businesses to ensure that while building new sections of your website, that we do not leave it unsecured or visible to users while it is being built. With this in mind, there are several ways for you to “lock” a folder or domain while it is being developed. This will safeguard a folder or an entire site using the security feature built into IIS and Plesk called password protection. In today’s article we will see how easy it is to restrict access to a site or a folder.
What is IIS?
IIS stands for “Internet Information Services”. This is the default web server that is integrated with the Windows server software packages. It has a graphical interface, used for managing the Microsoft Windows server.
Global Password Protection
One of the many features that IIS has implemented, is called .Net Authorization. These rules allow us to make custom rules sets which will delineate who has access to a folder or website. There are multiple options we have available to select when adding these custom, allow or deny rules. Some of these rules include the following options.
- All users - This rule will deny access to a folder for any user which attempt to access it. If you would like to block content for everyone, make sure that this rule is on top of the list of all other rules.
- All anonymous users - This rule will block access to all users that are not authenticated. In other words, any user attempting to access the folder or site must have specific access granted. Any user needing access must be added to the users and groups section, otherwise they will be blocked.
- Specified roles or user groups - This rule will block access to all users that do not have basic or custom user account and password set up.
If you would like to block access to everyone, we can follow the instructions noted here.
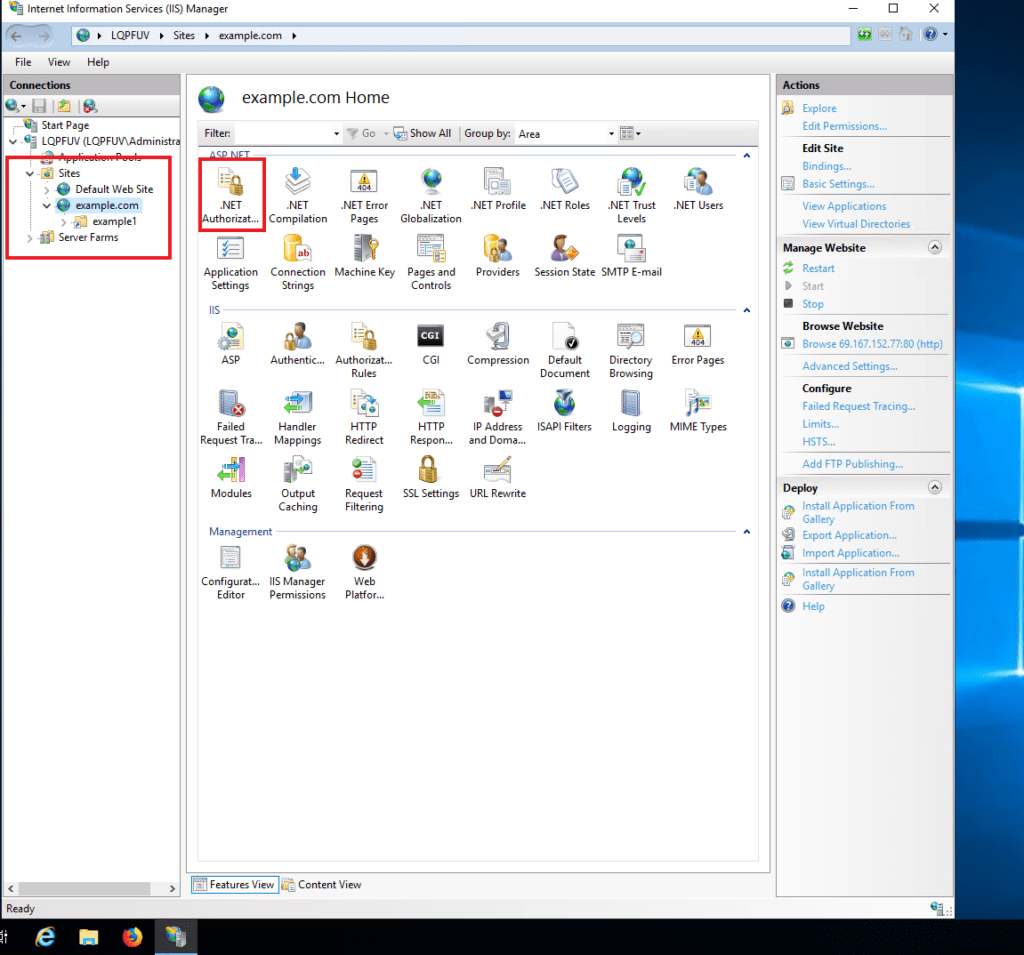
- First, open your IIS Manager from the Windows Start button.
- Next, select the site that you want to edit from the left side menu,
- Then, open the '.Net Authorization' rules and Click on “add rule” and select the type of rule you would like to add. Now, we should specify the users it will apply to.
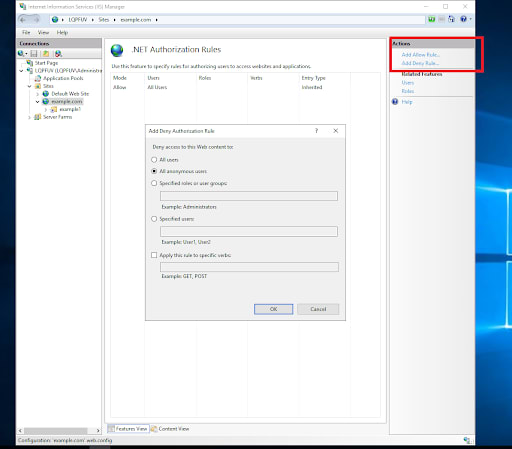
You can add as many custom rules as you would like depending on your situation.
Custom Folder Protection
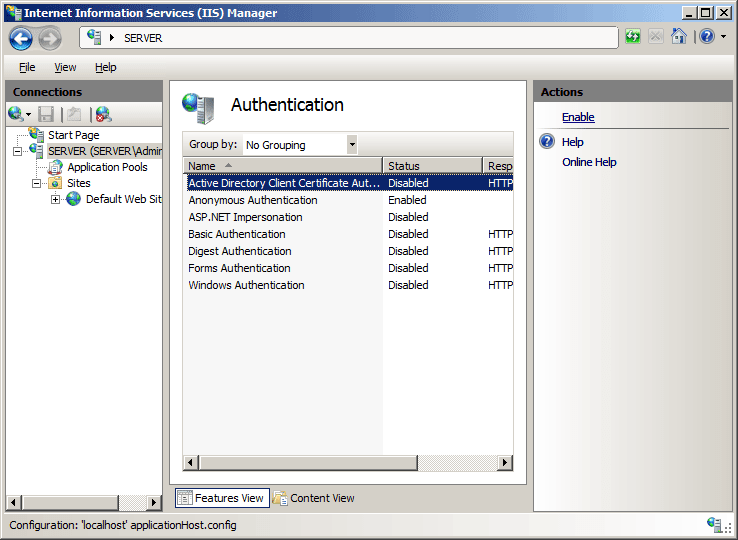
The other mechanism used for authentication and protection is called “Authentication”. In that area, we have multiple options that are available to modify. These choices are described in detail below.
- Active Directory Client Certificate Authentication
- Anonymous Authentication
- ASP. NET Impersonation
- Basic Authentication
- Digest Authentication
- Forms Authentication
- Windows Authentication
Active Directory Client Certificate Authentication - This is a form of authentication that requires the IIS 7 server to be a member of the Active Directory domain as well as the user accounts that are stored in active directory.
Anonymous Authentication - This is a feature that provides access to the public areas of your website. If FTP is enabled, by default it will allow users to access contents of the site.
ASP. NET Impersonation - This is a security feature that allows specific users to execute code. This feature is used for anonymous users who do not have credentials, but we want to allow them to have access.
Basic Authentication - This option provides access to users that have accounts on the server’s domain. In order to access the public facing content, basic authentication should be enabled to allow the user to set a password in “Local users and Groups”. The important thing to note here is that when accessing content, passwords are sent via a clear text format and as such, considered insecure.
Digest Authentication - This option is similar to “Basic Authentication”, but credentials are sent in a more secure manner using hashing instead of plain text. This method provides more security, and also requires a user's password to be set.
Forms Authentication - This option works by authenticating the user by reviewing the forms' authentication ticket (which is the container for the forms' authentication cookie), which is usually included within the user's collection of cookies. In the event no forms' authentication ticket is seen, the user is deemed as being anonymous.
Windows Authentication - This option is used in a more corporate setting or environment, or when numerous users are present within a network. This certification uses Windows-based authentication between a client and the Windows IIS server to verify the user who is attempting access must have a Windows account.
In all the options we have seen for protecting folders, we find it is best to use Basic Authentication or Digest authentication. Both options require a username and password. Let’s review how to set this up.
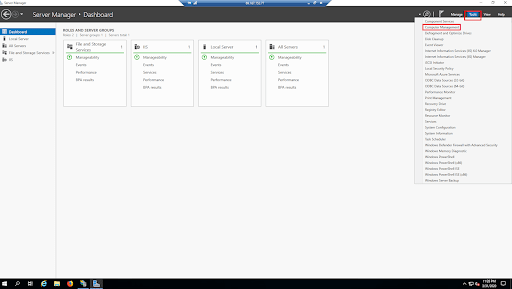
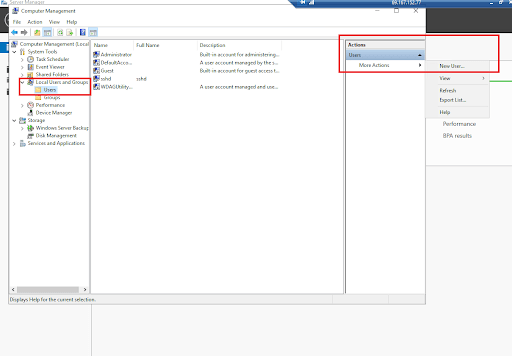
First, we will start by opening the Server Manager dashboard. Then, on the right side under “Tools” select “Computer Management”.
When the Computer Manager opens, navigate to the “Local Users and Groups” section. Click on the “Users” and on the right side select “More Actions >> New User”. Here we can set up a new username and password for a user, and once complete, save it to provide access.
Now that we have the user set up, we can enable protection on any folders needed. To select a folder, let's open our “IIS Manager” and select the site or folder that you want to limit access to.
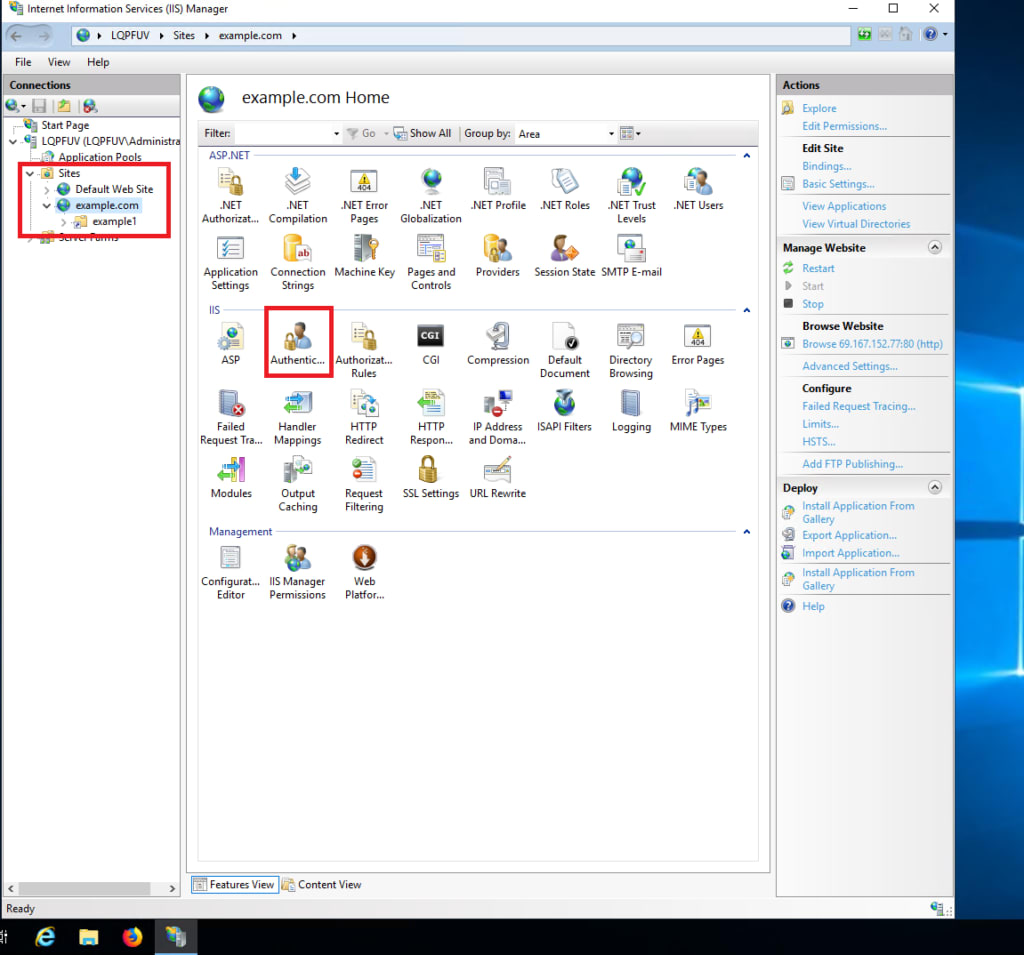
Next, the types of authentication section will open. Disable “Anonymous Authentication” and enable “Basic” or “Digest” authentication for a site or folder. That's it. We have allowed access to that specific new user.
How to Password Protect Sites in Plesk
In this segment. we will review how to protect folders and domains on a Windows server using Plesk. Plesk's protection features will add an extra layer of security to your sites and content, and it is easier to set up than just using the Windows IIS service manager.
What is Plesk?
Plesk is a hosting platform used for server administration. It will allow you to manage your websites, DNS zones, plugins, databases, email accounts, reseller accounts, etc. via a web-based interface.
Setting Up Password Protection
- Open Plesk
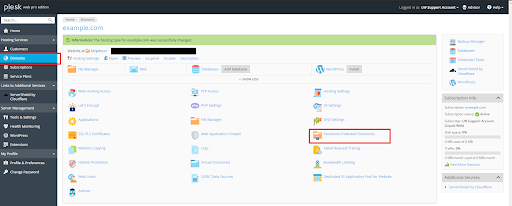
- Navigate to Domains > Domain name that you want to edit > Password-Protected Directories.
- Click “Add Protected Directory”.
- Type a path to the directory that you want to restrict, and a title that will be visible to the visitors.
- Click “OK”
Adding A User to the Password Protected Directory
Next, we have to allow a user or users access to the password protected directory. To accomplish this, use the following directions.
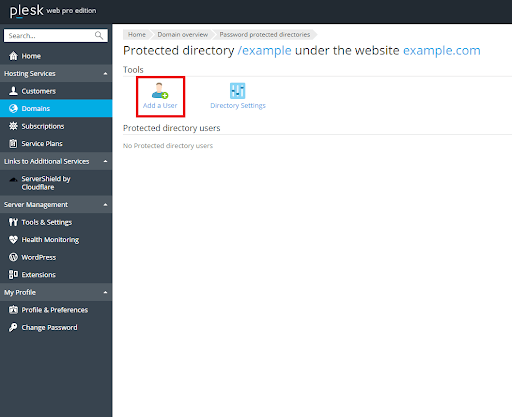
- Navigate to your Domains > Domain name that you want to edit > Password-Protected Directories.
- Click on the directory that you want to add user to.
- Set the username and password.
- Click “OK”.
That's it! Securing access to your domains and folders can be as easy as one, two, three. Here at Liquid Web we value your security and offer multiple options to increase your Servers protection level.
Conclusion
Now that we have set up our domain and folder security, we can work on our website without external users having access to it until we are completed. Would you like to add additional security measures? Have no fear! At Liquid Web, we understand your concerns and can provide complete protection to meet all of your security needs. Check out our Security addons for Windows servers and stay protected with Liquid Web.
Related Articles:


About the Author: Danny Jensen
I am a 29 years old Linux admin, techie and nature lover who loves solving puzzles. When I am not behind the keyboard you can find me in the woods but I will still probably be thinking about that server or that ticket I saw today.


Our Sales and Support teams are available 24 hours by phone or e-mail to assist.
Latest Articles
In-place CentOS 7 upgrades
Read ArticleHow to use kill commands in Linux
Read ArticleChange cPanel password from WebHost Manager (WHM)
Read ArticleChange cPanel password from WebHost Manager (WHM)
Read ArticleChange the root password in WebHost Manager (WHM)
Read Article