 Mohammed Noufal
 JBoss Application Server, now named WildFly Server, is a Java-based open-source application server developed by Red Hat. It serves as a platform for the development and deployment of enterprise-level applications.
Installing WildFly on AlmaLinux entails multiple steps, including downloading the software, creating the environment, and starting the server. In this tutorial, you will learn how to install JBoss Application Server (AS) — also known as JBoss AS or WildFly Server — on the AlmaLinux distribution of Linux.
Introduction to JBoss technologies
JBoss is a popular suite of middleware products developed by Red Hat, designed for enterprise-level applications. It provides a range of technologies and tools to support various application development, deployment, and management aspects. JBoss was initially created by Marc Fleury in 1999 as an open-source Java application server project. Over time, it gained popularity for its innovative features and development model. Red Hat, a prominent open-source software company, recognized the potential of JBoss and acquired JBoss Inc. in 2006.
With the acquisition, Red Hat incorporated JBoss into its product portfolio, strengthening its offerings for enterprise customers. Red Hat’s expertise in Linux and open-source technologies, combined with the capabilities of JBoss, led to the development of the JBoss Enterprise Application Platform (JBoss EAP), providing a stable, supported Java Enterprise Edition (Java EE) application server for enterprises.
Red Hat also integrated JBoss technologies into its Red Hat Enterprise Linux (RHEL) operating system, providing seamless integration and support for JBoss products on the widely adopted Linux platform. This integration enhanced the performance of applications, security, and manageability in enterprise environments. All of these improvements further solidified Red Hat’s position as a leading provider of open-source solutions for businesses.
In the sections that follow, we have provided an introduction to some key components of JBoss technologies.
JBoss Enterprise Application Platform (JBoss EAP)
JBoss EAP is a high-performance, fully certified Java EE application server designed for building and deploying enterprise-level applications. It offers clustering, high availability, load balancing, and centralized management, making it an ideal choice for critical and demanding applications.
WildFly Server (formerly JBoss Application Server)
WildFly, the community version of JBoss EAP, is a lightweight, modular, fast Java EE application server. It provides the latest Java EE specifications, a flexible architecture, and enhanced performance for modern application development. WildFly supports microservices architectures and cloud-native applications.
JBoss Web (Apache Tomcat-based Java servlet container)
JBoss Web is a Java servlet container built on the Apache Tomcat web server. It enables the deployment of Java web applications by implementing the Java Servlet specification. It’s optimized for high performance and scalability, making it a suitable choice for serving web applications.
JBoss Server
JBoss Server refers to the overall ecosystem of JBoss technologies, including the application server (WildFly), web server (JBoss Web), and other related tools and components for building and deploying enterprise applications.
JBoss EAP vs. Wildfly Server
JBoss EAP (Enterprise Application Platform) and WildFly Server (formerly JBoss Application Server) are significant offerings in the JBoss ecosystem. This table summarizes the key differences between JBoss EAP and WildFly, highlighting their focus, support models, management tools, performance characteristics, licensing, and preferred use cases:
| Feature | JBoss EAP (Enterprise Application Platform) | WildFly Server (JBoss Application Server) |
| Focus | – Enterprise-grade Java EE application server. | Latest Java EE standards, cutting-edge features. |
| Performance and Scalability | – Optimized for stability and reliability. – Horizontal scaling for varying workloads. | – Optimized for efficiency and resource utilization. – Scalable architecture. |
| Management and Tooling | – Advanced management and monitoring tools. – Red Hat support. | – Standard management tools. – Community support. |
| Certification and Support | – Extensive testing and certification. – Long-term support (LTS). | – Community-driven, rapid updates. – Community support. |
| Licensing | – Subscription-based model | -Open-source, free to use. |
| Use Cases | – Mission-critical applications. – Enterprises requiring long-term support. – High-availability applications. | – Development, testing, and cloud-native applications. – Development environments. – Microservices. |
Installing JBoss AS (WildFly Server)
Prerequisites
- Operating System and Version: AlmaLinux OS 8.
- Linux Permissions: Privileged access to your AlmaLinux operation system using the as root or sudo command.
- System Minimum Requirements: 2 GB RAM and 10 GB of disk space.
To install JBoss Application Server (WildFly Server) on AlmaLinux, follow the steps below in the next sections.
Step #1: Update your AlmaLinux system
Before installing JBoss Application Server (WildFly Server), you should update your system’s package list to ensure you have the most up-to-date information on accessible packages. You can update your AlmaLinux system by using the following command:
sudo dnf updateStep #2: Install Java
We need Java installed before installing WildFly Server because WildFly is based on Java. Using the following command, you can install OpenJDK (open-source Java Development Kit):
sudo dnf install java-11-openjdkOnce Java has been installed, use the following command to check the Java version:
java --versionHere is the output:
~]# java --version
openjdk 11.0.20 2023-07-18 LTS
OpenJDK Runtime Environment (Red_Hat-11.0.20.0.8-1) (build 11.0.20+8-LTS)
OpenJDK 64-Bit Server VM (Red_Hat-11.0.20.0.8-1) (build 11.0.20+8-LTS, mixed mode, sharing)
Step #3: Install WildFly Server
Create a system user and group for WildFly before downloading and installing it. Running WildFly as the root user is not recommended since it creates security issues. Use the following commands to establish a new system user and group called wildfly with the home directory /opt/wildfly:
groupadd -r wildfly
useradd -r -g wildfly -d /opt/wildfly -s /sbin/nologin wildfly
For adding users, WildFly contains an add-user.sh script in the bin folder.
Then, download the most recent version of WildFly from the official website. According to the WildFly documentation website, the most current version of WildFly available at the time this article was published was 30.0.0.Final.
You can download the WildFly Server using the following command using the appropriate version details within your command-line syntax:
wget https://github.com/wildfly/wildfly/releases/download/29.0.1.Final/wildfly-29.0.1.Final.tar.gzOnce the download is complete, use the following command to extract the downloaded file into the /opt directory:
tar -xvzf wildfly-29.0.1.Final.tar.gz -C /opt/Next, create a symbolic link to the WildFly installation directory:
ln -s /opt/wildfly-29.0.1.Final /opt/wildflyThen, the next step is to change ownership of the directory to the wildfly user:
sudo chown -R wildfly:wildfly /opt/wildflyStep #4: Create systemd service for WildFly Server
First, create a directory for WildFly under /etc and copy the WildFly configuration file to /etc/wildfly:
mkdir -p /etc/wildfly
sudo cp /opt/wildfly/docs/contrib/scripts/systemd/wildfly.conf /etc/wildfly
To view the content of the WildFly configuration file, use the following command:
cat /etc/wildfly/wildfly.conf Here is the output:
~]# cat /etc/wildfly/wildfly.conf
# The configuration you want to run
WILDFLY_CONFIG=standalone.xml

# The mode you want to run
WILDFLY_MODE=standalone

# The address to bind to
WILDFLY_BIND=0.0.0.0
According to the output above, it is clear that WildFly operates in Standalone mode by default, but you can modify this to your preference.
Next, copy the launch.sh script, which is necessary to start WildFly as a service:
sudo cp /opt/wildfly/docs/contrib/scripts/systemd/launch.sh /opt/wildfly/bin/ Then, copy the WildFly service file:
sudo cp /opt/wildfly/docs/contrib/scripts/systemd/wildfly.service /usr/lib/systemd/system/Create a directory for storing the PID file and change ownership of the directory to the wildfly user:
sudo mkdir /var/run/wildfly/
sudo chown -R wildfly:wildfly /var/run/wildfly/
Let’s make the script files executable so WildFly can run properly on your AlmaLinux system:
sudo chmod +x /opt/wildfly/bin/*.shNext, use the following command to reload the systemd daemon:
sudo systemctl daemon-reloadThen, using the following commands, start the WildFly service and enable it to start upon boot:
sudo systemctl start wildfly
sudo systemctl enable wildfly
You can now use the following command to check the status of the WildFly service:
sudo systemctl status wildflyHere is the output:
● wildfly.service - The WildFly Application Server
   Loaded: loaded (/etc/systemd/system/wildfly.service; enabled; vendor preset: disabled)
   Active: active (running) since Sun 2023-09-24 04:09:04 UTC; 634ms ago
 Main PID: 2498 (launch.sh)
    Tasks: 19 (limit: 11873)
   Memory: 12.0M
   CGroup: /system.slice/wildfly.service
           ├─2498 /bin/bash /opt/wildfly/bin/launch.sh standalone standalone.xml 0.0.0.0
           ├─2500 /bin/sh /opt/wildfly/bin/standalone.sh -c standalone.xml -b 0.0.0.0
           └─2562 java --add-modules=java.se -version

Sep 24 04:09:04 ip-172-31-19-237.us-east-2.compute.internal systemd[1]: Started The WildFly Application Server.
Step #5: Configure SELinux
AlmaLinux includes Security-Enhanced Linux (SELinux) by default. As a result, you will need to configure SELinux for WildFly. You can do so by using the commands shown below:
sudo semanage fcontext -a -t bin_t "/opt/wildfly/bin(/.*)?"
restorecon -Rv /opt/wildfly/bin/
setsebool -P httpd_can_network_connect 1
Step #6: Configure the firewall to allow the WildFly Server port
WildFly’s default service port is 8080/tcp, whereas the management console uses 9990/tcp. As a result, you must allow these service ports in the firewall to make the WildFly services available throughout the network. You can open ports 8080 and 9990 by using the following command:
sudo firewall-cmd --permanent --add-port={8080,9990}/tcpYou can reload the firewall using the following command to reflect the changes:
sudo firewall-cmd --reloadStep #7: Configure WildFly admin console for remote access
The WildFly admin console runs on localhost by default. If we wish to access it from a remote host, we must first configure it.
To access the WildFly admin console, we must first create an admin user. You can use the add-user.sh script to create a user for WildFly admin console:
sudo sh /opt/wildfly/bin/add-user.shDuring the WildFly user setup process, you must provide your username and password. You can enter your WildFly username and password and then follow the instructions that appear.
Here is the output:
~]# sudo sh /opt/wildfly/bin/add-user.sh

What type of user do you wish to add?
 a) Management User (mgmt-users.properties)
 b) Application User (application-users.properties)
(a): a

Enter the details of the new user to add.
Using realm 'ManagementRealm' as discovered from the existing property files.
Username : wildfly-admin
Password recommendations are listed below. To modify these restrictions edit the add-user.properties configuration file.
 - The password should be different from the username
 - The password should not be one of the following restricted values {root, admin, administrator}
 - The password should contain at least 8 characters, 1 alphabetic character(s), 1 digit(s), 1 non-alphanumeric symbol(s)
Password :
Re-enter Password :
What groups do you want this user to belong to? (Please enter a comma separated list, or leave blank for none)[  ]:
About to add user 'wildfly-admin' for realm 'ManagementRealm'
Is this correct yes/no? yes
Added user 'wildfly-admin' to file '/opt/wildfly/standalone/configuration/mgmt-users.properties'
Added user 'wildfly-admin' to file '/opt/wildfly/domain/configuration/mgmt-users.properties'
Added user 'wildfly-admin' with groups  to file '/opt/wildfly/standalone/configuration/mgmt-groups.properties'
Added user 'wildfly-admin' with groups  to file '/opt/wildfly/domain/configuration/mgmt-groups.properties'
Next, create an environment variable for WildFly. To create an environment variable for WildFly, open the WildFly configuration file /etc/wildfly/wildfly.conf:
sudo vi /etc/wildfly/wildfly.confFind the following line:
WILDFLY_BIND=0.0.0.0And replace it with the following line:
WILDFLY_CONSOLE_BIND=0.0.0.0Next, open /opt/wildfly/bin/launch.sh script and find the following line:
$WILDFLY_HOME/bin/standalone.sh -c $2 -b $3And replace it with the following line:
$WILDFLY_HOME/bin/standalone.sh -c $2 -b $3 -bmanagement=0.0.0.0Then, open the WildFly service file /usr/lib/systemd/system/wildfly.service and find the following line:
ExecStart=/opt/wildfly/bin/launch.sh $WILDFLY_MODE $WILDFLY_CONFIG $WILDFLY_BINDAnd add $WILDFLY_CONSOLE_BIND to the end of the line:
ExecStart=/opt/wildfly/bin/launch.sh $WILDFLY_MODE $WILDFLY_CONFIG $WILDFLY_BIND $WILDFLY_CONSOLE_BIND Finally, save the file and close it. Restart the Wildfly service to apply the changes:
sudo systemctl restart wildflyStep #8: Access the WildFly admin console
By default, the WildFly web interface will be accessible through HTTP port 8080. To get to the WildFly web interface, open your browser and go to http://your-domain.com:8080 or http://your-server-ip:8080:

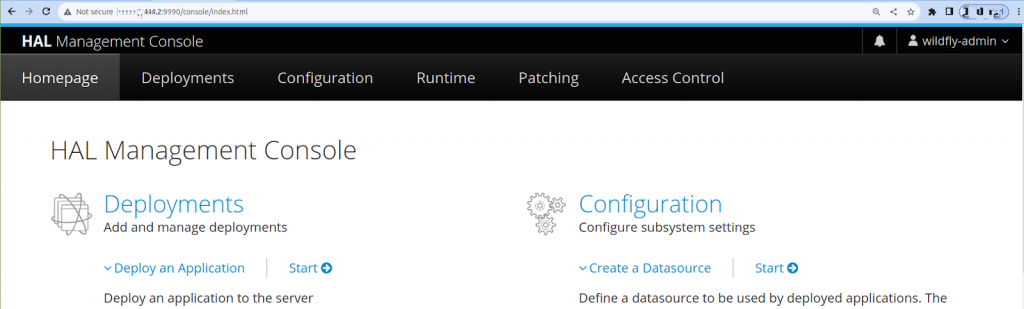
To access the WildFly admin console, you can either click on the Administrator Console link or go to http://your-domain.com:9990/console or http://your-server-ip:9990/console — remembering to replace “your-domain.com” and “your-server-ip” with your actual domain or IP address:

Enter the created admin username and password, and then click the Sign In button. After doing so, you will be taken to the management console’s homepage:
If you want to install WildFly on CentOS 8, refer to the How to install WildFly on CentOS 8 guide.
Uninstalling Wildfly Server
To uninstall WildFly Server, you need to delete the entries and folders you have created to hold its files:
sudo rm -r /opt/wildlfy
sudo rm -r /etc/wildfly
sudo rm -r /etc/systemd/system/wildfly.service
Final thoughts
We hope this guide has helped you install the JBoss AS (WildFly Server) on AlmaLinux. Liquid Web’s specialized VPS hosting plans are designed to elevate your experience and application performance with WildFly Server on AlmaLinux.
At Liquid Web, we understand the unique requirements of hosting Java-based applications, and our tailored solutions are crafted to optimize your deployment and management processes. So, you can host and manage your Java-based applications with us in order to provide your organization with a robust and reliable platform for your enterprise-level projects with a high degree of confidence.