
 Dean Conally
 What is Wildfly?
WildFly is a Java runtime application server and software management platform implemented in Java. It is primarily used to provision Java applications and services on a Java-based platform. It is currently developed by Red Hat as open-source software (apart from the community forums) and was better-known as JBoss AS previously. While the WildFly software remains open-source, paid support can be purchased from RedHat if needed. RedHat continues to implement a separate version of this software under the JBoss EAP name.
Prerequisites
First, let’s begin by checking the prerequisites needed for the installation.
| Category | Requirements, Conventions orSoftware Version Used |
| OS | CentOS 8 (Unmanaged) |
| User Type | Root/basic Linux user |
| Software | OpenJDK, WildFly |
| Task Difficulty | Medium: (A basic working knowledge of the command line is required) |
| Other | Internet connection on our server |
System Checkup
To begin, we will check to verify our system version and perform any updates needed so that we are sure everything is up to date. To check our system version, run this command.
[root@host ~]# cat /etc/redhat-releaseOur output will be similar to the one shown below.
CentOS Linux release 8.1.1911 (Core)This output implies that we are running CentOS 8.
Next, we will ensure that our server is up to date with the latest software using these commands.
root@host:~# yum check-update
root@host:~# yum clean all
root@host:~# yum update
After we are done with this, and we are sure that everything is updated, we can proceed with the installation of OpenJDK and WildFly.
Java needs to be installed before the software can be run.
WildFly 11 requires at least Java 8 to run.
OpenJDK Installation
OpenJDK (or Open Java Development Kit) is a free and open-source implementation of the Java (SE) or Standard Edition Platform. It is one of the most prevalent open-source Java platforms in use today. We will be installing OpenJDK before installing WildFly.
To begin, we will log into our server as the root user via SSH. Our first command installs the OpenJDK software.
[root@host ~]# dnf install java-11-openjdk-develThe output from this command will be quite lengthy, so we will truncate the output somewhat but show which packages have been installed on the server. The following packages are necessary for OpenJDK.
Installed:
  java-11-openjdk-devel-1:11.0.7.10-1.el8_1.x86_64
  dconf-0.28.0-3.el8.x86_64
  gtk3-3.22.30-4.el8.x86_64
  abattis-cantarell-fonts-0.0.25-4.el8.noarch
  adwaita-cursor-theme-3.28.0-2.el8.noarch
  adwaita-icon-theme-3.28.0-2.el8.noarch
  alsa-lib-1.1.9-4.el8.x86_64
  at-spi2-atk-2.26.2-1.el8.x86_64
  at-spi2-core-2.28.0-1.el8.x86_64
  atk-2.28.1-1.el8.x86_64
  cairo-1.15.12-3.el8.x86_64
  cairo-gobject-1.15.12-3.el8.x86_64
  colord-libs-1.4.2-1.el8.x86_64
  copy-jdk-configs-3.7-1.el8.noarch
  fribidi-1.0.4-7.el8_1.x86_64
  gdk-pixbuf2-modules-2.36.12-5.el8.x86_64
  giflib-5.1.4-3.el8.x86_64
  graphite2-1.3.10-10.el8.x86_64
  gtk-update-icon-cache-3.22.30-4.el8.x86_64
  harfbuzz-1.7.5-3.el8.x86_64
  hicolor-icon-theme-0.17-2.el8.noarch
  jasper-libs-2.0.14-4.el8.x86_64
  java-11-openjdk-1:11.0.7.10-1.el8_1.x86_64
  java-11-openjdk-headless-1:11.0.7.10-1.el8_1.x86_64
  javapackages-filesystem-5.3.0-1.module_el8.0.0+11+5b8c10bd.noarch
  jbigkit-libs-2.1-14.el8.x86_64
  lcms2-2.9-2.el8.x86_64
  libX11-1.6.7-1.el8.x86_64
  libX11-common-1.6.7-1.el8.noarch
  libXau-1.0.8-13.el8.x86_64
  libXcomposite-0.4.4-14.el8.x86_64
  libXcursor-1.1.15-3.el8.x86_64
  libXdamage-1.1.4-14.el8.x86_64
  libXext-1.3.3-9.el8.x86_64
  libXfixes-5.0.3-7.el8.x86_64
  libXft-2.3.2-10.el8.x86_64
  libXi-1.7.9-7.el8.x86_64
  libXinerama-1.1.4-1.el8.x86_64
  libXrandr-1.5.1-7.el8.x86_64
  libXrender-0.9.10-7.el8.x86_64
  libXtst-1.2.3-7.el8.x86_64
  libdatrie-0.2.9-7.el8.x86_64
  libepoxy-1.5.2-1.el8.x86_64
  libfontenc-1.1.3-8.el8.x86_64
  libjpeg-turbo-1.5.3-10.el8.x86_64
  libthai-0.1.27-2.el8.x86_64
  libtiff-4.0.9-15.el8.x86_64
  libwayland-client-1.15.0-1.el8.x86_64
  libwayland-cursor-1.15.0-1.el8.x86_64
  libwayland-egl-1.15.0-1.el8.x86_64
  libxcb-1.13-5.el8.x86_64
  lua-5.3.4-11.el8.x86_64
  pango-1.42.4-6.el8.x86_64
  pixman-0.36.0-1.el8.x86_64
  rest-0.8.1-2.el8.x86_64
  ttmkfdir-3.0.9-54.el8.x86_64
  tzdata-java-2019c-1.el8.noarch
  xorg-x11-font-utils-1:7.5-40.el8.x86_64
  xorg-x11-fonts-Type1-7.5-19.el8.noarch
  avahi-libs-0.7-19.el8.x86_64
  cups-libs-1:2.2.6-28.el8.x86_64
  fontconfig-2.13.1-3.el8.x86_64
  fontpackages-filesystem-1.44-22.el8.noarch
  gdk-pixbuf2-2.36.12-5.el8.x86_64
  glib-networking-2.56.1-1.1.el8.x86_64
  gsettings-desktop-schemas-3.32.0-3.el8.x86_64
  json-glib-1.4.4-1.el8.x86_64
  libgusb-0.3.0-1.el8.x86_64
  libmodman-2.0.1-17.el8.x86_64
  libproxy-0.4.15-5.2.el8.x86_64
  libsoup-2.62.3-1.el8.x86_64
  lksctp-tools-1.0.18-3.el8.x86_64

Complete!
Open JDK is now installed, and we can move forward to the installation of WildFly itself.
WildFly Installation
Now we are ready to install WildFly. It is considered a security risk to run WildFly as the root user, so to begin, we will create a user and group for WildFly. We can accomplish this using the following commands.
[root@host ~]# groupadd -r wildfly
[root@host ~]# useradd -r -g wildfly -d /opt/wildfly -s /sbin/nologin wildfly
WildFly also includes an add-user.sh script located within the bin folder for adding users.
Next, we will begin the installation of WildFly. We start by downloading the latest version of WildFly. At the time this article was written, the latest version was 19.0.0.Final. If you notice, we will download the tarball into a /tmp directory using a simple wget command.
[root@host~]#wget https://download.jboss.org/wildfly/19.0.0.Final/wildfly-19.0.0.Final.tar.gz -P /tmpNow, we will extract the tarball into /opt directory using the following command.
[root@host ~]# tar xf /tmp/wildfly-19.0.0.Final.tar.gz -C /opt/Next, we will create a symbolic link that will point to the WildFly installation directory.
[root@host ~]# ln -s /opt/wildfly-19.0.0.Final /opt/wildflyThen, we will change ownership of the directory to the wildfly user.
[root@host ~]# chown -RH wildfly: /opt/wildflyThis step completes the WildFly installation. We will now move on to configuring WildFly.
WildFly Configuration
First, we will create a directory where the WildFly configuration files will be located.
[root@host ~]# mkdir -p /etc/wildflyNext, we will copy the configuration file to the directory we just created.
[root@host~]#cp/opt/wildfly/docs/contrib/scripts/systemd/wildfly.conf /etc/wildfly/As noted in the WildFly’s configuration, it will by default run in standalone mode and listen on all interfaces. But, if we need to adjust it, we can edit the wildfly.conf file using vim or nano. Now, we will copy the WildFly’s binary launch script into our bin directory, modify the permission settings, and finally, enable the software to utilize systemd.
[root@host ~]# cp /opt/wildfly/docs/contrib/scripts/systemd/launch.sh /opt/wildfly/bin/

[root@host ~]# sh -c 'chmod +x /opt/wildfly/bin/*.sh'

[root@host~]#cp/opt/wildfly/docs/contrib/scripts/systemd/wildfly.service/ etc/systemd/system/
In the first command, we copied the script into the binary directory. With the second one, we added executable permissions so that we can execute the script, and with the third, we added the wildfly.service file into systemd so that we can use systemd to control the service.
Now we can start WildFly. Execute the following commands to start WildFly.
[root@host ~]# systemctl daemon-reload
[root@host ~]# systemctl start wildfly
[root@host ~]# systemctl enable wildfly
Next, let’s configure our firewall to allow access to WildFly.
[root@host ~]# firewall-cmd --zone=public --permanent --add-port=8080/tcpUsing this command, we opened port 8080 in the firewall.
Now, we will restart the firewall to load the new rule.
Wildfly is now installed. We should see the following page when accessing our server or domain on port 8080 in a browser.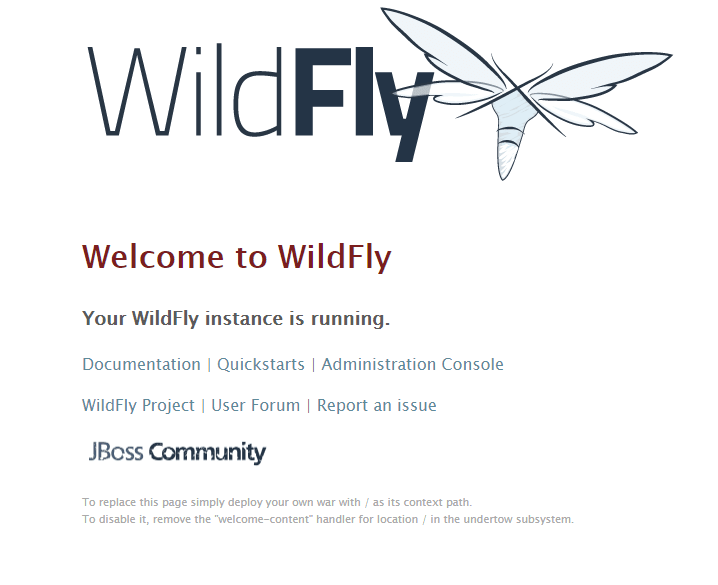
The proper URL would look like this: http://our-server-ip:8080 or http://our-domain.com:8080
Administration
WildFly 19 provide two administrative options for managing our running WildFly instance.
- A web-based Administration Console
- A command-line interface
Administration Console
To reach WildFly’s web-based Admin console, follow the link within the Welcome Screen. To directly access the Management Console, point your browser at: .
The default port for the administrative interface is port 9990. This can be configured in the default wildfly.conf file.
Congratulations! You are now running WIldFly on your server. We hope this article was helpful in providing all the information needed to install and configure WildFly!
Call In Now For A Free Consultation!
Are you looking for a solid platform from which you can develop, launch and host your Java application? Liquid Web has the ability to provide you with a reliable dedicated server, virtual private server or clustered setup from which you can follow your project through the entire development lifecycle!
Open a chat or ticket with us to speak with one of our knowledgeable Solutions Team or an experienced Hosting Advisor. They will engage with you to discuss your needs and goals to provide a well balanced setup in which your business can thrive!