


How To Install Apache Tomcat 7 on Ubuntu 16.04
Apache Tomcat is used to deploy and serve JavaServer Pages and Java servlets. It is an open source technology based off Apache.
Pre-Flight Check
- This document assumes you are installing Apache Tomcat on Ubuntu 16.04.
- Be sure you are logged in as root user.
Installing Tomcat 7
Step 1: Create the Tomcat Folder
Logged in as root, within the opt folder make a directory called tomcat and cd into that folder after completion.
mkdir /opt/tomcat
cd /opt/tomcat
Step 2: Install Tomcat Through Wget
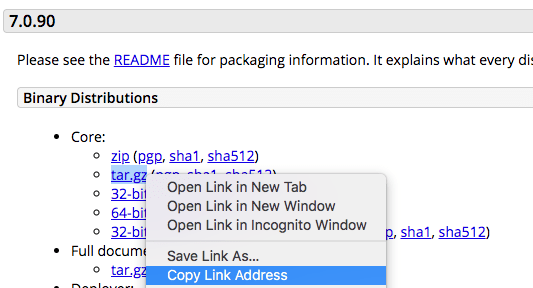
Click this link to the Apache Tomcat 7 Download site. Place your cursor under 7.0.90 Binary Distributions, right click on the tar.gz file and select Copy Link Address (as shown in the picture below). At the time of this article Tomcat 7 is the newest version but feel free to pick whatever version is more up-to-date.
Next, from your server, use wget command to download the tar to the tomcat folder from the URL you copied in the previous step:
wget http://www.trieuvan.com/apache/tomcat/tomcat-7/v7.0.90/bin/apache-tomcat-7.0.90.tar.gz
After the download completes, decompress the file in your Tomcat folder:
tar xvzf apache-tomcat-7.0.90.tar.gz
You will end up with a file called apache-tomcat-7.0.90.
Step 3: Install Java
Before you can use Tomcat, you’ll have to install the Java Development Kit (JDK). Beforehand, check to see if Java is installed:
java -version
If that command returns the following message then Java has yet to be installed:
The program 'java' can be found in the following packages:
To install Java, simply run the following command (and at the prompt enter Y to continue:
apt-get install default-jdk
Step 4: Configure .bashrc file
Set the environment variables in .bashrc with the following command:
vim ~/.bashrc
Add this information to the end of the file:
export JAVA_HOME=/usr/lib/jvm/java-1.8.0-openjdk-amd64

export CATALINA_HOME=/opt/tomcat/apache-tomcat-7.0.90
Save your edits and exit from the .bashrc file, then run the following command to register the changes:
. ~/.bashrc
Step 5: Test Run
Tomcat and Java should now be installed and configured on your server. To activate Tomcat, run the following script:
$CATALINA_HOME/bin/startup.sh
You should get a result similar to:
Using CATALINA_BASE: /opt/tomcat

Using CATALINA_HOME: /opt/tomcat

Using CATALINA_TMPDIR: /opt/tomcat/temp

Using JRE_HOME: /usr/lib/jvm/java-7-openjdk-amd64/

Using CLASSPATH: /opt/tomcat/bin/bootstrap.jar:/opt/tomcat/bin/tomcat-juli.jar

Tomcat started.
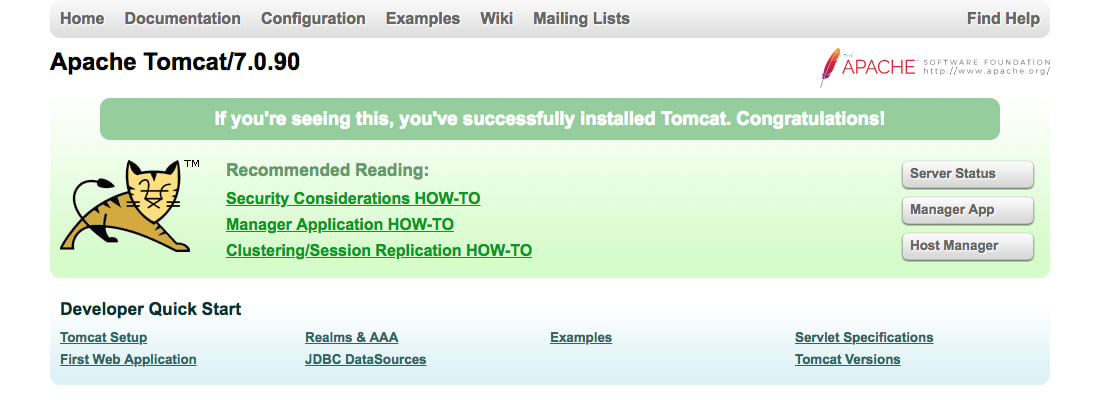
To verify that Tomcat is working by visiting the IP address of your server:8080 in a web browser. For example http://127.0.0.1:8080.
Related Articles:


About the Author: Michelle Almendarez
Michelle Almendarez started her love for technology at the University of Texas at San Antonio where she pursued a degree in Computer Science. She has written several Knowledge Base articles for Liquid Web starting in 2018. She has experience with video editing, web design, and server management and in her free time likes to post cute pictures of her dog “Ghost” on Facebook. She sustains her healthy lifestyle by eating only organic farm-raised tacos with her coffee daily.


Our Sales and Support teams are available 24 hours by phone or e-mail to assist.
Latest Articles
How to use kill commands in Linux
Read ArticleChange cPanel password from WebHost Manager (WHM)
Read ArticleChange cPanel password from WebHost Manager (WHM)
Read ArticleChange cPanel password from WebHost Manager (WHM)
Read ArticleChange the root password in WebHost Manager (WHM)
Read Article