
 Matthew Hurst
 Managing who has access to your server, and what type of access that person is an important part of server administration. This article will address multiple areas relating to user accounts on the Windows operating system. It assumes your Windows Server is on a “Workstation” and not a part of an Active Directory domain. The process for resetting an Active Directory user account is different and out of scope for this article.
To determine if your server is on a workstation, or an Active Directory domain, launch PowerShell and run the following command.
Get-WmiObject Win32_ComputerSystem | Select-Object domain
The output looks similar to this:

Jump to a Specific Topic
Computer Management Tool (compmgmt.msc)
Creating Accounts
Resetting Passwords for User Accounts
Adding Users to Groups
Creating Groups
Deleting and Disabling Accounts
Computer Management Tool
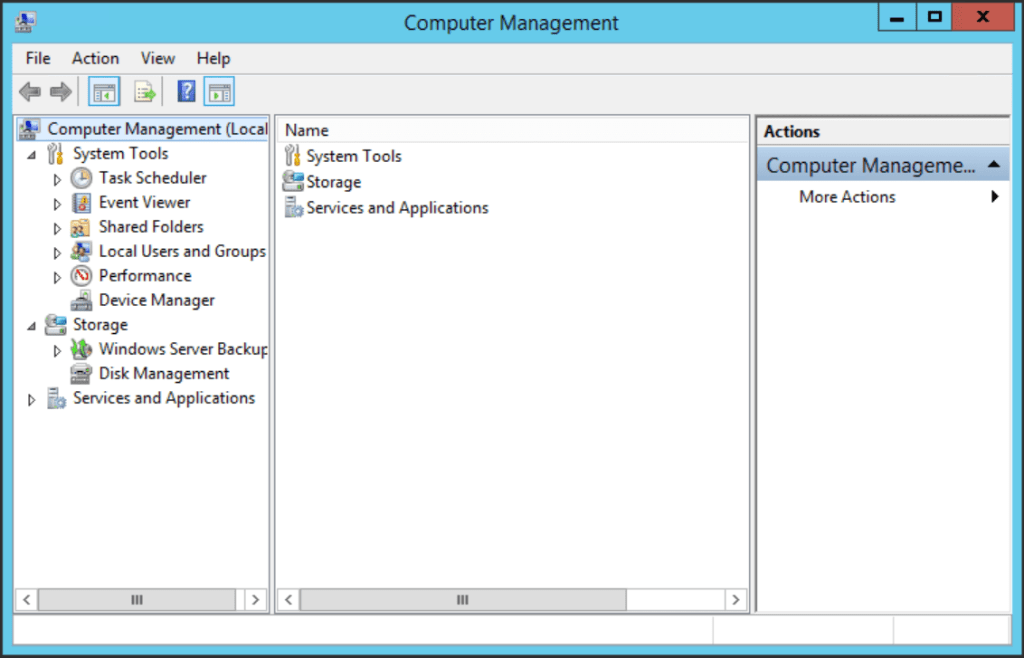
You will use the “Computer Management” tool to create and manage Windows accounts. We will perform all of our user management from this tool.
To open the Computer Management tool, in a command prompt, or in a PowerShell console, type the following.
- compmgmt.msc
- Press Enter
Alternatively, you can right-click the start button and select “Computer Management”. You’ll see a tool comparable to the following.
Creating Accounts
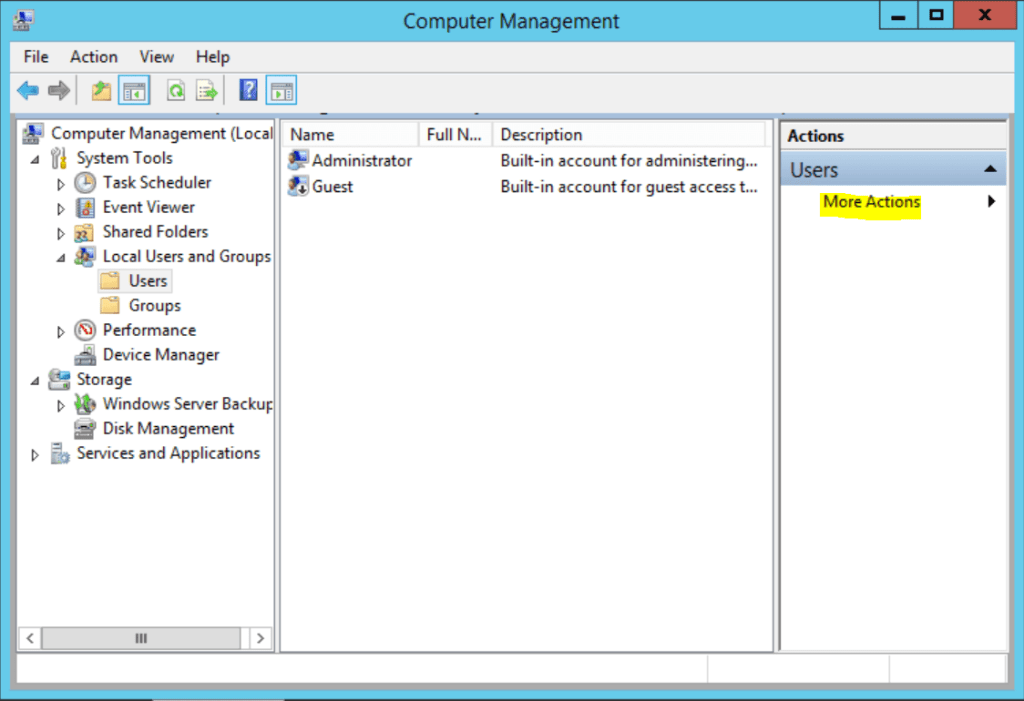
While using the Computer Management tool, expand “Local Users and Groups” and click the “Users” folder. You can now view all the existing user accounts on the server on the right-hand pane.
To create a new user, perform the following steps.
- Select “More Actions” under the “Actions” pane on the right, and then select “New User”.
The “New User” window will pop up where you can fill out the following information.
- User Name: (Required)
- Full Name: (Optional descriptor)
- Description: (Optional descriptor)
- Password: (Optional)
The following options are available upon creating a new user account.
- The user must change the password upon login. (Select this if creating an account for someone other than yourself)
- The user cannot change the password. (Optional. For specific use cases)
- Password never expires. (Typically used for service accounts)
- The account is disabled. (Optional. For specific use cases)
When you are ready to go, hit create and your new user account should show up.
Resetting Password for User Accounts
You may need to reset a password for a user account for multiple reasons. This is an easy task within the “Windows Management” tool.
To reset an account password, perform the following steps:
- In Windows Management expand “Local Users and Groups” and click the “Users” container.
- Locate the user account you want to edit in the middle pane, and right-click the account.
- Select “Set Password”
- Read the notice pop up, and select Proceed.
- Set the password and hit OK.
The password requirements are customizable on your server, but the default values are below for reference.
- Not contain the user’s account name or parts of the user’s full name that exceed two consecutive characters
- Be at least six characters in length
- Contain characters from three of the following four categories:
- English uppercase characters (A through Z)
- English lowercase characters (a through z)
- Base 10 digits (0 through 9)
- Non-alphabetic characters (for example, !, $, #, %)
- Complexity requirements are enforced when passwords are changed or created.
Please note, when resetting the password for the administrator account, be sure to also update your Liquid Web Manage panel to continue receiving Heroic Support.
Adding Users to Groups
Groups allow you to manage permissions and right assignments for multiple users at a time. There are many system groups created by default when you install windows. Assigning users to these system groups gives specific rights to users such as “Backup Operator”. If you would like a user to have remote desktop privileges, but not be an administrator, you assign them to the “Remote Desktop Users” group. Assigning a user to the “Administrators” group, by default gives the account “Remote Desktop Users” privileges.
To assign a user account to a local group perform the following steps.
- In Windows Management expand “Local Users and Groups” and click the “Groups” container.
- Locate the group you want to add the user to, right click it and select “Add to Group”
- In the new window, you will see the current members of the group. Select “Add” at the bottom.

- A new window will pop up “Select Users”.
- Enter the account name to add, and hit check names.
- Hit OK to add the account to the group.
Creating Groups
Occasionally, we might need to create custom groups. Typical use cases are for assigning folder or file level permissions.
To create a new group in Windows Management execute the following.
- In Windows Management expand “Local Users and Groups” and click the “Groups” container.
- Select “More Actions” under the “Actions” pane on the right, and then select “New Group”.

- The “New Group” window will pop up.
- Assign a group name.
- The description is optional.
- If you like, you can add accounts to the group upon creation by clicking “add”.
- Select Create.
Your new group should now be available to assign members.
[su_box title=”Caution:” style=”glass” box_color=”hsl(from var(–global-palette1) h s 60.4%)” title_color=”#000000″ radius=”20″]It is possible to lock yourself out of the server or cause other unforeseen issues with the following actions. If you are unsure, please feel free to reach out to your Heroic Support™ team for assistance.[/su_box]
Deleting and Disabling Accounts
When users no longer require access to your server, you might want to revoke their access by deleting or disabling their account. Typically, you will want to disable accounts for a short period before deleting them. This allows you to recover from issues that might arise from removing an account.
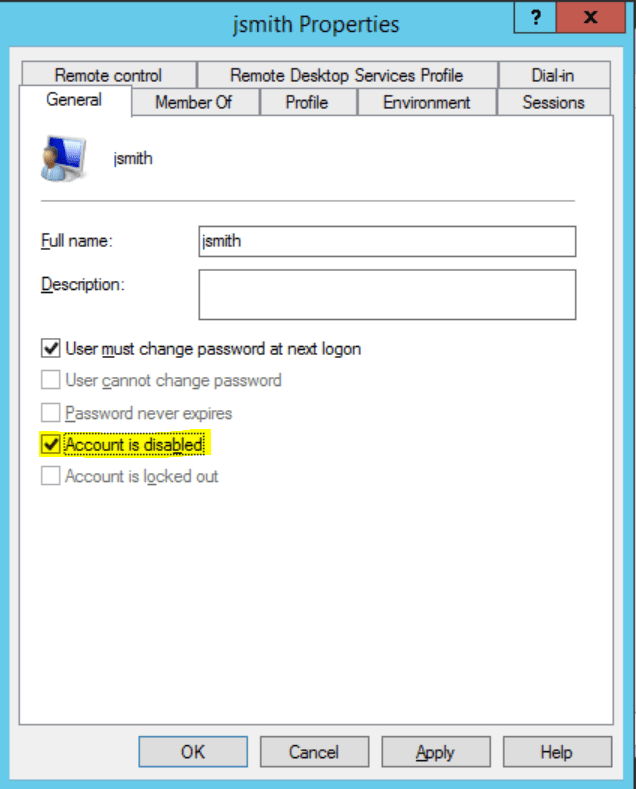
To disable an account in “Windows Management” tool perform the following steps.
- In Windows Management expand “Local Users and Groups” and click the “Users” container.
- Locate the user account you want to edit in the middle pane, and right-click the account.
- Select properties to expose the account properties window.
- Under the “General” tab, select the “Account is disabled” box and hit OK.
To delete an account in “Windows Management” tool perform the following steps.
- In Windows Management expand “Local Users and Groups” and click the “Users” container.
- Locate the user account you want to edit in the middle pane, and right-click the account.
- Select “Delete”
- Read the notice and select “Yes” when ready.
Our Support Teams are filled with talented admins with intimate knowledge of multiple Microsoft web hosting technologies, including Windows VPS, ASP.NET VPS, and RDP server hosting.
If you are fully managed VPS customer and you are uncomfortable with performing the outlined steps, we are a phone call, chat or ticket away from assisting you with this process.