Using Object Storage for cPanel Backups
Keeping backups of your cPanel data is a best practice and something often overlooked. Liquid Web offers multiple ways to backup your data, from using your on-server storage to off-server solutions. One such solution is using Object Storage for cPanel backups.
What is a Backup?
A backup is a copy of computer or server data taken and stored for restoration in the event of data loss. These backups can be stored locally on your computer, server, or off-site on a separate device. Ultimately, you want to ensure that you have duplicates of your data if the original information is lost or damaged.
Liquid Web understands that your information is invaluable. 86% of businesses back up their data daily, monthly, or weekly. If you are not a part of that number, you could be a part of the 40-60% of small companies that do not have a data recovery plan and go out of business.
If you are not backing up your data regularly, you could be putting your business in jeopardy. For those using cPanel for managing their websites, we will be exploring using object storage for your cPanel backups.
What is Object Storage?
Object storage is a cloud-based storage solution that manages data as objects stored in a cloud cluster. The data is accessible to users via an application programming interface (API). The objects contain both the data and the related metadata.
With Liquid Web’s Object Storage add-on, you have a stable and straightforward way of managing your cPanel backups.
It is also affordable, priced with a flat, per-gigabyte storage price of $0.08 per GB per month. Best of all, there are no bandwidth or request fees, so accessing or calling data within your code does not incur an additional cost.
3 Steps to Add a Cloud Object Storage Service in Manage
Setting up Liquid Web’s Object Storage is extremely easy to accomplish through your account’s home page. Log into your Liquid Web Manage account and proceed to Step 1. If you use the new My Liquid Web interface, you will still follow the 3 steps below in Manage, but accessing it will be slightly different.
Accessing Manage via Your My Liquid Web Account
First, in the My Liquid Web interface, click the Services icon.

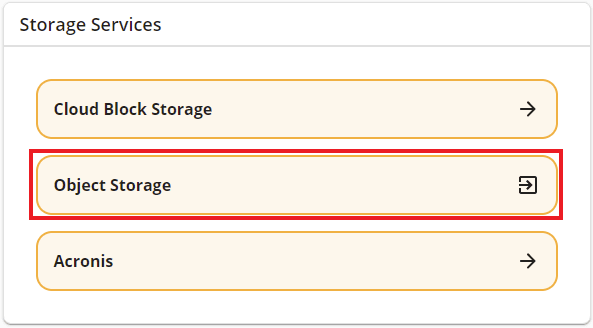
Then, scroll down to the Storage Services section and click Object Storage.
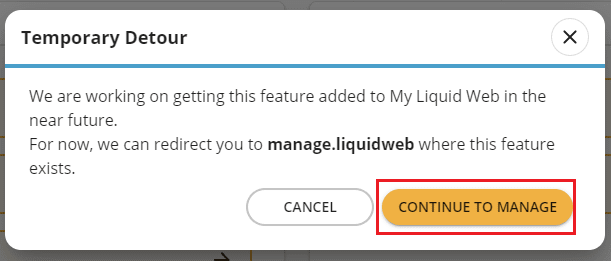
Lastly, click the Continue to Manage button.
Follow the remaining steps to complete your purchase.
Step 1
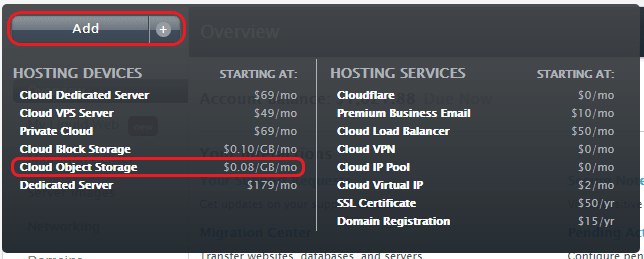
From the Manage interface, click the Add button and then select Cloud Object Storage.
Step 2
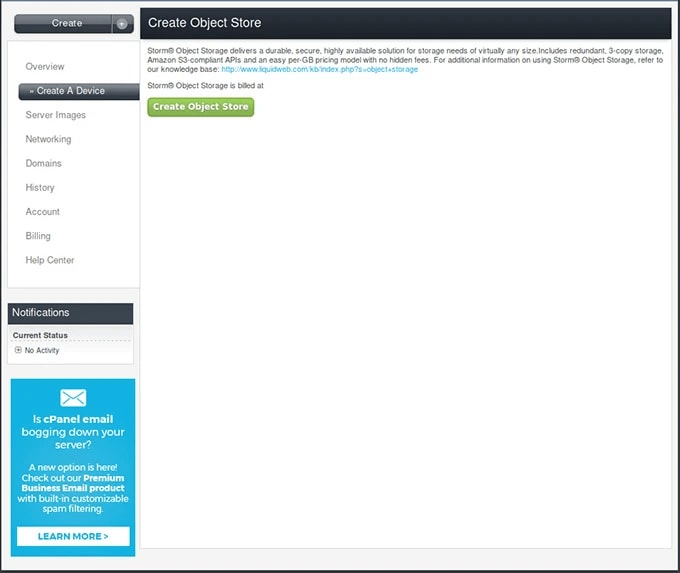
Click the green Create Object Store button.
Step 3
Save the Object Store Gateway, Access Key, and Secret Key of your new Object Store.
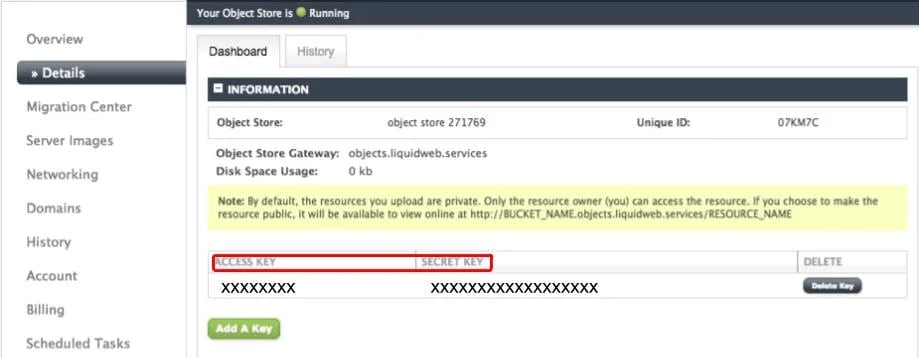
You will want to store the following information for later use:
- Object Store Gateway: The domain used to access everything in your object store.
- Access Key: This unique identifier is similar to a username and allows access to your object store.
- Secret Key: This unique identifier is similar to a password. It is paired with the Access Key and completes access to your object store.
Create the Bucket
You must first set up DragonDisk, as in this example, or another Amazon S3 compatible cloud storage client to create the bucket necessary to store cPanel backups. Liquid Web defaults to private permissions on buckets.
5 Steps to Configuring cPanel Backups
The following steps will walk you through configuring your object storage for cPanel backups. cPanel version 74 added direct support for S3 compatible storage, making this process simpler.
Step 1
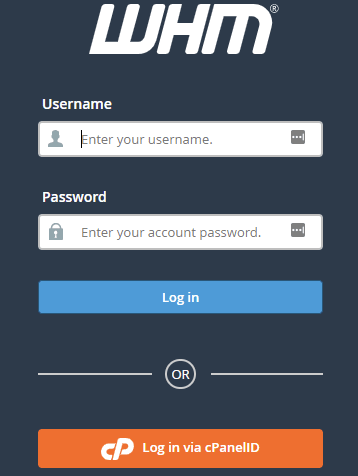
Log into WHM (Web Host Manager).
Step 2
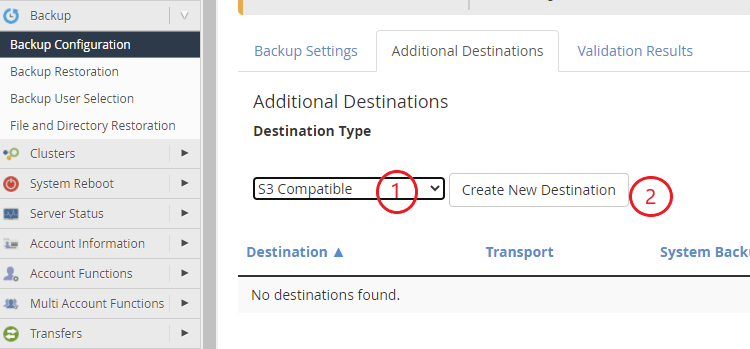
From the left-hand pane, click Backup and then Backup Configuration. Select Additional Destinations from the Options menu on the right.

Step 3
In the dropdown menu, select S3 Compatible and then click Create New Destination.
Step 4
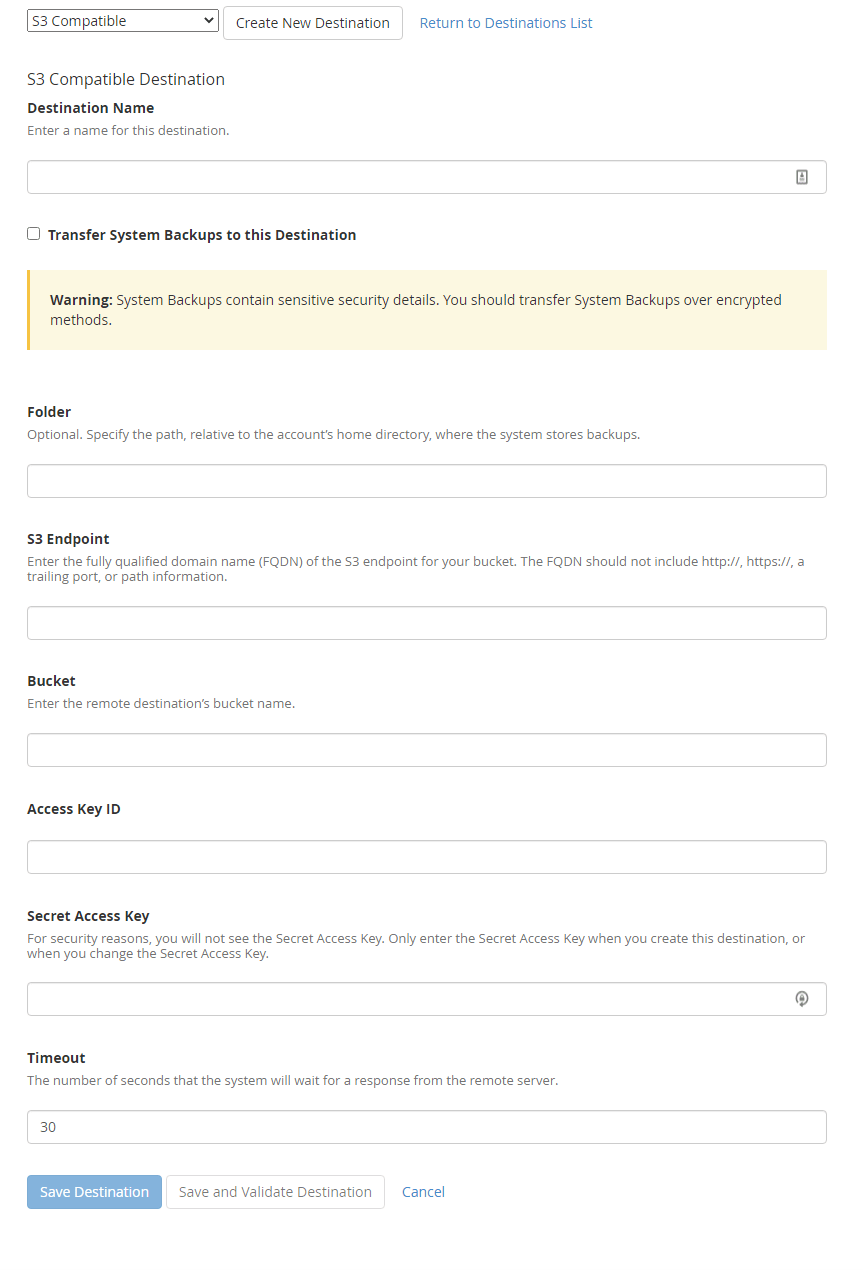
Complete the form that appears:
- Destination Name: A unique name. We recommend LW Object Storage.
- S3 Endpoint: objects.liquidweb.services.
- Bucket: Name of the bucket you created.
- Access Key ID: Generated previously.
- Secret Access Key: Generated previously.
Step 5
Click the Save and Validate Destination button at the bottom of the page.
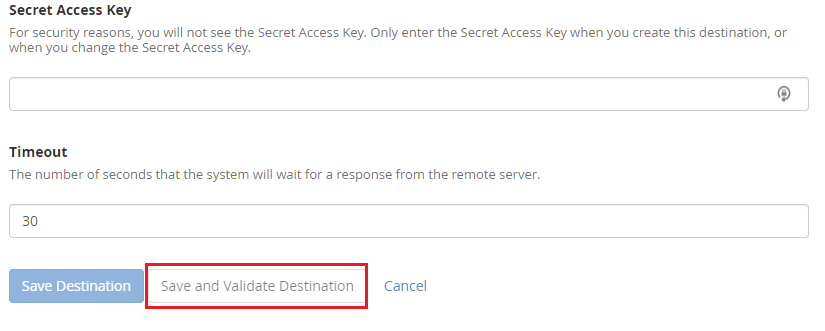
The word Validating will appear under the Actions section on the screen next to the destination.

Once validation completes, controls appear under the Actions section. A green checkmark to the left of the controls denotes that the object store is validated.

Conclusion
If you haven’t run into any issues, you should now have cPanel backups configured to use your newly added Object Storage service. Backups are essential to your business’s survival, and utilizing Liquid Web’s Object Storage with cPanel is a great way to keep your data secure and up to date.
Contact us if you need further assistance with your existing cPanel backups or if you want to learn about how Object Storage can work for your environment today!
Related Articles:

About the Author: Ronald Caldwell
Ron is a Technical Writer at Liquid Web working with the Marketing team. He has 9+ years of experience in Technology. He obtained an Associate of Science in Computer Science from Prairie State College in 2015. He is happily married to his high school sweetheart and lives in Michigan with her and their children.
Our Sales and Support teams are available 24 hours by phone or e-mail to assist.
Latest Articles
How to use kill commands in Linux
Read ArticleChange cPanel password from WebHost Manager (WHM)
Read ArticleChange cPanel password from WebHost Manager (WHM)
Read ArticleChange cPanel password from WebHost Manager (WHM)
Read ArticleChange the root password in WebHost Manager (WHM)
Read Article


