
 Katherine Kelly
 Introduction
Ansible is a system of configuration management written in Python programming language which uses a declarative markup language to describe configurations. It’s used for automation of configuration and OS setup. Ansible is often used to manage Linux-nodes, but Windows is also supported. It supports work with devices with Python v2.4 and higher installed through SSH connection. In this article, we are going to review the DevOps tool called Ansible.
But first, let’s take a look at why tools like Ansible are handy. Earlier, when computers just made their initial entry steps into our lives, they were used to accomplish a limited range of tasks — it was easy to serve them, and that didn’t take much time. However, computing power was increasing rapidly, and there were more and more computers available. As a result, a system administrator had to manage dozens, hundreds, or even thousands of devices.
It became complicated to manage an entire range of various device types, so applications were created to optimize processes like these.
- A system for monitoring servers
- Centralized systems used for authorization and authentication
- A system to oversee configurations management
Configuration Management Tools
There are multiple configuration management systems. The most popular are for Unix-based systems and include Ansible, Chef, Puppet, Saltstack, CFEngine.
All of them have pros and cons, but there is also a common trait they share — this is a new approach in the field of system administration. This new paradigm is called infrastructure as code. Before its creation, the process was as follows. Servers were set up, brought online, and then configured using various scripts to ease and automate many tasks. In most cases, this was required for every individual server. With this new approach, a configuration is created once and shared across many servers.
At first, it seemed that this approach was not worth the effort, as instead of setting up and configuring a server within five minutes, days could be spent to create the configurations needed and then countless man-hours were needed to implement those changes. But what if one needed to set up five servers? Fifty servers? Five hundred servers? Errors could creep in due to the sheer numbers involved.
When a configuration is written for an app like Ansible, one needs only to add the servers and variables into the configuration file, and then multiple servers could be set up with one command. Eventually, this system of configuration management not only saved time, it also increased productivity. Lastly, another important trait of using this type of system is called Idempotency. This means that all servers would be set up in the same repeatable manner with the similarity of each being the result.
What Can Ansible Do?
The following tasks can be solved using Ansible:
- OS (de)installation
- OS configuration
- creation and removal of users
- management of users’ passwords and keys
- creation and removal of virtual environments and containers
- deployment of code
- running scripts and tests, etc.
This is a short list of tasks that can be accomplished using Ansible, but the full range of options is much more comprehensive and only limited by the imagination.
Key Features of Ansible
- Agentless — SSH protocol is used to connect to servers and work on them instead of external agents;
- Idempotent — same operations provide the same result as many times as they are carried out;
- Easy and expandable — Ansible is written in Python and uses YAML to write the commands, and both languages are used to teach the beginners as they are considered to be easy to learn.
We are going to take a simple path while studying Ansible, which will include examples and their explanations. However, it’s preferable to know what a programming language, variable, cycle, and vocabulary used will be. Also, a basic knowledge of YAML structures and simple Unix commands would be useful. For all interactions, we are going to be using the client installed on Ubuntu 18.04, and on a server with Ubuntu 18.04 installed on it.
Ansible installation
The installation of Ansible on Ubuntu 18.04 is straightforward.
root@host-client:~# sudo apt-get install ansible -y
Reading package lists... Done
Building dependency tree
Reading state information... Done
The following additional packages will be installed:
  ieee-data libpython-stdlib python python-asn1crypto python-certifi
  python-cffi-backend python-chardet python-crypto python-cryptography
  python-enum34 python-httplib2 python-idna python-ipaddress python-jinja2
  python-jmespath python-kerberos python-libcloud python-lockfile
  python-markupsafe python-minimal python-netaddr python-openssl
  python-paramiko python-pkg-resources python-pyasn1 python-requests
  python-selinux python-simplejson python-six python-urllib3 python-xmltodict
  python-yaml python2.7 python2.7-minimal
(long install output...)
root@host-client:~#
Now, we can check whether Ansible is installed by running the following command.
root@host-client:~# ansible --version
ansible 2.5.1
  config file = /etc/ansible/ansible.cfg
  configured module search path = [u'/root/.ansible/plugins/modules', u'/usr/share/ansible/plugins/modules']
  ansible python module location = /usr/lib/python2.7/dist-packages/ansible
  executable location = /usr/bin/ansible
  python version = 2.7.17 (default, Apr 15 2020, 17:20:14) [GCC 7.5.0]
root@host-client:~#
Setting Up a Client and Server
To be able to utilize Ansible on a server, we will need to add configurations. We can configure the server itself using Ansible, but for now, we will do it manually the purpose of learning the method. First, we are going to install/update Python on the server. (This assumes that python is not installed by default.)
Now, let’s verify the current Python installation.
root@host-server:~# python -V
Python 2.7.17
root@host-server:~#
Next, let’s upgrade to a more suitable version of Python.
root@host-server:~# add-apt-repository ppa:deadsnakes/ppa
root@host-server:~# apt update -y && apt upgrade
root@host-server:~# apt install python3.8 python3.8-dev python3.8-venv
Reading package lists... Done
Building dependency tree
Reading state information... Done
The following additional packages will be installed:
  libc-dev-bin libc6-dev libexpat1-dev libpython3.8 libpython3.8-dev libpython3.8-minimal libpython3.8-stdlib
  linux-libc-dev manpages-dev python3-distutils python3-lib2to3 python3.8-minimal
Suggested packages:
  glibc-doc python3.8-doc binutils binfmt-support
The following NEW packages will be installed:
  libc-dev-bin libc6-dev libexpat1-dev libpython3.8 libpython3.8-dev libpython3.8-minimal libpython3.8-stdlib
  linux-libc-dev manpages-dev python3-distutils python3-lib2to3 python3.8 python3.8-dev python3.8-minimal
  python3.8-venv
0 upgraded, 15 newly installed, 0 to remove and 0 not upgraded.
Need to get 19.6 MB of archives.
After this operation, 81.9 MB of additional disk space will be used.
Do you want to continue? [Y/n] y
Get:1 http://ppa.launchpad.net/deadsnakes/ppa/ubuntu bionic/main amd64 libpython3.8-minimal amd64 3.8.5-1+bionic1 [761 kB]
...
Processing triggers for man-db (2.8.3-2ubuntu0.1) ...
Processing triggers for mime-support (3.60ubuntu1) ...
Processing triggers for libc-bin (2.27-3ubuntu1.2) ...
root@host-server:~#
Now, let’s set Python 3.8 as the default python3 command and then verify the version of Python installed.
root@host-server:~# update-alternatives --install /usr/bin/python3 python3 /usr/bin/python3.8 1

root@host-server:~# python3 -V
Python 3.8.5
root@host-server:~#
Next, we need to install SSH and configure it. To install it on the server, we can run the following command.
root@host-server:~# sudo apt install openssh-server -y
Reading package lists... Done
Building dependency tree
Reading state information... Done

The following additional packages will be installed:
  ncurses-term openssh-sftp-server ssh-import-id

The following NEW packages will be installed:
  ncurses-term openssh-server openssh-sftp-server ssh-import-id
0 upgraded, 4 newly installed, 0 to remove and 0 not upgraded.
Need to get 637 kB of archives.
After this operation, 5.316 kB of additional disk space will be used.
Get:1 http://by.archive.ubuntu.com/ubuntu bionic-updates/main amd64 ncurses-term all 6.1-1ubuntu1.18.04 [248 kB]
(long install output...)
root@host-server:~#
Now, let’s verify it’s status.
root@host-server:~# sudo systemctl status ssh
● ssh.service - OpenBSD Secure Shell server
   Loaded: loaded (/lib/systemd/system/ssh.service; enabled; vendor preset: ena
   Active: active (running) since Mon 2020-07-20 18:58:45 +03; 36s ago
 Main PID: 11147 (sshd)
    Tasks: 1 (limit: 4666)
   CGroup: /system.slice/ssh.service
           └─11147 /usr/sbin/sshd -D

ліп 20 18:58:45 host-server systemd[1]: Starting OpenBSD Secure Shell server...
ліп 20 18:58:45 host-server sshd[11147]: Server listening on 0.0.0.0 port 22.
ліп 20 18:58:45 host-server systemd[1]: Started OpenBSD Secure Shell server.
ліп 20 18:58:45 host-server sshd[11147]: Server listening on :: port 22.
lines 1-12/12 (END)
Next, we will open the port for SSH in Firewall configuration:
root@host-server:~# sudo ufw allow ssh
Rules updated
Rules updated (v6)
root@host-server:~#
To learn the IP of the server, we run the ip a command.
root@host-server:~# ip a
1: lo: <LOOPBACK,UP,LOWER_UP> mtu 65536 qdisc noqueue state UNKNOWN group default qlen 1000
    link/loopback 00:00:00:00:00:00 brd 00:00:00:00:00:00
    inet 127.0.0.1/8 scope host lo
       valid_lft forever preferred_lft forever
    inet6 ::1/128 scope host
       valid_lft forever preferred_lft forever
2: enp0s3: <BROADCAST,MULTICAST,UP,LOWER_UP> mtu 1500 qdisc fq_codel state UP group default qlen 1000
    link/ether 08:00:27:b4:0e:e5 brd ff:ff:ff:ff:ff:ff
    inet 192.168.50.106/24 brd 192.168.50.255 scope global dynamic noprefixroute enp0s3
       valid_lft 79253sec preferred_lft 79253sec
    inet6 fe80::b557:d5ad:5d29:7c44/64 scope link noprefixroute
       valid_lft forever preferred_lft forever
root@host-server:~#
Now, we are going to install sshpass (a non-interactive ssh password provider) on the Client (this is where we write Ansible configuration):
root@host-client:~# sudo apt install sshpass -y
Reading package lists... Done
Building dependency tree
Reading state information... Done

The following NEW packages will be installed:
  sshpass
0 upgraded, 1 newly installed, 0 to remove and 0 not upgraded.
Need to get 10,5 kB of archives.
After this operation, 30,7 kB of additional disk space will be used.
Get:1 http://by.archive.ubuntu.com/ubuntu bionic/universe amd64 sshpass amd64 1.06-1 [10,5 kB]
...
root@host-client:~#
Functioning Ansible Examples
First, we are going to create a folder and then move into it.
root@host-client:~# mkdir ansible
root@host-client:~#
root@host-client:~# cd ansible
root@host-client:~/ansible#
Next, we need to create an inventory file — hosts are listed in this file so that Ansible can define the IPs by the hosts and use this information to run the configuration. Here is an example of the format.
host
host parameters

[groups]
host
host parameters
Parameters are optional, which means that they can be either mentioned or not, but according to best practice, better not to mention them. Let’s create a file.
root@host-client:~/ansible# touch inventory
root@host-client:~/ansible#
Now, to edit the file, we will use a nano text editor, but one can use any other editor for this purpose.
root@host-client:~/ansible# sudo nano inventory
root@host-client:~/ansible#
Next, add these lines to the file.
[vm]
vm1
Then, press ctrl+s and ctrl+x to save the file.
Ansible uses hosts file to search for an IP address of the node (server) to which it can connect and under which a ssh-client configuration is running. It is better to keep the main settings in Ansible configuration files. In case we need to move data, the files will be moved, which guarantees that everything will work in the same manner.
Credentials are also recorded as variables. There can be several files for variables including files for groups of hosts, and personal variables for every file. These are stored in different folders: host_vars and group_vars. Personal variables have a higher priority in comparison with group ones. Let’s create a folder for personal variables:
root@host-client:~/ansible# mkdir host_vars
root@host-client:~/ansible#
root@host-client:~/ansible# touch host_vars/vm1
root@host-client:~/ansible#
Now let’s add data to the file.
root@host-client:~/ansible# sudo nano host_vars/vm1 Here is example of our specific data.
ansible_ssh_host: 192.168.50.106
ansible_ssh_user: katherine
ansible_ssh_pass: 54047922
ansible_become_pass: 54047922
In this file we will need to edit the following info.
- ssh_host – use your servers IP
- ssh_user – your SSH username
- ssh_pass – your SSH password
Now, let’s create a configuration file for Ansible and edit it.
root@host-client:~/ansible# touch ansible.cfg
root@host-client:~/ansible# sudo nano ansible.cfg
[defaults]
host_key_checking = falseWe can also make the changes for Ansible to not ask for key fingerprint. Now let’s run the following command.
root@host-client:~/ansible# ansible -i inventory -m ping vm1
vm1 | SUCCESS => {
    "changed": false,
    "ping": "pong"
}
root@host-client:~/ansible#
At this point, we have managed to connect to Ansible and do a test run. Now, let’s review. Ansible not only runs commands through ssh, but also copies itself with a scenario to the server and runs there. For this reason, we needed to install Python on the server because, to run Ansible files Python is required.
Now let’s look into the syntax of ‘ansible -i -m -a host/group_host’:
- -i – inventory: this is our file with a list of known hosts which we created in the beginning.
- -m – module: every module executes the operation. There is a wide range of module types which can be used.
- -a option: these are the parameters which can be sent to the module (previously we have used modules without parameters)
- host or group_host: only one of them is taken from the inventory file, and enumeration is not available.
Now let’s run the following command.
root@host-client:~/ansible# ansible -i inventory -m setup vm1
vm1 | SUCCESS => {
    "ansible_facts": {
        "ansible_all_ipv4_addresses": [
            "192.168.50.106"
        ],
        "ansible_all_ipv6_addresses": [
            "fe80::b557:d5ad:5d29:7c44"
        ],
        "ansible_apparmor": {
            "status": "enabled"
        },
        "ansible_architecture": "x86_64",
        "ansible_bios_date": "12/01/2006",
        "ansible_bios_version": "VirtualBox",
        "ansible_cmdline": {
            "BOOT_IMAGE": "/boot/vmlinuz-5.3.0-62-generic",
            "quiet": true,
            "ro": true,
            "root": "UUID=e3744878-64be-4d24-86a0-8ee98f7763c9",
            "splash": true
        },
        "ansible_date_time": {
            "date": "2020-07-20",
            "day": "20",

........

#output truncated as the entire output is quite long
This command shows us information about the system. Also, it can be useful when variables are needed, as it is easy to find them in the output.
Ansible Modules
Let’s review three modules that allow us run commands on the remote hosts.
- raw – allows us to run commands on the remote host even if Python is not installed on it, also the command is sent as it is and not checked by Ansible whether the syntax is correct.
- command – a command is run directly past the shell installed for the user.
- shell – the command is executed using shell mentioned in the /etc/passwd file for the user, which is used by Ansible for the session (usually /bin/sh or /bin/bash).
Now we are going to run each of the three commands to see the difference in the examples.
root@host-client:~/ansible# ansible -i inventory -m raw -a 'ls /' vm1
vm1 | SUCCESS | rc=0 >>
bin dev initrd.img lib64	 mnt root snap sys var
boot etc initrd.img.old lost+found opt run srv tmp vmlinuz
cdrom home lib	 media	 proc sbin swapfile usr vmlinuz.old
Shared connection to 192.168.50.106 closed.

root@host-client:~/ansible#
root@host-client:~/ansible# ansible -i inventory -m raw -a 'ls / | grep lib*' vm1 vm1 | SUCCESS | rc=0 >>
lib
lib64
vmlinuz
vmlinuz.old
Shared connection to 192.168.50.106 closed.
root@host-client:~/ansible# root@host-client:~/ansible# ansible -i inventory -m command -a 'ls / | grep lib*' vm1 vm1 | FAILED | rc=2 >>
/:
bin
boot
cdrom
dev
etc
home
initrd.img
initrd.img.old
lib
lib64
lost+found
media
mnt
opt
proc
root
run
sbin
snap
srv
swapfile
sys
tmp
usr
var
vmlinuz
vmlinuz.oldls: cannot access '|': No such file or directory
ls: cannot access 'grep': No such file or directory
ls: cannot access 'lib*': No such file or directorynon-zero return code
root@host-client:~/ansible# root@host-client:~/ansible# ansible -i inventory -m shell -a 'ls / | grep lib*' vm1 vm1 | SUCCESS | rc=0 >>
lib
lib64
vmlinuz
vmlinuz.old
root@host-client:~/ansible# This is how these commands look like when running with modules, and this way of printing output may be more convenient when there is no access to ssh keys on the server. In other cases, the playbook is described.
Playbooks
A Playbook is a scenario which contains multiple commands and variables. It is run using the ansible-playbook command. The syntax looks similar to the following command.
root@host-server:~# ansible -i inventory playbook.ymlWe use the name of the playbook file instead of host or group_host as the hosts’ list is located within the playbook. The structure of the playbook might look like this:
- – list of hosts and groups to which playbook is applied;
- – set of variables (it’s optional);
- – set of operations which should be worked out in any case;
- – set of operations to run after a signal (also optional).
To describe a playbook, the method of describing the YAML structure is used, since it is considered convenient for human reading and writing. We will briefly review how to describe a structure in YAML. Let’s have a look at the described file and its example syntax written out.
---

- hosts:
  - vm1
   vars:
   - variable1: "test variable"
  tasks:
   - task1
     do something
  handlers:
   - task to be completed
     do something
...
It’s important to follow the syntax. In this case, the dots mark spaces.
[su_box title=”Note:” style=”glass” box_color=”#3ac6eb” radius=”20″]Beginners can use a smart text editor like VSCodium or Atom, as YAML syntax extensions can be added easily in the settings. Using an editor can expedite and improve the study of the syntax. [/su_box]
Now let’s get back to the file. Three dashes at the beginning of the file are requirements of the YAML format (however, even if they are skipped, the playbook will be executed anyway). The file also ends with three dots.
Indents of the blocks are also written intentionally (as wrong indents can influence whether the file is going to be executed this is the requirement of YAML).
Some lines of the file start with dashes. Enumerations begin with a dash. Sections without dashes stand for the functional parts of a playbook. The lists of variables, list of mandatory operations, list of operations run after a signal (If enumerations are implied and there is only one point, a colon is going to be used).
Block hosts start with a dash, as there can be several hosts blocks in the same playbook, and each of them will have sections vars, tasks, handlers. Some structures are recommended to be described in the same file (one structure per one file). But in some cases, several hosts should be described in the same file.
Next, we will install a ntp-client (interaction protocol used with timeservers). To accomplish this, we are going to use the apt module. Here is more information about the apt module.
First, we are going to create a file in the same folder where we are:
root@host-client:~/ansible# touch ntp_vm1.yml
root@host-client:~/ansible# sudo nano ntp_vm1.yml
---
- hosts:
- vm1
...This is an example of a simple playbook that doesn’t install anything but can be executed anyway. Let’s run it.
root@host-client:~/ansible# ansible-playbook -i inventory ntp_vm1.yml

PLAY [vm1] *********************************************************************

TASK [Gathering Facts] *********************************************************
ok: [vm1]

PLAY RECAP *********************************************************************
vm1                        : ok=1    changed=0    unreachable=0    failed=0

root@host-client:~/ansible# 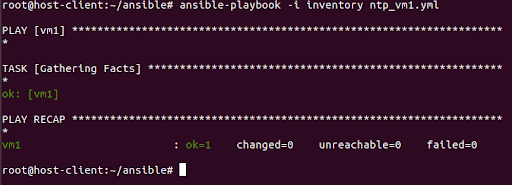
Information is gathered first, then if there is anything to execute, tasks from the block tasks are executed.
To finish our task, we are going to install the ntp-client first. We will do that using the apt module. For that, we need to edit our playbook and add the following information.
---

- hosts:
  - vm1
  tasks:
  - name: "Install NTP-client"
    apt:
      pkg: "ntpdate"
    become: yes
...
Notice the last “become: yes” option. This is an important option as it shows whether sudo privileges should be used to carry out the task.
Previously we have described access parameters on vm1, and they were listed for a usual user. However, the superuser access level is necessary to install packages. That’s why we mentioned in the playbook that sudo should be used. Options of condition or enumeration can be added for any operation from the tasks.
Let’s run the playbook.
root@host-client:~/ansible# ansible-playbook -i inventory ntp_vm1.yml

PLAY [vm1] *********************************************************************

TASK [Gathering Facts] *********************************************************
ok: [vm1]

TASK [Install NTP-client] ******************************************************
changed: [vm1]

PLAY RECAP *********************************************************************
vm1                        : ok=2    changed=1    unreachable=0    failed=0

root@host-client:~/ansible# 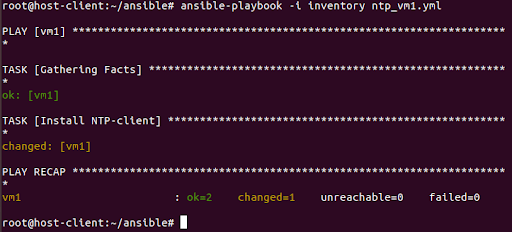
Now let’s look at the same operation in color and the changed output in particular (bottom line). It’s lit with yellow not green. This happens when:
- The operation is run on the host for the first time (Ansible saves a log of operations in a hidden file of the user’s folder whose credentials are used for the login);
- The operation makes some changes. Ansible compares files before and after an operation is completed. If there are no changes, the color will be green, and if there are any changes, it will be yellow.
Now let’s run the same command once again and see the difference:
root@host-client:~/ansible# ansible-playbook -i inventory ntp_vm1.yml

PLAY [vm1] *********************************************************************

TASK [Gathering Facts] *********************************************************
ok: [vm1]

TASK [Install NTP-client] ******************************************************
ok: [vm1]

PLAY RECAP *********************************************************************
vm1                        : ok=2    changed=0    unreachable=0    failed=0

root@host-client:~/ansible# 
As we can see, Ansible remembers that the package has been installed already, and the apt module shows that the package indeed exists, so Ansible shows that nothing has changed.
Also, in the examples above, we can see the Idempotency of Ansible. When it’s used, it tries to organize files and processes in the same way they are described in the playbook. If everything is organized correctly, then actions will be lit with green color, and if anything has been changed, then — with yellow. Later we can review a report where we will be able to see how many files and services remained without changes and how many were changed. In the perfect scenario, everything should be in green.
Logs
Also, the report contains information about the errors which could occur while running the playbook and information about the hosts which couldn’t be reached.
In fact, using Ansible modules, we can break the Idempotency principle. For example, if we write an unconditional operation like “service restart”, then it will be changed every time. However, best practice is to restart the service using conditions. In this case, if the system remains unchanged, and the output will be marked with green.
Now let’s check how the commands are run in a cycle. This helps to install a group of programs and not singly, not one by one. We will add the tzdata package (adds time zones information for Linux) for the ntpdate. A cycle is created using with_item parameter, and the name of the package is marked with the functional word “{{ item }}”. Depending on the context, all functional variables are placed between single or double braces.
Let’s edit the file.
---

- hosts:
  - vm1
  tasks:
  - name: "Install NTP-client"
    apt:
      pkg: "{{ item }}"
    become: yes
    with_items:
    - "ntpdate"
    - "tzdata"

...
Now, run it.
root@host-client:~/ansible# ansible-playbook -i inventory ntp_vm1.yml

PLAY [vm1] *********************************************************************

TASK [Gathering Facts] *********************************************************
ok: [vm1]

TASK [Install NTP-client] ******************************************************
ok: [vm1] => (item=[u'ntpdate', u'tzdata'])

PLAY RECAP *********************************************************************
vm1                        : ok=2    changed=0    unreachable=0    failed=0

root@host-client:~/ansible#
The commands finished without issues; however, cycles are outdated in apt as Ansible is being constantly updated and changed. Some features that could be popular and widely used in older versions cannot be supported in newer ones. But significant changes do not happen very often, so this should not stop one from using it. Now let’s review and use our best practice information.
---

- hosts:
  - vm1
  tasks:
  - name: "Install NTP-client"
    apt:
      pkg: [ "ntpdate", "tzdata" ]
    become: yes

...
Now, let’s run playbook once again:
root@host-client:~/ansible# ansible-playbook -i inventory ntp_vm1.yml

PLAY [vm1] *********************************************************************

TASK [Gathering Facts] *********************************************************
ok: [vm1]

TASK [Install NTP-client] ******************************************************
ok: [vm1]

PLAY RECAP *********************************************************************
vm1                        : ok=2    changed=0    unreachable=0    failed=0

root@host-client:~/ansible#
The information we have reviewed so far in this article is only a small part of knowledge about this tool, but this should be enough to ease the accomplishment of many tasks, define the direction of what to study next, and proceed in further detail.
Conclusion
This was a beginners guide on Ansible to help us understand some basic principles on how to use Ansible. We reviewed how and why it can be used, as well as some advantages and disadvantages. We examined its installation and use, and also covered playbooks and how to write configuration files to achieve installation of a program. There is much more to learn about this tool to master it. However, if you decide to dive deeper into the details and its features, it will ease many operations as it simplifies the management and accomplishment of many server tasks, which will save time and effort.
We pride ourselves on being The Most Helpful Humans In Hosting™!
Our support staff is always available to assist with any issues related to this article, 24 hours a day, 7 days a week 365 days a year.
If you have questions, we are available at [email protected], or by phone at 800-580-4986, or via a LiveChat.