


Mount ISO files via IPMI using a local file and the Java method
IPMI (Intelligent Platform Management Interface) provides us with a Kernel-based Virtual Machine (KVM)-like browser-based console that allows you to remotely control and manage your server when you don’t have access to Secure Shell (SSH) or RDP (Remote Desktop Protocol) — or when the operating system is not responsive. When using IPMI, it also provides the right tools to mount an ISO file on your server. An ISO file takes it name from the International Organization for Standardization (ISO) 9660 standard. It also ca be called an ISO image, and it is a type of specialized archive file that is intended to contain and maintain an exact copy of the data that was originally stored on an optical disc. The primary purpose of an ISO file is to contain a replica of the content of the optical disc in a digital format, effectively emulating the presence and functionality of a physical optical drive. This digital representation allows for convenient access and utilization of the stored data without needing the physical disc, offering a virtual alternative to traditional optical media.
One of the main uses for mounting an ISO file is while installing or recovering an operating system, especially on a server located in a data center or remote location. Instead of requiring you to be physically close to the server, IPMI allows you to mount an ISO file remotely. The IPMI's remote accessibility reduces the requirement for onsite presence and expedites the administrative tasks related to server management, which enhances efficiency and flexibility in managing critical operations.
Usually, for Supermicro's SMCIPMIToolto work properly, a paid license upgrade from Supermicro will be required. But as far as our Dedicated Server Hosting solution is concerned, there's no need for this kind of upgrade. We provide our dedicated servers with all the features and functionalities required to easily interface with Supermicro's SMCIPMITool without requiring the purchase of an extra license. In this article, we will look at how to mount the ISO file using a local file and the Java method.
Key points
Reading this technical article, you will learn about:
- Mounting ISO files via IPMI using a local file and Java.
- Understanding the prerequisite steps — including the requirement for the latest version of Java and VPN access.
- Navigating to the IPMI site via the IP address.
- Using the powerful Remote Control > Console Redirection feature.
- Launching the console via the Java iKVM viewer.
- Controlling, choosing, and mounting the ISO file.
- Understanding the benefit from remotely mounting ISO files using IPMI and Java.
Prerequisite steps
Before we continue, you need to have installed Java on your system and ensure the installed software is running the newest version of Oracle Java or the OpenJDK package before opening the IPMI KVM. Without those, you won’t be able to launch the console, and without making sure that they are updated, you might run into various errors, making it impossible to get to the next steps.
If you need help accessing IPMI for your server, you can follow the steps in the What is IPMI? article. You will also need to be connected to the Liquid Web VPN in order to open the IPMI site. The How to configure your Liquid Web VPN article will guide you through all the necessary steps.
Navigating to the IPMI site via the IP address
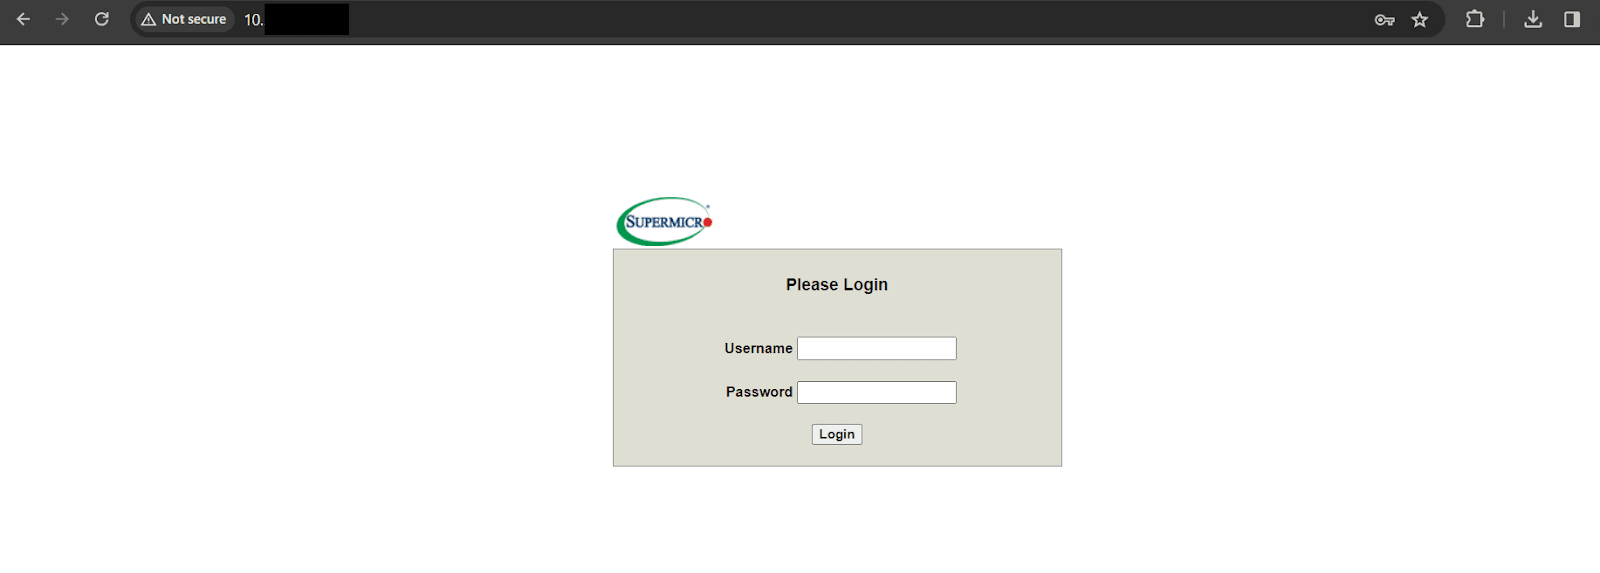
Once you are connected to the Liquid Web VPN and have the credentials for your server, you can open your browser and simply enter your server IPMI IP address in the field for the browser URL (IPs for IPMI are in the 10.x.x.x range). This entry will redirect you to Supermicro's login page:
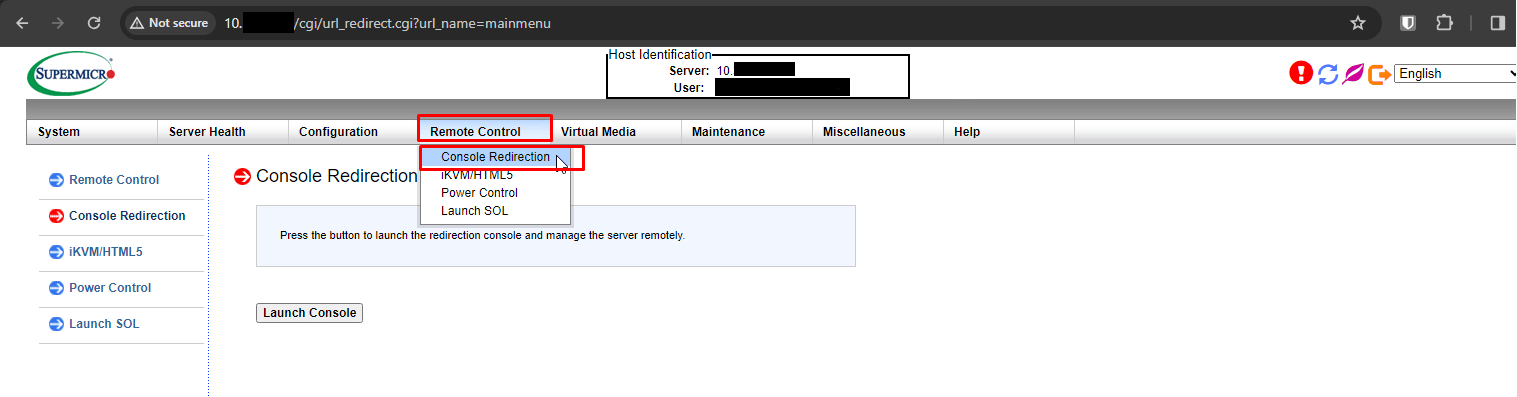
Using the Remote Control > Console Redirection feature
Once you log into the IPMI control panel, you need to click Remote Control and then on Console Redirection to be able to control the server remotely. Despite its simple appearance, this is one of the most essentials tools of IPMI allowing you to connect to the server remotely as if you had a KVM set up:
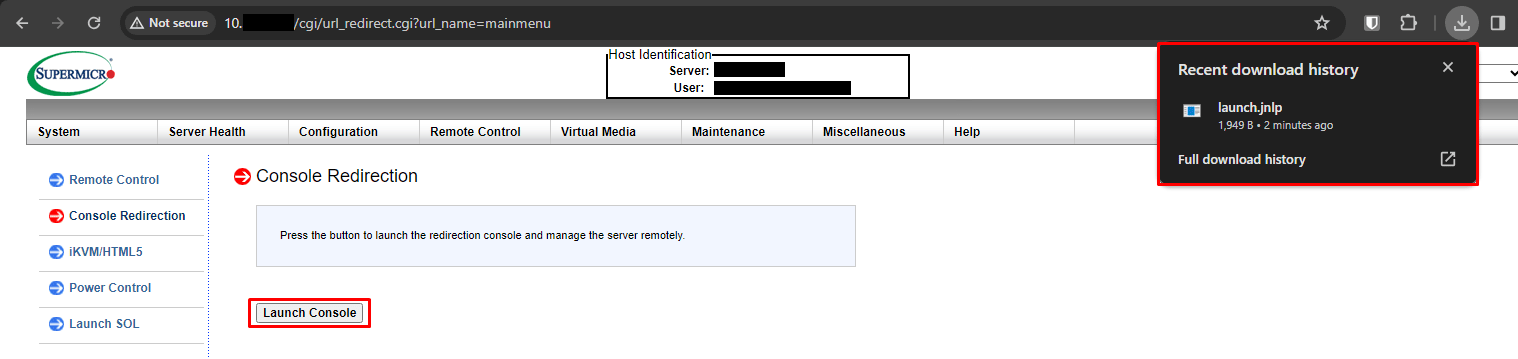
Launching the console via the Java iKVM viewer
Once you have installed Java or updated it to the latest version, you can click the Launch Console option. Depending on the BMC hardware of the server and your browser, this will either open the console directly or download a file on your computer named launch.jnlp:
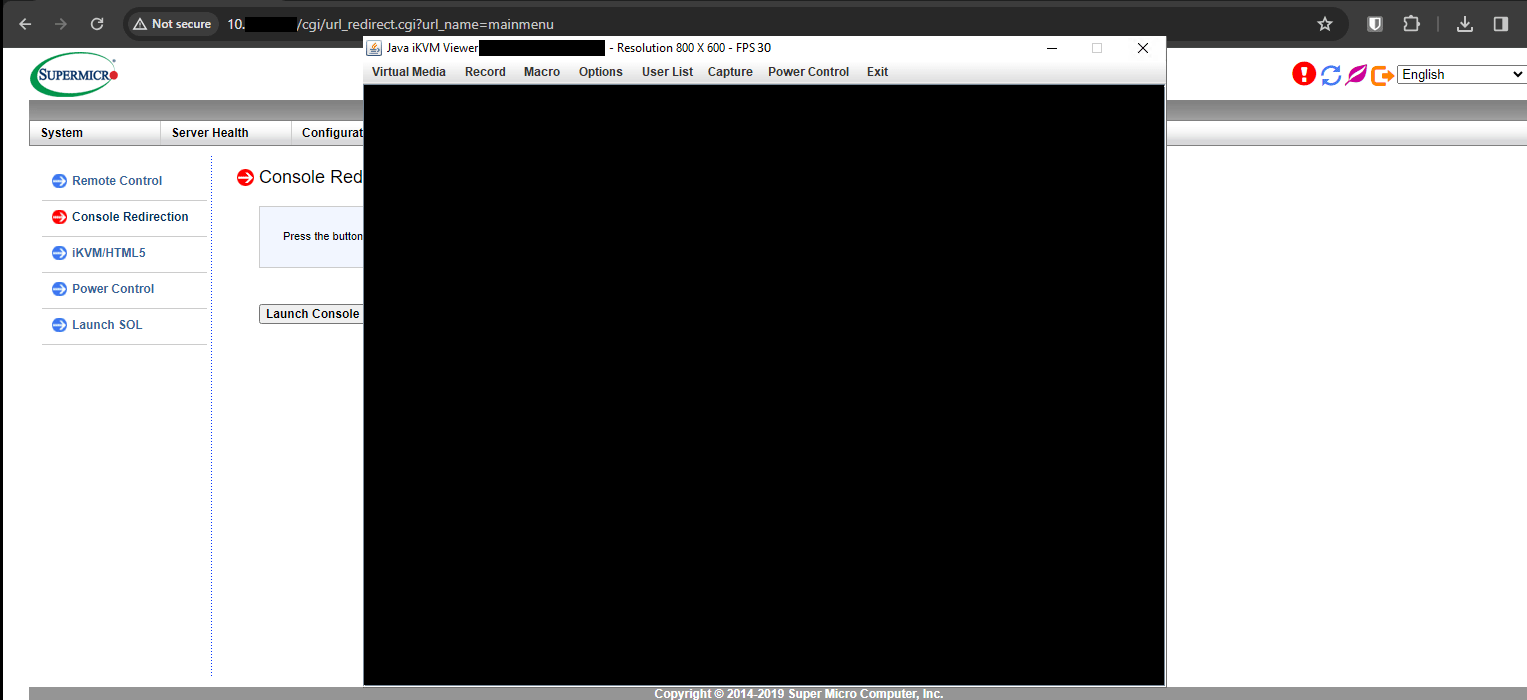
Once the file has completed downloading, you can click to open it, and this will open the Java iKVM viewer (IPMIView), allowing you to reach the server’s console. There are many options here, one of which is the ability to reboot the server, which will come in handy once you have mounted the ISO file:
Controlling, choosing, and mounting the ISO file
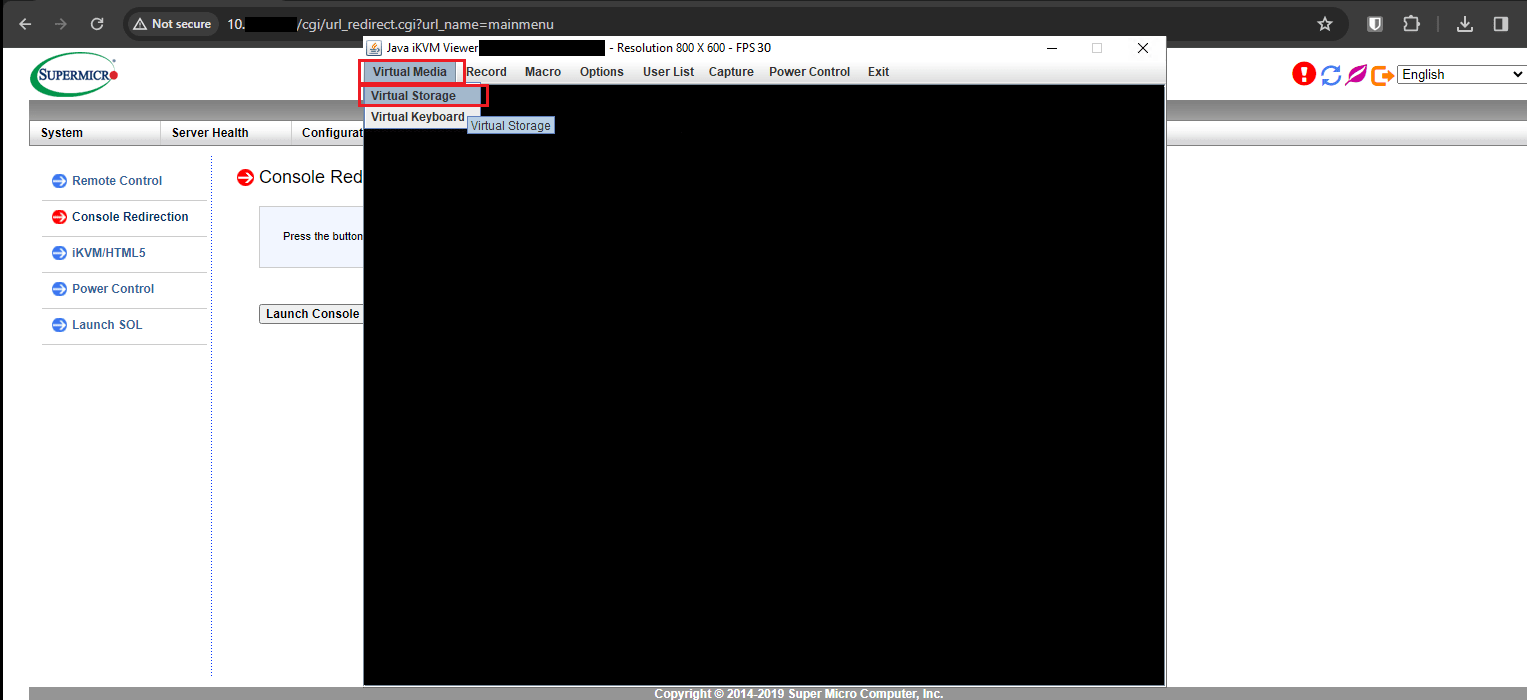
And now, here is the moment we have been waiting for. Once the console is loaded, you can click Virtual Media at the top left of the console window and then click the Virtual Storage option. This option helps you control, choose, and mount ISO files as virtual storage in the console:
The Virtual Storage options will appear on your screen. Virtual Storage allows you to mount up to three ISO files at the same time. From the dropdown menu, select ISO file and click Open Image. This action will allow you to view and browse the ISO files on your local computer and choose the one you wish to mount as a virtual USB:
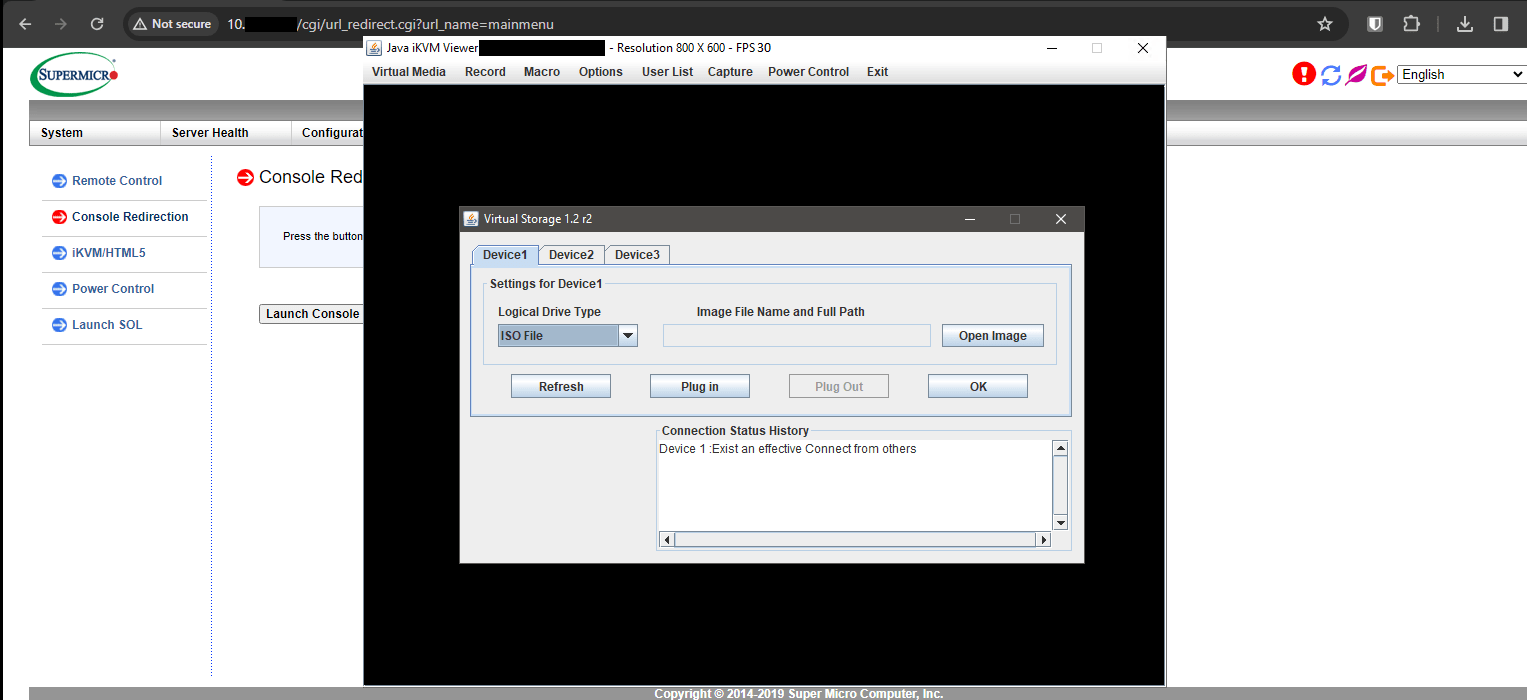
Once you have found and selected the ISO file, you can click the Plug In option to mount the ISO file as a Virtual USB. Now, when restarting the server, you will see the ISO file you mounted as a Virtual USB option in the boot menu that you can choose. The mounted ISO file will remain mounted if the console session is open. Once you close the console session, the mounted ISO will be removed as well.
Benefit from remotely mounting ISO files using IPMI and Java
IPMI combined with Java provides a simple way to mount a local ISO file and administer servers remotely. This method allows you to mount an ISO file easily and continue to reimage your server when the system is down. The ability to mount ISO files remotely offers a considerable advantage when installing or recovering an operating system in a data center or remote location, as it removes the requirement for physical presence at the server location. This feature demonstrates the strength and practicality that IPMI offers to server administration.
At Liquid Web, we recognize the value of remote accessibility and seamless server management. Our dedicated servers are outfitted with all the tools required to fully utilize IPMI, guaranteeing you a trouble-free experience without paying extra. Take a look at our selection of hosting services and tools to improve your server management abilities.
Related Articles:


About the Author: Luke Cavanagh
Product Operations Manager at Liquid Web. Devoted husband and Tween wrangler. Synthwave enthusiast. Jerry Goldsmith fan. Doctor Who fan and related gubbins.


Our Sales and Support teams are available 24 hours by phone or e-mail to assist.
Latest Articles
In-place CentOS 7 upgrades
Read ArticleHow to use kill commands in Linux
Read ArticleChange cPanel password from WebHost Manager (WHM)
Read ArticleChange cPanel password from WebHost Manager (WHM)
Read ArticleChange the root password in WebHost Manager (WHM)
Read Article