


Install Poweradmin on Ubuntu 16.04
What is Poweradmin?
Poweradmin is a web-based graphical user interface to interact with PowerDNS. It is released under the open source GPL license. It makes it easy to create and edit zone files and interacts directly with the SQL server. Poweradmin has full support for most PowerDNS features, including all zone types (master, native and slave), supermasters, for automatic provisioning of slave zones and full support for A, AAAA, CNAME, HINFO, MX, NS, PTR, SOA, SRV and TXT record types, validation against RFC’s. It also has user and permission management setup for controlling user permissions with templates. In this tutorial, we’ll be showing you how to install and configure Poweradmin as well as some records.
Prerequisites
If you don’t already have PHP, Apache, and Mcrypt installed on your Ubuntu VPS server you will need to install them now.
First, add the repository for the most recent versions of PHP.
sudo add-apt-repository ppa:ondrej/php
Then update your repo cache and install.
sudo apt-get update
sudo apt-get install apache2 libapache2-mod-php php php-common php-curl php-dev php-gd php-pear php-imap php-mcrypt php-mysql php-xmlrpc gettext libmcrypt-dev
Then install Mcrypt for PHP and Apache.
sudo pecl install mcrypt-1.0.2
sudo bash -c "echo extension=/usr/lib/php/20170718/mcrypt.so > /etc/php/7.2/cli/conf.d/mcrypt.ini"
sudo bash -c "echo extension=/usr/lib/php/20170718/mcrypt.so > /etc/php/7.2/apache2/conf.d/mcrypt.ini"
sudo systemctl restart apache2.service
Installing Poweradmin
Now that we have the prerequisites out of the way we can install Poweradmin. First, start by going to the document root of the site where you want to install Poweradmin. For these purposes, I am going to use the default document root in /var/www/html.
cd /var/www/html
Then download and extract Poweradmin.
sudo wget https://newcontinuum.dl.sourceforge.net/project/poweradmin/poweradmin-2.1.7.tgz
sudo tar xf poweradmin-2.1.7.tgz
sudo mv poweradmin-2.1.7 poweradmin
Now go to your domain.tld/poweradmin/install to complete the full installation of Poweradmin.
Step 1. Select your language.

Step 2. Acknowledge warning.

Step 3. Fill in database information and set the password for the admin user.
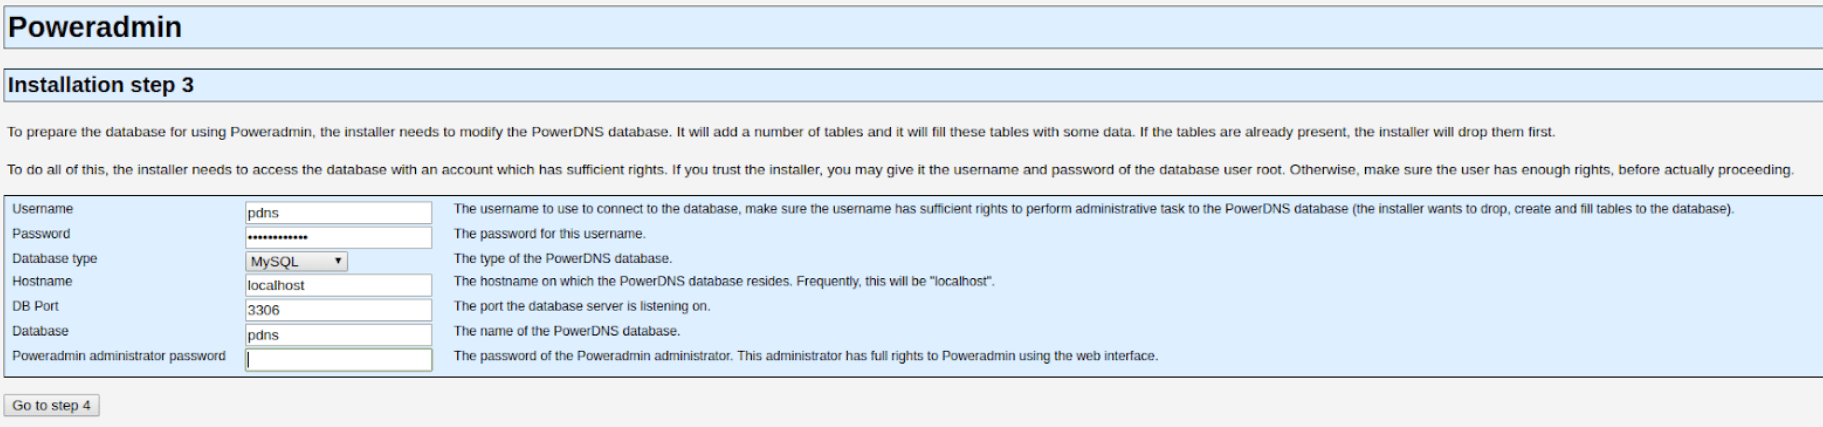
The database and user are “pdns”. The password was automatically generated password that was set when installing PowerDNS. You can find the password by catting the pdns config file.
sudo cat /etc/powerdns/pdns.d/pdns.local.gmysql.conf
The password will be the string of letters and numbers after”gmysql-password=”. You will also be asked to set the admin user’s password.
Step 4. Create a pdns user and set some default configurations.
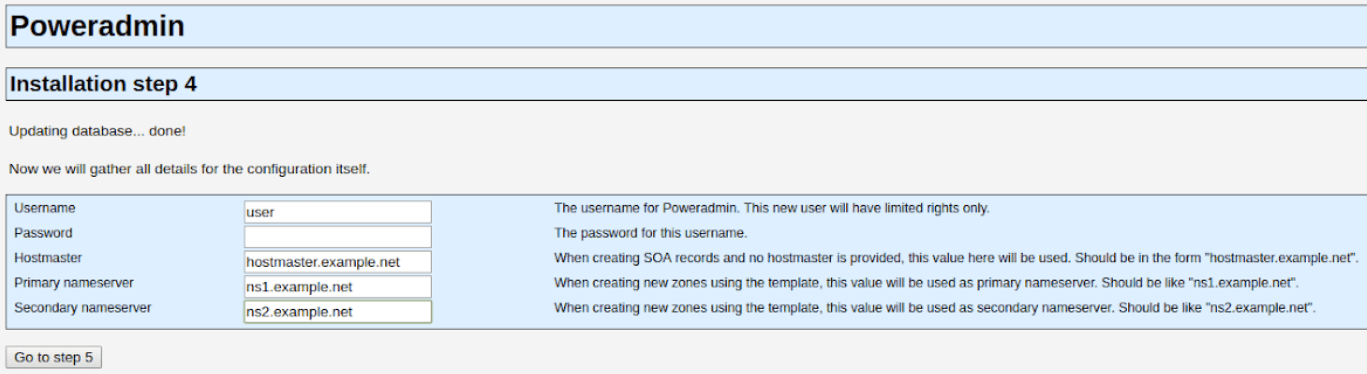
Put in a username and password for the non-admin pnds user. Set the default Hostmaster and nameservers.
Step 5. Create the database user in MySQL.

Log in to MySQL and then copy and paste the command to setup the database user in MySQL.
Step 6. Set up the PHP configuration file.
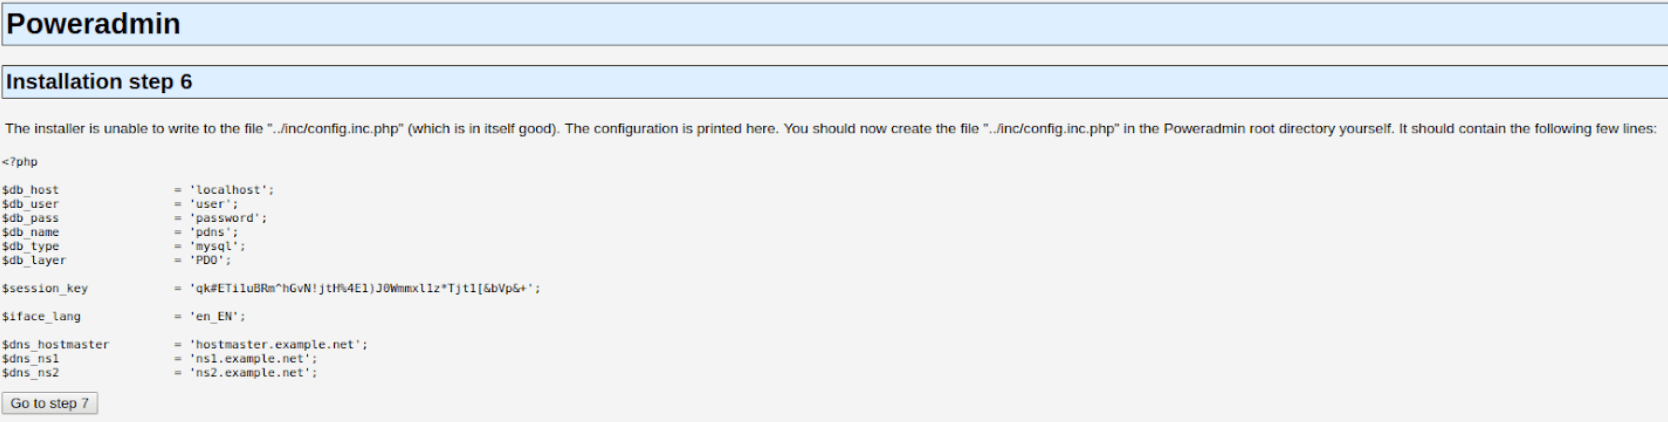
Create the PHP configuration file and copy and paste the output into the file.
cd poweradmin
sudo vim inc/config.inc.php
Step 7. Create the .htaccess and remove the install directory
sudo cp install/htaccess.dist .htaccess
sudo rm -rf install
Now you can browse to the poweradmin homepage domain.tdl/poweradmin. You should now see the login screen.
Using Poweradmin
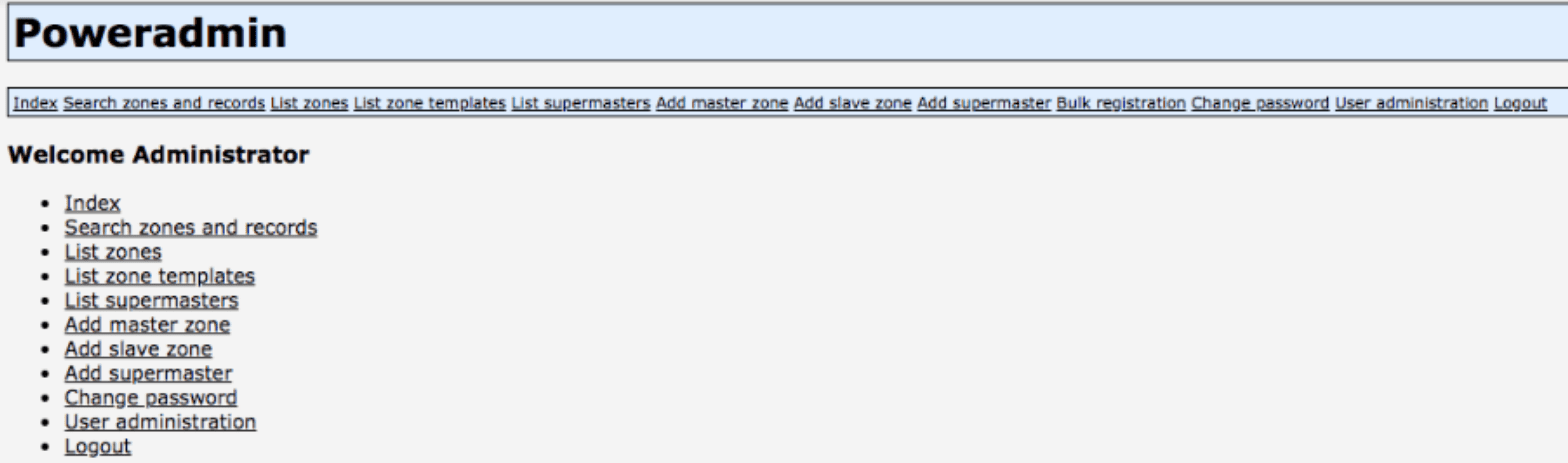
When you first log in you will be greeted with the main page and a list of available options.
The first thing you are likely to want to do is set up your domain with an A record. To do so simply click on “Add master zone”.
Now you will see a box to enter in the domain name. In this case, we’re using example.com as the domain. There are a couple of other options you can choose from. We left them as their defaults, but this would be a good time to set the zone’s owner (i.e., which Poweradmin user can modify the zone file) and also set the template to create the zone with specified DNS records already in place. Click “Add zone”.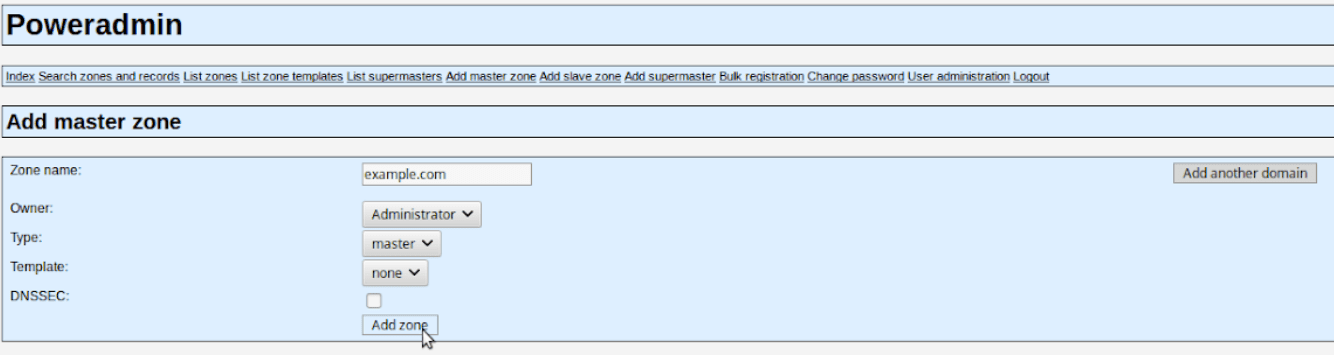
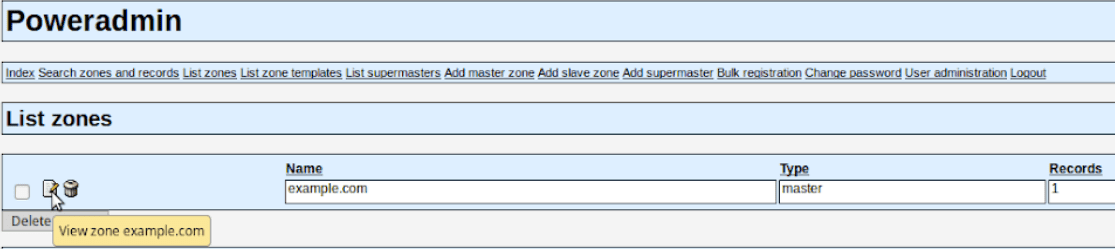
Now click list zones again, and you will see your newly created zone. Since we didn’t set up a template with our new zone file, it will not have any A records yet. To change that click the edit icon.
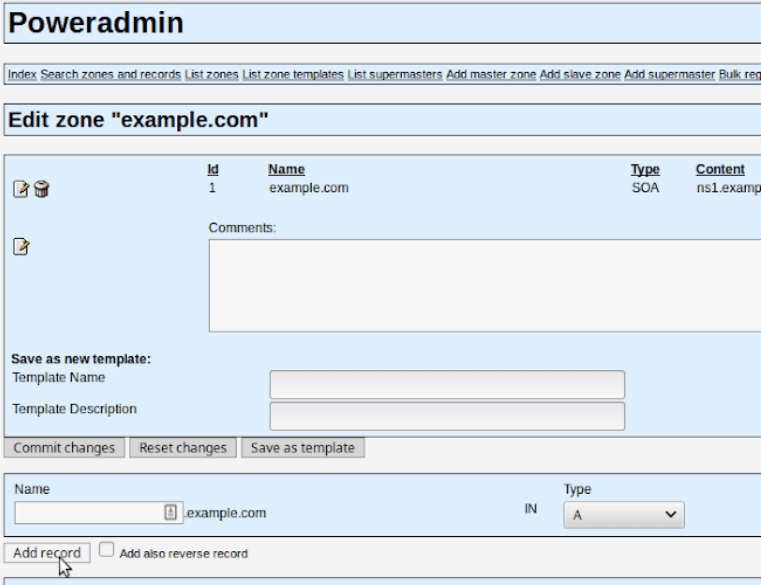
Now we can add the A record for the domain. We changed the type to A, fill in the IP address under “Content”, set the priority and the TTL then click “Add record”.
That’s all there is to it. With the record set up for example.com, we can now do a domain name lookup with dig on the server to get the IP address I just set up.
dig example.com @127.0.0.1
This request should now show something like this.
;; ANSWER SECTION:

example.com.       1440    IN A  127.0.0.1
This can, of course, be accomplished as we pointed out earlier with MySQL but Poweradmin is much more user-friendly and does not require knowledge of MySQL. Poweradmin is required to be installed separately from PowerDNS and has more requirements than PowerDNS (i.e., PHP, Apache, and Mycrypt).
In this Knowledge Base, we have shown you how to install Poweradmin on a server running Ubuntu 16.04. Be sure to check out our other Ubuntu related articles.
Cloud Spectator, an industry leader in laaS Marketplace Analysis, confirms Liquid Web’s VPS servers outperform Rackspace, Amazon, and Digital Ocean across the board.
Related Articles:


About the Author: Nathaniel Swanson


Our Sales and Support teams are available 24 hours by phone or e-mail to assist.
Latest Articles
In-place CentOS 7 upgrades
Read ArticleHow to use kill commands in Linux
Read ArticleChange cPanel password from WebHost Manager (WHM)
Read ArticleChange cPanel password from WebHost Manager (WHM)
Read ArticleChange the root password in WebHost Manager (WHM)
Read Article