


How to install KVM on Linux (AlmaLinux)
The Kernel-based Virtual Machine (KVM) is a robust virtualization solution for Linux that allows numerous virtual machines to run on a single host system. This overview will walk you through installing KVM on AlmaLinux, a Red Hat Enterprise Linux (RHEL)-compatible distribution.
Users can create and manage virtualized environments with KVM, optimizing resource utilization and increasing server deployment flexibility. The essential steps needed to install KVM on AlmaLinux are covered in this article, ensuring a solid virtualization base.
How to install KVM on AlmaLinux — a step-by-step guide
To install KVM on Linux AlmaLinux, you can follow the steps provided.
Prerequisites
- Operating system and version: AlmaLinux OS 8.
- CPU that supports hardware virtualization (Intel VT-x or AMD-V).
- Adequate RAM (4 GB or more is recommended).
- Sufficient disk space for virtual machines (at least 20 GB is recommended).
Step #1. Verify if hardware virtualization is enabled
The first step is determining whether virtualization is enabled on your AlmaLinux system. The virtualization capability is usually enabled in the BIOS of modern computers. Run the following command to ensure that the virtualization capability is enabled:
egrep -c '(vmx|svm)' /proc/cpuinfoIf the output is greater than 0, the CPU supports hardware virtualization.
Step #2. Update your AlmaLinux system
Make sure your system is up to date before you begin installing KVM. To update your package lists and upgrade existing packages, run the following command:
sudo dnf updateStep #3. Install KVM
Install KVM and other KVM administration tools to control the virtual machines when the system update is finished. Run the following command to install the KVM and administration tools:
sudo dnf install qemu-kvm libvirt libvirt-client virt-top virt-install virt-manager virt-viewer libguestfs-toolsStep #4. Start and enable the libvirtd daemon
Once KVM is installed, run the following commands to start and enable the daemon. The libvirtd server-side daemon is a component that manages tasks on virtualized guests, utilizing technologies like Xen, KVM, and ESXi:
sudo systemctl start libvirtd
sudo systemctl enable libvirtd
Then, run the following command to check the status of the libvirtd service.
sudo systemctl status libvirtdStep #5. Set up the bridge interface (optional)
You must configure the bridge interface if you want to use bridged networking for VMs. To set up the bridge interface, first edit the bridge interface configuration file:
sudo nano /etc/sysconfig/network-scripts/ifcfg-br0Add the following information and remember to change it based on your network settings:
DEVICE=br0
TYPE=Bridge
BOOTPROTO=none
ONBOOT=yes
IPADDR=<your_bridge_ip>
NETMASK=<your_netmask>
GATEWAY=<your_gateway>
DNS1=<your_primary_dns>
DNS2=<your_secondary_dns>
Here is an explanation of the values shown above that you will be managing:
- DEVICE=br0: Specifies the name of the bridge interface.
- TYPE=Bridge: Sets the interface type to a bridge.
- BOOTPROTO=none: Disables any automatic IP configuration during boot.
- ONBOOT=yes: Configures the interface to start at boot.
- IPADDR=: Assigns the desired IP address to the bridge interface.
- NETMASK=: Sets the netmask for the bridge interface.
- GATEWAY=: Specifies the gateway for the network.
- DNS1=: Provides the IP address of your primary DNS server.
- DNS2=: Provides the IP address of your secondary DNS server.
Ensure the values are correct, then save and close the file. Next, edit the Ethernet interface configuration file:
sudo nano /etc/sysconfig/network-scripts/ifcfg-eth0Add or modify the following information:
DEVICE=eth0
TYPE=Ethernet
ONBOOT=yes
BRIDGE=br0
Then, save and close the file.
Once everything is finished, restart the network service to reflect the changes. Use the following command to do so:
sudo systemctl restart networkStep #6. Create a virtual machine (VM)
To create a virtual machine (VM), run the following virt-install command. Assume you wish to create a virtual machine with the name AlmaLinux-server using AlmaLinux as the guest operating system:
sudo virt-install --name AlmaLinux-server --ram=2048 --vcpus=2 --cpu host --hvm --
disk path=/var/lib/libvirt/images/almalinuxservervml,size=20 --cdrom /var/lib/libvirt/boot/AlmaLinux-8.4-x86_64-DVD.iso --graphics vnc
Here is an explanation of the values shown above that you will be managing:
- --name: Specifies the name of the virtual machine.
- --ram: Sets the amount of RAM for the virtual machine in megabytes.
- --vcpus: Sets the number of virtual CPUs for the virtual machine.
- --hvm: The guest (VM) is fully virtualized.
- --disk path: Specifies the size of the virtual disk.
- --cdrom: Points to the path of the installation ISO (replace /path/to/alma-linux.iso with the actual path).
- size=20: The virtual machine's disk space in gigabytes.
- --graphics: Enables a graphical console for the virtual machine.
Depending on your needs, you can change specific settings, like the network configuration and the path of the ISO file. This following command will start an interactive console-based setup where you can configure the VM parameters. Follow the prompts to select a language, keyboard layout, create a user, and complete the installation.
After creating the VM, you can connect to its console using a Virtual Network Computing (VNC) viewer or other remote desktop clients. Find the VNC port used by the VM:
sudo virsh domdisplay AlmaLinux-serverIt will output something like :1, indicating the VNC display number. Replace AlmaLinux-server with your VM.
Step #7. Test the setup and configuration
Open a VNC viewer on your local machine and connect to the IP address of your AlmaLinux server, specifying the VNC port (for example, your-alma-linux-host:5901).
Then, follow the on-screen instructions to complete the AlmaLinux installation within the VM. After the installation, you can use the same VNC viewer or virt-viewer command to access the VM console:
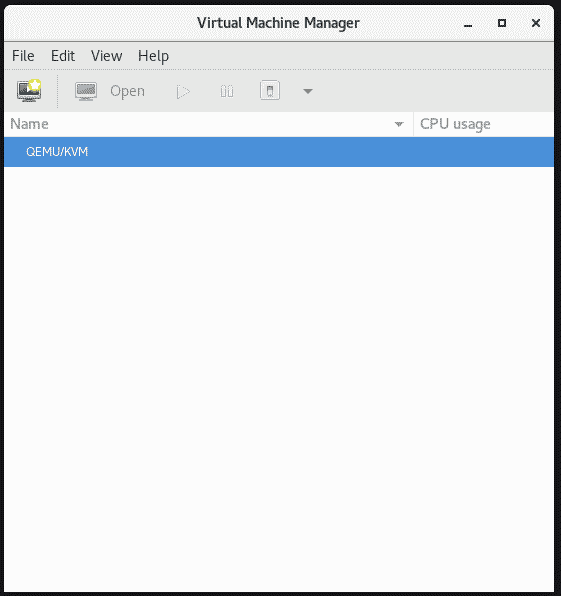
sudo virt-viewer AlmaLinux-serverYou can also launch a virtual machine with the virt-manager command:
sudo virt-managerThis command will pop open the Virtual Machine Manager desktop interface as shown:
How to update the KVM
Once you install KVM, here is how to update the KVM and related packages. Simply run the following command:
sudo dnf update qemu-kvm libvirt libvirt-client virt-top virt-install virt-manager virt-viewer libguestfs-toolsHow to uninstall or remove the KVM
To uninstall the KVM and related packages, run the following command:
sudo dnf remove qemu-kvm libvirt libvirt-client virt-top virt-install virt-manager virt-viewer libguestfs-toolsThis command removes the KVM and related packages but may leave configuration files. If you want to remove those as well:
sudo dnf autoremoveWe always think it is important to review the steps for uninstalling the software after learning how to install KVM. We hope this information is helpful to the reader.
Helpful virtual shell (virsh) commands
The virtual shell you use to manage virtual machines is called virsh. This section will cover some virsh commands you can use to manage a VM.
Obtaining the available virsh commands
To get the overview of available virsh commands issue the following virsh --help command:
virsh --helpListing the currently running virtual machines
This virsh list command lists the currently running virtual machines:
sudo virsh listListing all virtual machines both running and stopped
This virsh list --all command lists all virtual machines, including those that are currently running and those that are stopped:
sudo virsh list --allShowing virtual machine details
This virsh dominfo <VM_name> command displays specific details about a virtual machine. Replace <VM_name> with your virtual machine's name:
sudo virsh dominfo <VM_name>Starting a virtual machine
This virsh start <VM_name> command starts a stopped virtual machine:
sudo virsh start <VM_name>Stopping a running virtual machine
This virsh stop <VM_name> command immediately stops the virtual machine. It's a forceful action, like pulling the plug on a physical machine. The virtual machine does not go through a clean shutdown process, and there is a potential for data loss or other issues:
sudo virsh stop <VM_name> Gracefully shutting down of a virtual machine
This virsh shutdown <VM_name> command initiates a graceful virtual machine shutdown. It sends an ACPI (Advanced Configuration and Power Interface) Power Button event to the virtual machine, allowing the operating system inside the VM to perform a clean shutdown. The VM's operating system is allowed to shut down applications and services gracefully:
sudo virsh shutdown <VM_name> Forcefully powering off a virtual machine
This virsh destroy <VM_name> command forcefully powers off a running virtual machine:
sudo virsh destroy <VM_name> Suspending a virtual machine
This virsh suspend <VM_name> command suspends a running virtual machine:
sudo virsh suspend <VM_name> Resuming a suspended virtual machine
This virsh resume <VM_name> command resumes a previously suspended virtual machine:
sudo virsh resume <VM_name> Saving the state of a virtual machine
Replace with the file's name where the state will be saved. This virsh save <VM_name> <file_name> command saves the current state of a running virtual machine:
sudo virsh save <VM_name> <file_name>Restoring a virtual machine from a saved state
This command restores a virtual machine from a previously saved state:
sudo virsh restore <file_name>Cloning a virtual machine
The virt-clone command supports an --auto-clone option to automate the cloning process. The --auto-clone option removes the need to explicitly specify the new virtual machine name and file path. It automatically generates a new name for the cloned virtual machine and chooses a suitable file path for the clone:
sudo virt-clone --original <VM_name> --auto-cloneGetting the virtual machine console log
This command shows the console log of a virtual machine:
virsh console-log <VM_name>Closing thoughts on installing KVM
KVM installation on AlmaLinux provides a solid foundation for receiving the benefits of virtualization. Users can efficiently manage and install virtual machines using KVM's packages and services, improving server efficiency and resource utilization. This overview has provided the necessary steps to install KVM on AlmaLinux, whether you are a system administrator, developer, or IT enthusiast.
As you investigate KVM's possibilities, remember that this technology enables you to build a dynamic and scalable IT infrastructure, thereby contributing to the seamless integration of virtualized environments inside the Linux ecosystem.
We are excited to offer Liquid Web's cutting-edge technology, mainly our Private Cloud powered by VMware, designed to install KVM on AlmaLinux smoothly. This dynamic combination represents a strategic dedication to unparalleled security, scalability, and dependability beyond simple hosting.
As your dedicated assistance team, we understand the crucial relevance of a stable virtualized environment. Liquid Web is your trusted partner, providing seamless technology integration, global accessibility, and 24-hour heroic support. Your hosting success is critical to our promise, and when you choose Liquid Web, you're not simply picking a provider; you're picking an innovative approach for your virtualization journey.
Related Articles:


About the Author: Mohammed Noufal
Mohammed Noufal is a B.Tech graduate with a decade of experience in server administration and web hosting. He is a father to two daughters and finds fulfillment in their growth. In his free time, he enjoys blogging, sharing experiences, and listening to music. With a strong technical background, family commitment, and creative outlets, he represents a well-rounded life journey.


Our Sales and Support teams are available 24 hours by phone or e-mail to assist.
Latest Articles
In-place CentOS 7 upgrades
Read ArticleHow to use kill commands in Linux
Read ArticleChange cPanel password from WebHost Manager (WHM)
Read ArticleChange cPanel password from WebHost Manager (WHM)
Read ArticleChange the root password in WebHost Manager (WHM)
Read Article