How To Setup A Domain In Cloudflare
Full Cloudflare Website Integration
In this article, we will discuss how to set up our domain in a full Cloudflare configuration. This will allow us to take full advantage of their many DNS features, increased speed, Railgun options, and other amazing features that full domain integration allows.
It should be noted that these instructions do not require you to interact with your Cloudflare account directly. Liquid Web Support works with Cloudflare via your Manage account interface to implement many of these changes. Unfortunately, support cannot directly access external providers, so any changes that need to be made outside the Manage interface will need to be addressed by you or your team. This being said, we find the benefits of a full Cloudflare domain setup to be well worth the effort of some minor DNS modifications.
Liquid Web Manage Dashboard
Let’s get started. Log in to your Liquid Web manage account at https://manage.liquidweb.com and go the Domain's navigation menu in the left menu. Once there, click on the Cloudflare tab.
In the Cloudflare tab, click on the “Add Website” button.

Next, we will enter our domain name in the box at the top and then select the radio button in the bottom section “Make Cloudflare my DNS provider (Full).”
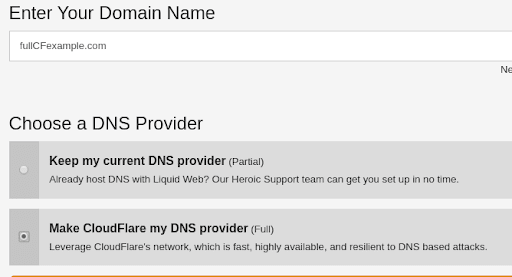
Next, select the plan you would like to use at the bottom and then click “Activate Service.” Shortly, a new domain will appear in your account. You will see this screen once it has completed.
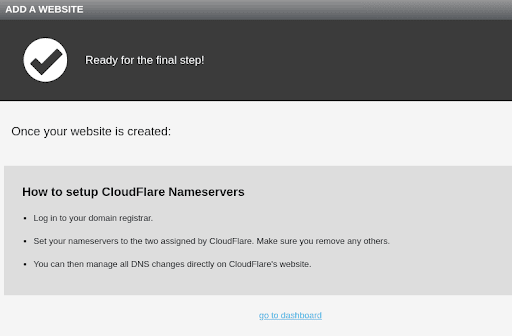
Now, click “Go to Dashboard” and then we can see the domain, and note its pending status.

This screen will also show you the nameservers that will be assigned to our domain, but these nameservers will vary for different users so the ones you see here may not match the ones you have assigned to you.

Cloudflare Dashboard
Next, we click the three dots on the right side of our new domain name screen, and then select “Cloudflare Dashboard.”

This will take us to the Cloudflare site where we will need to log in to access our account. Now, we need to locate our domain name and it will still show pending, but we can still click on it.

Next, we will be taken to a screen where we can complete our nameserver setup, but before we do, we need to click on the DNS Icon as we need to add our DNS records.
Adding DNS Records
Now, we will need to add all of our DNS records for the domain. This information will vary by domain, but at a minimum, you will need to add an A record that points to your Liquid Web server IP and a www.domain.tld cname record.


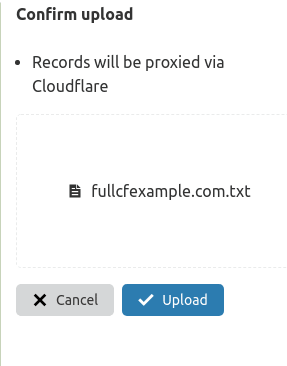
From here, select the zone file to upload and leave the defaults in place.
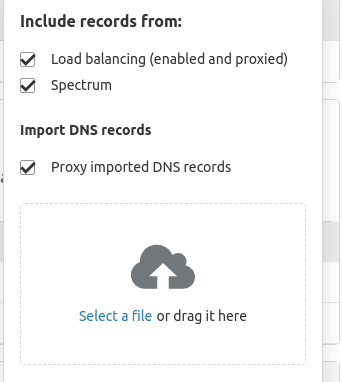
Next, click upload. You may get an error stating that some records failed to upload, so we need double-check to make sure the records are correct, but most of the information should be imported. Make sure to remove any NS records that are imported by clicking on the X to the right of them and confirming that choice.
Once you have confirmed that all your DNS records look correct, we can remove the proxying option as we do not want interruptions in our service (as will be explained in the SSL section below.)
Proxy Status
To remove Proxying for your records, click on the Proxied Cloud.

Next, it will turn to DNS Only.

Once these settings are all adjusted to “DNS Only”, we can move on.
Note: when we are at the “DNS Only” setting, no traffic is passing through Cloudflare’s CDN network yet.

Change Nameservers
Now we are ready to change our nameserver information to the ones provided to us by Cloudflare on the overview page. Cloudflare provides clear directions to accomplish this.
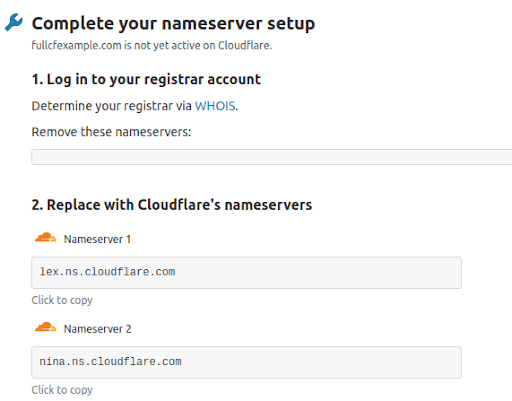
We will have to wait until propagation takes place after changing our nameservers for our domain. Tip: A good way to check on the progress of propagation is to review your domain name at https://www.whatsmydns.net/.
Once the propagation of your new nameserver has taken place, we should verify that our site loads correctly. At this point, our DNS is running through the Cloudflare service, but the other DNS records like MX, cname and other records should still be pointing at your server.
SSL Setup
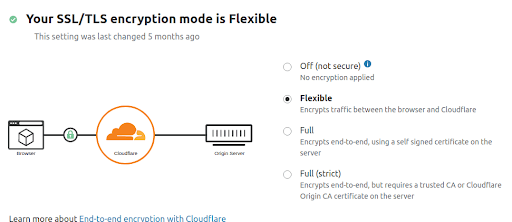
Next, let’s take a look at our SSL setup. In the Cloudflare main menu, click on the SSL/TLS icon.

We can now select any of the four options available here with "Flexible" being the most lenient if you want SSL support, Full, or Full (Strict) being most stringent, as it indicates. Generally, Full is a good option here, or if needed, Flexible will work also. If there are issues with Flexible, we can switch back over to Full.
Cloudflare will issue a universal SSL to cover our domains, but sometimes, this can take time after we change our nameserver information. We want to try to avoid proxying our traffic until we confirm that the universal certificate has been issued as we may see insecure warnings if it has not been completed. To confirm this change, click on the “Edge Certificates” tab under the SSL/TLS button.

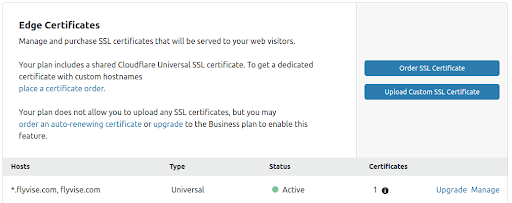
The first box is Edge Certificates, and in this area, we want to see a certificate present for our domain. If we do not see this certificate, we will have to wait until we do see the certificate to enable proxying.
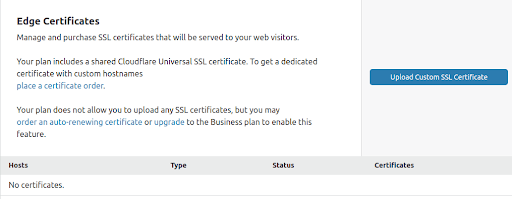
When there is a certificate in place, it will look like this.
Enable DNS
Once we see that certificate in place, (which might take a little while) we are now ready to proxy traffic through Cloudflare, so you get all the benefits of the service. Let’s finish these final few settings. In your Cloudflare account go back to the DNS tab
and click on the “DNS only” clouds

to toggle them back to “Proxied.”

Success!
Now we have set up our site to run on Cloudflare and have our traffic proxied through them.
Bonus
Cloudflare has some other great features as well. There are two which stand out that we should consider employing. The first of which is Railgun.
Railgun
The Railgun service helps cache content and improves the overall speed of our site. We also provide this service as part of the Liquid Web Cloudflare plan. If you do not have our Cloudflare service, the cost to utilize this service would be close to $200/month for a similar plan from Cloudflare. Enabling this service is very easy. Simply log in to your Cloudflare account in manage and click on the Speed Button,
then the Optimization tab,

and then scroll down to the Railgun heading. Here we will see the Liquid Web Central and Liquid Web Staging areas. For this selection, we are only concerned with the Liquid Web Central Option.
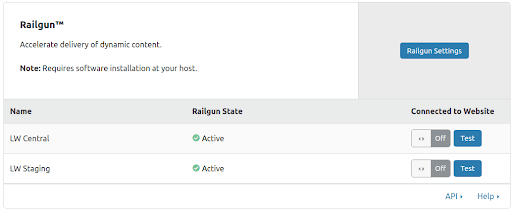
To enable it, toggle the off button to the on position,

Then click the Test button. We will want to ensure we see a Success message after the test runs.

Now, let's check our site to ensure it is working as expected. In rare cases, there could be issues with Railgun, but generally, enabling this service will make your website faster. That's it! Railgun is enabled.
BOT Fight Mode
This feature helps to stop malicious bots from weighing your server down and is an excellent option to stop most of them. To enable this setting in your Cloudflare account, go to the Firewall button
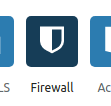
and then click the settings tab on the right.

You will see the Bot Fight Mode box, which needs to be toggled to the on position. Now we are fighting back against the malicious bots.

Try It Now!
Utilizing Cloudflare is an excellent way to optimize any site in multiple ways. Would you like to give it a try?
Related Articles:

About the Author: Dayne Larsen
Dayne was born into IT and remembers taking notes as a kid on old mainframe punch cards his mom brought home. With a degree in Technology Education from Montana State University, he enjoys being a helpful human to clients and loves to empower people to tackle challenges. He has worn many hats in his day, from a stay-at-home Dad, to a freelance web designer, LEGO company Merchandiser and even an antique store owner. In his free time you will find him fly fishing, snowboarding, working on his 66' Mustang, home improving, or enjoying his family.
Our Sales and Support teams are available 24 hours by phone or e-mail to assist.
Latest Articles
In-place CentOS 7 upgrades
Read ArticleHow to use kill commands in Linux
Read ArticleChange cPanel password from WebHost Manager (WHM)
Read ArticleChange cPanel password from WebHost Manager (WHM)
Read ArticleChange the root password in WebHost Manager (WHM)
Read Article


