How To Install MongoDB on CentOS 6
MongoDB is a NoSQL database intended for storing large amounts of data in document-oriented storage with dynamic schemas. NoSQL refers to a database with a data model other than the tabular format used in relational databases such as MySQL, PostgreSQL, and Microsoft SQL. MongoDB features include: full index support, replication, high availability, and auto-sharding.
- These instructions are intended for installing MongoDB on a single CentOS 6 node.
- I’ll be working from a Liquid Web Core Managed CentOS 6.5 server, and I’ll be logged in as root.
For a refresher on editing files with vim see: New User Tutorial: Overview of the Vim Text Editor
vim /etc/yum.repos.d/mongodb.repo
Option A: If you are running a 64-bit system, add the following information to the file you’ve created, using i to insert:
[mongodb]

name=MongoDB Repository

baseurl=http://downloads-distro.mongodb.org/repo/redhat/os/x86_64/

gpgcheck=0

enabled=1
Then exit and save the file with the command :wq . You should see an output very similar to the following image:

Option B: If you are running a 32-bit system, add the following information to the file you’ve created, using i to insert:
[mongodb]

name=MongoDB Repository

baseurl=http://downloads-distro.mongodb.org/repo/redhat/os/i686/

gpgcheck=0

enabled=1
Then exit and save the file with the command :wq .
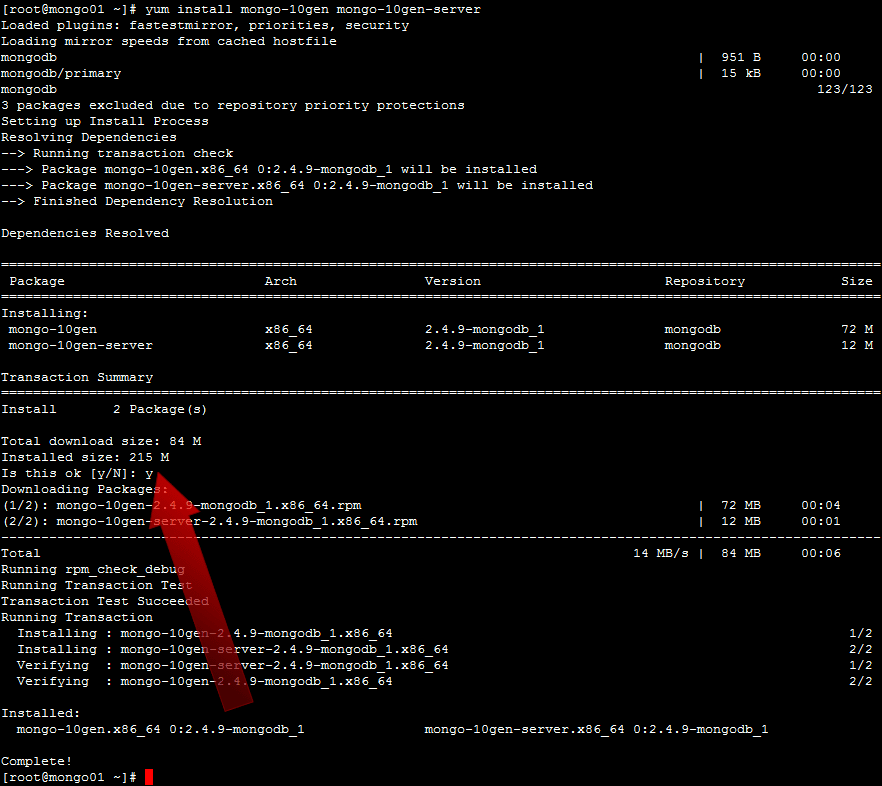
At this point, installing MongoDB is as simple as running just one command:
yum install mongo-10gen mongo-10gen-server
When prompted Is this ok [y/N]: , simply type y and then hit the enter key. You should see an output very similar to the following image:

Start-Up MongoDB
service mongod start
You should see an output very similar to the following image:

Check MongoDB Service Status
service mongod status
Summary List of Status Statistics
mongostat
Enter the MongoDB Command Line
mongo
You should see an output very similar to the following image:

By default, running this command will look for a MongoDB server listening on port 27017 on the localhost interface.
If you’d like to connect to a MongoDB server running on a different port, then use the –port option. For example, if you wanted to connect to a local MongoDB server listening on port 22222, then you’d issue the following command:
mongo --port 22222
Shutdown MongoDB
service mongod stop
There are many, many more things we could say about MongoDB, but those will be detailed in follow-up articles in the Liquid Web Knowledge Base! Look for articles on: How To Install MongoDB and Run a Multi-Node Cluster on CentOS 6 , Recommended Production Settings for MongoDB on CentOS 6 and more!
Related Articles:

About the Author: J. Mays
As a previous contributor, JMays shares his insight with our Knowledge Base center. In our Knowledge Base, you'll be able to find how-to articles on Ubuntu, CentOS, Fedora and much more!
Our Sales and Support teams are available 24 hours by phone or e-mail to assist.
Latest Articles
In-place CentOS 7 upgrades
Read ArticleHow to use kill commands in Linux
Read ArticleChange cPanel password from WebHost Manager (WHM)
Read ArticleChange cPanel password from WebHost Manager (WHM)
Read ArticleChange the root password in WebHost Manager (WHM)
Read Article


