


How to Install Django on AlmaLinux
Django is a full-featured Python web development framework that is free and open source. It provides several tools to improve software development and is used to create dynamic frameworks and applications. It also includes a set of tools for building scalable web applications.
This web framework streamlines the deployment of web applications by allowing for rapid development, code reuse, scale, and assisting with critical parts of deployment such as content administration, authentication, and security. This help article will explore how to install the Django web development software on a Linux server that is running the AlmaLinux operating system (OS).
Use Cases
- Web Development: Django is a robust web framework that can create many web applications, including social networking platforms, ecommerce websites, content management systems, and more.
- API Development: Django REST Framework, an extension for Django, allows you to build robust APIs quickly, making it suitable for applications that require a back-end API.
- Data-Driven Applications: Django's database support and object-relational mapping (ORM) system makes it suitable for developing data-driven applications and platforms.
- Prototyping & MVPs: Django's simplicity and built-in features make it a good choice for rapidly prototyping applications in software programming and developing minimal viable products (MVPs).
Steps to Learn How to Install Django on AlmaLinux
To Install Django on the AlmaLinux System, follow the steps below.
Prerequisites
- Operating System and Version: AlmaLinux OS 8.
- Use the as root or sudo command to gain privileged access to your AlmaLinux system.
- System Minimum Requirements: 2 GB RAM and 10 GB of disk space.
Step #1: Update your AlmaLinux System
Before you begin, it is advised that you update your AlmaLinux system to ensure you have the most recent packages and security patches.
To update your AlmaLinux system, use the following commands:
sudo dnf update
sudo dnf install epel-release
Step #2: Install Python and Package Installer for Python (PIP) — Also Referred to as "Pip" or "pip"
The Django framework is built on Python. On AlmaLinux, Python is usually pre-installed. To check the installed Python version, use the following command:
python3 --version Here is the output:
~]# python3 --version
Python 3.6.8
Since Python 3.6 is no longer supported, you can use the following command to see which versions are available for your AlmaLinux system:
~]# dnf -q module list python*Here is the output:
~]# dnf -q module list python*
AlmaLinux 8 - AppStream
Name                                             Stream                                             Profiles                                                  Summary
python27                                         2.7 [d]                                            common [d]                                                Python programming language, version 2.7
python36                                         3.6 [d][e]                                         build, common [d]                                         Python programming language, version 3.6
python38                                         3.8 [d]                                            build, common [d]                                         Python programming language, version 3.8
python39                                         3.9 [d][e]                                         build, common [d]                                         Python programming language, version 3.9

Hint: [d]efault, [e]nabled, [x]disabled, [i]nstalled
If Python still needs to be installed on your AlmaLinux, use the following command to install the latest available Python version:
sudo dnf install python39Here is the output:
~]# sudo dnf install python39
Last metadata expiration check: 0:44:57 ago on Sat 30 Sep 2023 03:14:08 AM UTC.
Dependencies resolved.
==============================================================================================================================================================================================================================================
 Package                                                        Architecture                                Version                                                                      Repository                                      Size
==============================================================================================================================================================================================================================================
Installing:
 python39                                                       x86_64                                      3.9.16-1.module_el8.8.0+3577+f4afbb0e.1                                      appstream                                       32 k
Installing dependencies:
 python39-libs                                                  x86_64                                      3.9.16-1.module_el8.8.0+3577+f4afbb0e.1                                      appstream                                      8.2 M
 python39-pip-wheel                                             noarch                                      20.2.4-7.module_el8.6.0+2780+a40f65e1                                        appstream                                      1.1 M
 python39-setuptools-wheel                                      noarch                                      50.3.2-4.module_el8.6.0+2780+a40f65e1                                        appstream                                      496 k
Installing weak dependencies:
 python39-pip                                                   noarch                                      20.2.4-7.module_el8.6.0+2780+a40f65e1                                        appstream                                      1.9 M
 python39-setuptools                                            noarch                                      50.3.2-4.module_el8.6.0+2780+a40f65e1                                        appstream                                      870 k

Transaction Summary
==============================================================================================================================================================================================================================================
Install  6 Packages
—
—

Installed:
  python39-3.9.16-1.module_el8.8.0+3577+f4afbb0e.1.x86_64                     python39-libs-3.9.16-1.module_el8.8.0+3577+f4afbb0e.1.x86_64                 python39-pip-20.2.4-7.module_el8.6.0+2780+a40f65e1.noarch
  python39-pip-wheel-20.2.4-7.module_el8.6.0+2780+a40f65e1.noarch             python39-setuptools-50.3.2-4.module_el8.6.0+2780+a40f65e1.noarch             python39-setuptools-wheel-50.3.2-4.module_el8.6.0+2780+a40f65e1.noarch

Complete!
After the installation is complete, use the following command to verify the installed Python version:
python3.9 --versionHere is the output for Python 3.9.16:
~]# python3.9 --version
Python 3.9.16
Pip is a command-line Python package installation tool. However, Python 3.9 also includes the installation of Pip. By the way, the Package Installer for Python (PIP) is often also referred to as "Pip" or "pip" and may be appended with the version of Python it is used for. For example, it may be called "PIP3" or "Pip3' but the "3" can be left off as well in many instances.
To check the installed Pip version, use the following command:
~]# pip3.9 --versionHere is the output:
~]# pip3.9 --version
pip 20.2.4 from /usr/lib/python3.9/site-packages/pip (python 3.9)
Step #3: Install Django on AlmaLinux via PIP3
To install Django using Pip for Python 3.9, use the following command:
pip3.9 install django Here is the output:
~]# pip3.9 install django
WARNING: Running pip install with root privileges is generally not a good idea. Try `pip3.9 install --user` instead.
Collecting django
  Downloading Django-4.2.5-py3-none-any.whl (8.0 MB)
     |████████████████████████████████| 8.0 MB 21.7 MB/s
Collecting asgiref<4,>=3.6.0
  Downloading asgiref-3.7.2-py3-none-any.whl (24 kB)
Collecting sqlparse>=0.3.1
  Downloading sqlparse-0.4.4-py3-none-any.whl (41 kB)
     |████████████████████████████████| 41 kB 447 kB/s
Collecting typing-extensions>=4; python_version < "3.11"
  Downloading typing_extensions-4.8.0-py3-none-any.whl (31 kB)
Installing collected packages: typing-extensions, asgiref, sqlparse, django
Successfully installed asgiref-3.7.2 django-4.2.5 sqlparse-0.4.4 typing-extensions-4.8.0
After the installation is complete, use the following commands to verify the installed Django version:
python3.9 -m django --version
django-admin --version
Here is the output:
~]# python3.9 -m django --version
4.2.5
~]# django-admin --version
4.2.5
Congratulations on learning how to install Django in the proceeding steps.
Step #4: Create a Django Sample Project
After successfully installing Django on AlmaLinux, you can create a Django sample project.
First, create a directory for your Django sample project using the following command:
sudo mkdir sample_projectThen, switch to your Django sample project directory sample_project:
cd sample_projectYou can build your first Django sample project using the Django admin tool followed by the name of your application, which is project_django in this case:
django-admin startproject project_djangoThen, switch to the newly created Application project_django:
cd project_djangoIn your project_django Application directory, there is a manage.py Python file. You can now migrate changes using the following command:
sudo python3.9 manage.py migrateHere is the output:
~]# sudo python3.9 manage.py migrate
Operations to perform:
  Apply all migrations: admin, auth, contenttypes, sessions
Running migrations:
  Applying contenttypes.0001_initial... OK
  Applying auth.0001_initial... OK
  Applying admin.0001_initial... OK
  Applying admin.0002_logentry_remove_auto_add... OK
  Applying admin.0003_logentry_add_action_flag_choices... OK
  Applying contenttypes.0002_remove_content_type_name... OK
  Applying auth.0002_alter_permission_name_max_length... OK
  Applying auth.0003_alter_user_email_max_length... OK
  Applying auth.0004_alter_user_username_opts... OK
  Applying auth.0005_alter_user_last_login_null... OK
  Applying auth.0006_require_contenttypes_0002... OK
  Applying auth.0007_alter_validators_add_error_messages... OK
  Applying auth.0008_alter_user_username_max_length... OK
  Applying auth.0009_alter_user_last_name_max_length... OK
  Applying auth.0010_alter_group_name_max_length... OK
  Applying auth.0011_update_proxy_permissions... OK
  Applying auth.0012_alter_user_first_name_max_length... OK
  Applying sessions.0001_initial... OK
Step #5: Create a Django Superuser Account
To access the Django admin interface, you must create a superuser account. Use the following command to create a superuser account:
sudo python3.9 manage.py createsuperuserHere is the output:
~]# sudo python3.9 manage.py createsuperuser
Username (leave blank to use 'root'): django_admin
Email address: admin@example.com
Password:
Password (again):
Superuser created successfully.
You can replace the username, email address, and password used as per your requirements.
Step #6: Configure Firewall Rules for Django
By default, Django listens on port 8000. We assumed you have firewalld enabled. Now, the following commands allow traffic on ports 8000 and 80:
sudo firewall-cmd --add-port=8000/tcp --zone=public --permanent
sudo firewall-cmd --permanent --add-port=80/tcp
Next, there is the required step of reloading the firewall that will apply the new rules:
sudo firewall-cmd --reloadUse the following command to verify that the firewall allows the port:
sudo firewall-cmd --list-ports Here is the output:
~]# sudo firewall-cmd --list-ports
80/tcp 8000/tcp
Next, we must change the settings.py file in the Django application directory to allow other users to use Django. In the ALLOWED_HOSTS field, we can specify a server's IP address or enter the [''] value.
Please make note that any network can access the application when utilizing the [''] value.
Open the settings.py file with an editor and add ['*'] to the ALLOWED_HOSTS field:
sudo nano project_django/settings.pyHere is a screenshot with the ['*'] value being used for the ALLOWED_HOSTS field:
![How to install Django on AlmaLinux: Here is a screenshot with the ['*'] value being used for the ALLOWED_HOSTS field.](https://res.cloudinary.com/lwgatsby/f_auto/www/uploads/2023/10/django-1.png)
Once you make the changes, save the file and exit.
Step #7: Start the Django Application
After finishing all the necessary configurations, you can launch the Django application. Use the following command to launch the application:
sudo python3.9 manage.py runserver 0.0.0.0:8000Here is the output:
~]# sudo python3.9 manage.py runserver 0.0.0.0:8000
Watching for file changes with StatReloader
Performing system checks...
System check identified no issues (0 silenced).
September 30, 2023 - 07:24:28
Django version 4.2.5, using settings 'project_django.settings'
Starting development server at http://0.0.0.0:8000/
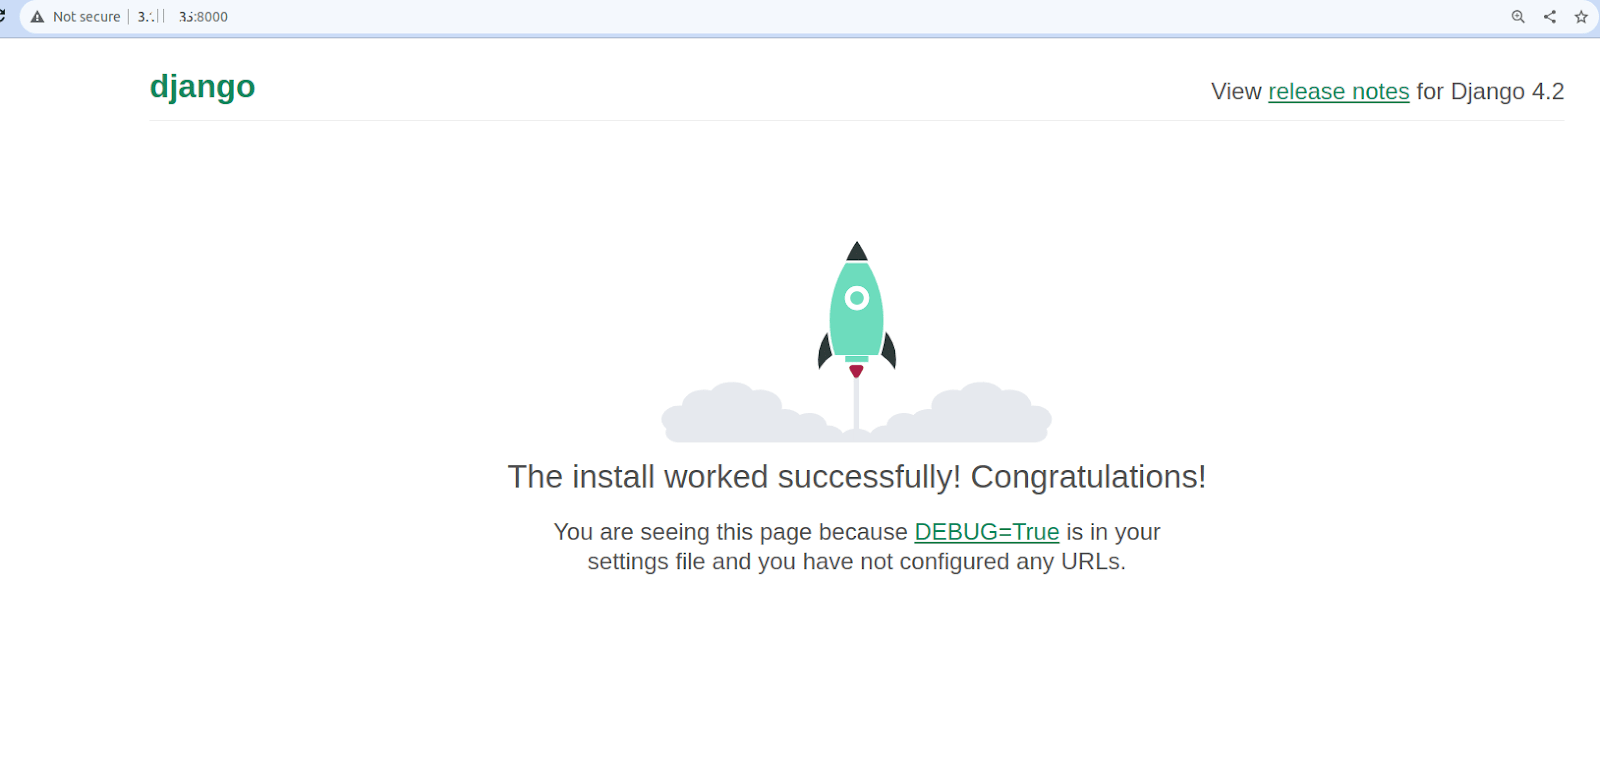
Quit the server with CONTROL-C.Once the Django application has been properly started, you can view it by visiting the URL of http://your-server-ip-address:8000. The following page will be displayed:
You can also use the URL http://your-server-ip-address:8000/admin to visit Django's admin panel. You will be directed to the following page:
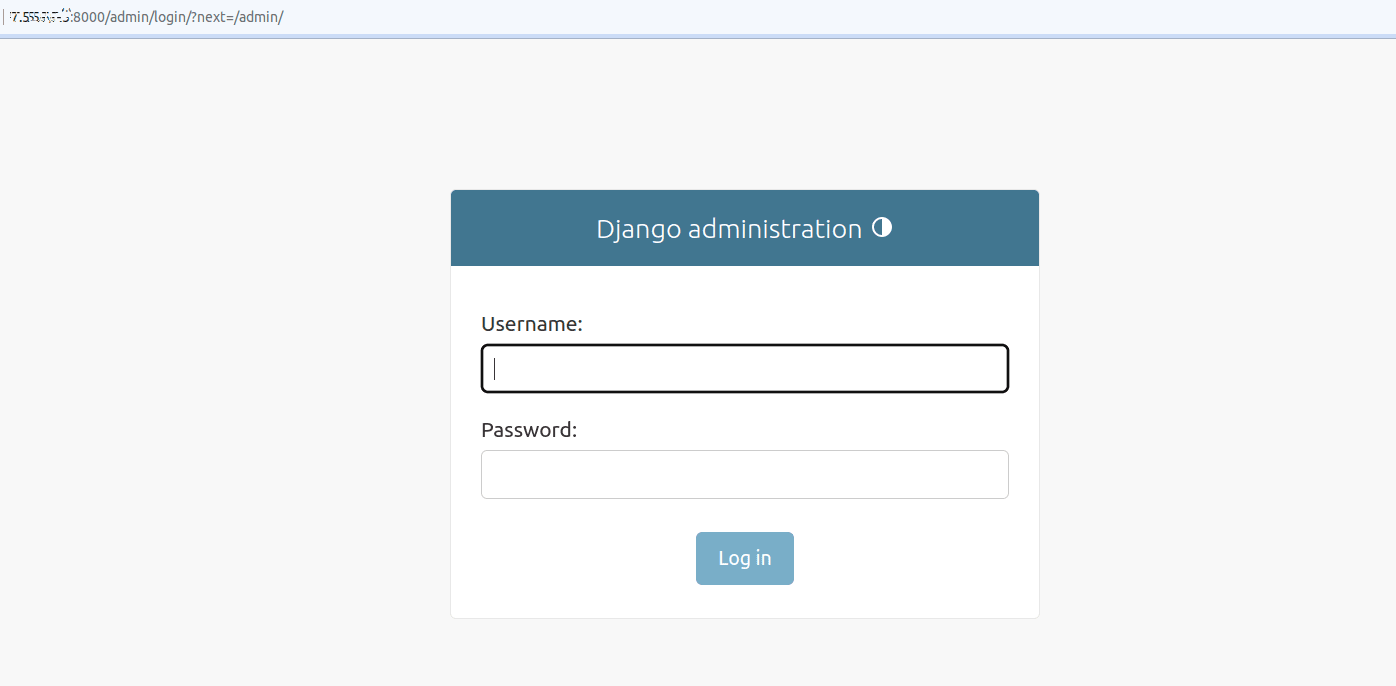
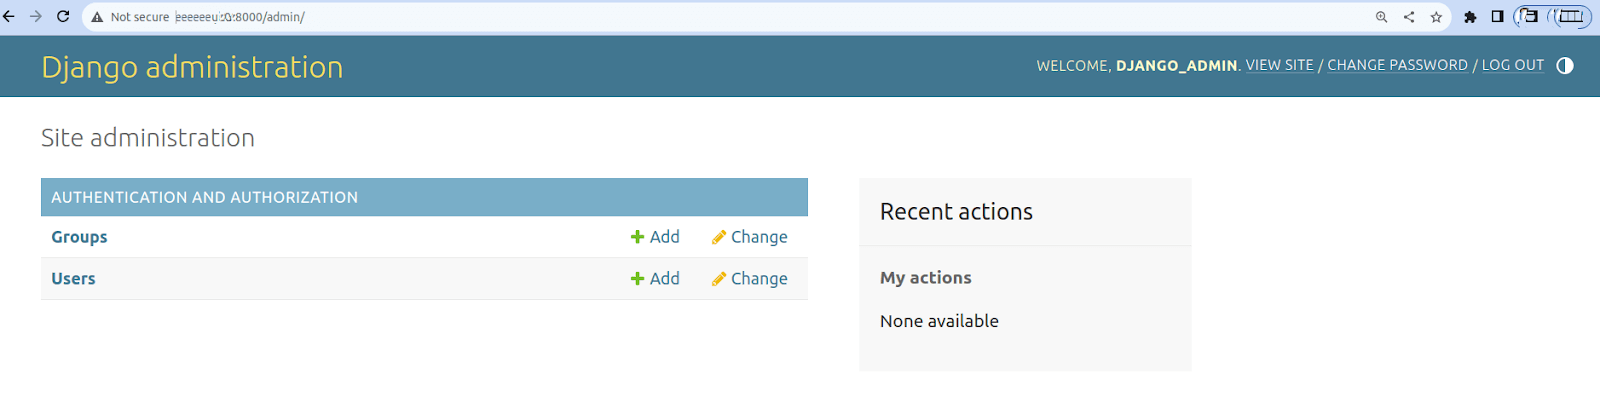
Enter your Django username and password, then click the Log In button:
Replace your-server-ip-address using your IP address in the steps shown above.
Now that you know how to install Django, let's look at how to update and uninstall Django.
How to Update Django on AlmaLinux
To update Django to the latest version, use the following command:
pip3.9 install --upgrade djangoThis command will upgrade your existing Django installation to the latest available version.
To confirm that Django has been updated, you can check its version:
python3.9 -m django --versionThis check should display the latest installed version of Django.
To learn how to install Django on CentOS, refer to the article How to Install Django on CentOS. To install Django on Ubuntu, refer to the article How to Install Django on Ubuntu.
How to Uninstall Django on AlmaLinux
To uninstall Django from your AlmaLinux system, you can use pip to remove the Django package. Use the following command to uninstall Django:
pip3.9 uninstall djangoYou'll be prompted to confirm the uninstallation. Type y and press the Enter key.
To verify that Django has been uninstalled, attempt to recheck its version:
python3.9 -m django --versionIf Django is successfully uninstalled, this command will produce an error indicating that the module doesn't exist.
How to Install Django FAQs
How do I create a new Django application within a project?
Use the command python3.9 manage.py startapp appname to create a new Django application within your project.
How can I configure the database for my Django project?
Modify the database settings in the settings.py file of your Django project. Django supports various databases like PostgreSQL, MySQL, SQLite, and more.
How do I apply migrations to update the database schema?
Run python3.9 manage.py makemigrations to create migration files based on your models. Then, run python3.9 manage.py migrate to apply those migrations and update the database schema.
How can I set up static files and media in Django?
Configure the STATIC_ROOT, STATIC_URL, MEDIA_ROOT, and MEDIA_URL settings in your settings.py file to handle static files and media.
How do I deploy my Django application to a production server?
For deployment, use web servers like Gunicorn or uWSGI (Web Server Gateway Interface). Set up a reverse proxy — for example on NGINX or Apache web servers — to handle client requests and serve static files.
How can I handle user authentication and authorization in Django?
Django provides a built-in authentication system. You can use django.contrib.auth for user authentication and authorization.
How can I debug my Django application?
Use Django's built-in debugging tools like print() statements logging or a debugger like pdb — The Python Debugger. You can also set the DEBUG setting to True in the development environment for detailed error pages.
Issues Encountered by Technology Layer — How to Install Django
Python Installation Issues
Problem: Difficulty in installing Python or pip.
Solution: Ensure that Python and pip are installed correctly and the PATH is set up appropriately.
Dependency Installation Issues
Problem: Errors during the installation of Django or its dependencies using pip.
Solution: Check for any missing or conflicting dependencies, and ensure you have the necessary permissions to install packages.
Django Installation Issues
Problem: Errors or failures during the installation of Django using pip.
Solution: Verify the version compatibility, check for network issues, or use an alternative installation method like pip3 or specify the Django version.
Database Configuration Issues
Problem: Difficulty configuring the database settings in Django.
Solution: Ensure the correct database settings (for example, the database engine, or credentials) are provided in the Django project's settings.py file.
Migration and Database Schema Issues
Problem: Migrations failing or database schema not updating correctly.
Solution: Check the migration files, ensure they are correct, and troubleshoot any issues with the database schema.
Server and Deployment Issues
Problem: Errors or issues when deploying the Django application using Gunicorn, uWSGI, or a similar server.
Solution: Review the server configuration, log files, and settings to identify and resolve deployment-related problems.
Static Files and Media Issues
Problem: Problems with serving static files and media during development or deployment.
Solution: Configure the appropriate settings for static files and media in the settings.py file and ensure the web server is set up to serve them.
Authentication and Authorization Issues
Problem: Challenges with implementing user authentication and authorization in Django.
Solution: Review Django's authentication documentation and ensure the system is configured correctly.
Debugging and Error Handling Issues
Problem: Difficulty debugging and handling errors in the Django application.
Solution: Utilize Django's built-in debugging tools, logging, and proper error-handling techniques to diagnose and resolve issues.
Wrapping Up
With this article's help, we hope you can understand how to install Django on AlmaLinux without any issues. Using Liquid Web to host your Django application on AlmaLinux is an excellent decision. We provide managed hosting options that allow you to focus on developing and deploying your Django application while we handle the hosting. Due to our Linux-based hosting architecture and competence in administering Django environments, you can anticipate a robust and optimized setup suitable for Django applications.
Liquid Web's dedication to security, performance, and scalability makes it an excellent choice for hosting your Django project. If you have any questions or problems installing the Django Web Framework on AlmaLinux, please contact our Django experts, who can assist you with installation and configuration.
Related Articles:


About the Author: Mohammed Noufal
Mohammed Noufal is a B.Tech graduate with a decade of experience in server administration and web hosting. He is a father to two daughters and finds fulfillment in their growth. In his free time, he enjoys blogging, sharing experiences, and listening to music. With a strong technical background, family commitment, and creative outlets, he represents a well-rounded life journey.


Our Sales and Support teams are available 24 hours by phone or e-mail to assist.
Latest Articles
Email security best practices for using SPF, DKIM, and DMARC
Read ArticleLinux dos2unix command syntax — removing hidden Windows characters from files
Read ArticleHow to use kill commands in Linux
Read ArticleChange cPanel password from WebHost Manager (WHM)
Read ArticleChange cPanel password from WebHost Manager (WHM)
Read Article