Editing DNS Zone Files in WHM/cPanel
When using custom name servers, it is essential to update the DNS in cPanel/WHM, doing so, is a component of hosting your own DNS. To use custom name servers, you must update the nameservers at your domain’s registrar to match your Liquid Web server’s hostname. If you are unsure how to do this, you can see how in our article Setting Up Private Name servers in WHM/cPanel. It is critical to have created a cPanel account and to add the domain to your WHM panel, if you haven’t already, follow our article, How To: Create a cPanel Account in WHM. Additionally, access to your registrar’s control panel is necessary to update the name servers. If you are questioning who your registrar is, learn how to locate where your domain’s DNS is by following the instructions in our article, Where Is My DNS Hosted?
Knowing your DNS provider is imperative in guaranteeing that you’re pointing your name servers to your Liquid Web server. There is not much use in updating the records you see in WHM if your name servers are not looking to the Liquid Web server. Any updates that you want to take place have to be done so on the authoritative server for DNS (which in this case is Liquid Web), as this is the actual server responding to DNS requests.
Editing DNS Through WHM
Once you’ve set up your custom nameservers and created a cPanel account, the final step is to edit the DNS in your WHM/cPanel account.
If you’re setting your records through WHM/ cPanel and your WHOIS information reflects the correct name servers, then you are ready to make changes to your DNS. There are several different kinds of DNS records that you can set up, but the most essential of the records, and the one I am going to focus on for this article is the A and CNAME records.
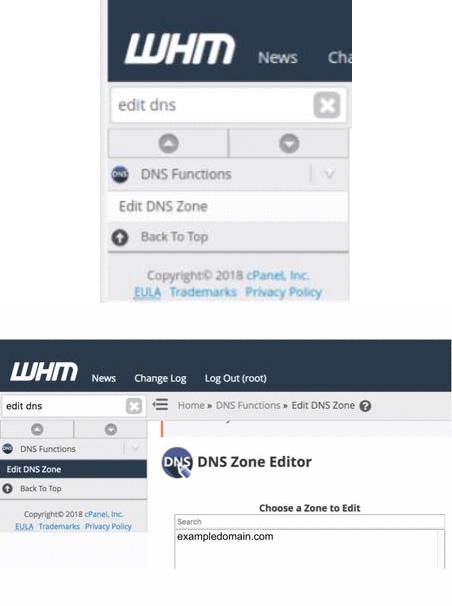
After logging into WHM navigate to “Edit DNS Zone” under “DNS Functions,” and select the domain you want to edit DNS. Once highlighted, select “Edit” to update records on a particular domain.

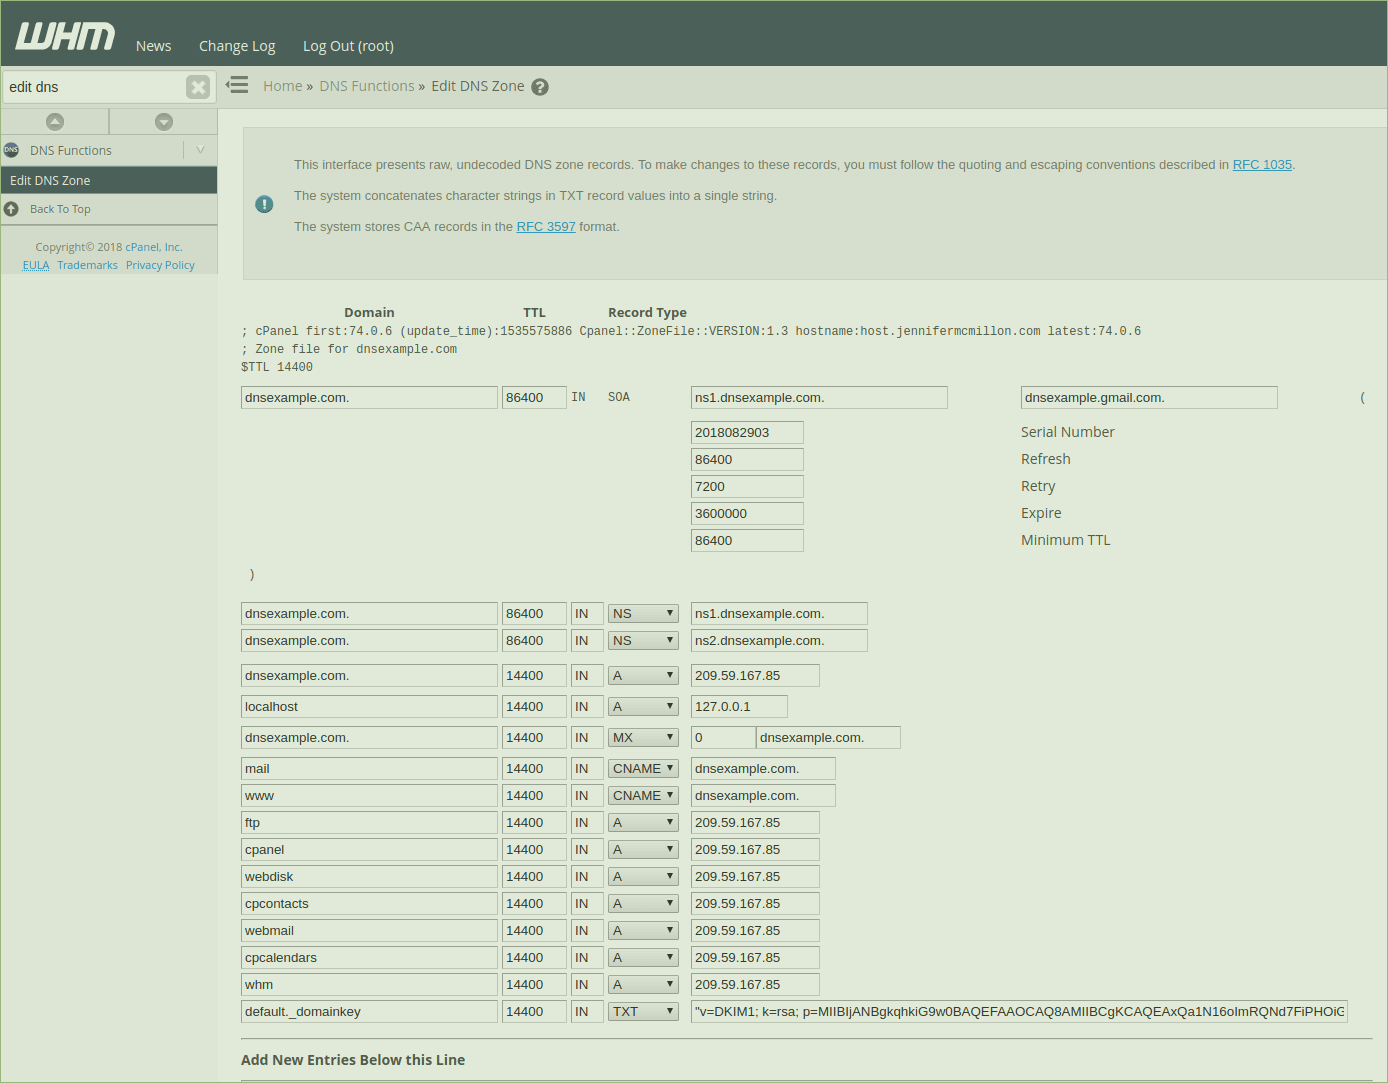
Once you enter the zone file, none of the changes you make will take effect until you save them, so you can back out at any time and start over, a good tactic if you think you have messed up the syntax. Many parts of the zone file will never get changed, so we will focus on the three fields you are most likely to edit:
- Domain
- TTL (Time to Live)
- Record Type
These are significant fields for the function of the DNS, and within each area, specific nuances tend to raise questions from people, but the fundamentals remain very simple. The Domain field should be the domain name followed by a trailing period (.). Anywhere that a Fully Qualified Domain Name (FQDN) is used, never forget the trailing period. If you are not using a FQDN in the domain field, you can use the sub-domain, which does not require the trailing period.
This image shows several different sub-domain names and how their syntax differs from FQDNs:

The TTL column controls how long the record remains cached before it requires the general public to re-request the DNS record from the source. Caching is convenient during times of migration because it can effectively minimize downtime by using a lower TTL! The IN field always needs to be set to IN, so it is best not to make changes to this field.
Lastly, we have the record type, which is twofold: it’s necessary to select the record type and fill in the data field. For example, if you choose to add an A record, an IP address must follow that in the adjacent field. If using a CNAME then you’ll use a FQDN in its adjoining field, again, don’t forget the trailing period!
WHM is broken up into two sections, one section allows for modifying the existing data OR adding a record. In this example, we are going to add an A record a new sub-domain “files.domain.com,” if propagation is a factor we can edit the TTL:

In this example, we’ve added a new record to my zone file using a TTL of 300 seconds and pointed to the IP of the sub-domain. It will take at least 300 seconds, and up to 24 hours in some cases, for you to be able to see that domain from your browser or through a DNS lookup. Once you have added this info, you can save your changes! For the sake of brevity, we will skip the mail exchanger settings.
Editing DNS Through cPanel
So far, we have only discussed editing DNS in WHM. Editing in cPanel is much more straightforward only offering two record options: add an A record, or add a CNAME. CPanel has fewer options and does not give full permission to the Panel user to edit their file, though they can make additional A and CNAME records, necessary for adding such elements as CDNs (Content Delivery Networks) or sub-domains.
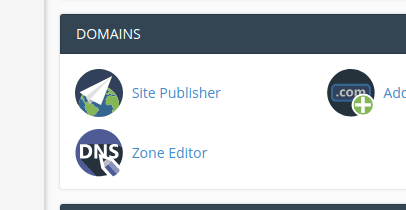
If you need to add an A record through the cPanel you will want to search for and click on “Zone Editor” through the cPanel interface:

Once in the Zone Editor, you will have the option of adding either an A, CNAME, or an MX record. You will see the options next to a plus sign:

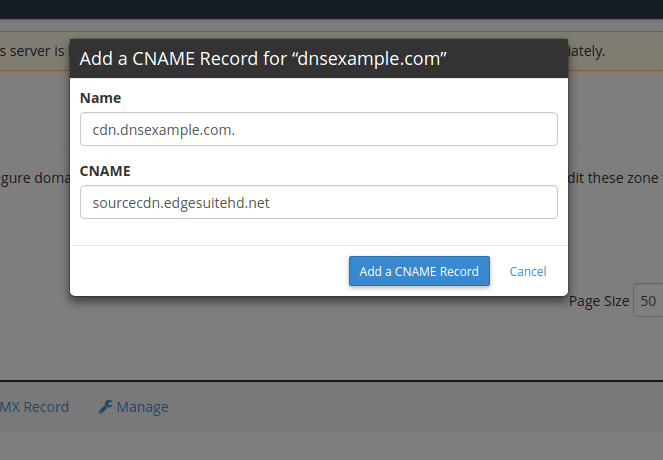
This becomes useful when setting up services like CDN or the like. CDN services typically require a CNAME record to be added. In the following example, we are adding a CNAME to dnsexample.com for the sub-domain cdn.dnsexample.com:

Once complete, select “add” and the record will be saved. One advantage of the cPanel view versus the WHM view of the DNS record is the ability to filter your search by record type:

In closing, when the hosting DNS on your server enables editing through WHM >> Edit DNS Zone. Altering any records will not be reflected changes if the name servers are not pointed to the appropriate server. In general, you won’t touch or need to change most fields in the zone file, except for Domain, TTL and Record Type. Through WHM you can make edits to the existing record or opt to add records. To get started with editing your DNS records and locate your DNS provider our easy to follow DNS article can assist you.
Related Articles:

About the Author: Jennifer McMillon
Our Sales and Support teams are available 24 hours by phone or e-mail to assist.
Latest Articles
Email security best practices for using SPF, DKIM, and DMARC
Read ArticleLinux dos2unix command syntax — removing hidden Windows characters from files
Read ArticleHow to use kill commands in Linux
Read ArticleChange cPanel password from WebHost Manager (WHM)
Read ArticleChange cPanel password from WebHost Manager (WHM)
Read Article


