


Adding a Mailbox in Premium Business Email and Hosted Exchange
Other than the platform you get your mail on, there’s really no difference between how you add a mailbox with your Premium Business Email or Hosted Exchange email. Adding an individual mailbox is an easy process that just takes a few moments, or you can add multiple mailboxes all at one time.
This tutorial will walk you through adding a single mailbox. Select your email plan below to view the instructions:
Premium Business Email
- Log into your Premium Business Email.
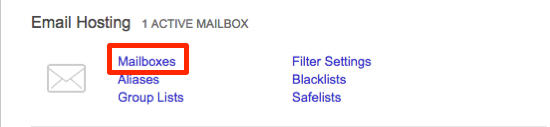
- From the Email Hosting Home page, click on the Mailboxes link.
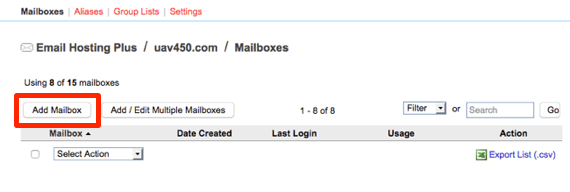
- Click on the Add Mailbox button in the Email Accounts home page.
- In the General tab, fill out the users first and last name, this will populate the Display Name. If you want their name to display differently in the company directory, you can enter a different display name. Next, enter the username (email address) and password.
Note:
The Display Name will not change the email address for the user, if you want to create an alias please see our article Creating an Alias in Premium Business Email.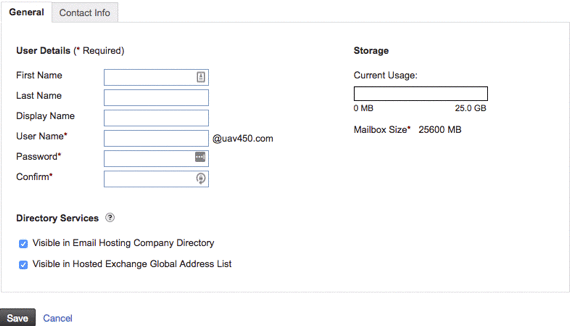
- You can manage the directories they are visible to in the Directory Services section. Make them visible to your company directory or Hosted Exchange address list by checking the box next to the directory.
Adding Contact Information
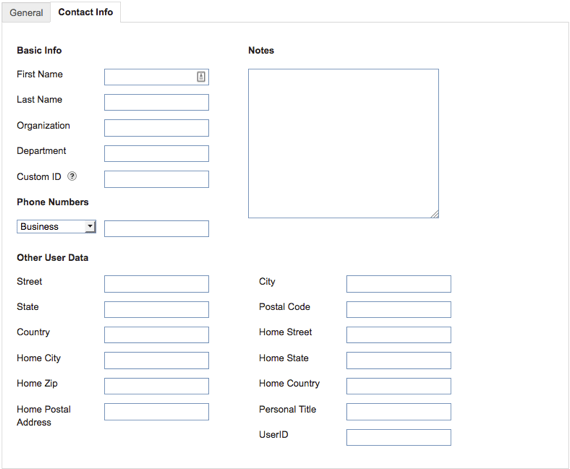
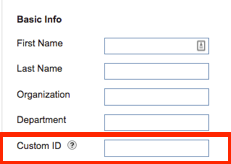
The second tab is Contact Info, and just like it sounds, it houses all the information to contact the user. Enter their name, organization, department, mailing address and phone numbers.
Note:
Hosted Exchange
- Log into your Email control panel.
- Click on the Mailboxes link in the Hosted Exchange section.
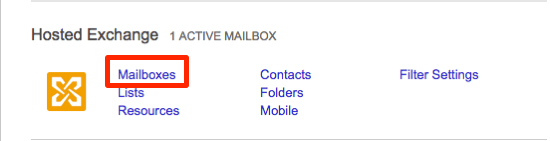
- This will take you to the Email Accounts tab, click Add Mailbox.

- In the General tab, fill out the user’s first and last name, this will populate the Display Name. If you want their name to display differently in the company directory, you can enter a different display name. Next, enter the username (email address) and password.
Warning:
Make sure your users go in and change their passwords after the mailbox is created.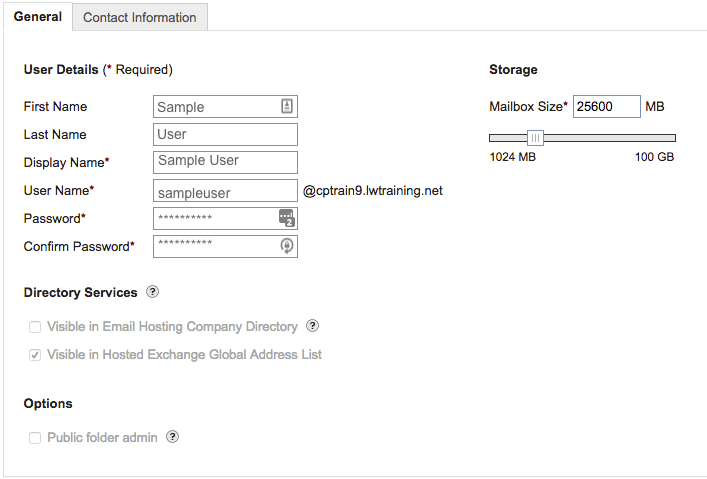
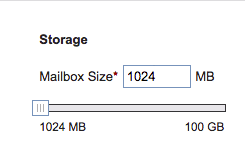
- Select the size of the mailbox by using the slider on the right-hand side of the User Details section.
Adding Contact Information
The second tab is Contact Info, and just like it sounds, it houses all the information to contact the user. Enter their name, organization, department, mailing address and phone numbers.

Note:

Related Articles:


About the Author: Libby White
Former technical writer for Liquid Web. When Libby is not writing for work, she spends time learning more about digital & technical writing, web development, hanging with her family, and taking photographs with her Nikon. Always learning, always growing, never stopping.


Our Sales and Support teams are available 24 hours by phone or e-mail to assist.
Latest Articles
How to use kill commands in Linux
Read ArticleChange cPanel password from WebHost Manager (WHM)
Read ArticleChange cPanel password from WebHost Manager (WHM)
Read ArticleChange cPanel password from WebHost Manager (WHM)
Read ArticleChange the root password in WebHost Manager (WHM)
Read Article