


7 Steps to Using VMware to Clone a VM
The cloning process in VMware is a process in which you create an exact copy of your original virtual machine (VM). A VMware clone has the same hardware, software, and other configurations as the original VM.
Cloning is useful when deploying several virtual machines with the same resource allocation and configurations. The cloning process saves you a lot of time in situations that require new, similar machines fast.
In this article, we will explain how to use the VMware cloning VM function.
Benefits of Cloning a Virtual Machine
The speed and simplicity of the VMware cloning VM process are its biggest advantage. The process of new VM creation can be quite long sometimes because of the OS installation. With cloning, you can quickly deploy multiple virtual machines with the same setup.
Cloning is handy when you’ve just started a new quality assurance (QA) team, and they all need to run tests in the same environment. They can all get their environment in just a few clicks.
Drawbacks of Cloning a Virtual Machine
The only real drawback is that eventually, you may run out of resources. It is easy to create new clones, and you may run out of resources faster than you realize.
When creating many VM clones, you will overload your RAM and CPU at some point. It happens because you will have many virtual CPUs and virtual memory allocated to your virtual machines, not to mention storage space. So just keep in mind how many resources you have at your disposal when you are cloning virtual machines.
How to Clone a Virtual Machine
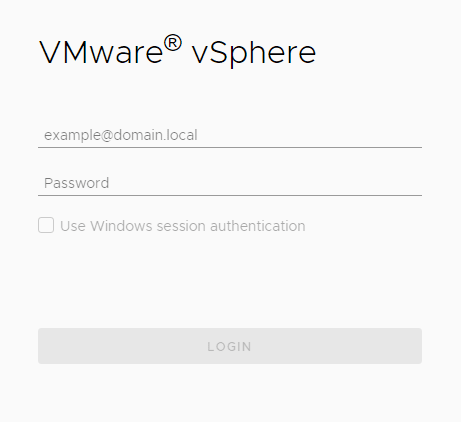
Step 1
Log in to your vSphere client. Each managed VMware cloud hosting here at Liquid Web comes with vSphere. Enter the IP address of the host on which has your vSphere installation. The login page will load. Enter your credentials and click login.
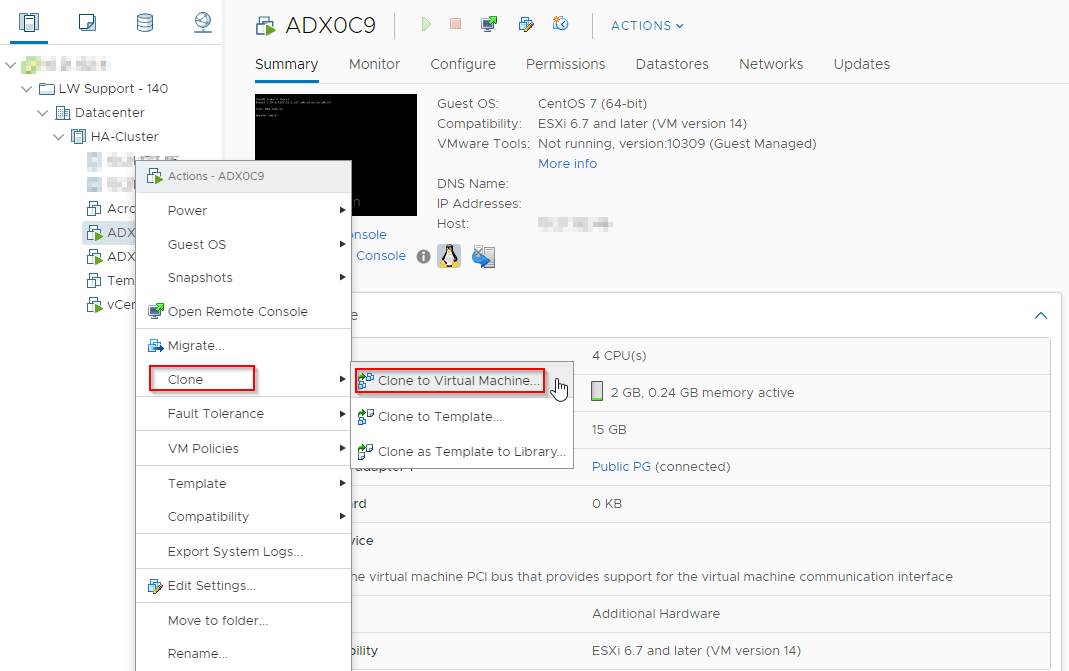
Step 2
Once logged in, navigate to your virtual machines. Choose a VM you wish to clone and right-click on it with your mouse. A menu will appear, and you can hover your mouse pointer over the Clone option. Finally, click on Clone to Virtual Machine.
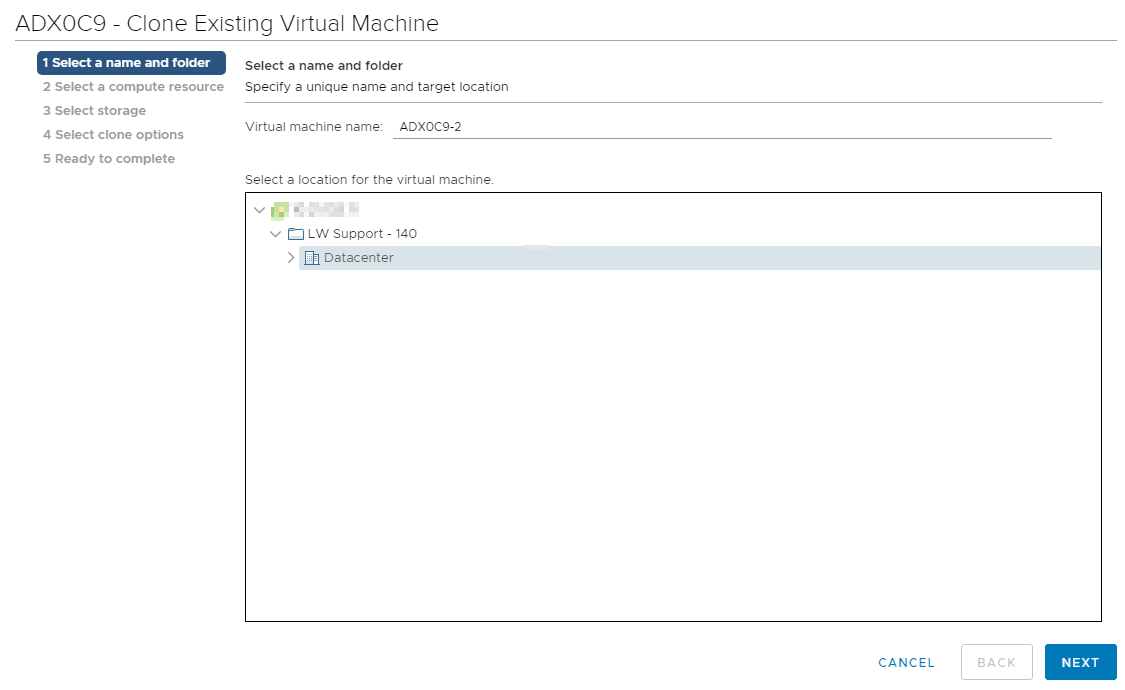
Step 3
Once you go through the process in step 2, a new window will appear. You need to name your VM clone and choose a location for it. Type in the name and select the location of your preference. Once done, click on the Next button in the lower right corner.
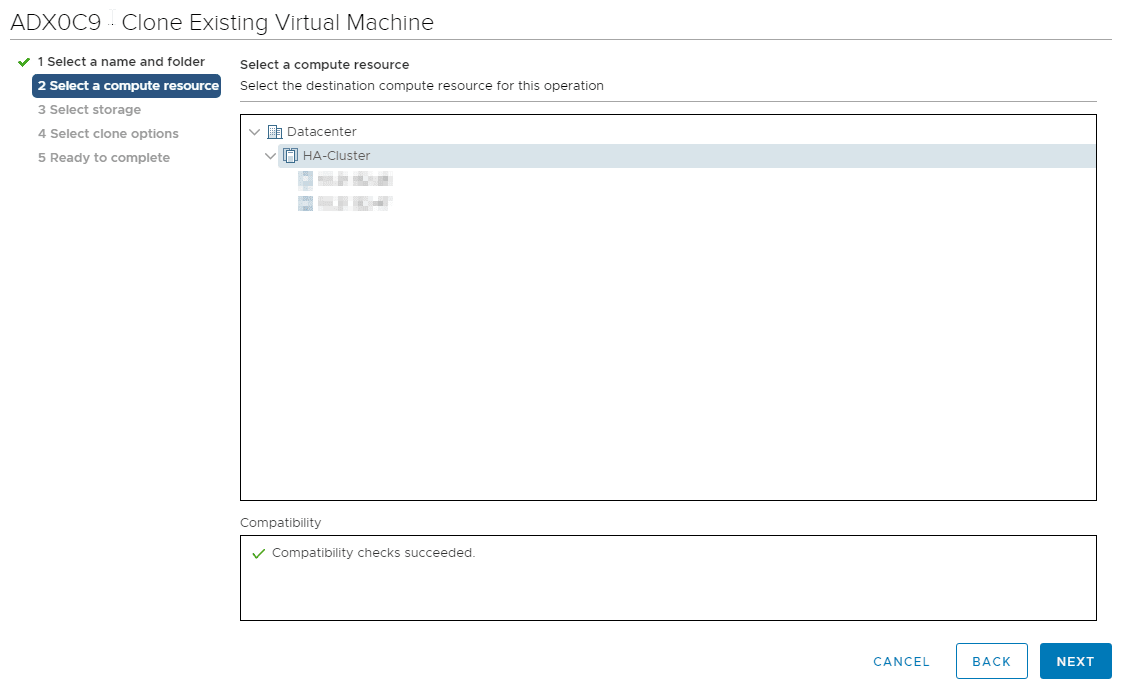
Step 4
Select the destination compute resource for our VMware cloning VM operation and the host for the clone. Once completed, click the Next button again.
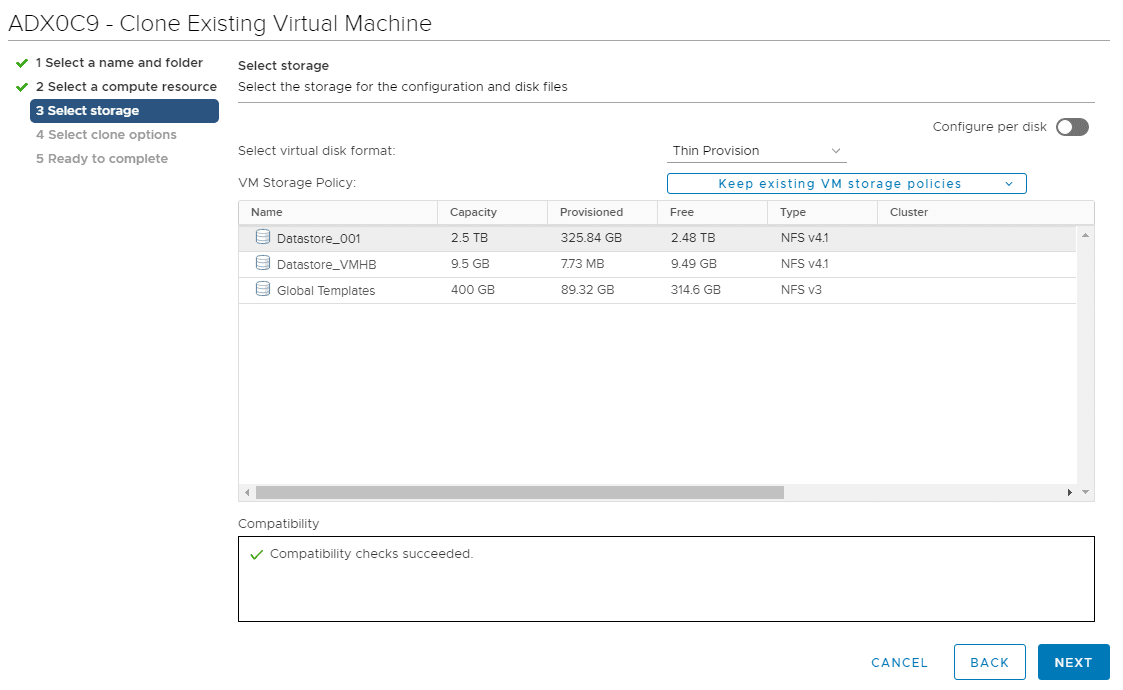
Step 5
Now we are going to select the storage for our VMware clone machine. Choose the disk on which you want to keep configuration files for this VM and click Next when you are ready.
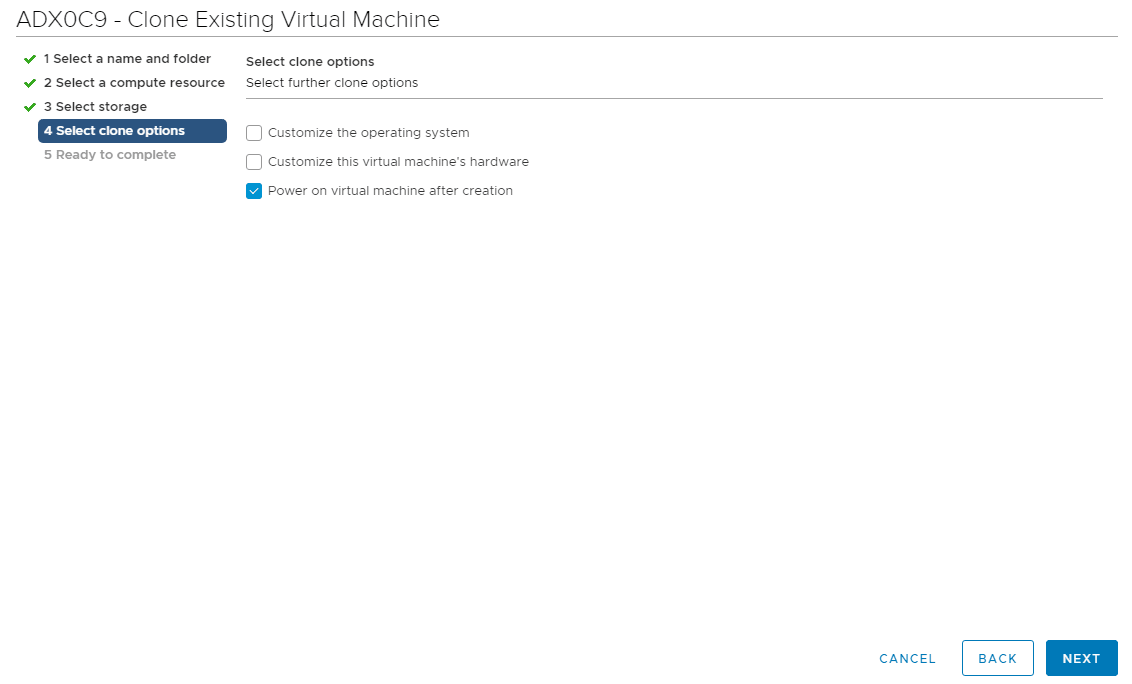
Step 6
You will have a couple of options from which to choose. However, it is worth noting that if you want the exact copy of the original VM, you only need to select Power on virtual machines after creation. It will boot up your freshly cloned VM.
Click Next when ready.
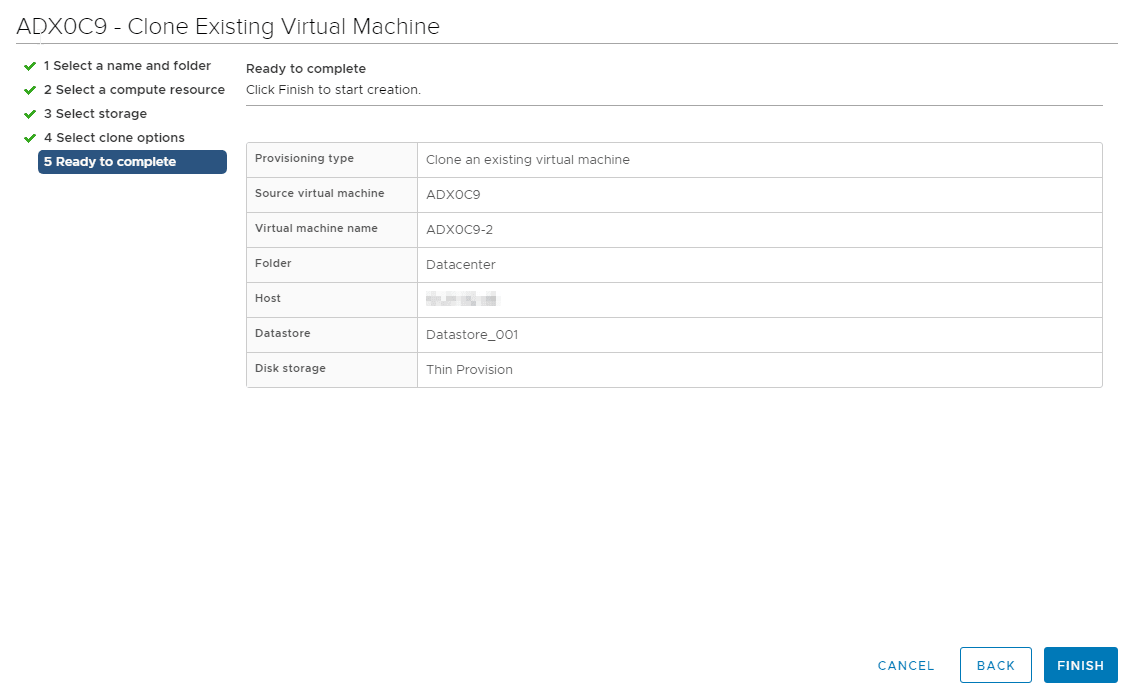
Step 7
Here you see an overview of the previously selected options. Go through them once more, and if everything is correct, click the Finish button. If you want to change something, you can click the Back button to get back to one of the previous steps and make the necessary changes.
Congratulations! You successfully completed the VMware cloning VM process.
Conclusion
We hope that you learned how to clone a virtual machine with VMware and that the whole process of VMware cloning is more straightforward for you. If cloud environments are new to you and you don’t know where to start, take a look into Liquid Web’s private cloud vs public cloud comparison. Have fun with cloning!
For those ready to set up their VMware environment, contact our Sales team to get started.

Related Articles:


About the Author: Dean Conally
I am a Linux enthusiast and console gamer, dog lover, and amateur photographer. I've been working at Liquid Web for a bit less than two years. Always looking for knowledge to expand my expertise, thus tackling new technologies and solutions one day at a time.


Our Sales and Support teams are available 24 hours by phone or e-mail to assist.
Latest Articles
In-place CentOS 7 upgrades
Read ArticleHow to use kill commands in Linux
Read ArticleChange cPanel password from WebHost Manager (WHM)
Read ArticleChange cPanel password from WebHost Manager (WHM)
Read ArticleChange the root password in WebHost Manager (WHM)
Read Article