Utilizing Liquid Web’s CDN with WordPress
You may have read our previous article on the Liquid Web Content Delivery Network, CDN Overview, and may be wondering how to actually use the Liquid Web CDN with your installation of WordPress. Utilizing the W3 Total Cache plugin, it is easier than you think. In fact, W3 Total Cache is among our list of recommended plugins for WordPress.
Although W3 Total Cache offers many performance enhancing options for WordPress, this article will be focusing on the CDN functionality provided. This article will also be written utilizing the Origin Pull CDN methodology, as compared to Origin Storage. Do not worry though, W3 Total Cache offers support for using Origin Storage as well.
At this point, we will go with the assumption that you have ordered a CDN account with us. However, if you have any questions about ordering or configuring a CDN with Liquid Web, do not hesitate to contact a Liquid Web Sales Engineer at the number below.
The process
The first step, if not completed already, is to install and activate the W3 Total Cache plugin. An article on installing WordPress plugins can be viewed in our piece entitled “WordPress Tutorial 3: How to Install a New Plugin, Theme, or Widget” should you require.
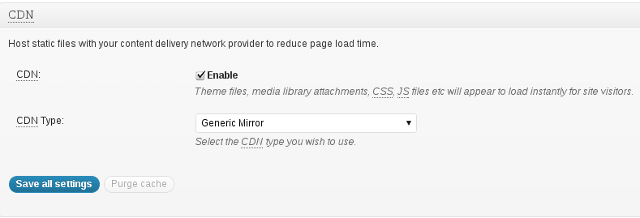
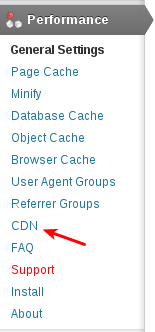
The next step is to open up the settings page for W3 Total Cache, and go to the CDN section. Here, there will be a check box to enable CDN functionality, and then a drop down menu for “CDN Type”. For this, select “Generic Mirror”. After this is done, click the save button.

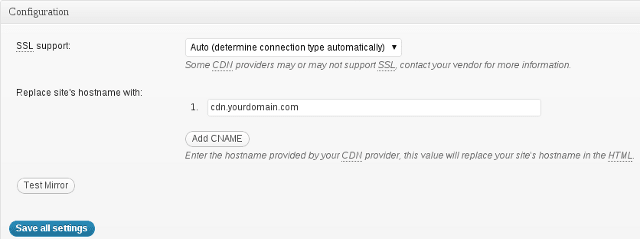
At this point, you will have an alert at the top indicating that you need to populate the “Replace site’s hostname with:”. This is the next step.
To populate this field, go to the CDN settings page for W3 Total Cache.

Enter the CNAME used for your CDN account. This will usually be cdn.yourdomain.com. You do not have to click the “Add CNAME” button, as this is for if you were going to use different CDN accounts for things such as Cascading Style Sheets or JavaScript. Just click “Save All Settings”.

After you save your settings, you will be prompted at the top of the page to deploy your changes. Do so at this time.
Once you have done that, you can verify that your WordPress installation is utilizing the CDN by looking at the source (or another tool in the browser) and checking if the domain used for images and other static content, such as Cascading Style Sheets, is the CNAME for your CDN.
Questions?
If you have any further questions about how to set up your WordPress installation to utilize Liquid Web’s CDN, do not hesitate to contact our Heroic Support team at the number below.
===
Liquid Web’s Heroic Support is always available to assist customers with this or any other issue. If you need our assistance please contact us:
Toll Free 1.800.580.4985
International 517.322.0434
support@liquidweb.com
https://manage.liquidweb.com/
Related Articles:

About the Author: Jason Gillman
Our Sales and Support teams are available 24 hours by phone or e-mail to assist.
Latest Articles
In-place CentOS 7 upgrades
Read ArticleHow to use kill commands in Linux
Read ArticleChange cPanel password from WebHost Manager (WHM)
Read ArticleChange cPanel password from WebHost Manager (WHM)
Read ArticleChange the root password in WebHost Manager (WHM)
Read Article


