


Apache Cassandra install tutorial for Linux (AlmaLinux)
Apache Cassandra is a highly robust, distributed NoSQL database management system that is open-source and designed to handle vast amounts of data across many conventional servers while maintaining high availability and eliminating a single point of failure. It is an Apache Software Foundation initiative frequently used to organize and store structured data across several standard servers. This article will review the prerequisites, installation steps, and configuration features required for a successful Apache Cassandra install on AlmaLinux.
You can start the Apache Cassandra install procedure on AlmaLinux by following the steps provided in this post.
Prerequisites
- Operating System and Version: AlmaLinux OS 8.
- System Access: Ensure you have root or sudo access to install and configure Apache Cassandra.
Step 1. Run the DNF update
1.1. You can use the system update command to confirm that all installed packages are up to date and refresh their repository cache:
sudo dnf update1.2. You may now install the EPEL repository and PowerTools using the following commands:
sudo dnf install yum-utils
sudo dnf install epel-release
sudo dnf config-manager --set-enabled powertools
Step 2. Install the default OpenJDK for Java
2.1. The Apache Cassandra install requires Java to run. Install OpenJDK, which is commonly used with Cassandra. You can use the following command to install OpenJDK:
sudo dnf install java-11-openjdk2.2. After installing OpenJDK, use the following command to check the version:
java --version2.3. Here is the output:
]# java --version
openjdk 11.0.21 2023-10-17 LTS
OpenJDK Runtime Environment (Red_Hat-11.0.21.0.9-1) (build 11.0.21+9-LTS)
OpenJDK 64-Bit Server VM (Red_Hat-11.0.21.0.9-1) (build 11.0.21+9-LTS, mixed mode, sharing)
Step 3. Add the Apache Cassandra repository
Apache Cassandra installation packages are not included in the standard AlmaLinux 8 package repositories and must be added. The key benefit of installing Cassandra from the official repository is that we can confidently receive the most recent software updates using the easy update command. The most recent Apache Cassandra version can be found on the official Apache Cassandra install website. For the purposes of this tutorial, Apache Cassandra version 4.1 will be used.
3.1. First, create the repository using your favorite editor:
sudo nano /etc/yum.repos.d/cassandra.repo3.2. In the file, add the following lines:
[cassandra]
name=Apache Cassandra
baseurl=https://redhat.cassandra.apache.org/41x/
gpgcheck=1
repo_gpgcheck=1
gpgkey=https://downloads.apache.org/cassandra/KEYS
3.3. Then, save the file and update the repository cache using the following command:
sudo dnf updateStep 4. Install the latest Apache Cassandra version on AlmaLinux
4.1. Upon adding the repository, we can easily use the DNF package manager to install the most recent version of Apache Cassandra on AlmaLinux 8:
sudo dnf install cassandra4.2. Here is the output:
~]# sudo dnf install cassandra
Last metadata expiration check: 0:08:11 ago on Thu 16 Nov 2023 01:51:19 AM UTC.
Dependencies resolved.
==============================================================================================================================================================================================================================================
 Package                                                    Architecture                                            Version                                                  Repository                                                  Size
==============================================================================================================================================================================================================================================
Installing:
 cassandra                                                  noarch                                                  4.1.3-1                                                  cassandra                                                   46 M

Transaction Summary
==============================================================================================================================================================================================================================================
Install  1 Package

Total download size: 46 M
Installed size: 56 M
Is this ok [y/N]: y
Downloading Packages:
cassandra-4.1.3-1.noarch.rpm                                                                                                                                                                                   17 MB/s |  46 MB     00:02
----------------------------------------------------------------------------------------------------------------------------------------------------------------------------------------------------------------------------------------------
Total                                                                                                                                                                                                          17 MB/s |  46 MB     00:02
Running transaction check
Transaction check succeeded.
Running transaction test
Transaction test succeeded.
Running transaction
  Preparing        :                                                                                                                                                                                                                      1/1
  Running scriptlet: cassandra-4.1.3-1.noarch                                                                                                                                                                                             1/1
  Installing       : cassandra-4.1.3-1.noarch                                                                                                                                                                                             1/1
  Running scriptlet: cassandra-4.1.3-1.noarch                                                                                                                                                                                             1/1
  Verifying        : cassandra-4.1.3-1.noarch                                                                                                                                                                                             1/1

Installed:
  cassandra-4.1.3-1.noarch

Complete!
Step 5. Start and enable the Apache Cassandra service
5.1. After installation, we must start and enable the Apache Cassandra service to run automatically when the system boots. This can be done by using the following commands:
sudo systemctl start cassandra
sudo systemctl enable cassandra
Step 6. Verify the Apache Cassandra install is running
6.1. To verify the current status of Apache Cassandra, use the following command:
sudo systemctl status cassandra6.2. Here is the output:
]# sudo systemctl status  cassandra
● cassandra.service - LSB: distributed storage system for structured data
   Loaded: loaded (/etc/rc.d/init.d/cassandra; generated)
   Active: active (running) since Thu 2023-11-16 02:05:01 UTC; 7s ago
     Docs: man:systemd-sysv-generator(8)
  Process: 48829 ExecStop=/etc/rc.d/init.d/cassandra stop (code=exited, status=0/SUCCESS)
  Process: 48867 ExecStart=/etc/rc.d/init.d/cassandra start (code=exited, status=0/SUCCESS)
 Main PID: 48976 (java)
    Tasks: 30 (limit: 11968)
   Memory: 1.2G
   CGroup: /system.slice/cassandra.service
           └─48976 /usr/lib/jvm/java-11-openjdk-11.0.21.0.9-2.el8.x86_64/bin/java -ea -da:net.openhft... -XX:+UseThreadPriorities -XX:+HeapDumpOnOutOfMemoryError -Xss256k -XX:+AlwaysPreTouch -XX:-UseBiasedLocking -XX:+UseTLAB -XX:+Resize>
6.3. Also, check if the Apache Cassandra install is operating by going to localhost:9042, as shown below. Remember to wait until Apache Cassandra has loaded all the modules:
nodetool status6.4. Here is the output:
]# nodetool status
Datacenter: datacenter1
=======================
Status=Up/Down
|/ State=Normal/Leaving/Joining/Moving
--  Address    Load        Tokens  Owns (effective)  Host ID                               Rack
UN  127.0.0.1  125.41 KiB  16      100.0%            9f81a238-fdeb-4430-9b0d-e6e664c13f14  rack1
Step 7. Check key configuration files
7.1. The Apache Cassandra data is stored in the location /var/lib/cassandra, while the configuration files are located at /etc/cassandra. The /etc/default/cassandra file allows for setting up Java startup parameters.
7.2. The database can only listen to localhost by default; however, if you want to use the client to connect to Apache Cassandra remotely, we must configure it by modifying the file /etc/cassandra/default.conf/cassandra.yaml.
Step 8. About the Apache Cassandra Query Language (CQL)
The Apache Cassandra Query Language (CQL)is a query language for interacting with the Apache Cassandra NoSQL database. CQL is designed to provide a SQL-like interface, making it more familiar to developers accustomed to relational databases. However, it's important to note that while CQL shares some similarities with SQL, it also has distinct characteristics tailored to the distributed and NoSQL nature of Apache Cassandra.
8.1. To query Apache Cassandra from the terminal, use the command-line tool cqlsh, which comes with the Apache Cassandra package. It requires at least a Python 2 package to be installed on the AlmaLinux system to be used.
8.2. In this article, we'll install Python 3.9, which is installed below:
sudo dnf install python398.3. As shown below, you should set the default Python version if you have various Python versions.
8.4. After installing Python, use the following command to check the version:
python3 --version8.5. Here is the output:
]# python3 --version
Python 3.9.16
8.6. Next, Install the cqlsh tool using PIP:
pip3 install --user cqlsh8.7. Here is the output:
]# pip3 install --user cqlsh
WARNING: Running pip install with root privileges is generally not a good idea. Try `pip3 install --user` instead.
Collecting cqlsh
  Downloading cqlsh-6.1.2-py3-none-any.whl (110 kB)
     |████████████████████████████████| 110 kB 7.0 MB/s
Collecting cassandra-driver
  Downloading cassandra_driver-3.28.0-cp39-cp39-manylinux_2_17_x86_64.manylinux2014_x86_64.whl (19.9 MB)
     |████████████████████████████████| 19.9 MB 55.2 MB/s
Collecting six
  Downloading six-1.16.0-py2.py3-none-any.whl (11 kB)
Collecting geomet<0.3,>=0.1
  Downloading geomet-0.2.1.post1-py3-none-any.whl (18 kB)
Collecting click
  Downloading click-8.1.7-py3-none-any.whl (97 kB)
     |████████████████████████████████| 97 kB 17.1 MB/s
Installing collected packages: six, click, geomet, cassandra-driver, cqlsh
  WARNING: The script geomet is installed in '/root/.local/bin' which is not on PATH.
  Consider adding this directory to PATH or, if you prefer to suppress this warning, use --no-warn-script-location.
  WARNING: The script cqlsh is installed in '/root/.local/bin' which is not on PATH.
  Consider adding this directory to PATH or, if you prefer to suppress this warning, use --no-warn-script-location.
Successfully installed cassandra-driver-3.28.0 click-8.1.7 cqlsh-6.1.2 geomet-0.2.1.post1 six-1.16.0
8.8. After installing cqlsh, use the following command to check the version.
cqlsh --version8.9. Here is the output:
]# cqlsh --version
cqlsh 6.1.0
8.10. You can use the following command to obtain the CQL shell:
cqlsh8.11. Here is the output:
~]# cqlsh
Connected to Test Cluster at 127.0.0.1:9042
[cqlsh 6.1.0 | Cassandra 4.1.3 | CQL spec 3.4.6 | Native protocol v5]
Use HELP for help.
cqlsh>
Step 9. Change cluster name
Updating the cluster name is essential for accurately identifying and managing your Apache Cassandra instance. Changing the default cluster name in Apache Cassandra is a good practice for several reasons:
9.1. Avoiding Conflicts
9.1.1. The default cluster name is often set to "Test Cluster" but using the same default name can lead to conflicts if you have multiple Cassandra clusters in your environment. Changing the cluster name ensures that each cluster is uniquely identified.
9.2. Preventing Unintentional Connections
9.2.1. If you have multiple clusters with the same name in the same network, nodes may unintentionally connect to the wrong cluster. Changing the cluster name helps prevent accidental connections to the wrong cluster.
9.3 Security Considerations
9.3.1. Changing the cluster name can enhance security by adding uniqueness to your Cassandra deployment, making it less predictable to potential attackers.
9.3.2. Switch to CQL Shell and update the cluster name with the UPDATE statement:
UPDATE system.local SET cluster_name = 'Sample Cluster' WHERE KEY = 'local';9.3.3. Then, exit the shell:
exit;9.3.4. Then, in the YAML configuration file, make the following changes:
sudo nano /etc/cassandra/default.conf/cassandra.yaml9.3.5. Replace cluster_name with your cluster's name:
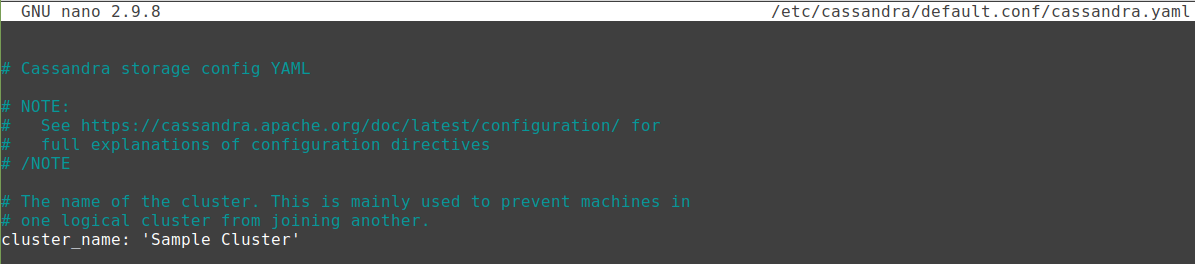
9.3.6. Then, flush the cache and restart the Cassandra service as follows:
nodetool flush system
sudo systemctl restart cassandra
9.3.7. Use the following commands to ensure that the cluster name has been updated:
cqlsh
DESC CLUSTER
9.3.8. Here is the output:
]# cqlsh
Connected to Sample Cluster at 127.0.0.1:9042
[cqlsh 6.1.0 | Cassandra 4.1.3 | CQL spec 3.4.6 | Native protocol v5]
Use HELP for help.
cqlsh> DESC CLUSTER

Cluster: Sample Cluster
Partitioner: Murmur3Partitioner
Snitch: DynamicEndpointSnitch

cqlsh>
Step 10. Enable user authentication
10.1. Open the YAML configuration file:
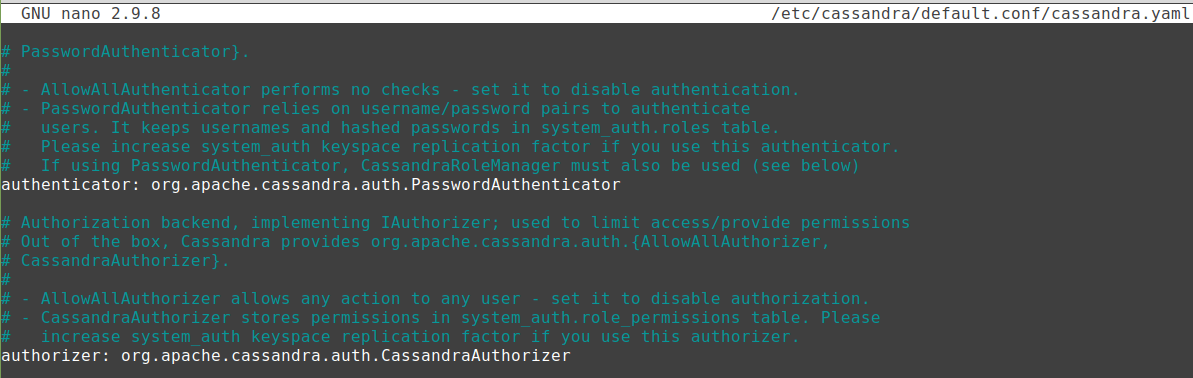
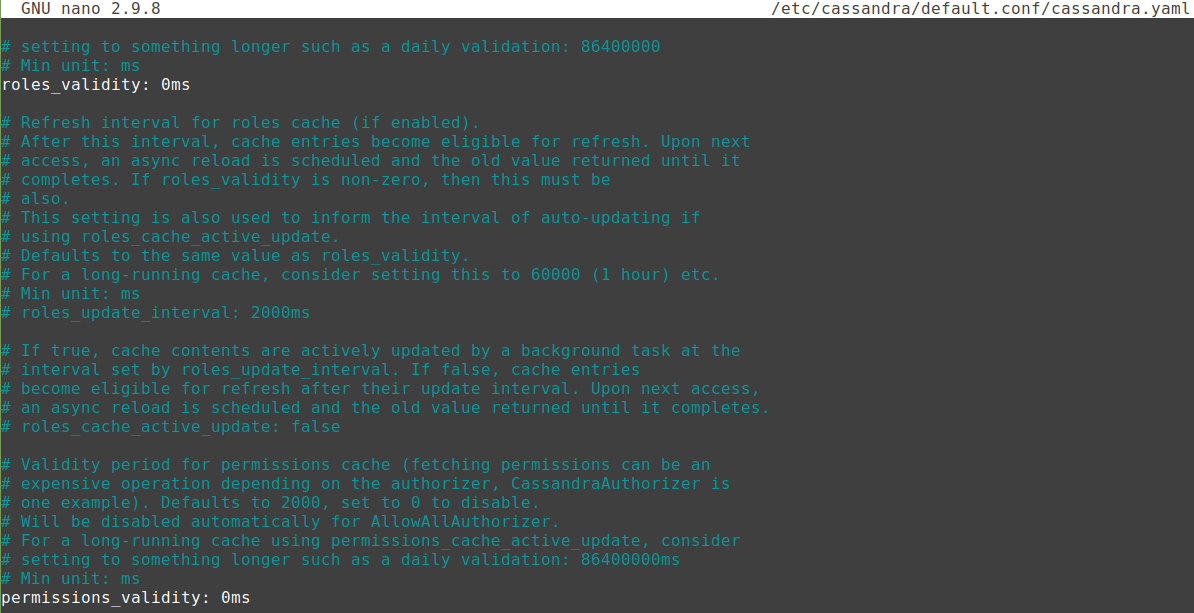
sudo nano /etc/cassandra/default.conf/cassandra.yaml10.2. Then, find the following lines in the file and modify the values as shown below:
authenticator: org.apache.cassandra.auth.PasswordAuthenticator
authorizer: org.apache.cassandra.auth.CassandraAuthorizer
roles_validity: 0ms
permissions_validity: 0ms
10.3. Here is the output:
10.4. Next, Save the file and restart Apache Cassandra:
sudo systemctl restart cassandraStep 11. Add an admin user for your database
11.1. Begin by entering the shell with the default user credentials listed below:
cqlsh -u cassandra -p cassandra11.2. Now use the following command to create a user, replacing the appropriate values:
CREATE ROLE sample_cassandra_user WITH PASSWORD = 'strong_@password' AND SUPERUSER = true AND LOGIN = true;11.3. Remember to replace sample_cassandra_user and strong_@password with the preferred user credentials. Please be warned that using a password on the command line interface is insecure. Therefore, we recommend using the credentials file to provide the password securely.
11,4. Once created, exit the shell:
exit;11.5. Log in again with your new username and password:
cqlsh -u sample_cassandra_user -p strong_@password11.6. Once the newly created user has logged in, disable the superuser or admin access for the default Cassandra user:
ALTER ROLE cassandra WITH PASSWORD = 'cassandra' AND SUPERUSER = false AND LOGIN = false;11.7. Then, grant all permission for your user:
GRANT ALL PERMISSIONS ON ALL KEYSPACES TO 'sample_cassandra_user';exit;11.8. Here is the output:
~]# cqlsh -u cassandra -p cassandra

Warning: Using a password on the command line interface can be insecure.
Recommendation: use the credentials file to securely provide the password.

Connected to Test Cluster at 127.0.0.1:9042
[cqlsh 6.1.0 | Cassandra 4.1.3 | CQL spec 3.4.6 | Native protocol v5]
Use HELP for help.
cassandra@cqlsh> CREATE ROLE sample_cassandra_user WITH PASSWORD = 'strong_@password' AND SUPERUSER = true AND LOGIN = true;
cassandra@cqlsh> quit
]#
]#
]# cqlsh -u sample_cassandra_user -p strong_@password

Warning: Using a password on the command line interface can be insecure.
Recommendation: use the credentials file to securely provide the password.

Connected to Test Cluster at 127.0.0.1:9042
[cqlsh 6.1.0 | Cassandra 4.1.3 | CQL spec 3.4.6 | Native protocol v5]
Use HELP for help.
sample_cassandra_user@cqlsh> ALTER ROLE cassandra WITH PASSWORD = 'cassandra' AND SUPERUSER = false AND LOGIN = false;
sample_cassandra_user@cqlsh> GRANT ALL PERMISSIONS ON ALL KEYSPACES TO 'sample_cassandra_user';
sample_cassandra_user@cqlsh> exit;
]#
]#
]# cqlsh -u cassandra -p cassandra

Warning: Using a password on the command line interface can be insecure.
Recommendation: use the credentials file to securely provide the password.

Connection error: ('Unable to connect to any servers', {'127.0.0.1:9042': AuthenticationFailed('Failed to authenticate to 127.0.0.1:9042: Error from server: code=0100 [Bad credentials] message="cassandra is not permitted to log in"')})
11.9. To use a credentials file, you can follow the steps given in the next sections.
11.9.1. Create a file to store your credentials. For example, you can use a file named cqlshrc:
touch ~/.cqlshrc11.9.2. Open the file in a text editor:
nano ~/.cqlshrc11.9.3. Add the following details to the file, replacing and with your actual Cassandra username and password:
[authentication]
username = <Your_username>
password = <Your_password>
11.9.4. Once the file has been saved, exit the text editor.
11.9.5. Make sure the file has the appropriate permissions to protect your credentials:
chmod 600 ~/.cqlshrc11.9.6. Now, when using cqlsh, you can omit the -u and -p options, and cqlsh will read the credentials from the file:
cqlshHow to update your Apache Cassandra install on AlamLinux
Running the system update and upgrade command will fetch and install the most recent version update because we installed this NoSQL database by adding its repository.
sudo dnf update && sudo dnf upgradeHow to uninstall or remove your Apache Cassandra install
If you want to remove the Apache Cassandra install from your AlmaLinux system, use the package manager:
sudo dnf remove cassandraThen, remove the Apache Cassandra repository:
rm /etc/yum.repos.d/cassandra.repoWrapping up
Deploying a Apache Cassandra install on AlmaLinux can significantly enhance your data management capabilities, providing a scalable and highly available solution for distributed databases. The installation process carefully considers system requirements, dependencies, and configuration settings. Following this article's recommended steps and best practices can ensure a smooth and efficient deployment.
When selecting a hosting plan for Apache Cassandra, Liquid Web's plans should be considered on their merits. We provide a variety of plans that fit the unique needs of a Apache Cassandra install because of our expertise in managed hosting services. Our dedication to performance, security, and support makes us an excellent choice for businesses or individuals looking for a stable hosting environment for their Cassandra databases. You can construct a solid and effective foundation for your distributed database needs by combining the power of Apache Cassandra on AlmaLinux with the hosting services provided by Liquid Web. Working together allows you to use a scalable, high-performance database solution while concentrating on your primary business operations.
Related Articles:


About the Author: Mohammed Noufal
Mohammed Noufal is a B.Tech graduate with a decade of experience in server administration and web hosting. He is a father to two daughters and finds fulfillment in their growth. In his free time, he enjoys blogging, sharing experiences, and listening to music. With a strong technical background, family commitment, and creative outlets, he represents a well-rounded life journey.


Our Sales and Support teams are available 24 hours by phone or e-mail to assist.
Latest Articles
In-place CentOS 7 upgrades
Read ArticleHow to use kill commands in Linux
Read ArticleChange cPanel password from WebHost Manager (WHM)
Read ArticleChange cPanel password from WebHost Manager (WHM)
Read ArticleChange the root password in WebHost Manager (WHM)
Read Article