
 Josh Escobedo
 Imagine a dynamic and responsive web application powered by Node.js, running on your very own server with complete control and flexibility. Sounds like something you might be interested in?
Node.js has emerged as a popular open-source, cross-platform JavaScript runtime environment that executes JavaScript code outside a web browser. This versatile tool enables developers to construct scalable, high-performance web applications that can handle a multitude of simultaneous connections.
To fully harness the power of Node.js, it’s essential to host your applications in an environment that offers robust performance, reliability, and security. This is where virtual private server (VPS) hosting comes into play!
VPS hosting is a cost-effective and flexible hosting solution that offers dedicated resources and complete control over the server environment. Deploying Node.js applications on a VPS can provide numerous benefits over shared hosting, such as a higher level of control and isolation.
By the end of this guide, you’ll have mastered the art of installing, hosting, and optimizing Node.js applications on a VPS, unlocking the full potential of your creations and elevating your web development prowess. Let’s get started on this path to Node.js and VPS success!
Why use Node.js on VPS hosting?
Node.js is an open-source, cross-platform runtime environment allowing developers to execute JavaScript code outside a web browser. It enables server-side execution of JavaScript code, making it possible to build web applications, APIs (application programming interfaces), and various server-side applications using JavaScript.
A virtual private server (VPS) is a virtualized instance that acts as a dedicated server within a larger physical server. It is a virtual machine created using specialized software that allows multiple virtual servers to coexist on a single physical server.
Node.js and VPS hosting are a potent duo, attracting developers seeking an efficient and robust technology stack for their applications – and here’s why:
Asynchronous and non-blocking architecture
Node.js is built on the foundation of an event-driven, non-blocking I/O model. This architecture enables it to handle multiple concurrent connections without blocking the execution of other tasks.
In the context of VPS hosting, this translates to enhanced server performance and responsiveness, as Node.js can efficiently manage numerous requests and operations simultaneously. It is also particularly well-suited for applications that require real-time interactions, like chat applications, online gaming, and collaborative tools.
Lightweight and fast
VPS hosting is all about efficiency and resource management – Node.js excels in this domain as it is incredibly lightweight and boasts a low memory footprint. The lean nature of Node.js allows VPS instances to allocate more resources to other essential processes, improving overall server performance.
Rich package ecosystem
One of the most significant advantages of using Node.js is its vast and vibrant package ecosystem, known as npm (Node Package Manager). With over a million packages available, developers can access a treasure trove of pre-built modules and libraries to expedite development.
This extensive collection covers almost every aspect of web development, from front-end frameworks to back-end utilities, making it a boon for developers working on VPS-hosted applications.
Scalability
Scalability is a critical concern when it comes to VPS hosting, especially for applications expecting high traffic and user loads. Adjacently, Node.js offers a straightforward approach to horizontal scaling, where additional servers are added to handle increased demand.
Cross-platform compatibility
VPS hosting often involves managing servers running different operating systems. Node.js’s cross-platform compatibility allows developers to write code that works seamlessly across various environments.
This eliminates the need to rewrite applications for specific platforms, saving time and effort while ensuring consistency in functionality.
Dedicated resources and complete control
VPS hosting provides guaranteed RAM, CPU, and storage. This allocation of dedicated resources ensures consistent performance for your Node.js applications, regardless of the traffic volume.
Even more, with VPS hosting, users have root access to their servers, allowing the configuration of the server environment according to specific requirements and facilitating the optimal performance of Node.js applications.
Security
Compared to shared hosting, VPS hosting offers a more secure environment. Each virtual server is isolated from the other, reducing the risk of cross-site contamination and keeping your Node.js app safeguarded.
Cost-effectiveness
VPS hosting provides the benefits of a dedicated server at a fraction of the cost. This makes it an affordable solution for businesses of all sizes.
After reviewing the advantages of running your Node.js project on a VPS, it’s time to dive into how to do it.
Step-by-step guide for Node.js installation
For this tutorial, we will be covering the process of installing Node.js on a VPS operating on popular Linux distributions such as Ubuntu and CentOS.
Step 1: Access your VPS
If you’re connecting to the Linux VPS from a Windows OS, you have three options to choose from:
1. Using the OpenSSH and running the following command:
ssh username@your_VPS_IP
2. Using the Windows Subsystem for Linux, which you can easily install from the Microsoft Store.
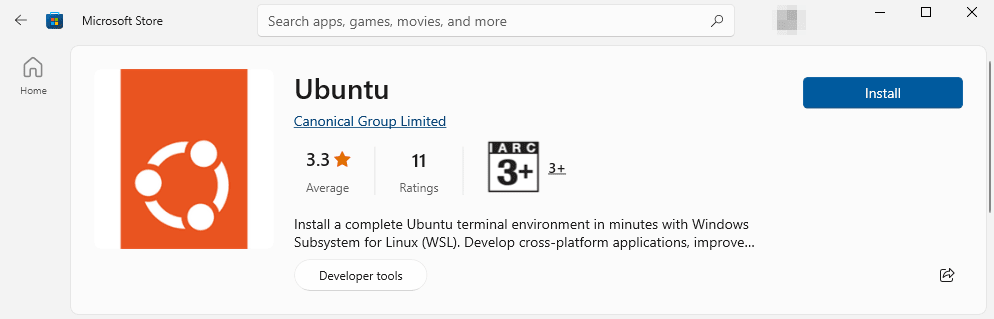
Once installed, open the Terminal as you would on a Linux machine and run the following command:
ssh username@your_VPS_IP3. Using PuTTy, a popular SSH client for Windows. Once you download and install PuTTy, launch it, enter your VPS’s IP address or hostname, then press Open.

Step 2: Update your VPS
Before installing Node.js, it’s essential to ensure your VPS is updated to keep your system secure and stable.
Using the package managers (APT for Ubuntu and YUM for CentOS), update the package lists and upgrade the installed packages by running the following commands from the Terminal:
For Ubuntu
sudo apt update
sudo apt upgrade
For CentOS
sudo yum updateIn general, it’s a good idea to reboot your VPS after you’ve updated your VPS to guarantee the changes are applied.
Step 3: Install Node.js
For Ubuntu
1. Install the Curl command-line tool, which is used to transfer data to or from a server. It’s required to download the setup script for Node.js:
sudo apt install curl2. NodeSource is a popular repository for Node.js that provides up-to-date versions of Node.js for various Linux distributions. Choose the Node.js version that you want from NodeSource, then run the following command and change 18.x to the version number you chose:
curl -fsSL https://deb.nodesource.com/setup_18.x | sudo -E bash -3. Install Node.js and npm (Node Package Manager) using the following command:
sudo apt-get install -y nodejs4. Verify the installation by checking the versions of Node.js and npm:
node --versionnpm --versionFor CentOS
1. Install the Curl command-line tool:
sudo yum install curl2. NodeSource is a popular repository for Node.js that provides up-to-date versions of Node.js for various Linux distributions. Choose the Node.js version that you want from NodeSource, then run the following command and change 18.x to the version number you chose:
curl -fsSL https://rpm.nodesource.com/setup_18.x | sudo -E bash -3. Install Node.js and npm using the following command:
sudo yum install -y nodejs4. Verify the installation by checking the versions of Node.js and npm:
node --versionnpm --versionThat’s it – you have now installed Node.js on your Ubuntu or CentOS system VPS from the NodeSource repository. You can start using Node.js to run JavaScript applications on your machine.
Remember to always check the Node.js website for the latest version and adjust the commands according to your requirements. It’s generally a best practice to choose the latest long-term support (LTS) version.
Step 4: Manage your Node.js applications
Let’s now create a simple Node.js app to see how to start and stop it.
1. Create a new file named app.js using your preferred text editor (for example, nano):
nano app.jsFor the sake of this tutorial, the app.js will include the following simple code:
// app.js
const http = require('http');

const hostname = 'your_VPS_IP';
const port = your_port_number;

const server = http.createServer((req, res) => {
  res.statusCode = 200;
  res.setHeader('Content-Type', 'text/plain');
  res.end('Hello, World!\n');
});

server.listen(port, hostname, () => {
  console.log(`Server running at http://${hostname}:${port}/`);
});
2. Install the PM2 process manager globally on your VPS to manage your Node.js apps efficiently.
sudo npm install -g pm23. To start the Node.js app, run the following command:
pm2 start app.js4. To stop the application:
pm2 stop app.js5. You can view the status of the running applications on your VPS by executing the following command:
pm2 list6. You can view logs of a specific application using this command:
pm2 logs appStep 5: Keep your application running
It’s crucial to ensure your Node.js applications continue running even after your server reboots or crashes for several reasons, including:
- Uptime and reliability: If your Node.js application crashes or stops running after a server reboot, it can lead to downtime, causing inconvenience to users and potentially affecting business operations.
- Fault tolerance: Servers can experience unexpected failures for various reasons, such as hardware issues, software bugs, or external factors. By ensuring your Node.js applications can recover automatically and continue running, you increase the fault tolerance of your system.
- User experience: Users expect reliable and uninterrupted service. If your application crashes and requires manual intervention every time the server restarts, it can lead to frustration and a negative user experience.
- Data integrity: If your Node.js application handles critical data, abrupt shutdowns can result in data loss or corruption. By ensuring the application gracefully handles server reboots or crashes, you can protect data integrity.
- Cost efficiency: Manual intervention to restart applications after a server crash can be time-consuming and may require additional resources. Automatically restarting the application saves time and reduces operational costs.
The PM2 process managers can automatically restart your Node.js applications, keeping them up and running. Here’s how to set up PM2 to manage your apps automatically:
1. Run the following to generate the sudo command to set up the startup script:
pm2 startup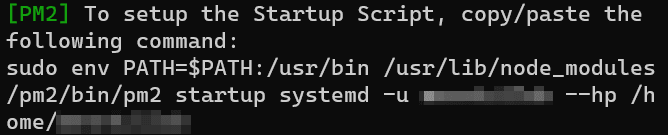
2. Run the following command to save the current list of applications being managed by PM2 so they can automatically restart:
pm2 saveStep 6: Updating Node.js
Keeping your Node.js installation up to date is important for ensuring optimal performance and security.
If you used the NodeSource repository for installation, you can update Node.js with the commands sudo apt-get update and sudo apt-get upgrade for Ubuntu or sudo yum update for CentOS.
Deploying Node.js applications on VPS
Now that you have installed Node.js on your VPS and understand how to manage your applications, it’s time to deploy your Node.js application. The process can vary depending on the specifics of your VPS and your application, but here is a general outline of the steps you’ll need to follow:
- Access your VPS using SSH (step 1).
- If your application’s code is hosted on a version control system like Git, clone your repository onto your server using a command like git clone your_repository_url.
- Navigate to your application’s directory using the cd your_application_directory command.
- Use npm install to install any dependencies your application needs. This command reads the package.json file in your app directory and installs all the necessary dependencies listed there.
- Use a package like dotenv to store your variables in a .env file.
- Start your application just like we did before in step 4.
- (Optional) If you’re serving a web application, you may want to set up a reverse proxy to route incoming HTTP/S requests to your Node.js application. You can use a web server like Nginx or Apache for this.
- (Optional) If you have a firewall enabled, ensure that it’s configured to allow traffic to your Node.js application (or to your web server if you’re using a reverse proxy).
- Test your app by visiting your server’s IP address (or domain name, if you have one set up) in a web browser. If everything is set up correctly, you should see your application running.
To modernize your deployment process, consider implementing containerization with Docker:
- Create a Dockerfile for your Node.js application
- Build and test your container locally
- Set up a CI/CD pipeline using platforms like Jenkins or GitHub Actions
- Implement automatic deployment triggers on code changes
- This approach ensures consistent deployments across different environments and simplifies scaling.
With these steps, you should be able to deploy your Node.js application on your VPS successfully!
Best practices for optimizing Node.js performance
To get the most out of your Node.js application on a VPS, consider the following recommended strategies:
- Use a reverse proxy: Web server software like Nginx or Apache can handle incoming requests and serve static assets, reducing the load on your Node.js application.
- Configure caching and gzip compression: These techniques can significantly reduce load times and bandwidth usage, improving the user experience.
- Implement load balancing: If your application receives a lot of traffic, you might benefit from distributing that traffic across multiple instances of your application.
- Monitor performance: Tools like New Relic or Datadog can help you identify and address performance bottlenecks.
- Regularly update Node.js and its dependencies: Keeping your software up to date is critical for ensuring optimal performance and security.
- Code splitting and lazy loading: Break your application into smaller chunks that load only when needed to improve initial load times.
- Memory leak detection and prevention: Regularly profile your application to identify and fix memory leaks that can degrade performance over time.
- Database query optimization: Structure your queries efficiently and use indexing to minimize database response times.
- Connection pooling: Reuse database connections instead of creating new ones for each request to reduce overhead.
- Proper error handling and logging strategies: Implement comprehensive error handling to prevent crashes and use structured logging for easier debugging.
- Use monitoring tools like New Relic or Datadog to track these metrics in real-time.
Nevertheless, the realm of Node.js on VPS is rife with complexities where oversight can lead to sluggish performance, mysterious crashes, and vulnerable security gaps. Let’s go over the most frequent problems and their fixes.
Common issues and solutions for Node.js on VPS
- Permission issues when installing Node.js or its dependencies: If you’re having trouble installing Node.js or its dependencies, it might be due to permission issues. Try running the commands with sudo or check the ownership and permissions of the relevant directories and files.
- Application crashes or unresponsiveness due to insufficient resources: Crashing or unresponsive apps might be because your VPS doesn’t have enough resources (CPU, RAM, etc.). Consider upgrading your VPS or optimizing your application to use resources more efficiently.
- Slow performance caused by misconfigurations or outdated software: If your application is running slowly, it might be due to misconfigurations or outdated software. Check your application and server configurations, and make sure you’re running the latest versions of Node.js and all its dependencies.
Troubleshooting involves careful observation and systematic problem-solving – it’s vital when you stumble upon an issue that you check logs, adjust resource allocations, and update software as needed.
Choosing the right Node.js VPS hosting provider
Imagine your Node.js application as a ship sailing the vast seas of cyberspace, destined for success. The VPS hosting provider you choose will serve as your trusty crew, responsible for steering the ship, maintaining its performance, and ensuring its safe passage through tumultuous waves and calm waters alike.
This critical decision can shape the course of your online projects, propelling your application toward success or causing it to miss business opportunities. Selecting a VPS hosting provider that specializes in Node.js hosting can significantly impact the performance and security of your app.
One particular web hosting provider that stands out is Liquid Web – a leading provider of managed hosting, cloud services, and managed applications, catering to a diverse range of customers, from small startups to large enterprises. Liquid Web’s commitment to delivering top-notch customer support, cutting-edge technologies, and unwavering reliability has earned it a stellar reputation.
Among the plethora of key features and benefits that make Liquid Web an excellent choice for Node.js VPS hosting include:
- Multiple hosting plans: Liquid Web offers various hosting plans with different levels of processing power, RAM, and storage space. This flexibility can accommodate different types of Node.js applications, from small, lightweight apps to larger, more resource-intensive ones. Plus, with easy scalability, you can upgrade or downgrade your plan as your needs change.
- Faster 10Gbps network: A fast network ensures quick data transfers and minimal latency for your Node.js applications, improving the user experience.
- Full management and control panel: Liquid Web’s plans include full VPS management and a control panel, allowing easy server and application management. Additionally, root access gives you complete control of your environment, which can be helpful for advanced configurations and tasks.
- Robust security features: Liquid Web includes security features like DDoS protection, firewalls, and ServerSecure Advanced Security, which can help protect your Node.js application from threats.
- 100% network and power uptime service level agreements (SLAs): These guarantees ensure that your application will remain accessible and performant, which is critical for business continuity.
- Fully managed hosting: Liquid Web handles tasks such as server and hardware management, security patches, OS upgrades, and real-time proactive monitoring. This can be a significant advantage if you prefer to focus on your application rather than server hosting and management tasks.
- Excellent customer support: Liquid Web has a strong reputation for good customer support, which is crucial when encountering issues or needing guidance.
With its managed hosting services, cutting-edge infrastructure, and customer-centric approach, Liquid Web offers hosting solutions that empower businesses and individuals to thrive online. Whether launching a new website or seeking to upgrade your existing hosting, Liquid Web’s robust offerings and commitment to excellence make it a compelling choice.
Get started with Liquid Web’s Node.js VPS hosting today
Deploying your Node.js applications on a VPS offers numerous benefits, including improved performance, greater control, and cost-efficiency. However, the success of your deployment largely depends on the hosting provider you choose.
Liquid Web stands out as a powerful and dependable choice for hosting Node.js apps on a VPS. With flexible hosting plans, a fast network, hardy security features, and exceptional customer support, Liquid Web provides an environment where your Node.js applications can thrive.
Even better, Liquid Web’s fully managed hosting allows you to focus on your application while our team of experts handles your server management tasks so you can be assured a smooth, hassle-free Node.js app hosting experience.
Related Resources
How to install Node.js on Linux (AlmaLinux)
Installing Node.js on Windows Servers
How to Configure and Deploy CloudLinux’s Node.js Selector