

While modern IT applications have come a long way in making business operations easier, the same degree of simplicity doesn’t extend to backend application development. Instead, developers have to deal with different frameworks, various APIs, and a multitude of dependencies to get their everyday programs to work.
But how do they manage all that? Kubernetes.
Kubernetes remains the most widely adopted container orchestration tool, holding approximately 92% of the market share, according to SlashData’s report. Developed by Google, it allows developers to package applications and their dependencies together so they can run everywhere, irrespective of the environment. In this guide, we’ll explore how you can set up Kubernetes on bare metal servers to get even more benefits out of Kubernetes.
- What is bare metal Kubernetes?
- Benefits of bare metal Kubernetes
- How to deploy Kubernetes on bare metal
- Best practices for deploying Kubernetes on bare metal
- Bare metal Kubernetes: Considerations
- Final thoughts: Kubernetes on bare metal — what you need to know
What is bare metal Kubernetes?

In traditional Kubernetes deployments, virtual machines act as intermediaries between the hardware and containers.
Bare metal Kubernetes, however, refers to the deployment of Kubernetes on a bare metal server. In other words, it involves running clusters and containers directly on physical servers, bypassing virtual machines and the abstraction layers of hypervisors.
Due to its direct deployment on physical hardware, it consumes fewer resources, has lower fees, offers more management control, and can reduce network latency by up to three times compared to VM-based setups.
Benefits of bare metal Kubernetes

Due to the direct access to hardware resources, bare metal Kubernetes offers several benefits.
Resource efficiency
Without the virtualization layer, bare metal Kubernetes has access to all the hardware resources, including CPU, RAM, and storage. It’s no longer working with a limited capacity because of a virtualization overhead.
So, if you have small form-factor hardware, you can rely on bare metal Kubernetes to run your development operations without giving your precious resources to a virtualization layer. The absence of this abstraction layer also leads to a significant boost in performance.
Reduced latency
Bare metal Kubernetes can also reduce network latency by up to three times. This makes it an ideal choice for workloads with demanding performance requirements, such as big data processing, live video streaming, machine learning analytics, and deploying 5G stacks in telecommunications, where low latency is paramount. In these scenarios, bare metal ensures that applications can harness the full power of the hardware and deliver fast, responsive results. Additional hardware options like GPUs can deliver best in speed and reliability.
Lower costs
Bare metal servers are ideal for core business processes and offer significant cost savings.
Organizations with established on-premise applications find running Kubernetes on existing bare metal infrastructure more affordable than migrating to the cloud.
Additionally, the absence of virtualization also means you don’t have to deal with the licensing costs of virtualization technologies — which means saving hundreds or even thousands of dollars.
Plus, if you specifically pay for backend-managed services, you don’t have to incur those expenses, either.
Management and control
Bare metal Kubernetes gives you more control over the ecosystem, as you have full access to the server’s complete configuration. You no longer deal with a black box in the shape of virtualization software.
Besides that, you can configure your own network settings, security protocols, and access restrictions without worrying about virtualization-specific issues.
Physical isolation
If you’ve ever undergone a security audit, you’ll know that the best way to breeze through it is to get a physical server and keep it locked away in a basement.
Bare metal Kubernetes gives you a similar kind of isolation by letting you deploy your applications on a single-tenant physical server without any external interactions.
Want more Kubernetes guidance?
Download the complete guide to Kubernetes on bare metal, crafted by the experts at Liquid Web.
Effective load balancing
Ensuring consistent access to applications is critical, and load balancing is essential to achieving this goal. In a bare metal environment, load balancers like MetalLB and kube-vip play a pivotal role. They facilitate the effective distribution of network traffic, guaranteeing that applications remain accessible and responsive.
How to deploy Kubernetes on bare metal

Deploying Kubernetes on a bare metal server involves checking off a few prerequisites, installing Kubernetes tools, and configuring the cluster using the terminal.
Prerequisites
- Two or more Linux servers running Ubuntu 18.04.
- Access to a user account with sudo or root privileges on each server.
- The apt package manager.
- A terminal window or command-line access. We recommend using Kubectl, a command-line tool designed explicitly for Kubernetes.
Step-by-step deployment process
1. Set up physical machines
a. Install operating system: Choose a lightweight Linux distribution (e.g., Ubuntu, CentOS, CoreOS) and install it on your bare metal servers.
b. Configure network settings: Ensure each machine has a unique IP address.
c. Assign hostnames: Edit /etc/hostname and /etc/hosts to assign descriptive hostnames (e.g., master-node, worker01) to each machine.
2. Install container runtime
a. For Ubuntu or CentOS: Install Docker:
sudo apt-get update

sudo apt-get install docker.io

sudo systemctl enable docker
b. For CoreOS: Use rkt (Rocket) as the container runtime.
3. Disable swap
Prevent Kubernetes from relying on swap space by running:
sudo swapoff -a4. Install Kubernetes tools
a. Add Kubernetes repositories and install dependencies:
sudo apt-get update

sudo apt-get install -y apt-transport-https curl

curl -s https://packages.cloud.google.com/apt/doc/apt-key.gpg | sudo apt-key add -

echo "deb http://apt.kubernetes.io/ kubernetes-xenial main" | sudo tee /etc/apt/sources.list.d/kubernetes.list

sudo apt-get update
b. Install Kubernetes tools:
sudo apt-get install -y kubelet kubeadm kubectl kubernetes-cni5. Initialize and configure master node
a. Initialize master node:
sudo kubeadm init --pod-network-cidr=10.244.0.0/16b. Configure kubectl on master node:
mkdir -p $HOME/.kube

sudo cp -i /etc/kubernetes/admin.conf $HOME/.kube/config

sudo chown $(id -u):$(id -g) $HOME/.kube/config
Save the kubeadm join command: Note the output command to join worker nodes.
6. Install a pod network add-on
kubectl apply -f https://raw.githubusercontent.com/coreos/flannel/master/Documentation/kube-flannel.ymlReplace the URL if you use a different pod network add-on.
7. Join worker nodes to the cluster
sudo kubeadm join <master-node-ip>:6443 --token <token> --discovery-token-ca-cert-hash sha256:<hash>Replace placeholders with actual values from the kubeadm init output.
8. Verify cluster status
kubectl get nodes9. Deploy applications
kubectl create deployment nginxtest1 --image=nginxBest practices for deploying Kubernetes on bare metal
By setting up a bare metal Kubernetes cluster, you can bypass many of the struggles you might be having with virtualization technology. That said, to ensure you start off on the right foot, stick with the following best practices.
Choose your machines wisely
Not all bare metal nodes are equal. Consider the hardware specifications and location of servers. Servers in a public cloud may lack control and long-term cost benefits compared to self-owned servers. Tailor your server choice to your workload types and use cases.
Being realistic about performance is also important; overestimating your hardware’s capabilities can lead to overcommitment and resource exhaustion. Conduct thorough benchmarking and performance testing to understand your infrastructure’s true capabilities.
Regularly update and upgrade your hardware
Keeping your hardware up to date is crucial. Regular upgrades help you take advantage of technological advancements and ensure security and performance are maintained.
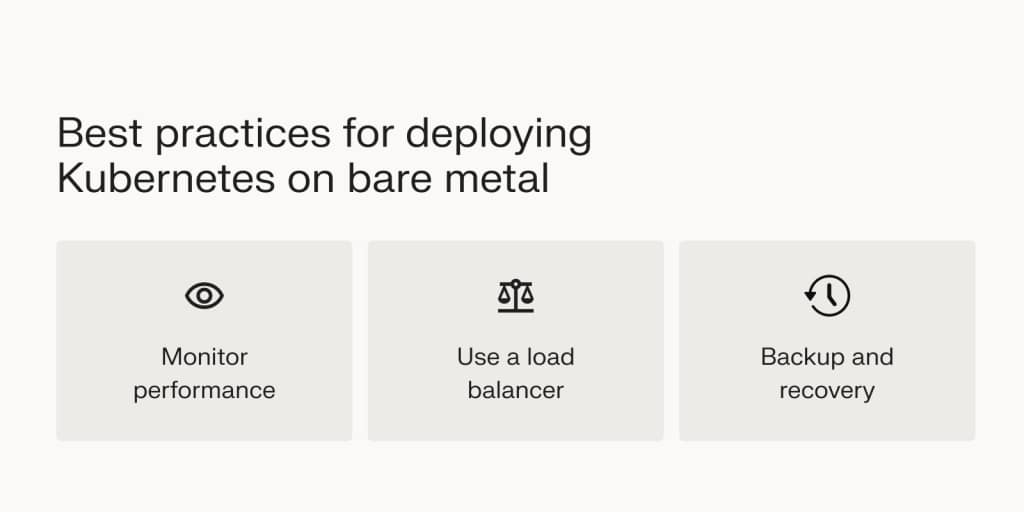
Monitor performance
Track the performance and health of the Kubernetes cluster to identify issues, optimize resource allocation, and avoid sudden failures.
In particular, monitor CPU, memory, and storage usage across the nodes to ensure resource efficiency. Tools like Prometheus and Grafana provide comprehensive insights into your cluster’s performance metrics, helping identify and address potential bottlenecks or inefficiencies.
Additionally, setting up automated alerts for critical events ensures prompt notification of issues, allowing quick responses to performance degradation, resource exhaustion, or other critical incidents. This approach maintains the smooth operation of your infrastructure.
Use a load balancer
If you’re using multiple master nodes in your configuration, set up a load balancer to distribute traffic among them to ensure high availability. A load balancer, such as MetalLB or kube-vip, distributes the incoming requests among the available nodes to prevent a single point of failure. This approach enhances the resilience of your cluster and ensures consistent access to your applications.
Automate node provisioning
Streamlining the process of adding and configuring nodes in your cluster can significantly reduce manual effort and the potential for errors. Using automation tools like MAAS (Metal as a Service) or Tinkerbell, you can automate node provisioning, ensuring consistent and efficient deployment across your infrastructure.
Automating node provisioning reduces manual effort, saves time, and ensures consistent configuration across your infrastructure. This approach not only enhances scalability and reduces the time required to expand your cluster but also minimizes the risk of configuration errors, thereby enhancing the reliability of your deployments.
Avoid OS sprawl
Maintaining OS consistency and avoiding OS sprawl is vital for smooth operations across your Kubernetes cluster. Use a standardized operating system image for all nodes to maintain uniformity. This practice simplifies management, updates, security patching, and troubleshooting.
Avoiding OS sprawl and ensuring uniform application of updates, patches, and configurations reduces compatibility issues and simplifies administrative tasks. Consistency in the OS environment helps maintain the reliability and efficiency of your infrastructure.
Backup and recovery
Accidents can happen even with all the precautions. So, ensure you have a recovery solution for critical data.
Typically, you can rely on etcd snapshots to restore the Kubernetes to the last good state. Store these backups in alternative locations, such as off-site storage or cloud services.
Having a robust backup strategy ensures that you can quickly restore your cluster in the event of data loss or corruption. Note that there is an absence of image-based backups, so relying on application-level backups is necessary.
Hybrid deployment
Depending on your workload requirements, it might be beneficial to use a combination of VMs and bare metal nodes. This hybrid approach allows you to take advantage of the flexibility of VMs for certain applications while leveraging the performance benefits of bare metal for others. Carefully evaluate your workload requirements to determine the best mix for your deployment.
Bare metal Kubernetes: Considerations

While bare metal Kubernetes offers several advantages, you must also consider the challenges associated with deployment:
- Technically intensive: A bare metal Kubernetes needs hands-on involvement from the IT team compared to VM-based Kubernetes. Your IT team will need to handle hardware provisioning, networking configuration, and workload optimization manually.
- Absence of image-based backups: Unlike with VMs, you don’t have snapshots or images to facilitate backup and recovery operations. Instead, you must rely on application-level backups to ensure disaster recovery.
- Susceptible to node failure: In bare metal Kubernetes, each node is a separate physical machine. So, if a node fails due to operating system (OS) issues, all the hosted containers come to a stop, as well.
- Backup and migration: Due to the absence of virtualization, creating backups of bare metal servers or migrating them to different hardware can be more challenging. You can’t rely on VM snapshots or image-based backups for this purpose.
Final thoughts: Kubernetes on bare metal — what you need to know
By configuring Kubernetes on a bare metal server, you can get direct access to hardware resources, reduced latency, and lower costs. So, if you’re developing an application with high performance requirements, running Kubernetes on bare metal is a great way to start off the process.
Following best practices, carefully planning your deployment, and incorporating specific tools and strategies, you can leverage the full potential of bare metal Kubernetes to achieve a robust, efficient, and resilient system tailored to meet your organization’s specific workload requirements.
That said, bare metal Kubernetes also comes with its own set of challenges, including operational complexity and the need for technical expertise. So, consider VM-based machines, as well, if you have a small IT team.
Whatever your choice, opt for a supportive hosting provider like Liquid Web for your bare metal or cloud metal needs to ensure you have external support to lean on if an issue arises.