Enabling Two-factor Authentication (2FA) for CloudVPN
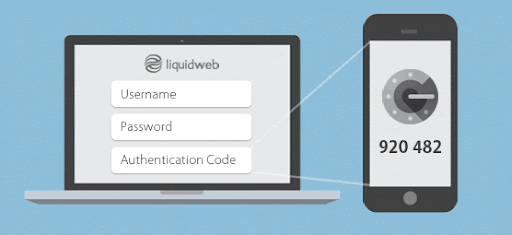
What is Two-factor Authentication (2FA)?
Two-factor authentication (also known as 2FA) means that instead of just a password (one factor), you will need two factors (password, plus a rotating authentication token) to login to your Liquid Web CloudVPN account. Only the correct combination of the first and second factors will allow you to log in. Two-factor authentication is more secure than one-factor authentication. 2FA is required for CloudVPN access.
1. Login to your Liquid Web Portal
Navigate to your Liquid Web Portal and sign in with your username and password.
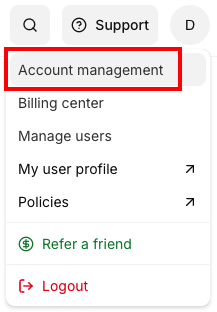
2. Navigate to the Account Security section
Once you’re logged into your Liquid Web Portal, click on the Account tab in the top menu, and then click on the Account Management in the dropdown.
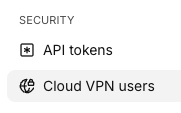
3. Security
Scroll down to the Security section and click on Cloud VPN Users.
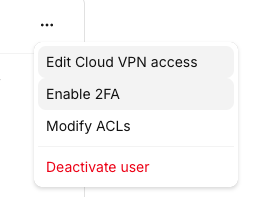
4. Select VPN Users
If you have previously setup a VPN user, you should have at least one user listed in the USERS window. Select Cloud VPN USERS, choose the user you’d like to enable two-factor authentication for, click the 3 dots icon, and click Enable Two-Factor:
You’ll receive a new expanded view for the particular user for which you’re going to enable two-factor authentication, that will include a key and a QR Code. Download a two-factor authentication app like Duo Mobile or Google Authenticator, then enter the key or scan the QR Code with the app:
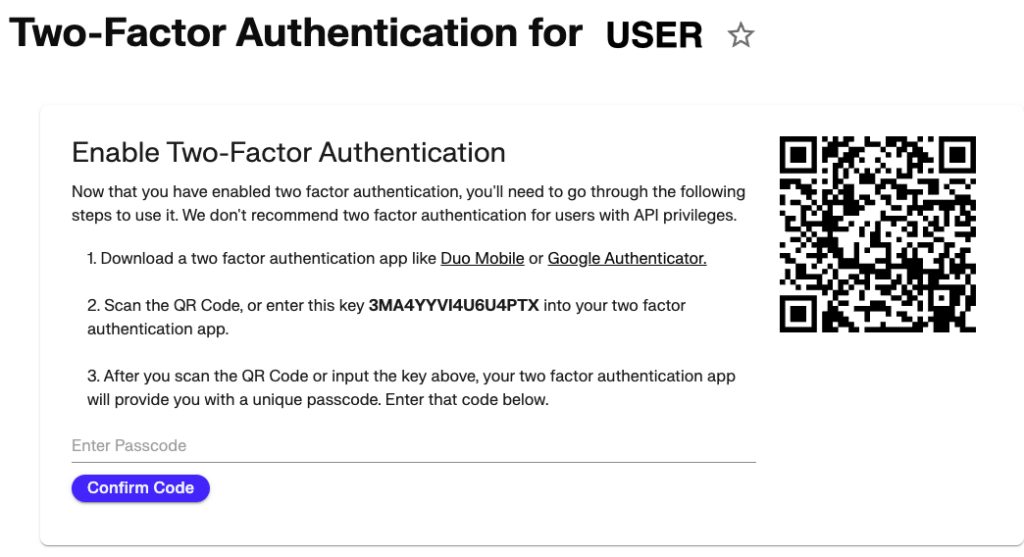
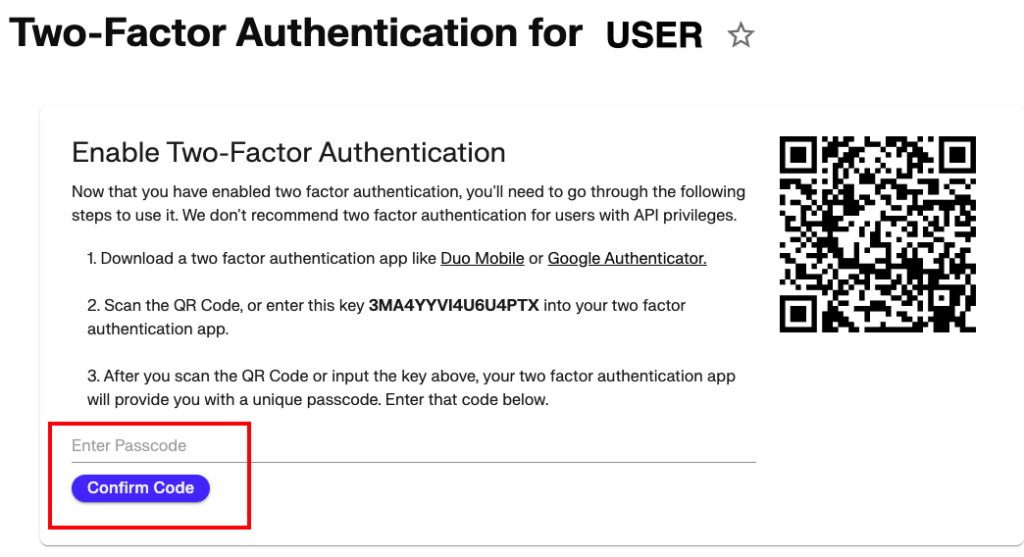
Then, enter the unique passcode into the Enter Passcode field. Then click on Confirm Code:
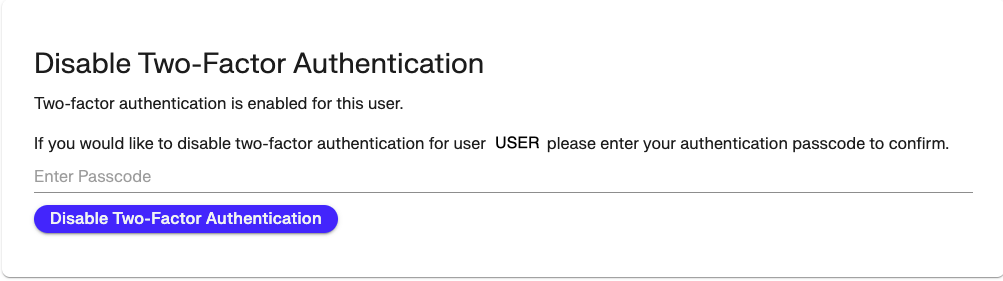
If this is successfully confirmed, you should see this window indicating 2FA is enabled and how to disable. You can navigate away from this window by clicking Users or Account or Home in the breadcrumbs.
5. Visually verify Two-factor Authentication is Enabled
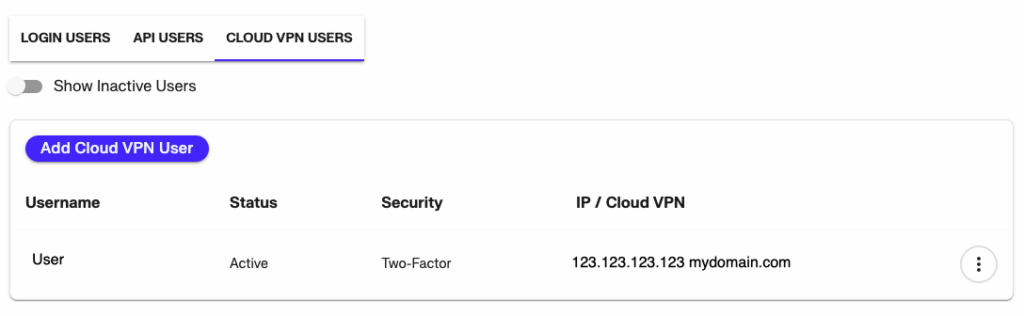
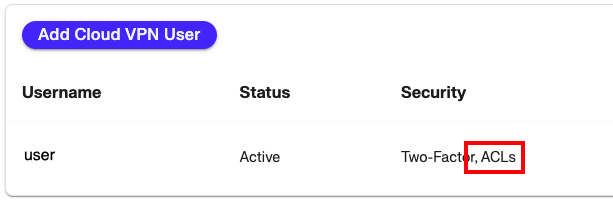
If you’ve enabled two-factor authentication, then the Security field will display Two-Factor and the 3 dots menu option will display Disable Two-Factor instead of Enable Two-Factor:
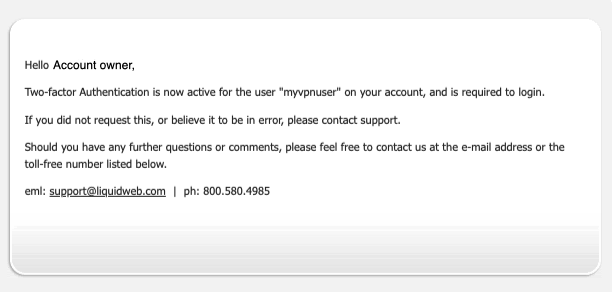
6. Email Notification
You’ll also receive an e-mail notification with the following information:
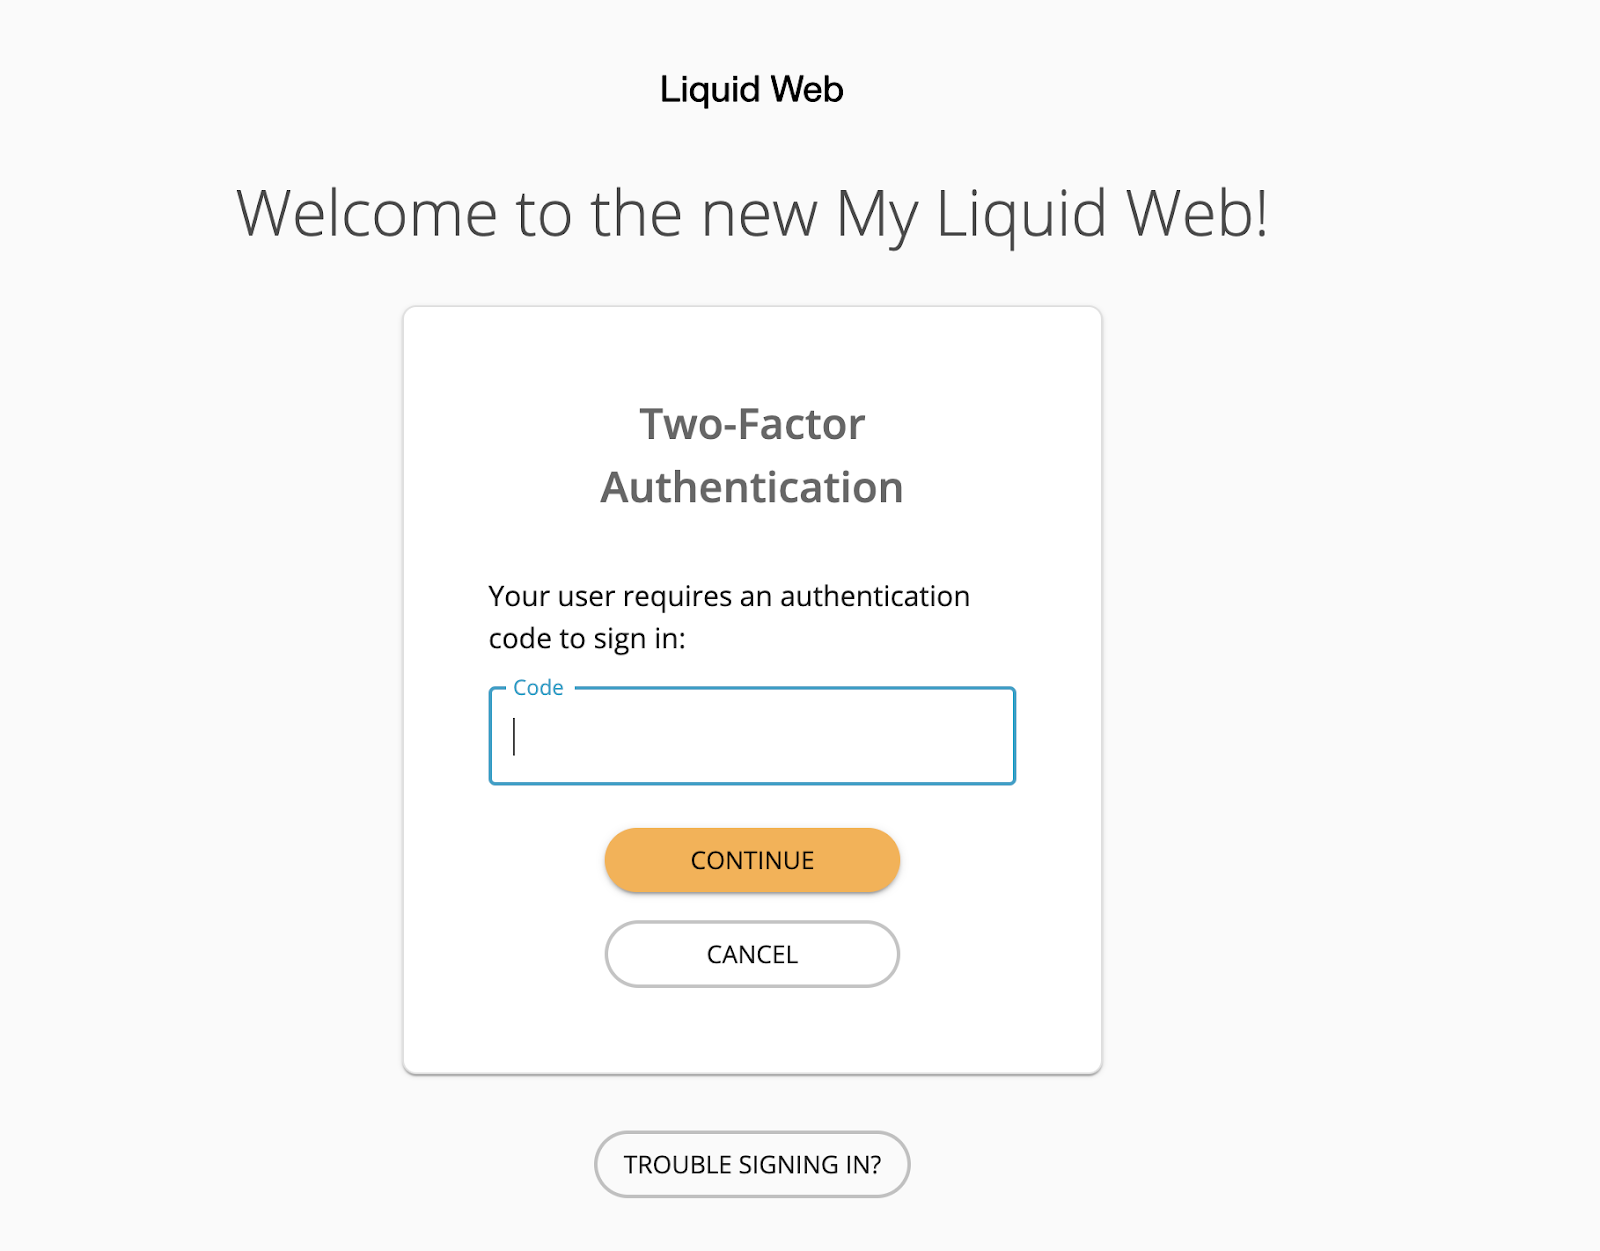
7. Verify that 2FA is enforced for your user
Logout of the Liquid Web Portal and log back in using your Cloud VPN username.
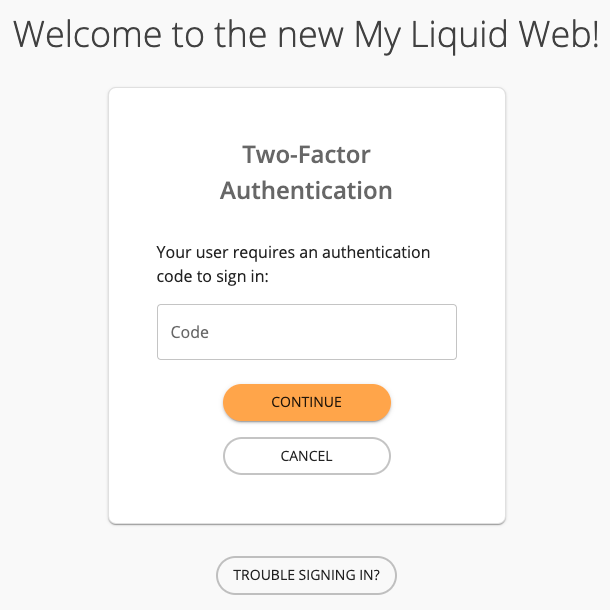
After entering in your VPN username and valid password, you should see the 2FA screen next. Provide the code from your 2FA device.
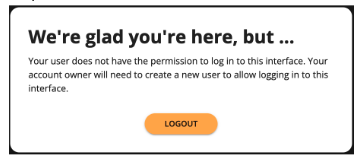
If you successfully provide your 2FA code, you will see the below screen. This indicates that your VPN username, password, and 2FA code entry was all successful, but this user type does not have access to the portal.
8. Use your 2FA when logging into a VPN client
In your VPN client of choice, when asked for username, use your VPN username (example: mycloudvpn). When prompted for password, provide your VPN password and your 2FA code, without spaces, as the password.
Frequently asked questions
Occasionally, this error can be caused by Google Authenticator not displaying a correct code. Sometimes the Authenticator app is simply not synced correctly.
Sync the app manually by following these steps:
- Go to the main menu on the Google Authenticator app
- Click Settings
- Click Time correction for codes
- Click Sync now
You may have enabled the Access Control List (ACL). The ACL restricts access to specified IP addresses. You may need to whitelist the IP address you are attempting to access the CloudVPN from. For more information about using ACLs, see Securing your Cloud VPN using ACLs.
Whitelist your IP address by following these steps:
Navigate to your CloudVPN User management page in your Liquid Web Portal.
Verify the relevant CloudVPN user has ACLs enabled
Obtain your IP address using our IP Address Checker.
Back in your Liquid Web portal to the right of the relevant CloudVPN user click the three dots for more options
Click Edit ACLs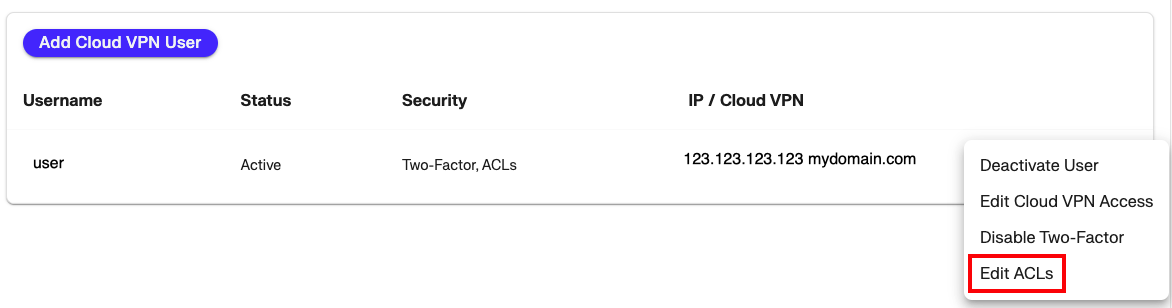
Either update the IP address in the existing ACL or Add Another ACL
Click Save ACLs