


How to Install WordPress on Linux (AlmaLinux)
Installing WordPress on Linux (AlmaLinux) offers a powerful combination of user-friendliness, customization options, security, and community support. It is a significant choice for individuals and businesses seeking an online presence. This knowledge base article will show you how to install WordPress on Linux — specifically AlmaLinux.
Liquid Web hosting can make your WordPress website outperform other web hosting providers. Our web hosting blog can assist you in incorporating superb content into the pages of your website.
Steps to Install WordPress on Linux (AlmaLinux)
Prerequisites for Learning How to Install WordPress On Linux
- Operating System: AlmaLinux OS 8.
- System Permissions: Use the sudo command as root or a user with administrative capabilities to log into the AlmaLinux 8 system.
You can follow these steps in the next sections to install WordPress on Linux (AlmaLinux).
Step 1: Update the DNF Repository Cache
The system update command using Dandified YUM (DNF) can set up a new system repository cache containing an updated list of the packages still available for installation from the system repositories:
sudo dnf updateStep 2: Install Apache HTTPd on AlmaLinux
A web server is required to serve WordPress webpages via a browser over a local or internet network. You can install the Apache HTTP Server by running the following command:
sudo dnf install httpd -yYou can run the following commands to start the httpd service and configure it to execute on boot:
sudo systemctl start httpd
sudo systemctl enable httpd
To verify the status of the httpd service, you can run the following command:
sudo systemctl status httpdHere is the output:
~]# sudo systemctl status httpd
● httpd.service - The Apache HTTP Server
   Loaded: loaded (/usr/lib/systemd/system/httpd.service; enabled; vendor preset: disabled)
   Active: active (running) since Mon 2023-08-28 03:08:33 UTC; 10s ago
     Docs: man:httpd.service(8)
 Main PID: 22773 (httpd)
   Status: "Running, listening on: port 80"
    Tasks: 213 (limit: 11968)
   Memory: 28.3M
   CGroup: /system.slice/httpd.service
           ├─22773 /usr/sbin/httpd -DFOREGROUND
           ├─22774 /usr/sbin/httpd -DFOREGROUND
           ├─22775 /usr/sbin/httpd -DFOREGROUND
           ├─22776 /usr/sbin/httpd -DFOREGROUND
           └─22777 /usr/sbin/httpd -DFOREGROUND
Run the following commands to enable HTTP and HTTPS services if Firewalld is configured:
sudo firewall-cmd --permanent --zone=public --add-service=http
sudo firewall-cmd --permanent --zone=public --add-service=https
sudo systemctl reload firewalld
You can check that everything is working properly by going to http://your-server-ip-address or http://your-domain.com. If everything is set up correctly, you should be welcomed by the standard Apache page for your version of the Apache httpd service.
Step 3: Install the MariaDB Database Server
You can install MariaDB by running the command:
sudo dnf install mariadb-server mariadbYou can run the following commands to start the MariaDB service and configure it to execute on boot:
sudo systemctl start mariadb
sudo systemctl enable mariadb
To verify the status of the MariaDB service, you can run the following command:
sudo systemctl status mariadbHere is the output:
~]# sudo systemctl status mariadb
● mariadb.service - MariaDB 10.3 database server
   Loaded: loaded (/usr/lib/systemd/system/mariadb.service; enabled; vendor preset: disabled)
   Active: active (running) since Mon 2023-08-28 03:13:17 UTC; 43s ago
     Docs: man:mysqld(8)
           https://mariadb.com/kb/en/library/systemd/
 Main PID: 26464 (mysqld)
   Status: "Taking your SQL requests now..."
    Tasks: 30 (limit: 11968)
   Memory: 84.0M
   CGroup: /system.slice/mariadb.service
           └─26464 /usr/libexec/mysqld --basedir=/usr
MariaDB installation is not secure by default. Run the following command to secure your MariaDB server after installing the database software. This command initiates a series of security configurations to enhance the protection of your MariaDB installation:
sudo mysql_secure_installationHere is the output:
~]# sudo mysql_secure_installation

NOTE: RUNNING ALL PARTS OF THIS SCRIPT IS RECOMMENDED FOR ALL MariaDB
      SERVERS IN PRODUCTION USE!  PLEASE READ EACH STEP CAREFULLY!

In order to log into MariaDB to secure it, we'll need the current
password for the root user.  If you've just installed MariaDB, and
you haven't set the root password yet, the password will be blank,
so you should just press enter here.

Enter current password for root (enter for none):
OK, successfully used password, moving on...

Setting the root password ensures that nobody can log into the MariaDB
root user without the proper authorisation.

Set root password? [Y/n] Y
New password:
Re-enter new password:
Password updated successfully!
Reloading privilege tables..
 ... Success!

By default, a MariaDB installation has an anonymous user, allowing anyone
to log into MariaDB without having to have a user account created for
them.  This is intended only for testing, and to make the installation
go a bit smoother.  You should remove them before moving into a
production environment.

Remove anonymous users? [Y/n] Y
 ... Success!

Normally, root should only be allowed to connect from 'localhost'.  This
ensures that someone cannot guess at the root password from the network.

Disallow root login remotely? [Y/n] Y
 ... Success!

By default, MariaDB comes with a database named 'test' that anyone can
access.  This is also intended only for testing, and should be removed
before moving into a production environment.

Remove test database and access to it? [Y/n] Y
 - Dropping test database...
 ... Success!
 - Removing privileges on test database...
 ... Success!

Reloading the privilege tables will ensure that all changes made so far
will take effect immediately.

Reload privilege tables now? [Y/n] Y
 ... Success!

Cleaning up...

All done!  If you've completed all of the above steps, your MariaDB
installation should now be secure.

Thanks for using MariaDB!
Then, to make the changes effective, you must restart the database service:
sudo systemctl restart mariadbAt this point, you are halfway there in terms of installing WordPress on AlmaLinux. There are just a few more steps. Continue reading for those instructions.
Step 4: Install PHP and PHP Extensions
As of this writing, the PHP version available in the AlmaLinux repositories is 7.2, which WordPress does not support. To install PHP 8.1, you must utilize Remi's RPM Repository, in which the "RPM" acronym stands for RPM Package Manager or Red Hat Package Manager (RPM). However, please be aware that adding external repositories can introduce risks to system stability and security. We recommend thoroughly researching any repositories you add and exercising caution.
To install the Extra Packages for Enterprise Linux (EPEL) release, run the following command:
sudo dnf install epel-releaseTo add the remi repositories, run the following command:
sudsudo dnf install https://rpms.remirepo.net/enterprise/remi-release-8.rpmTo update repositories, run the following command:
sudo dnf updateRun the following command to reset the PHP module to its default state:
sudo dnf module reset phpTo enable the remi PHP 8.1 module, run the following command:
sudo dnf module enable php:remi-8.1To install PHP and other supporting packages, run the following command:
sudo dnf install psudo dnf install php php-curl php-bcmath php-gd php-soap php-zip php-mbstring php-mysqlnd php-xml php-intl php-zip To verify the installed PHP version, run the following command:
php -vHere is the output:
~]# php -v
PHP 8.1.22 (cli) (built: Aug  1 2023 16:16:09) (NTS gcc x86_64)
Copyright (c) The PHP Group
Zend Engine v4.1.22, Copyright (c) Zend Technologies
    with Zend OPcache v8.1.22, Copyright (c), by Zend Technologies
Step 5: Create Database and Database User
To log in to the MariaDB shell, run the following command. You'll then be prompted to enter the MariaDB root password:
sudo mysql -u root -pTo create a database and database user, run the following commands. Replace DB_password with a strong and secure password:
CREATE DATABASE wordpress_db;
CREATE USER 'wordpress_user'@'localhost' IDENTIFIED BY 'DB_password';
Then, run the following commands to grant and flush the database user all privileges:
GRANT ALL ON wordpress_db.* TO 'wordpress_user'@'localhost';
FLUSH PRIVILEGES;
You can also replace wordpress_db and wordpress_user with your database details.
To exit the MySQL command prompt, run the following command:
exitHere is the output:
~]# sudo mysql -u root -p
Enter password:
Welcome to the MariaDB monitor.  Commands end with ; or \g.
Your MariaDB connection id is 8
Server version: 10.3.35-MariaDB MariaDB Server

Copyright (c) 2000, 2018, Oracle, MariaDB Corporation Ab and others.

Type 'help;' or '\h' for help. Type '\c' to clear the current input statement.

MariaDB [(none)]> CREATE DATABASE wordpress_db;
Query OK, 1 row affected (0.000 sec)

MariaDB [(none)]> CREATE USER 'wordpress_user'@'localhost' IDENTIFIED BY 'DB_password';
Query OK, 0 rows affected (0.000 sec)

MariaDB [(none)]> GRANT ALL ON wordpress_db.* TO 'wordpress_user'@'localhost';
Query OK, 0 rows affected (0.000 sec)

MariaDB [(none)]> FLUSH PRIVILEGES;
Query OK, 0 rows affected (0.000 sec)

MariaDB [(none)]> exit
Bye
You can also refer to the article How to Install LAMP Stack on AlmaLinux regarding the details on how to install the full LAMP (Linux, Apache, MySQL, PHP) stack on AlmaLinux. Knowing how to install WordPress on Linux (AlmaLinux) would be incomplete knowledge without the LAMP information.
Step 6: Download WordPress
The default repository does not contain WordPress. We must manually download the most recent version of WordPress from the official WordPress website. This step is necessary in the process of learning how to install WordPress on Linux (AlmaLinux),
To download WordPress, run the following command:
sudo wget https://wordpress.org/latest.tar.gzHere is the output:
~]# sudo wget https://wordpress.org/latest.tar.gz
--2023-08-28 03:49:40--  https://wordpress.org/latest.tar.gz
Resolving wordpress.org (wordpress.org)... 198.143.164.253
Connecting to wordpress.org (wordpress.org)|198.143.164.253|:443... connected.
HTTP request sent, awaiting response... 200 OK
Length: 23445410 (22M) [application/octet-stream]
Saving to: 'latest.tar.gz'

latest.tar.gz                              100%[=====================================================================================>]  22.36M  52.8MB/s    in 0.4s

2023-08-28 03:49:41 (52.8 MB/s) - 'latest.tar.gz' saved [23445410/23445410]
Step 7: Configure and Install WordPress
After downloading WordPress, run the following command to extract the file:
sudo tar -xvzf latest.tar.gzTo move the files to the webroot directory, run the following command:
sudo mv wordpress/* /var/www/html/Run the following command to grant the Apache user read and write access to the relocated folder:
sudo chown -R apache:apache /var/www/html/Security-Enhanced Linux (SELinux) may occasionally cause specific permission problems. Therefore, you must run the following command:
sudo chcon -t httpd_sys_rw_content_t /var/www/html/ -R To correctly apply the update in SELinux, run the following command:
sudo restorecon -Rv /var/www/html/Then, you must create an Apache Virtual Host configuration file for WordPress. You can do this by running the following command:
vi /etc/httpd/conf.d/wordpress.confPress the i keyboard shortcut to enter Insert Mode in the Vi Editor, make changes to the file, and add the following details. You must replace the placeholder details with values that match your setup:
<VirtualHost *:80>
ServerAdmin webmaster@your-domain.com
ServerName your-domain.com
ServerAlias www.your-domain.com
DocumentRoot /var/www/html
<Directory /var/www/html>
        Options FollowSymlinks
        AllowOverride All
        Require all granted
</Directory>
ErrorLog /var/log/httpd/your-domain.com_error.log
CustomLog /var/log/httpd/your-domain.com_access.log combined
</VirtualHost>
After you've finished all your changes, press the Esc keyboard shortcut to exit Insert Mode in the Vi Editor. Then, press the :wq keyboard shortcut to save your changes and quit the Vi Editor. Next, restart the Apache service by running the following command to reflect the changes:
sudo systemctl restart httpdYou may also quickly install WordPress using the WP-CLI command by reading the article Installing WordPress Using WP-CLI. If your server has a cPanel or Plesk control panel, you can utilize Softaculous or WP Toolkit tools to install WordPress for your domain.
Step 8: Let's Go! WordPress Installation Wizard
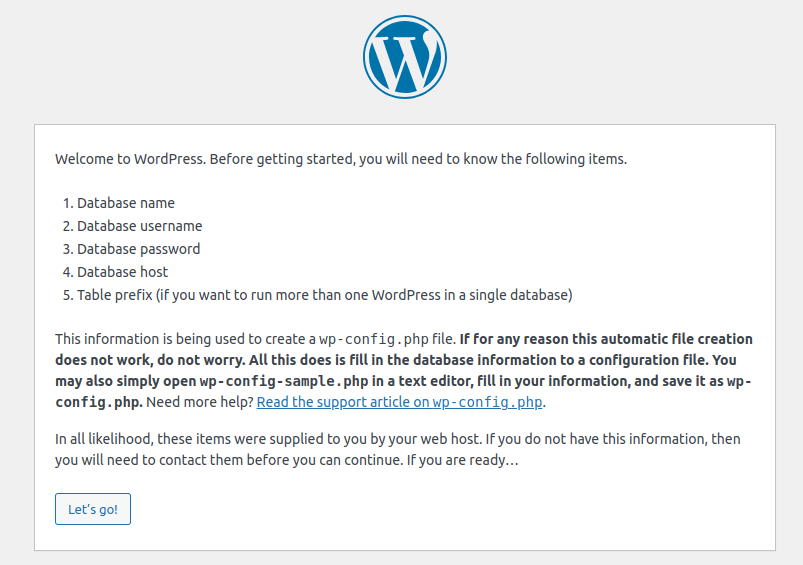
Finally, open a web browser and type in a domain name like http://your-server-ip-address or http://your-domain.com of the server where you installed WordPress. Then, click the Let's Go! button to get started:
Enter the Database details you have created. Then click the Submit button:

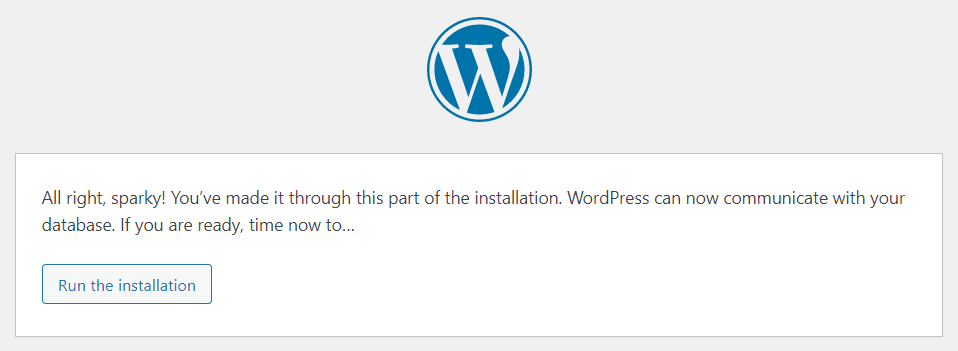
You can start WordPress Installation by clicking on the Run the Installation button:
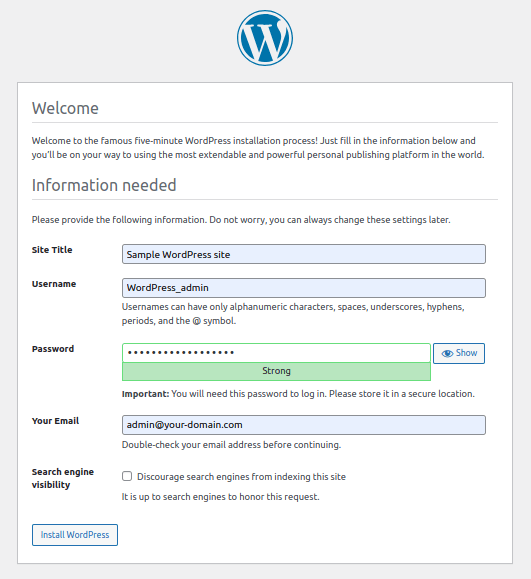
Provide the requested details and click on the Install WordPress button:
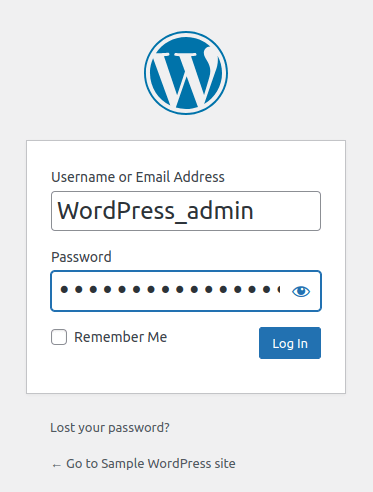
Once WordPress installation is completed, you can enter your WordPress administrator username and password. To access the WordPress Admin Panel, select the Log In option shown in the window:
On the page that appears, you will see the WordPress Admin Panel Dashboard:
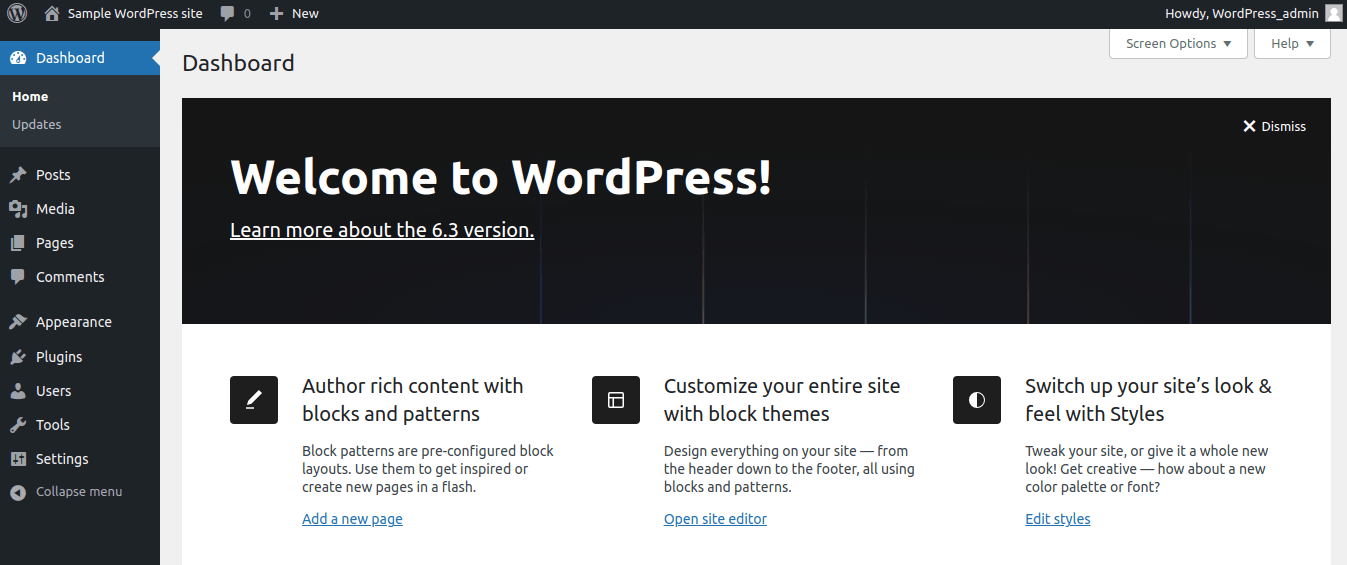
The WordPress Admin Panel is usually accessed via the URL your-domain.com/wp-admin. You can also customize the WordPress Admin Panel URL as per your requirements. For example, a best practice is to restrict access to the WordPress Administration Panel.
Congratulation on successfully learning how to install WordPress on Linux (AlmaLinux). You're now ready to use WordPress to build a stellar website.
How to Uninstall WordPress on Linux (AlmaLinux)
After studying how to install WordPress on Linux and completing an installation on AlmaLinux, there may be a time when you need to remove WordPress from the system. Let's learn how to do an uninstall.
Go to the directory where your WordPress files are located. This is typically your website's root directory, often found in /var/www/html or a similar path. Then, delete all the WordPress files and folder:
sudo rm -r /var/www/html/*Use the command line or a tool like phpMyAdmin to access your database. When removing the WordPress database, the value of wordpress_db shown in the example below should be replaced with the name of your actual database:
DROP DATABASE wordpress_db;Then, remove the virtual host setup for your WordPress site /etc/httpd/conf.d/wordpress.conf:
sudo systemctl restart httpdAfter you've made all your changes, restart the Apache service to reflect the changes:
sudo systemctl restart httpdHost Your WordPress Website with Liquid Web
We hope you learned how to install WordPress on Linux (AlmaLinux) with the help of this article. You can benefit from hassle-free hosting, optimized performance, and a secure environment by choosing Liquid Web's managed hosting plan for your WordPress website on AlmaLinux. Your WordPress site running on AlmaLinux will get the attention it needs to flourish because of Liquid Web's well-established reputation as a trustworthy managed hosting company.
To obtain information about our various managed hosting services, pay particular attention to the features relevant to your WordPress hosting requirements, clear up any questions, or make an educated decision, you can contact our experts.
Related Articles:


About the Author: Mohammed Noufal
Mohammed Noufal is a B.Tech graduate with a decade of experience in server administration and web hosting. He is a father to two daughters and finds fulfillment in their growth. In his free time, he enjoys blogging, sharing experiences, and listening to music. With a strong technical background, family commitment, and creative outlets, he represents a well-rounded life journey.


Our Sales and Support teams are available 24 hours by phone or e-mail to assist.
Latest Articles
In-place CentOS 7 upgrades
Read ArticleHow to use kill commands in Linux
Read ArticleChange cPanel password from WebHost Manager (WHM)
Read ArticleChange cPanel password from WebHost Manager (WHM)
Read ArticleChange the root password in WebHost Manager (WHM)
Read Article