


What is Tomcat?
In this article, we will be demonstrating how to install Apache Tomcat on CentOS 8. Before we begin, let's define exactly what Apache Tomcat is. Apache defines Tomcat as: "An open-source, servlet container, JavaServer Pages, Java Expression Language, and WebSocket technology that also acts as a web server. It affords a "pure Java" based HTTP server environment in which Java can be executed." Tomcat works with the Java programming language and is associated with web applications written in Java.
Prerequisites
Our first task is to make sure our system is updated. Since we are going to install Tomcat on CentOS 8, we will run the following commands.
[root@host ~]# cat /etc/redhat-release
CentOS Linux release 8.1.1911 (Core)
[root@host ~]#  yum -y install epel-release
[root@host ~]# yum -y update -y
Next, we need to verify whether Java is already installed.
[root@host ~]# java -version
-bash: java: command not found
[root@host ~]#
If we do not have Java installed, we will receive the output noted above.
Install Java
Moving forward, let's install Java. Apache Tomcat will not work properly if Java is not present on the system. Additionally, we need to ensure that we are installing Java OpenJDK 11. Because it is open-source and a long term release, we will not run into any licensing issues. To accomplish this task, we will use the following command.
[root@host ~]# dnf install java-11-openjdk-devel
Last metadata expiration check: 0:53:36 ago on Tue 04 Feb 2020 02:50:27 PM EST.
Dependencies resolved.
======================================================================
 Package  Architecture   Version Repository Size
======================================================================
Installing:
 java-11-openjdk-devel x86_64 1:11.0.5.10-2.el8_1 AppStream  3.3 M
...
...
...
javapackages-runtime                 201801
Transaction Summary
======================================================================
Install 53 Packages

Total download size: 67 M
Installed size: 255 M
Downloading Packages:
(1/53): abattis-cantarell-fonts-0.0.25-4.el8.noarch.rpm                     2.8 MB/s | 155 kB 00:00
(2/53): at-spi2-atk-2.26.2-1.el8.x86_64.rpm                           4.7 MB/s | 89 kB 00:00
(3/53): adwaita-cursor-theme-3.28.0-2.el8.noarch.rpm
...
...
...
Complete!
[root@host ~]#
Next, we will verify the version of Java installed by running this command.
[root@host ~]# java -version
openjdk version "11.0.5" 2019-10-15 LTS
OpenJDK Runtime Environment 18.9 (build 11.0.5+10-LTS)
OpenJDK 64-Bit Server VM 18.9 (build 11.0.5+10-LTS, mixed mode, sharing)
[root@host ~]#
Installing Tomcat
First, we need to create a user for Tomcat.
[root@host ~]#useradd -r tomcat
[root@host ~]#
Next, we are going to create a folder and then use the "cd" command to change directories into that folder where we will download Tomcat.
[root@host ~]# mkdir /usr/local/tomcat9
[root@host ~]# cd /usr/local/tomcat9
[root@host tomcat9]#
Now, let's download the Tomcat archive using curl. (wget is also an option if it is installed on your version of CentOS 8. If not, you may want to install it for later use)
[root@host tomcat9]# curl -o tomcat9.tar.gz http://www-us.apache.org/dist/tomcat/tomcat-9/v9.0.30/bin/apache-tomcat-9.0.30.tar.gz
 % Total  % Received % Xferd Average Speed Time  Time Time Current

Dload Upload Total Spent  Left Speed
100   10.5M  100   10.5M  0  0 3404k   0 0:00:03 0:00:03 --:--:-- 3404k
[root@host tomcat9]#Next, we can unpack the "tomcat9 tar.gz" file into our working folder.
[root@host tomcat]# tar -xvf tomcat9.tar.gz
<filescroll>
[root@host tomcat9]#
[root@host tomcat9]# ll
total 10912
-rw-r--r-- 1 root root 11026056 Jan 31 18:46 apache-tomcat-9.0.30.tar.gz
drwxr-x--- 2 root root  4096 Jan 31 18:47 bin
-rw-r----- 1 root root  18982 Dec 7 11:46 BUILDING.txt
drwx------ 2 root root  4096 Dec 7 11:46 conf
-rw-r----- 1 root root  5409 Dec 7 11:46 CONTRIBUTING.md
drwxr-x--- 2 root root  4096 Jan 31 18:47 lib
-rw-r----- 1 root root  57092 Dec 7 11:46 LICENSE
drwxr-x--- 2 root root  4096 Dec 7 11:42 logs
-rw-r----- 1 root root  2333 Dec 7 11:46 NOTICE
-rw-r----- 1 root root  3255 Dec 7 11:46 README.md
-rw-r----- 1 root root  6898 Dec 7 11:46 RELEASE-NOTES
-rw-r----- 1 root root  16262 Dec 7 11:46 RUNNING.txt
drwxr-x--- 2 root root  4096 Jan 31 18:47 temp
drwxr-x--- 7 root root  4096 Dec 7 11:43 webapps
drwxr-x--- 2 root root  4096 Dec 7 11:42 work
[root@host tomcat]#
Now, we need to modify the ownership of the /usr/local/tomcat9/ directory.
[root@host tomcat9]# chown -R tomcat:tomcat /usr/local/tomcat9
[root@host tomcat9]# ll
total 10912
-rw-r--r-- 1 tomcat tomcat 11026056 Jan 31 18:46 apache-tomcat-9.0.30.tar.gz
drwxr-x--- 2 tomcat tomcat  4096 Jan 31 18:47 bin
-rw-r----- 1 tomcat tomcat  18982 Dec 7 11:46 BUILDING.txt
drwx------ 2 tomcat tomcat  4096 Dec 7 11:46 conf
-rw-r----- 1 tomcat tomcat  5409 Dec 7 11:46 CONTRIBUTING.md
drwxr-x--- 2 tomcat tomcat  4096 Jan 31 18:47 lib
-rw-r----- 1 tomcat tomcat  57092 Dec 7 11:46 LICENSE
drwxr-x--- 2 tomcat tomcat  4096 Dec 7 11:42 logs
-rw-r----- 1 tomcat tomcat  2333 Dec 7 11:46 NOTICE
-rw-r----- 1 tomcat tomcat  3255 Dec 7 11:46 README.md
-rw-r----- 1 tomcat tomcat  6898 Dec 7 11:46 RELEASE-NOTES
-rw-r----- 1 tomcat tomcat  16262 Dec 7 11:46 RUNNING.txt
drwxr-x--- 2 tomcat tomcat  4096 Jan 31 18:47 temp
drwxr-x--- 7 tomcat tomcat  4096 Dec 7 11:43 webapps
drwxr-x--- 2 tomcat tomcat  4096 Dec 7 11:42 work
[root@host tomcat9]#
By default, your files will be located in this folder: /usr/local/tomcat9 and the configuration files will be stored in: /usr/local/tomcat9/conf
[root@host tomcat9]# ll
total 144
drwxr-x--- 2 tomcat tomcat 4096 Feb 4 17:26 bin
-rw-r----- 1 tomcat tomcat 18982 Dec 7 11:46 BUILDING.txt
drwx------ 3 tomcat tomcat 4096 Feb 4 15:54 conf
-rw-r----- 1 tomcat tomcat 5409 Dec 7 11:46 CONTRIBUTING.md
drwxr-x--- 2 tomcat tomcat 4096 Feb 4 15:50 lib
-rw-r----- 1 tomcat tomcat 57092 Dec 7 11:46 LICENSE
drwxr-x--- 2 tomcat tomcat 4096 Feb 4 15:54 logs
-rw-r----- 1 tomcat tomcat 2333 Dec 7 11:46 NOTICE
-rw-r----- 1 tomcat tomcat 3255 Dec 7 11:46 README.md
-rw-r----- 1 tomcat tomcat 6898 Dec 7 11:46 RELEASE-NOTES
-rw-r----- 1 tomcat tomcat 16262 Dec 7 11:46 RUNNING.txt
drwxr-x--- 2 tomcat tomcat 4096 Feb 4 17:27 temp
drwxr-x--- 7 tomcat tomcat 4096 Dec 7 11:43 webapps
drwxr-x--- 3 tomcat tomcat 4096 Feb 4 15:54 work
Set Environment Variable
Now, we can configure the CATALINA_HOME environment variable using the following commands:
[root@host tomcat9]# echo "export CATALINA_HOME="/usr/local/tomcat9"" >> ~/.bashrc
[root@host tomcat9]# source ~/.bashrc
This variable is set to ensure software access is allowed for all the users on your system.
Create & Configure The Systemd Service
First, let's review our Java information as we will need that info to populate part of our unit file.
[root@host tomcat]# java -version
openjdk version "11.0.5" 2019-10-15 LTS
OpenJDK Runtime Environment 18.9 (build 11.0.5+10-LTS)
OpenJDK 64-Bit Server VM 18.9 (build 11.ets0.5+10-LTS, mixed mode, sharing)
[root@host tomcat]#
[root@host tomcat9]# alternatives --list | grep java
jre_openjdk auto /usr/lib/jvm/java-11-openjdk-11.0.5.10-2.el8_1.x86_64
javac auto /usr/lib/jvm/java-11-openjdk-11.0.5.10-2.el8_1.x86_64/bin/javac
java_sdk_11_openjdk auto /usr/lib/jvm/java-11-openjdk-11.0.5.10-2.el8_1.x86_64
java_sdk_openjdk auto /usr/lib/jvm/java-11-openjdk-11.0.5.10-2.el8_1.x86_64
jre_11 auto /usr/lib/jvm/java-11-openjdk-11.0.5.10-2.el8_1.x86_64
java auto /usr/lib/jvm/java-11-openjdk-11.0.5.10-2.el8_1.x86_64/bin/java
java_sdk_11 auto /usr/lib/jvm/java-11-openjdk-11.0.5.10-2.el8_1.x86_64
[root@host tomcat9]# Next, to ensure we have Tomcat set up as a service, we will create a simple systemd unit file.
[root@host tomcat9]# touch /etc/systemd/system/tomcat.service
[root@host tomcat9]# vim /etc/systemd/system/tomcat.service
Now, we can add the following information to our new unit file.
[Unit]
Description=Apache Tomcat Server
After=syslog.target network.target

[Service]
Type=forking
User=tomcat
Group=tomcat

Environment=CATALINA_PID=/usr/local/tomcat9/temp/tomcat.pid
Environment=CATALINA_HOME=/usr/local/tomcat9
Environment=CATALINA_BASE=/usr/local/tomcat9

ExecStart=/usr/local/tomcat9/bin/catalina.sh start
ExecStop=/usr/local/tomcat9/bin/catalina.sh stop

RestartSec=10
Restart=always
[Install]
WantedBy=multi-user.target
This unit file can contain multiple directives besides the ones listed above. After this, we need to save the file (using :wq) and reload the service to apply the changes.
[root@host tomcat9]# systemctl daemon-reloadNow we can test the systemd Java config file.
Start, Enable, and Check the Status of Tomcat
Next, let's start the Tomcat service, and then enable it.
[root@host tomcat9]# systemctl start tomcat.service
[root@host tomcat9]# systemctl enable tomcat.service
Now, we can check its status using the following command.
[root@host tomcat9]# systemctl status tomcat.service
● tomcat.service - Apache Tomcat Server
   Loaded: loaded (/etc/systemd/system/tomcat.service; enabled; vendor preset: disabled)
   Active: active (running) since Tue 2020-02-04 17:27:23 EST; 23min ago
 Main PID: 59815 (java)
    Tasks: 42 (limit: 10686)
   Memory: 93.1M
   CGroup: /system.slice/tomcat.service
           └─59815 /usr/bin/java -Djava.util.logging.config.file=/usr/local/tomcat9/conf/logging.properties -Djava.util.logging.>

Feb 04 17:27:23 host.lwkbcentos.com systemd[1]: tomcat.service: Service RestartSec=10s expired, scheduling restart.
Feb 04 17:27:23 host.domain.com systemd[1]: tomcat.service: Scheduled restart job, restart counter is at 485.
Feb 04 17:27:23 host.domain.com systemd[1]: Stopped Apache Tomcat Server.
Feb 04 17:27:23 host.domain.com systemd[1]: Starting Apache Tomcat Server...
Feb 04 17:27:23 host.domain.com catalina.sh[59801]: Existing PID file found during start.
Feb 04 17:27:23 host.domain.com catalina.sh[59801]: Removing/clearing stale PID file.
Feb 04 17:27:23 host.domain.com catalina.sh[59801]: Tomcat started.
Feb 04 17:27:23 host.domain.com systemd[1]: Started Apache Tomcat Server.
Finally, hit the 'q' key to exit out of the status check and return to the bash prompt.
Version Check
To retrieve the Tomcat server information, we can use the following command:
[root@host bin]# /usr/local/tomcat9/bin/version.sh
Using CATALINA_BASE: /usr/local/tomcat9
Using CATALINA_HOME: /usr/local/tomcat9
Using CATALINA_TMPDIR: /usr/local/tomcat9/temp
Using JRE_HOME: /usr
Using CLASSPATH: /usr/local/tomcat9/bin/bootstrap.jar:/usr/local/tomcat9/bin/tomcat-juli.jar
NOTE: Picked up JDK_JAVA_OPTIONS: --add-opens=java.base/java.lang=ALL-UNNAMED --add-opens=java.base/java.io=ALL-UNNAMED --add-opens=java.rmi/sun.rmi.transport=ALL-UNNAMED
Server version: Apache Tomcat/9.0.30
Server built: Dec 7 2019 16:42:04 UTC
Server number: 9.0.30.0
OS Name: Linux
OS Version: 4.18.0-147.3.1.el8_1.x86_64
Architecture: amd64
JVM Version: 11.0.5+10-LTS
JVM Vendor: Oracle Corporation
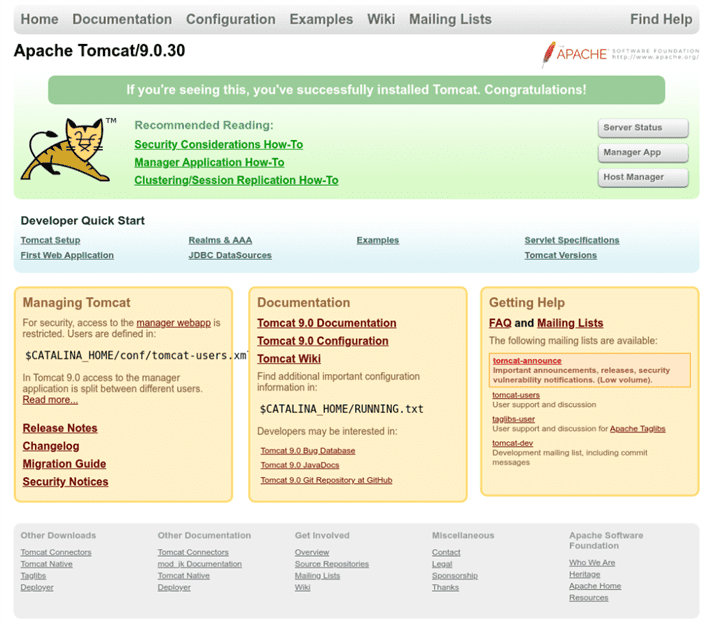
[root@host bin]# Testing
Next, let's open a browser to test out the connection.
Load http://localhost:8080 or http://server.ip:8080 into your browser, and you should see an image like the one below.
Errors?
If by some chance, you get an "err_ssl_protocol_error" page when visiting http://ip.ad.dr.ess:8080/, verify the error using curl and once verified, take the following steps.
user@host:~$ curl -Iv https://67.225.186.120:8080
* Trying 67.225.186.120:8080...
* TCP_NODELAY set
* connect to 67.225.186.120 port 8080 failed: Connection refused
* Failed to connect to 67.225.186.120 port 8080: Connection refused
* Closing connection 0
curl: (7) Failed to connect to 67.225.186.120 port 8080: Connection refused
1. Check to ensure the Java/Tomcat ports are open in the firewall
firewall-cmd --zone=public --permanent --add-port=8080/tcp
firewall-cmd --zone=public --permanent --add-port=8443/tcp
2. Run a netstat command to check to see if the server is listening for the IPv4 addresses (and/or IPv6 address if needed).
After checking netstat, we saw that Tomcat was only bound to the IPv6 protocol ports.
[root@host tomcat9]# netstat -nlp | grep java
tcp6 0 0 :::8080  :::* LISTEN 33080/java
tcp6 0 0 127.0.0.1:8005  :::* LISTEN 33080/java
tcp6 0 0 :::8009 :::* LISTEN 33080/javaTo address this, create a file called setenv.sh file within either your CATALINA_BASE or CATALINA_HOME bin/ directory
(we used the /usr/local/tomcat9/bin folder).
Next, create a new file called setenv.sh.
cd bin/
touch setenv.sh
vim setenv.sh
Click insert and add the following line to the file.
JAVA_OPTS="$JAVA_OPTS -Djava.net.preferIPv4Stack=true -Djava.net.preferIPv4Addresses=true "This entry overrides the default settings used by Tomcat. Once that task is complete, save and exit the file using ":wq" and reload the services to save our changes.
systemctl daemon-reloadNow, let’s check the ports again.
[root@host tomcat9]# netstat -nlp | grep java
tcp 0 0 0.0.0.0:8080  0.0.0.0:* LISTEN 59815/java
tcp 0 0 127.0.0.1:8005 0.0.0.0:* LISTEN 59815/java
tcp 0 0 0.0.0.0:8009  0.0.0.0:* LISTEN 59815/java
Verify correct firewall ports are open.
[root@host ~]# firewall-cmd --zone=public --list-ports | grep 8080
8080/tcp 8443/tcp
[root@host ~]#
Configuration Settings
Here are a couple of useful configuration settings for Tomcat.
Add Users
Sometimes, we may need to add new users or an admin user. We can accomplish this by going to the Tomcat conf folder and modifying these settings.
[root@host conf]# cd /usr/local/tomcat9/conf <!-- user admin can access manager and admin section both -->
<role rolename="admin-gui" />
<user username="admin" password="_SECRET_PASSWORD_" roles="manager-gui,admin-gui" />Note: We can open the file through vi or vim or by utilizing the file manager and opening the file using a text editor.
Finally, use :wq to save the file.
Changing Ports
At times, you may wish to run Tomcat on an alternate port. To accomplish this, we can modify the connector port setting in the server.xml file.
These are the steps to take.
[root@host conf]# cd /usr/local/tomcat9/conf/
[root@host conf]# vim /usr/local/tomcat9/conf/server.xml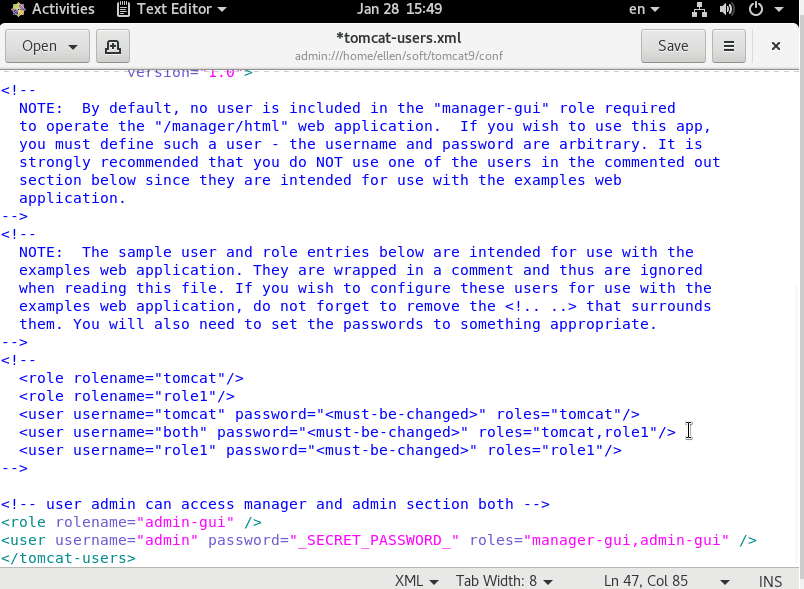
In the server.xml file or from within a text editor, we can modify the "Connector port" line, changing it from port 8080 to 80 or any other port number we choose.
Line
69  <Connector port="8080" protocol="HTTP/1.1"
70        connectionTimeout="20000"
71        redirectPort="8443" />
Conclusion
Overall, Tomcat easily facilitates the exchange of data between a client and the servlet, provides a programming platform for web applications, and assumes the functions of identifying and authorizing clients, creating sessions for each of them in a safe and secure manner.
Comparing Providers?
Consider reviewing our Liquidweb vs DigitalOcean post for further solid information about your hosting project or SMB infrastructure. See comparisons on performance, support, and easy migrations.
Related Articles:


About the Author: Ellen Sletton
I'm 23 years old Linux Tech who always takes NO as Next Opportunity. Every day I'm trying to learn something new and share my knowledge with others. My free time I spend with my dog Emil or doing some UI/UX design or simply making an inspiring photo for my blog :) Sharing knowledge helps me generate new ideas and stay motivated.


Our Sales and Support teams are available 24 hours by phone or e-mail to assist.
Latest Articles
Linux dos2unix command syntax — removing hidden Windows characters from files
Read ArticleHow to use kill commands in Linux
Read ArticleChange cPanel password from WebHost Manager (WHM)
Read ArticleChange cPanel password from WebHost Manager (WHM)
Read ArticleChange the root password in WebHost Manager (WHM)
Read Article