◦ Comprehensive security
◦ 24/7 support
WordPress Guide → SEO → Yoast
Yoast SEO WordPress plugin: a complete guide
If you want your WordPress content to rank well on Google, Yoast SEO is one of the easiest tools to get started. It adds real-time SEO and readability suggestions, generates sitemaps, and gives you full control over metadata—all from your WordPress dashboard.
Let’s walk through how to install, configure, and make the most of everything Yoast SEO has to offer.
Get fast, reliable hosting for WordPress
Power your site with the industry’s fastest, most optimized WordPress hosting
What is Yoast SEO and why is it popular?
Yoast SEO is a free WordPress plugin that helps users optimize their content for search engines. It was first launched in 2010 and quickly became one of the most installed plugins in the WordPress ecosystem.
The plugin appeals to bloggers, business owners, and ecommerce store managers, because it simplifies technical SEO tasks—like adding meta titles and descriptions, setting canonical URLs, and generating XML sitemaps—without needing to touch code. It also analyzes your content and provides suggestions to improve readability and keyword usage, helping you create posts that are more likely to perform well in search engines.
How to install and set up Yoast SEO
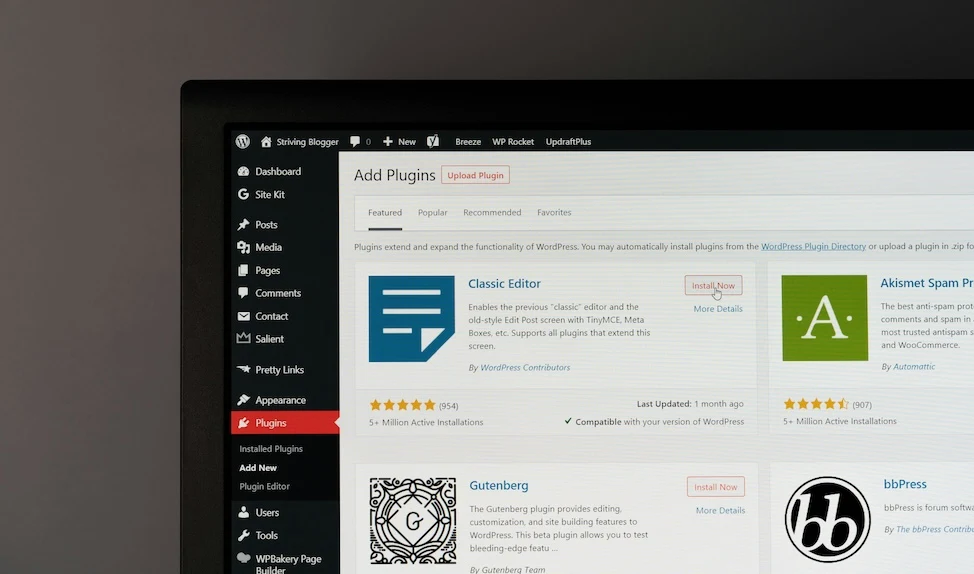
Install Yoast SEO from the plugin directory
- Log in to your WordPress admin panel.
- Go to Plugins > Add New.
- Search for “Yoast SEO.”
- Click Install Now and then Activate.
You’ll see a new menu item called “SEO” in your dashboard menu.
Use the configuration wizard
After activation, Yoast prompts you to run its configuration wizard. Follow the steps to set up your SEO basics:
- Choose whether your site represents an organization or individual.
- Set your site type (e.g., blog, online store).
- Configure visibility settings for post types, taxonomies, and archives.
- Set default title and meta formats.
You can rerun this wizard anytime from SEO > General > Configuration Wizard.
Using the Yoast SEO meta box
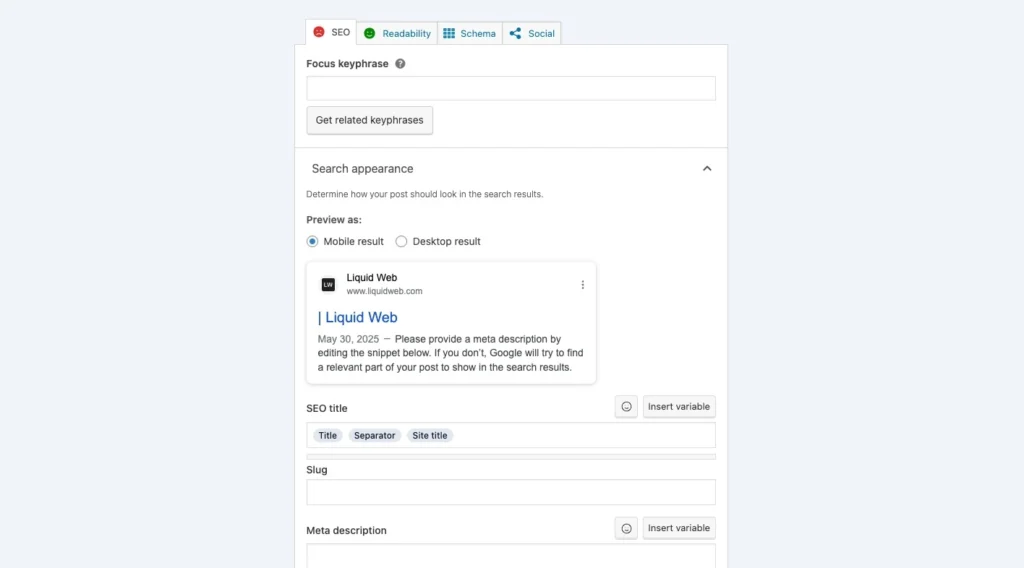
The meta box appears beneath the content editor for posts, pages, and custom post types. It’s your main tool for optimizing individual pieces of content.
Key inputs
There are a few very important fields to fill out here.
- Focus keyphrase: This field lets you specify the main keyword or phrase you’re targeting. Yoast uses it to evaluate how well your content is optimized.
- SEO title: The is the title that will (usually) appear in search results. Make it descriptive, simple, and exciting to get people to click.
- Slug: If you leave this blank, WordPress will format the URL according to settings. If you specify a slug, it will overwrite the settings and customize the URL.
- Meta description: This is sometimes the two lines of text that appear in organic search results. Note that if Google doesn’t think your meta description is helpful, it will scrape text from your content to use instead.
SEO analysis tab
Yoast scans your content for:
- Keyphrase in title, URL, meta description, and introduction
- Use of outbound and internal links
- Image alt attributes
- Sentence and paragraph length
You’ll get a red, orange, or green bullet for each metric, with specific suggestions to improve.
Readability analysis tab
This analysis focuses on human readers. It checks:
- Passive voice frequency
- Paragraph and sentence length
- Subheading distribution
- Flesch reading ease score
These suggestions help you write clearer, more engaging content.
How to use cornerstone content and internal linking
Cornerstone content refers to the most important, evergreen content on your site—like ultimate guides, main service pages, or long-form tutorials.
Yoast lets you:
- Mark any post or page as cornerstone content
- Prioritize cornerstone articles when linking from new posts
- Improve internal linking by showing suggestions in the sidebar (Premium feature)
Structuring your content this way helps search engines understand which pages on your site are most authoritative.
To mark a post or page as cornerstone content:
1. Open the post or page in the WordPress editor
Go to Posts > All Posts or Pages > All Pages in your WordPress dashboard, then click Edit on the content you want to mark as cornerstone.
2. Scroll to the Yoast SEO meta box
In the WordPress editor (Classic or Block Editor), scroll down to the Yoast SEO panel beneath your content area.
- In the Classic Editor, the meta box appears directly under the post content.
- In the Block Editor (Gutenberg), click the SEO tab in the right sidebar.
3. Find the “Cornerstone content” toggle

Look for a section labeled Cornerstone content near the bottom of the SEO panel. It should have a short description like “Mark as cornerstone content”.
4. Toggle it on
Switch the toggle to “On” to mark the post as cornerstone content. Once activated, Yoast will:
- Prioritize this content in its internal linking suggestions (Premium feature)
- Analyze the post more strictly for SEO and readability
- Encourage more inbound links from other related posts
Bonus tip: Create a cornerstone content strategy
After marking your cornerstone articles, link to them regularly from shorter or related posts. This helps search engines understand which content is most important on your site.
How to optimize your site structure with Yoast
Beyond individual post optimization, Yoast lets you control your overall SEO setup.
Title and meta defaults
Setting default title and meta tag formats in Yoast SEO helps ensure consistency, save time, and reduce the chance of SEO errors. Instead of manually entering titles and descriptions for every post or page, you can define smart templates. This standardizes how your content appears in search engine results, reinforces branding, and provides fallback metadata if you forget to write something manually.
If search engines index too many archive pages with similar or thin content, it can dilute your site’s authority and reduce the crawl budget for more important pages. By selectively noindexing these archives, you keep your site focused, streamlined, and optimized for rankings.
How to set archive indexing in Yoast:
- In your WordPress dashboard, go to SEO > Search Appearance.
- Click the Taxonomies tab to manage categories and tags, or the Archives tab for author and date archives.
- For each section, choose Yes or No under “Show X in search results?”
- Click Save changes at the bottom of the page.
Enable breadcrumbs
Enabling breadcrumbs in Yoast SEO improves site navigation for users and helps search engines understand the structure of your site. Breadcrumbs show the path to the current page (like Home > Blog > Post Title), making it easier for visitors to backtrack or explore related content.
In search results, Google may also display these breadcrumbs instead of long URLs, which can improve click-through rates and make your listings look more professional.
How to enable breadcrumbs in Yoast SEO:
- In your WordPress dashboard, go to SEO > Search Appearance.
- Click the Breadcrumbs tab.
- Click the button labeled Enable breadcrumbs.
- Customize the breadcrumb settings (like separator, prefix, and homepage text) if needed.
- Click Save changes.
- Follow the on-screen instructions to add the breadcrumb code snippet to your theme, or use a compatible theme or block that supports Yoast breadcrumbs.
Yoast SEO integrations and schema features
Schema helps search engines better understand your content and display rich results like FAQs, how-tos, and breadcrumbs in search listings. Yoast automatically adds the right schema to your pages and connects with tools like SEMrush and Zapier to help you manage SEO more efficiently.
- Structured data blocks: Add FAQ, How-To, and breadcrumb schema with WordPress blocks.
- Automatic schema output: Outputs organization/person data, content types, and relationships.
- Integrations: Connect with SEMrush (for keyword research), Wincher (for rank tracking), and Zapier (for automation).
Upgrading to Yoast SEO Premium
The free version covers most SEO basics, but Premium adds tools that can save time and improve your results.
Premium features include:
- Redirect manager: Set up 301 redirects without a separate plugin.
- Multiple focus keyphrases: Target more than one keyword per post.
- Internal linking suggestions: Get relevant suggestions as you write.
- Social previews: See how your content will appear on Facebook and Twitter.
- 24/7 support: Access to Yoast’s support team.
Premium starts at $99/year for one site.
How to combine Yoast SEO with other optimization plugins
Yoast SEO works well with most WordPress plugins, but it’s important to avoid overlapping features.
Compatible plugins:
- Caching: WP Super Cache, W3 Total Cache, and WP Fastest Cache all work well with Yoast.
- Performance tools: Asset CleanUp and Perfmatters can be used alongside Yoast to remove bloat.
- Security: Wordfence, Sucuri, and other firewall plugins don’t conflict with Yoast.
- SEO utilities: The Redirection plugin complements Yoast if you use the free version.
What to avoid:
- Don’t use multiple SEO plugins together (e.g., Rank Math, All in One SEO).
- Don’t activate sitemap generation in two plugins at once.
- Avoid duplicate schema output from theme builders or WooCommerce extensions.
Proper pairing ensures clean output and avoids performance or indexing issues.
Yoast SEO FAQs
Getting started with the best XML sitemap generator for WordPress
The best sitemap plugin is the one that fits your goals, site size, and technical comfort level. Whether you’re optimizing a simple blog or managing a large ecommerce site, generating and maintaining an accurate XML sitemap is crucial for search visibility.
Pick a plugin that fits your workflow—whether that means simplicity, flexibility, or advanced features—and take the extra step to verify it in Search Console.
Ready to upgrade your WordPress experience? Professional hosting improves speeds, security, and reliability for a website and a brand that people find engaging and trustworthy.
Don’t want to deal with server management and maintenance either? Our fully managed hosting for WordPress is the best in the industry. Our team are not only server IT experts, but WordPress hosting experts as well. Your server couldn’t be in better hands.
Click below to explore options or start a chat with one of our WordPress hosting experts now to get answers to your questions and further guidance.
Additional resources
Comprehensive guide to securing WordPress with ModSecurity
→
This guide provides a comprehensive overview of how to use ModSecurity to enhance the security of your WordPress site.
Best WordPress robots.txt template (example) →
Discover the best robots.txt template to guide search engines and boost your WordPress site’s SEO performance.
Why security matters for WordPress enterprise hosting
→
Use the blog as your guide to attacks to watch out for, security best practices, and steps to improve the WordPress protection you already have.

Leslie Bowman is an Organic SEO Manager at Liquid Web and expert wordsmith. She specializes in driving revenue through organic and paid channels with SEO and CRO. When she’s not bending search algorithms to her will, she’s most likely spending time with animals, reading nonfiction, or marveling at nature’s beauty.