◦ Comprehensive security
◦ Support
WordPress Guide → Management → Hide Site While Editing
How to hide a WordPress site while editing

At some point in the life of a WordPress site, its owner will want to make changes significant enough to justify blocking access to the site. Hiding a WordPress site is the process of making your website temporarily inaccessible to visitors while you perform updates or development work.
It’s not a good idea to leave a site online when major changes are being implemented. A site with rough edges looks unprofessional and visitors won’t know that it’s because you’re renovating — they’ll think that’s just how your site looks. Also, when changes are being implemented, the site is in an unpredictable state — if you’re changing code while users are attempting to execute it, the results will not be pretty.
That said, taking a site offline should be the last resort. It inconveniences users and can result in lost revenue. In many cases, manually entering a maintenance mode isn’t necessary. Let’s look at various methods you can use to hide a WordPress site, including using built-in tools, using plugins, advanced techniques for experienced users, and even hiding specific posts or pages.
Get fast, reliable WordPress hosting
Power your site with the industry’s most optimized WordPress hosting
Quick overview: Which method should you use?
| Method | Best for | Technical level required | Time to implement |
| Built-in WordPress tools | Beginners or non-technical users | Low | 10-15 minutes |
| Plugins | Users looking for quick, customizable solutions | Low to medium | 15-30 minutes |
| Advanced methods (e.g., .htaccess, server config) | Experienced users or developers | High | 30 minutes – 1 hour |
| Hiding individual posts/pages | Restricting access to specific content | Low to medium | 10-20 minutes |
Method 1: Relying on WordPress’ built-in privacy settings
When you update a plugin or theme, WordPress enters a built-in maintenance mode. It will present a brief message to inform users that the site is unavailable. You don’t have to do anything; it’s automatic. Usually updates happen so quickly that your site will only be in maintenance mode for a few seconds. If you have a very busy site, that’s a significant amount of time, but, for the most part, it’s the best way to avoid showing users inconsistent state.
As an aside, if you do an update and something goes wrong, it’s possible that your site will get “stuck” in maintenance mode. To unstick it, delete the “.maintenance” file from the root directory of your site.
Method 2: Using maintenance mode plugins
Maintenance mode plugins are WordPress tools that display a temporary page to visitors while allowing administrators to perform WordPress site management behind the scenes.
If you’re absolutely determined to hide your WordPress site using maintenance mode, there are plugins that will help you.
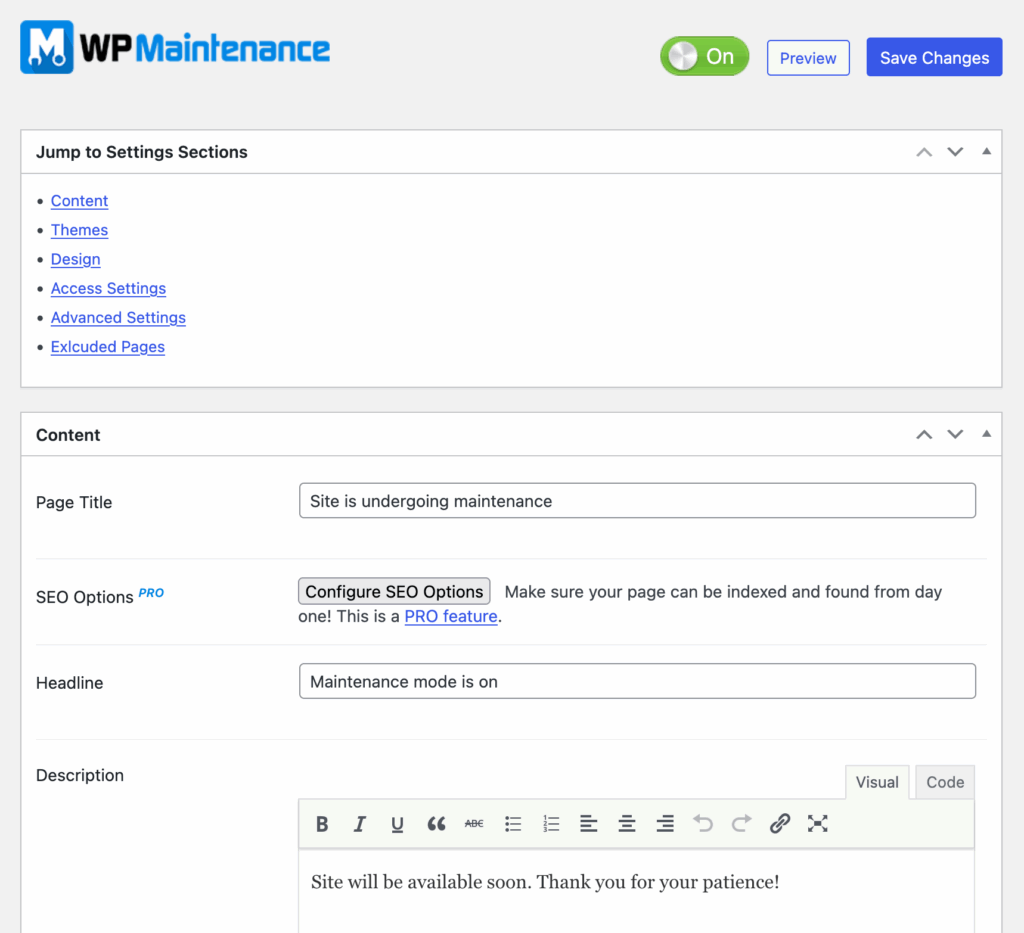
WP Maintenance and LightStart let you design an attractive maintenance mode page with a custom message. Here’s what the settings look like in the free version of WP Maintenance:
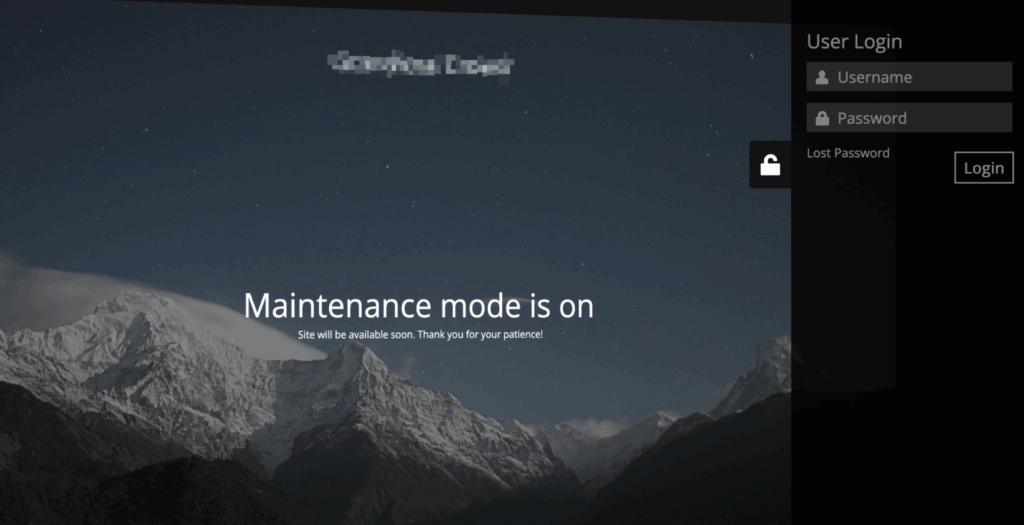
And here’s what the frontend looks like to visitors that aren’t logged in:
Maintenance mode plugins will usually ensure WordPress sends the right response codes to web browsers and search crawlers, letting them know that the downtime is only temporary. Here are some additional features to look for in a good maintenance mode plugin, or the paid version:
- Custom maintenance page with templates, messaging, and branding options.
- Admin bypass allowing logged-in administrators to access the site normally.
- IP allowlisting to grant specific visitors access during maintenance.
- One-click activation/deactivation for easy toggling of maintenance mode.
- Email capture forms to collect visitor information while the site is down.
If you do need to take your site offline, it’s better to use a plugin than blocking access by some other method, because a completely unavailable site has negative consequences for SEO.
Method 3: Alternative methods for advanced users
For developers and technical users, server-level protection offers more security than plugin-based ways to make your WordPress site private. The most common approach uses .htaccess authentication, which prompts visitors for credentials before they can access any part of your site.
Create an .htpasswd file with your desired username and encrypted password, then add this code to your .htaccess file in your WordPress root directory:
AuthType Basic
AuthName "Restricted Access"
AuthUserFile /path/to/.htpasswd
Require valid-user
This method works independently of WordPress and cannot be bypassed through plugin vulnerabilities or WordPress exploits. It’s particularly effective for staging sites or during major development phases.
Managed hosting providers like Liquid Web offer server-level password protection through their control panels, eliminating the need for manual .htaccess configuration. These tools provide user-friendly interfaces while maintaining the same server-level security benefits.
💡 Don’t forget about search engine visibility during development.
A properly configured robots.txt file can prevent search engines from indexing your work-in-progress content:
User-agent: *
Disallow: /
Place this file in your site’s root directory to block all search engine crawlers. However, remember that robots.txt is merely a suggestion to search engines, not a security measure.
Method 4: Hiding individual pages and posts
Individual page hiding allows you to make specific content private while keeping the rest of your site public. This approach is ideal for client previews, internal documentation, or work-in-progress content that isn’t ready for general viewing.
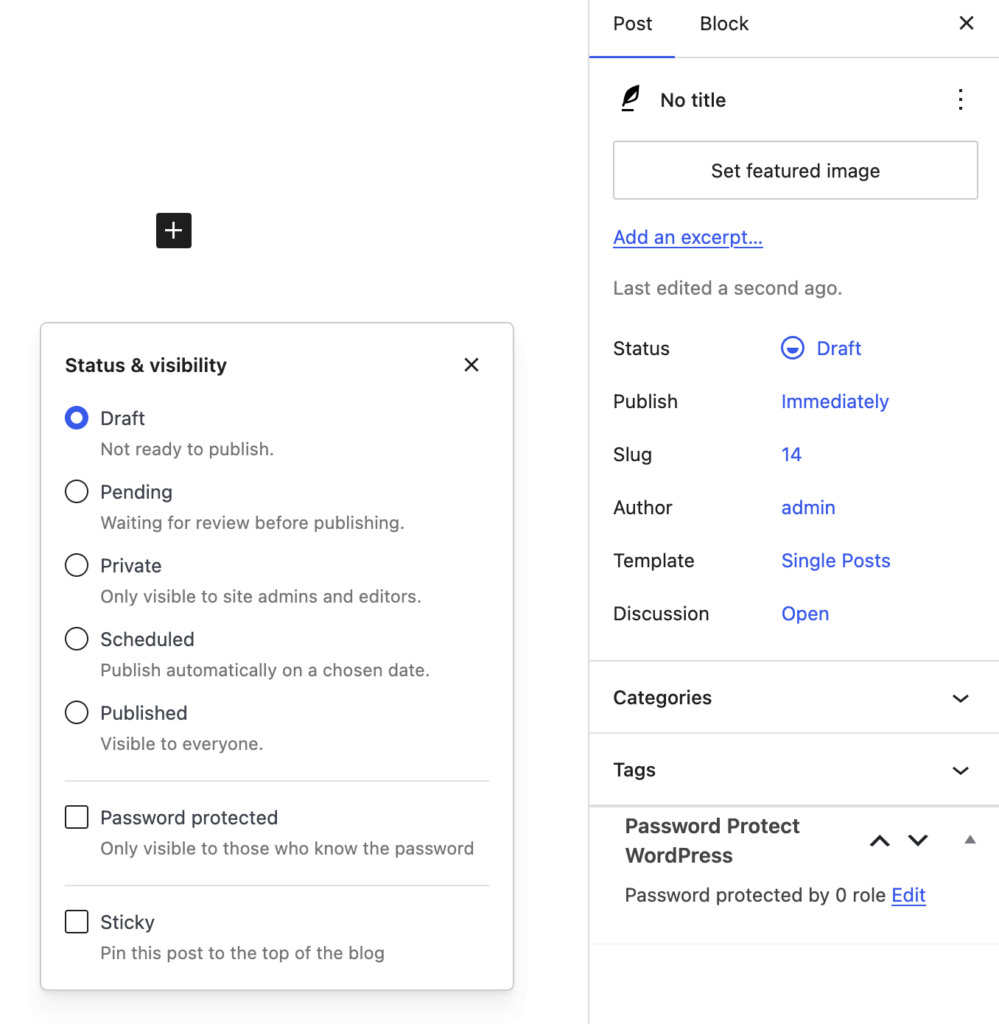
Password protection is WordPress’s native solution for securing individual posts and pages. Simply edit your content, change the visibility from “Public” to “Password Protected,” and set your desired password. Visitors will see the title and excerpt but need the password to view the full content. This method works well for client previews or sharing drafts with specific stakeholders.
Private visibility completely hides content from public view. Only logged-in users with appropriate permissions can access private pages and posts. This setting is perfect for internal notes, draft content, or administrative pages that should never be publicly visible.
To use either of the options above:
- Edit the page or post in WordPress editor.
- Click Status in the settings panel.
- Choose Private or Password Protected.
For more sophisticated control, consider specialized plugins like Password Protect WordPress (PPWP). PPWP’s Pro version, for example, offers the following features:
- Password protect unlimited WordPress pages, posts, and custom post types including WooCommerce products with support for page builders and custom templates.
- Set multiple passwords per post with unlimited random or custom passwords to share content with different users while tracking individual usage.
- Role-based password protection restricts access so only specific user roles like members can enter passwords while others cannot see the content.
- Quick access links allow users to bypass password entry entirely with convenient direct links that can expire automatically.
- Master passwords let users enter one password to unlock all your protected content across the entire site with date or click restrictions.
Remember that password-protected content may still appear in search results with titles and excerpts visible. For truly sensitive content, combine private visibility settings with proper user role management to ensure only authorized personnel can access your hidden pages and posts.
Best practices and common mistakes
The wrong approach to hiding your WordPress site can damage your SEO rankings, frustrate legitimate visitors, and leave your site vulnerable to security breaches. Here are some things to keep in mind:
- Match your method to your specific needs, i.e., built-in WordPress tools for quick previews, maintenance plugins for extended updates, server-level protection for staging sites, and individual page/post hiding for selective content access.
- Prioritize server-level protection for highest security since it operates independently of WordPress.
- Always enable HTTPS for password-protected content and maintain strong passwords with regular updates. Never rely solely on hiding as your security strategy.
- Configure maintenance mode to return proper 503 status codes with retry-after headers to preserve rankings during temporary downtime.
- Use robots.txt to block development site indexing, but remember password-protected pages may still show titles in search results.
- Schedule calendar reminders to disable maintenance mode and test protection thoroughly by logging out completely.
Always maintain emergency access through hosting control panels or SFTP, and ensure your maintenance pages are mobile-responsive for all visitors.
Next steps for editing your WordPress site
If you must take the site down for edits, plan to make the most of your time so you can get it back up ASAP. Start by deciding if you can use a staging site instead of taking the site down completely.
If you need to upgrade hosting for your WordPress site, you’re in the right place. Liquid Web offers the widest range of hosting options specifically designed for WordPress sites — from a simple VPS, to WordPress cloud hosting, to dedicated WordPress servers for enterprise organizations. You choose your favorite OS and the level of management support you need. Get in touch today.
Additional resources
WordPress management tips and trends →
A crash course on hosting, plugins and themes, running multiple sites, and more
How to build a WordPress site →
A complete beginner’s guide to getting your WordPress site up (or revamped)
How to install WordPress on localhost →
5 steps to setting up local WordPress development