Deploying a WordPress or WooCommerce site with Branch

Branch is a Continuous Integration (CI) and Continuous Delivery (CD) tool designed around the needs of WordPress developers from the same folks behind WP Pusher. Best of all, Branch has built-in support for deploying to Liquid Web!
To get started, sign up for Branch by connecting your GitHub, GitLab, or Bitbucket account, then create a site within Branch by selecting a Git repository.
Next, we’ll want to configure all of the steps necessary to build our site. Branch offers a number of “recipes” for common actions (installing Composer dependencies, running Webpack, etc.), but also gives us the ability to add any number of custom steps.
Get fast, reliable hosting for WordPress
Power your site with the industry’s fastest, most optimized WordPress hosting

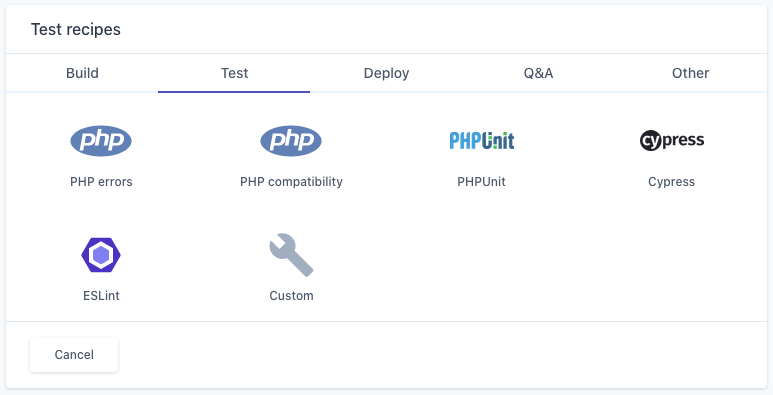
Once we’ve outlined the steps necessary to build our site, we can move onto the next stage of our pipeline: testing.
If you have an automated test suite for your site already, you can simply tell Branch to run whatever commands are necessary. Even if you don’t already have tests, Branch makes it a breeze to add in linting, coding standards, and compatibility checks:
Now that we’ve installed our dependencies, built everything, and passed our tests, it’s time to get our code into production!
Branch contains recipes for deploying to Liquid Web, and connecting the two platforms is painless:
- Select your site in the Branch dashboard, click “Settings”, then grab your Branch site’s public SSH key
- Add this public key to the list of keys within the portal
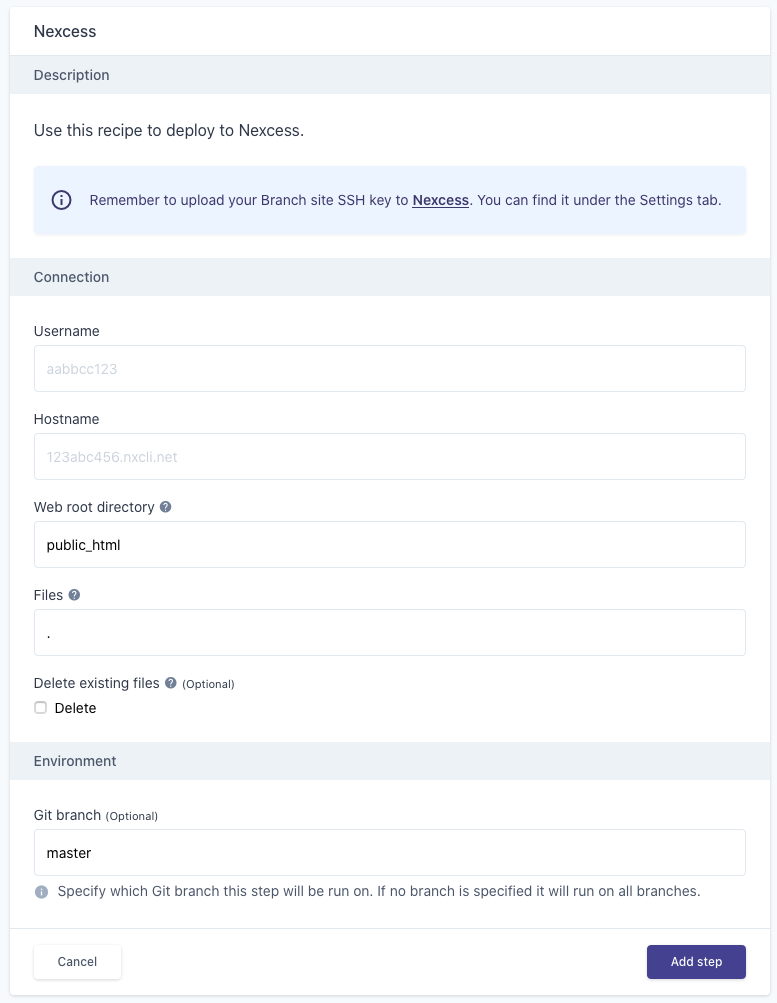
Once Branch is able to communicate with your Liquid Web site, we can select the “Liquid Web” deployment recipe and fill in a few details:
- The hostname and username for the site (available via the Liquid Web portal on your site’s “Access” screen)
- The web root that we’re deploying to. If our git repo is meant to serve as the wp-content/ directory, this value should be “public_html/wp-content”.
- The files we wish to deploy (generally the default, “*”, is sufficient)
- The git branch to deploy to this environment
The “Git branch” setting is especially important, as this lets you specify different deployments for different branches. For example, you might have a “staging” branch that deploys to your staging environment, letting you test changes before making them live.
It’s worth noting that Branch uses the continuous deployment model by default, where the pipeline runs with each push to the given branch. If you would prefer more of a continuous delivery model (where some manual action must be taken), you might consider maintaining a “production” branch that only gets merged into when you’re ready to release.
At this point, Branch should be configured to build and deploy your git repository to Liquid Web! You may trigger your first deployment either by clicking the “Run Deployment” button on your site’s “Pipelines” page or by pushing to your Git repository.
Customizing your release process
One of the really nice features of Branch is the ability to configure additional steps after a successful deployment, such as automatically clearing your site’s object cache after a deployment. This can be accomplished using the WP-CLI recipe under “Other”:
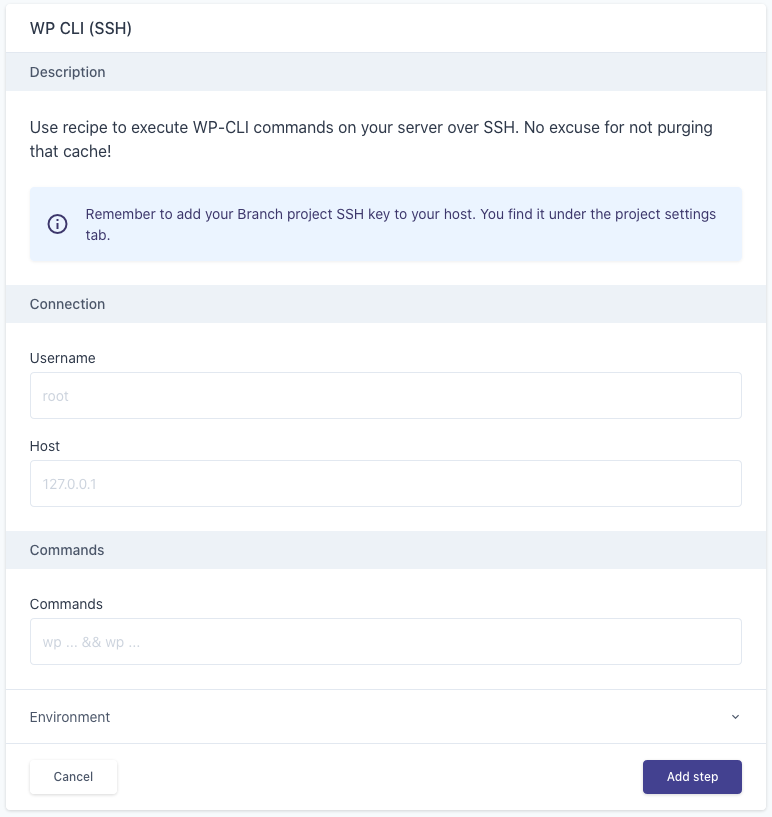
The host and username will generally be the same as we used in the deployment step, and you can chain as many commands as necessary.
Please note that the commands will be run relative to the home directory of the SSH user, so commands should be prefixed with “–path=public_html” to avoid issues with WP-CLI not finding WordPress. For example, clearing the object cache would be “wp –path=public_html cache flush”.
Additional resources
Best WordPress theme frameworks →
Compare top theme frameworks for flexible site development.
Must-have theme development tools →
Build themes with top development tools for faster workflows.
What is a WordPress staging site? →
Create a staging site to test changes safely before going live.