◦ Comprehensive security
◦ 24/7 support
WordPress Guide → Build → Change Favicon
How to change the favicon in WordPress

A favicon is the small icon that appears next to your site’s name in browser tabs, bookmarks, and mobile shortcuts. It’s a subtle but powerful way to reinforce your brand identity and make your website easier to recognize.
In WordPress, changing your favicon only takes a few clicks—and using the right size ensures it looks sharp everywhere. Let’s get into it.
Get fast, reliable hosting for WordPress
Power your site with the industry’s fastest, most optimized WordPress hosting
WordPress favicon size
The recommended favicon size for WordPress is 512×512 pixels in a square format. While older browsers used smaller dimensions like 16×16 or 32×32 pixels, modern WordPress themes and web browsers prefer a larger, high-resolution image that can be scaled down as needed.
WordPress handles most favicon resizing for you when you upload your image under Appearance > Customize > Site Identity. However, starting with the correct size reduces the chance of distortion or blurry icons. To keep your favicon looking sharp, make sure it’s simple, visually distinct, and optimized for small display sizes.
Method 1: Place a favicon within your WordPress directory
- Verify the file is named favicon.ico.
- Upload the Favicon using FTP or SSH to the directory where WordPress is installed.
- WordPress should recognize the changes have been made will update your Favicon automatically.
Method 2: Use a plug-in
1. Log in to the administration panel of your WordPress site.
2. On the left side menu, navigate to Plugins>Add New.
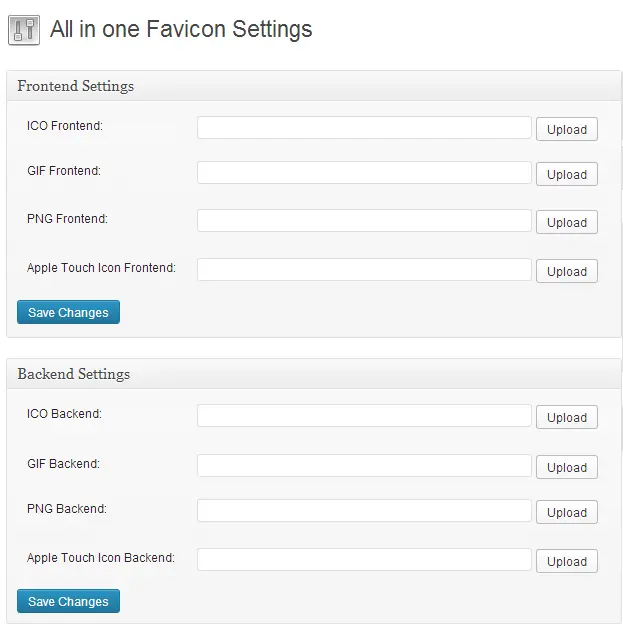
3. Search for and then install the plug-in titled All in One Favicon.
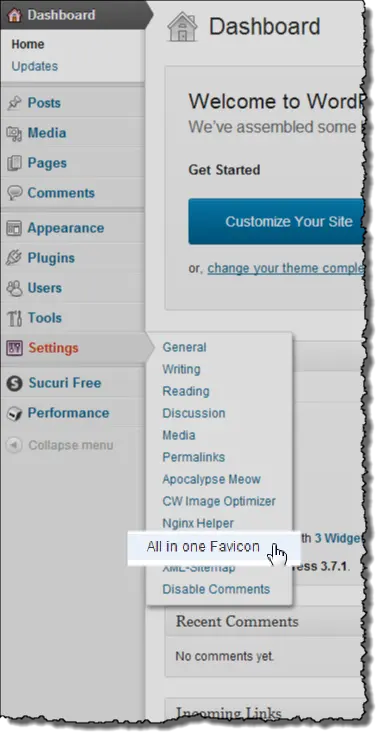
4. Upload the Favicon to the frontend and backend of your site and click Save Changes.
5. Refresh the page, and the new Favicon should display.
Method 3: Edit your theme header.php file
ATTENTION: Unless you are experienced at modifying themes, make a backup of your files before modifying them.
1. Before starting the upload process, ensure that your Favicon file is named favicon.ico.
2. Using FTP or SSH, upload the Favicon SH to the directory containing the WordPress installation.
3. Log in to your WordPress Admin Panel.
4. On the left menu, click Appearance > Theme Editor.
5. Select the file titled header.php to edit the file.
6. Locate or add a line of code as shown below.

7. If this line does not exist, add the code within the html tags.
Next steps for your WordPress site
Truly optimizing your site for performance and user experiences starts with great hosting. Liquid Web has been offering the fastest hosting for WordPress sites for decades.
We also offer the widest range of options, from self-managed to fully-managed, and lots more. Click below to learn about secure, reliable WordPress hosting, or start a chat and get details from one of our expert support team members.
Additional resources
How to build a WordPress site →
A complete beginner’s guide that covers 9 key steps to a successful launch
How to change a font in WordPress →
Three simple strategies and where to get good fonts
What is managed WordPress hosting? →
What it really looks like, benefits, and how to decide if it’s for you

Jason Dobry is a technical writer with deep experience in web hosting and ecommerce applications. He is a family man, and lover of the Oxford comma and Monty Python. His natural enemies are the passive voice, adverbs, and cluttered language.