How to configure Magento 2 to use Elasticsearch

How to configure Magento 2 to use Elasticsearch, a versatile search engine for large and varied data sets.
Get fast, reliable hosting for WordPress
Power your site with the industry’s fastest, most optimized WordPress hosting
What you need
If you are a Liquid Web Magento 2 Cloud client:
- You must first enable the Elasticsearch feature as outlined in How to enable Elasticsearch for your LIquid Web Cloud account.
- You will need your SSH login credentials. See How to generate and view SSH/FTP passwords for your Liquid Web Cloud account for details.
Step 1: configure Magento 2 to use Elasticsearch
ATTENTION: If you have not already done so, follow the steps provided in How to enable Elasticsearch for your Liquid Web Cloud account before continuing.
- Log in to your Magento 2 admin panel.
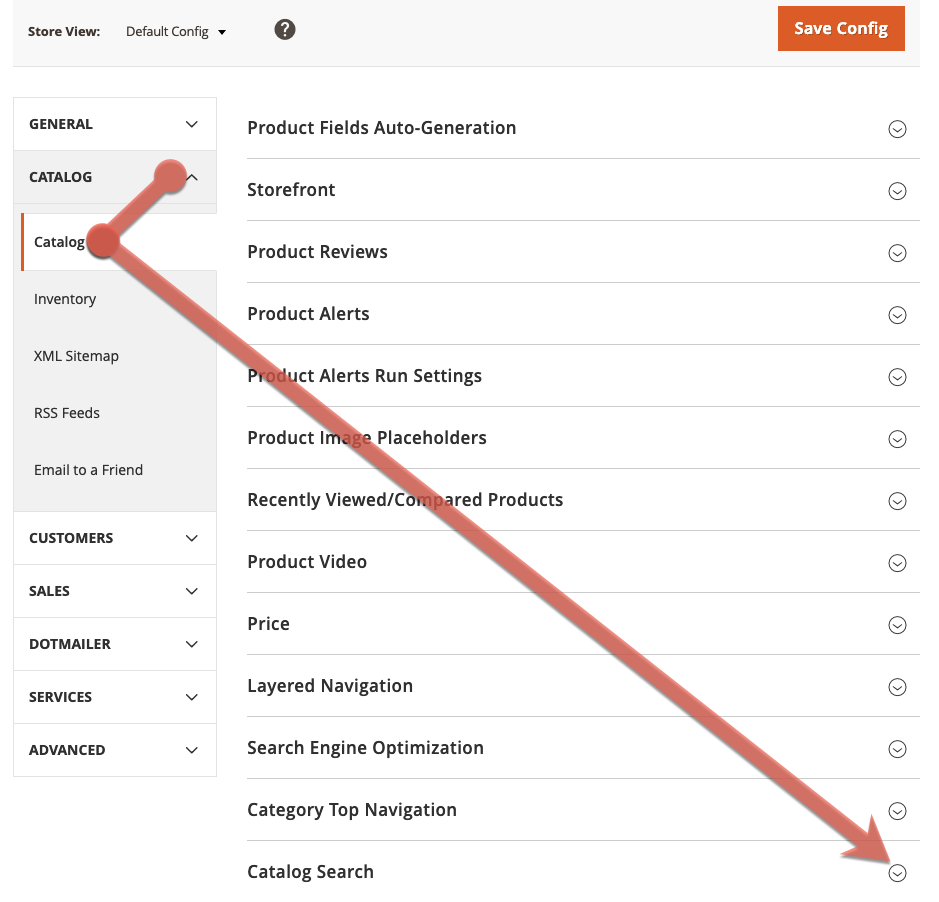
- From your dashboard, select Stores > Configuration.
- From the Catalog drop-down menu, select Catalog, then Catalog Search.

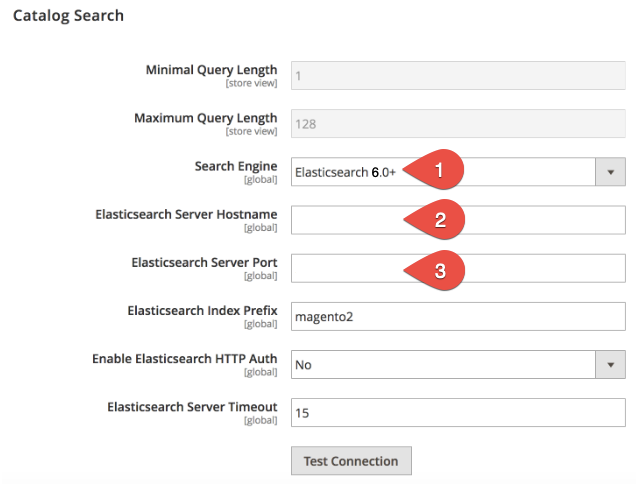
- From the Search Engine drop-down list, select Elasticsearch 6.0+ (1). Fill the Elasticsearch Server Hostname (2) and Elasticsearch Server Port (3) fields. ATTENTION: If you are a Magento 2 Liquid Web Cloud client, use the information provided in Step 4 of How to enable Elasticsearch for your Magento 2 Cloud account for the Elasticsearch Server Hostname and Elasticsearch Server Port fields. If you are using an Elasticsearch container with multiple sites then you need to pick a unique prefix or it will break the other site every time the cron runs.

- Click Test Connection. If the test passes, go to Step 2 below. If it fails, either follow the provided recommendations, or contact our 24/7 Support team by email or through your Client Portal.
Step 2: refresh your full page cache
You may perform this step from either the Admin panel or the command line.
Method 2a: from the admin panel
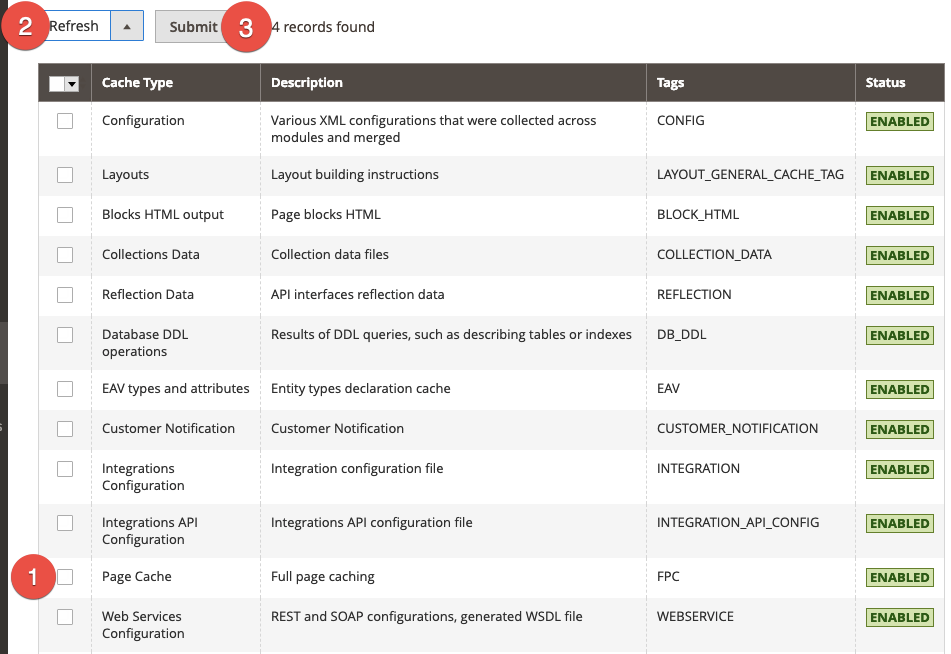
- From the dashboard, select System > Cache Management.
- Select the Page Cache check box (1), confirm the Refresh selection (2), then click Submit.

Method 2b: from the command line
If necessary, see How to generate and view SSH/FTP passwords for your Liquid Web Cloud Account.
Log in to your Magento server, then issue: magento cache: clean
Step 3: reindex catalog search
- Log in to your Magento server.
- Enter one of the following commands, but replace the angled brackets (<>) and everything between them with the indicated information. ATTENTION: If you are a Liquid Web Cloud client, will use your domain name; for example, mydomain.com/bin/magento.
- To reindex the catalog search index only:
php /bin/magento indexer:reindex catalogsearch_fulltext
- To reindex all indexers:
php /bin/magento indexer:reindex
Reverting to MySQL
If you experience issues with Elasticsearch and cannot resolve them, repeat Steps 1A-1D, but select MySQL for the Search Engine field and save. Then, repeat Step 2: Refresh your full page cache and Step 3: Reindex catalog search.
For 24-hour assistance any day of the year, contact our support team by email or through your Client Portal.
Additional resources
Best abandoned cart email solutions for Magento 2 →
Learn how to recover lost sales with Magento abandoned cart emails.
How to install Magento extensions →
Install extensions to add features and customize your store.
How to backup my cms tables on Magento 2 →
Discover how to back up cms tables to protect key store content.