
 Dean Conally
 Introduction
Zabbix is an open-sourced tool used to monitor various IT components such as servers and hardware that they are running, cloud services, whole networks, etc. Zabbix can monitor the network health and integrity of your servers. All monitoring can be done through Zabbix’s web-based frontend. This means that you can quickly check the status of your servers from anywhere!
This article describes how to install the Zabbix monitoring tool, create a database, and configure the frontend on Ubuntu 20.04.
Prerequisites
Here is a summary of the requirements needed to complete this tutorial.
- OS: Ubuntu 20.04 (Self Managed)
- User Type: Root/basic Linux user (Typical Linux users will need to add the sudo command)
- Software: Apache, MySQL, Zabbix, PHP version 7.2+ or >
Note: The installation of Zabbix 5.2 is considered to be an intermediate level of difficulty.
Install the Zabbix Monitoring Tool
First, let’s grab the Zabbix .deb file for adding the repository using the wget command. The example URL shown may change depending on the current release number.
root@host:~# wget https://repo.zabbix.com/zabbix/5.2/ubuntu/pool/main/z/zabbix-release/zabbix-release_5.2-1+ubuntu$(lsb_release -rs)_all.debAfter running this command, we will see a download bar similar to the one below.
zabbix-release_5.2-1+ub 100%[===============================>] Add Zabbix Repository
Once the repository is added, install it using the dpkg command.
root@host:~# dpkg -i zabbix-release_5.2-1+ubuntu$(lsb_release -rs)_all.debAfter you run the command above, you will see an output like this.
Selecting previously unselected package zabbix-release.
(Reading database ... 96998 files and directories currently installed.)
Preparing to unpack zabbix-release_5.2-1+ubuntu20.04_all.deb ...
Unpacking zabbix-release (1:5.2-1+ubuntu20.04) ...
Setting up zabbix-release (1:5.2-1+ubuntu20.04) ...
The repository is now ready to use. Next, run an update to refresh the repository information.
root@host:~# apt update

Hit:1 http://syspackages.sourcedns.com/packages/stable/ubuntu focal InRelease
Hit:2 http://security.ubuntu.com/ubuntu focal-security InRelease
Get:3 http://repo.zabbix.com/zabbix/5.2/ubuntu focal InRelease [4,930 B]
Hit:4 http://us.archive.ubuntu.com/ubuntu focal InRelease
Hit:5 http://us.archive.ubuntu.com/ubuntu focal-updates InRelease
Hit:6 http://us.archive.ubuntu.com/ubuntu focal-backports InRelease
Get:7 http://repo.zabbix.com/zabbix/5.2/ubuntu focal/main Sources [1,202 B]
Get:8 http://repo.zabbix.com/zabbix/5.2/ubuntu focal/main amd64 Packages [3,231 B]
Fetched 9,363 B in 0s (19.1 kB/s)
Reading package lists... Done
Building dependency tree
Reading state information... Done
All packages are up to date.
Install Zabbix
Now that our server is up to date, we can now proceed with the installation of Zabbix. The next step is to install the Zabbix server, Zabbix frontend, and the Zabbix agent. We can accomplish this using a single command.
root@host:~# apt -y install zabbix-server-mysql zabbix-frontend-php zabbix-apache-conf zabbix-agentThis output of this command will take some time to complete. We show the last few lines out of the output below.
Setting up libapache2-mod-php (2:7.4+75) ...
Setting up php-gd (2:7.4+75) ...
Setting up zabbix-apache-conf (1:5.2.4-1+ubuntu20.04) ...
Enabling conf zabbix.
To activate the new configuration, you need to run:
  systemctl reload apache2
Processing triggers for ufw (0.36-6) ...
Processing triggers for systemd (245.4-4ubuntu3.4) ...
Processing triggers for man-db (2.9.1-1) ...
Processing triggers for libc-bin (2.31-0ubuntu9.2) ...
Processing triggers for php7.4-cli (7.4.3-4ubuntu2.4) ...
Processing triggers for libapache2-mod-php7.4 (7.4.3-4ubuntu2.4) ...
Output like this will indicate a successful installation. Now we proceed to reload Apache as the command output informs us. Now that we installed Zabbix let’s create and configure a database.
Database Creation and Configuration
Install MariaDB
First, we need to install MariaDB. Use the following command to accomplish this.
root@host:~# apt -y install mariadb-common mariadb-server-10.3 mariadb-client-10.3Start MariaDB
Again, the output will be lengthy, but MariaDB will be installed successfully without errors if the previous steps are followed. Now, start MariaDB and enable it using the following command.
root@host:~# systemctl start mariadb && systemctl enable mariadbCreate and Configure the Zabbix Database
Now we can create the database for Zabbix. We can accomplish this using two separate commands. The first command will generate the database.
root@host:~# mysql -uroot -p'rootDBpass' -e "create database zabbix character set utf8 collate utf8_bin;"The second command will grant privileges to the user and allow you to define your password. In this example, the password is YourPassworD1236.
root@host:~# mysql -uroot -p'rootDBpass' -e "grant all privileges on zabbix.* to zabbix@localhost identified by 'YourPassworD1236';"Now we have to import the database schema. Make sure that we use the password that we set in the previous command. Importing the database schema will not provide any output, but it can take up to 5 minutes to run.
root@host:~# zcat /usr/share/doc/zabbix-server-mysql*/create.sql.gz | mysql -uzabbix -p'YourPassworD1236' zabbixThe next step is essential. Use your preferred text editor (we used vi) to edit the zabbix_server.conf file.
root@host:~# vi /etc/zabbix/zabbix_server.confOnce you are inside the file, scroll down to the line below.
# DBPassword=Add your previously defined password after the equal sign. You can exit vi by running :wq and then hitting enter. Next, we configure the firewall.
Configure the Firewall
Now, we need to open ports 10050, 10051, and 80 using the commands below. This allows the Zabbix agents to communicate with the server
root@host:~# ufw allow 10050/tcp
root@host:~# ufw allow 10051/tcp
root@host:~# ufw allow 80/tcp
Then, reload the firewall using the ufw reload command.
root@host:/# ufw reload
Firewall reloaded
Enable Zabbix Server
We can now start and enable the Zabbix server and agent.
root@host:~# systemctl restart zabbix-server zabbix-agent
root@host:~# systemctl enable zabbix-server zabbix-agent
The final step in the process is to configure the Zabbix frontend.
Zabbix Frontend Configuration
We begin by editing the /etc/zabbix/apache.conf file.
root@host:~# vi /etc/zabbix/apache.confFind the following line and remove the “#” sign from the beginning of it.
php_value date.timezone Europe/AmsterdamAfter removing the “#” sign, set the correct timezone for your location. In our case, we used America/Phoenix.
Next, exit the Apache configuration file by typing :wq and then pressing Enter.
Lastly, we restart and enable apache using the commands below.
root@host:~# systemctl restart apache2 && systemctl enable apache2
Synchronizing state of apache2.service with SysV service script with /lib/systemd/systemd-sysv-install.
Executing: /lib/systemd/systemd-sysv-install enable apache2
Now we can connect to the Zabbix frontend in our browser using the following URL.
http://server_ip_address/zabbix
Of course, replace server_ip_address with your server’s IP address, like http://143.143.93.75/zabbix. Once entered, the following screen should show in your browser.
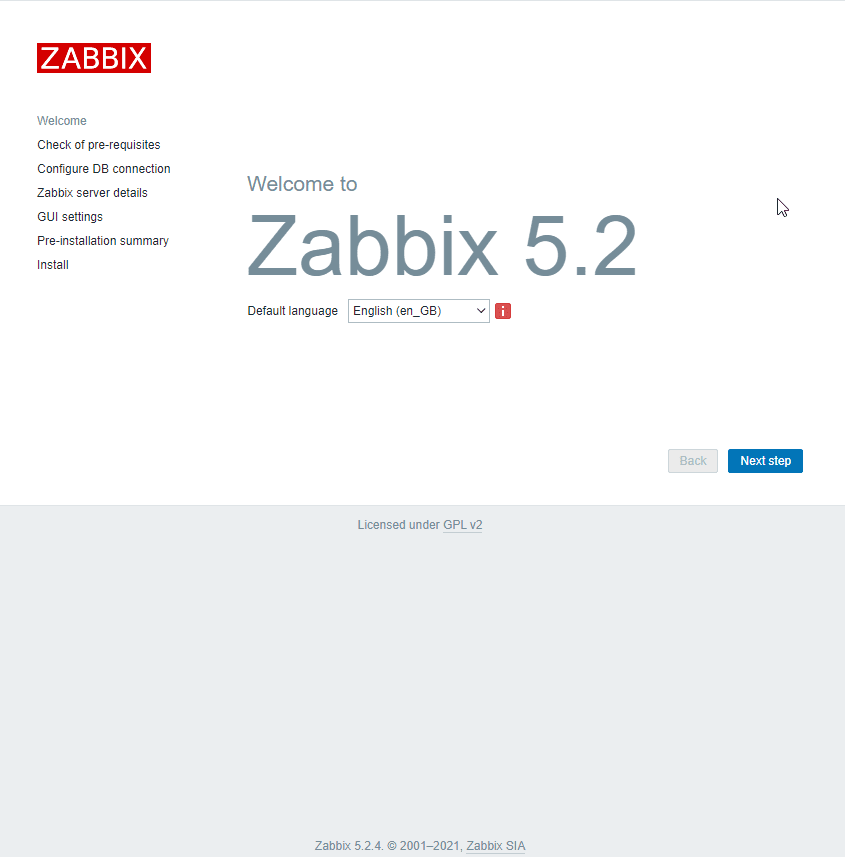
Now, click the Next Step button. Zabbix will verify all prerequisites are in place and working as expected. If the software and configurations are correct, everything should be marked with green OK. Click Next Step again to move on.

Next, inside the Password field, please enter the password that we previously configured, which is YourPassworD1236. Continue to click on Next Step until you reach this screen.
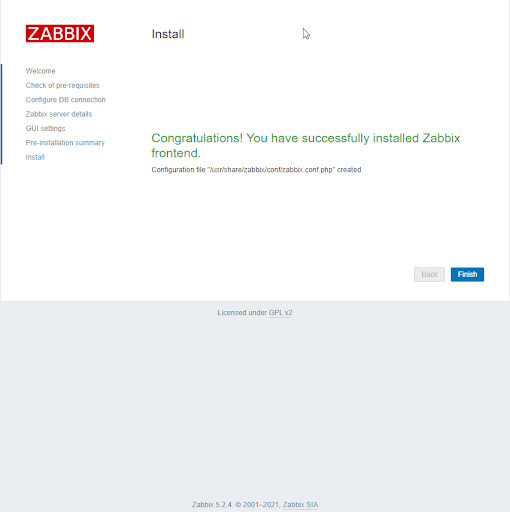
How awesome is this? We have installed the Zabbix monitoring software successfully.
Now click Finish and input the default login information:
- Username: Admin
- Password: Zabbix
Change Default Password
Make sure to secure your account by resetting the default password after your first login. Below are instructions on how to do so through the Zabbix interface.
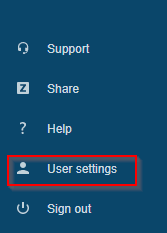
Click User Settings in the lower left part of the dashboard.

Then click the Change Password button.

Two empty fields will appear at the top of the screen, where we can input our new password. Once we are done, click Update. We will then be sent back to the main dashboard page, with the message User Updated at the top of the screen.
Zabbix Agents
The Zabbix agent is a small piece of software that is deployed on servers needing to be monitored. They actively monitor local resources and applications. The agents gather operational information and report back to the Zabbix server on ports 10020 and 10021. Zabbix agents are extremely efficient because of the use of native system calls for gathering statistical information.
Conclusion
And that’s it! Zabbix has been successfully installed. For further information on configuring tasks in the interface, see the quickstart documentation at zabbix.com. We hope this tutorial was easy to follow and that you will explore many of the useful features that Zabbix has at its disposal.
We pride ourselves on being The Most Helpful Humans In Hosting™! Our Support Teams are filled with experienced Linux technicians and talented system administrators who have intimate knowledge of multiple web hosting technologies, including those discussed in this article. Should you have any questions regarding this information, we will always answer any inquiries related to this article, 24 hours a day, 7 days a week, 365 days a year.
If you are a fully managed VPS server, dedicated cloud server, VMware private cloud, VPS reseller hosting, managed cloud server, or a dedicated server owner, and you are uncomfortable with performing any of the steps outlined, we can be reached via chat or support ticket to assist you in this process.