What is ModDeflate?
How mod_deflate works
When a visitor accesses a website, a request is made to the web server for a specific kind of data. An example might be a home page of a site. Next, the web server locates that data and delivers it to the client who is requesting that data – basically back to the web browser.
In this example, the speed at which the home page loads can depend on a variety of factors. One of them could be how long it takes to find and deliver the data for that page. This is just one example.
Some of that data – such as javascript files, css files, and php files – can actually be compressed into smaller sizes before they are delivered back to the visiting client or browser at the smaller size. The visitor can now have a more optimized browsing experience.
This is where mod_deflate comes in.
Using mod_deflate
In order for mod_deflate to work properly, two things need to happen:
- It needs to be installed on an Apache v2 server
- It needs to be configured or setup on the server
Using mod_deflate will require some configuration, so you may wish to have a developer configure that for you. If you have a server at Liquid Web, one of our Helpful Support Technicians would be happy to install this for you.
Not all server environments can utilize mod_deflate, as it is a module (add-on) to work specifically with the Apache Web Server.
Here are some things to keep in mind when setting up mod_deflate:
- It is compatible only with an Apache Web Server, and only on Apache V2.
- It will require that the module itself is installed directly on the server environment.
- You can configure it by placing certain directives in an .htaccess file.
- If you have worked with older versions of Apache, you may have worked with a very similar module called mod_gzip. Mod_gzip also compresses data before it leaves the server; only specific types of data can be compressed.
- Only compress data that is already uncompressed, so the module is not trying to compress something that is already reduced in size through compression.
- There can be a slight CPU load in exchange for compressing data. You will want to test your specific environment to see how compression affects web traffic speed improvements versus web server resources.
- Smaller files leaving the server equals lower bandwidth, which is good news for most, especially if outgoing bandwidth costs are an issue.
Next, let’s look at how to install mod_deflate in WHM on a CentOS 7 server with Easy Apache v4.
Installing mod_deflate in WHM on Centos 7 with Easy Apache v4
- Find EasyApache 4 in WHM
Login to WHM and type “apache” in the upper left search field. Once the menu adjusts to that filter, click on EasyApache 4.
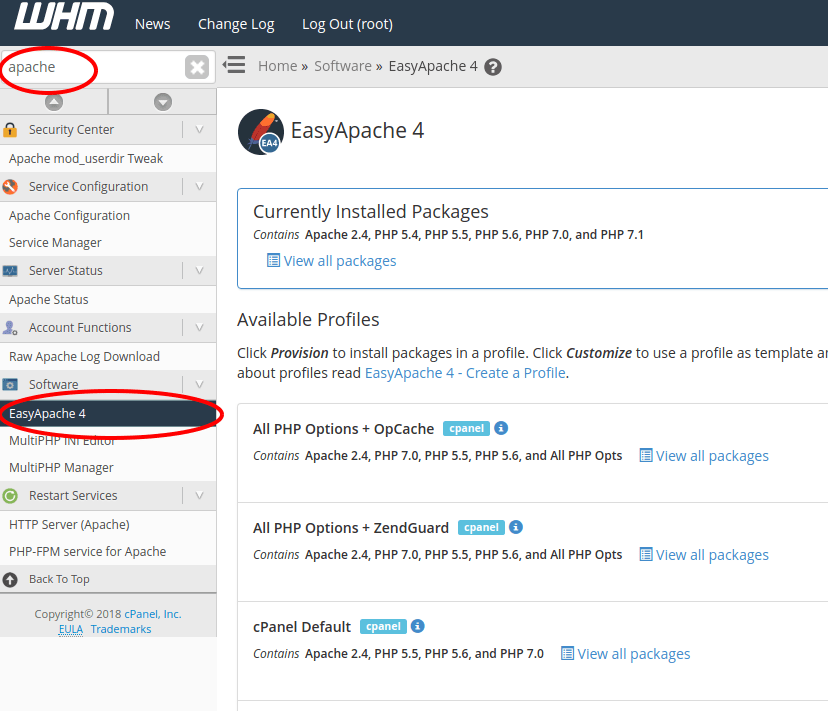 We’ll want to customize our EasyApache 4 setup, so find and click the blue Customize button.
 This will load the current Apache profile.
 - Find the mod_deflate Module
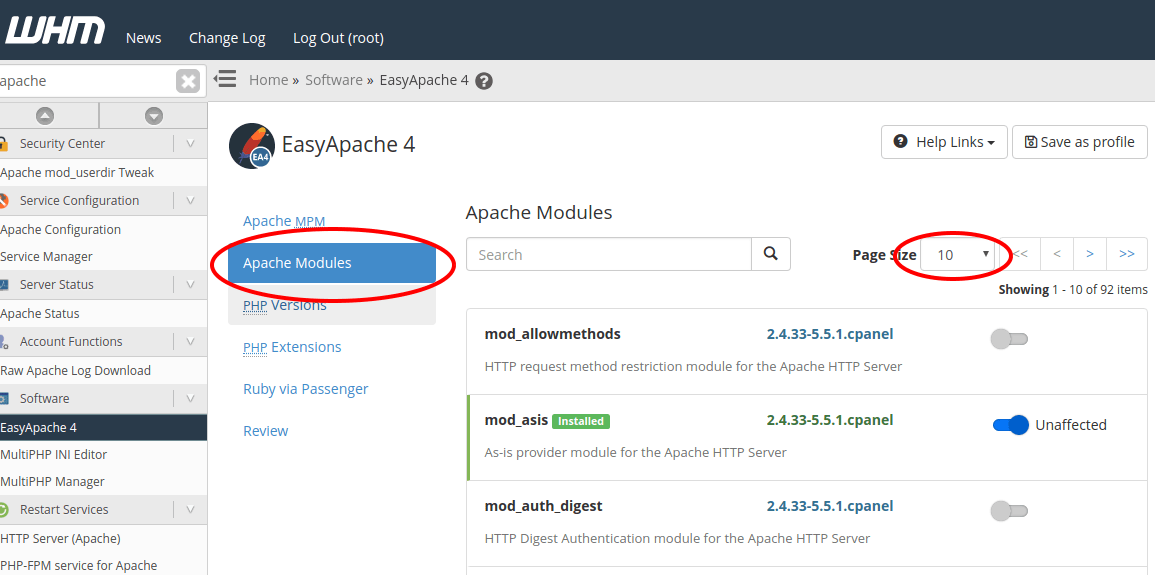
You will need to load more modules on the page, or even all of them, to find the mod_deflate module. Once you find it, toggle it on. Click on Apache Modules in the left menu to load the Apache Modules. Next, change the dropdown menu to show 50 items per page.
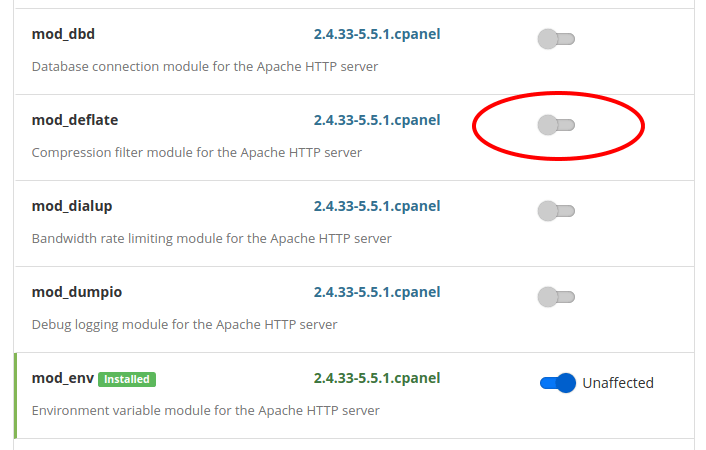
 Scroll down through the Apache Modules until you find mod_deflate. Turn it on.
- Review and Provision
Now, go to the left menu and click on Review. Once you click on it, EasyApache 4 will review all the changes you have made to the current EasyApache 4 profile. It is as simple as that!
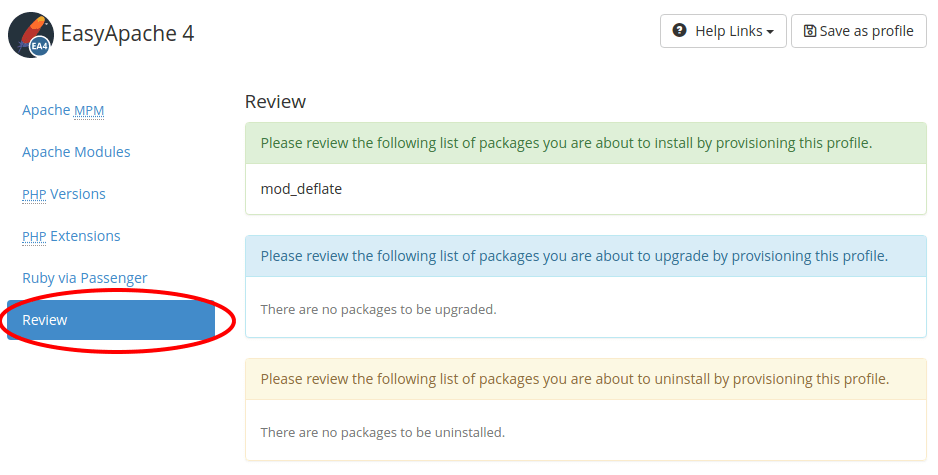 Finish the review by clicking on the Provision button toward the bottom of the page.
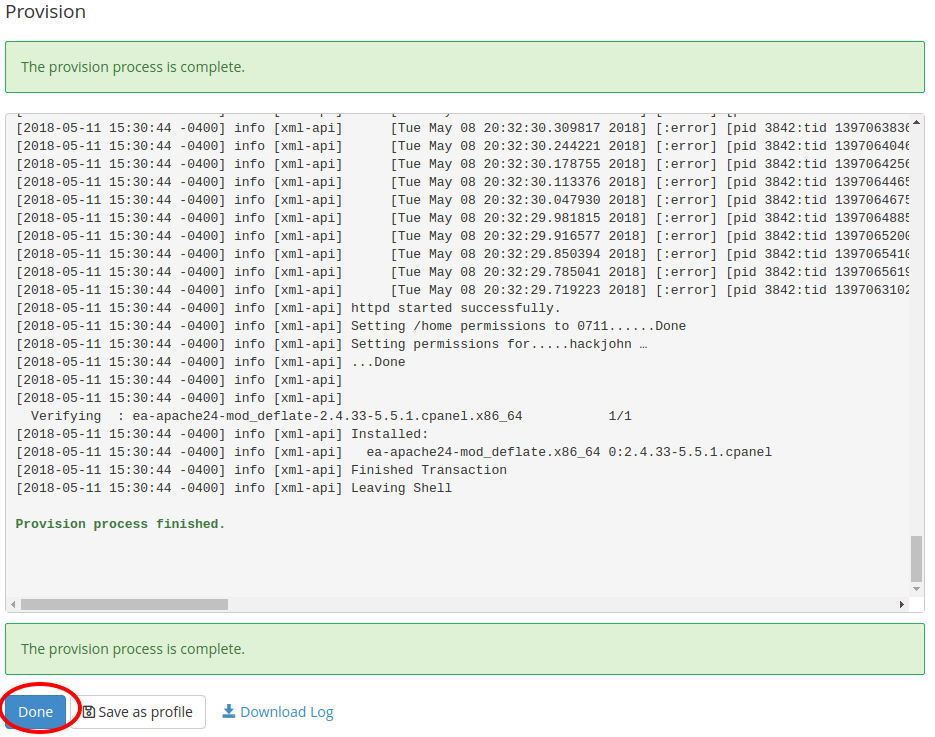
 EasyApache 4 will now add the mod_deflate, and provision all the changes. Once it is finished, you will get a confirmation – at which point you can click on the blue Done button.
- Check the Installation
You can confirm that mod_deflate is installed by going back to EasyApache 4 and clicking on View All Packages.
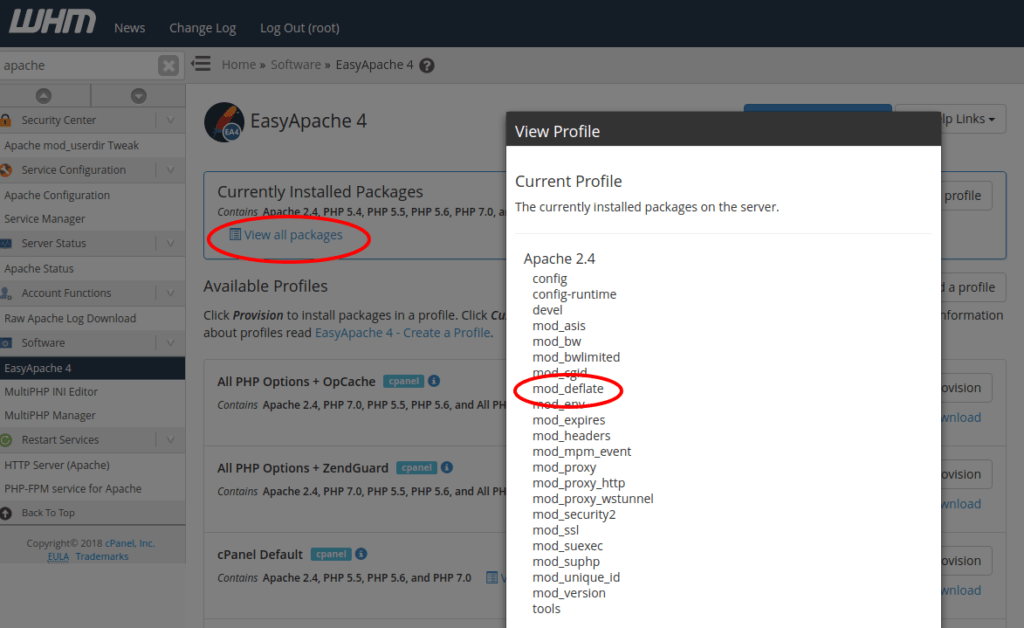 That’s it! The server now has mod_deflate installed. Don’t forget – you also need to configure the server to use this module.
Configuring mod_deflate
- Find the Include Editor in WHM.
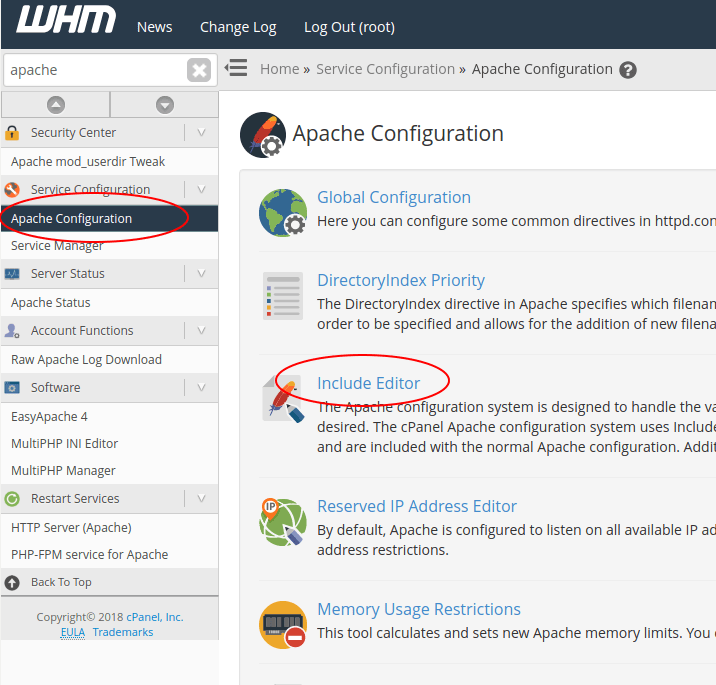
Log in to WHM and go into Service Configuration → Apache Configuration → Include Editor.
- Add the mod_deflate rules
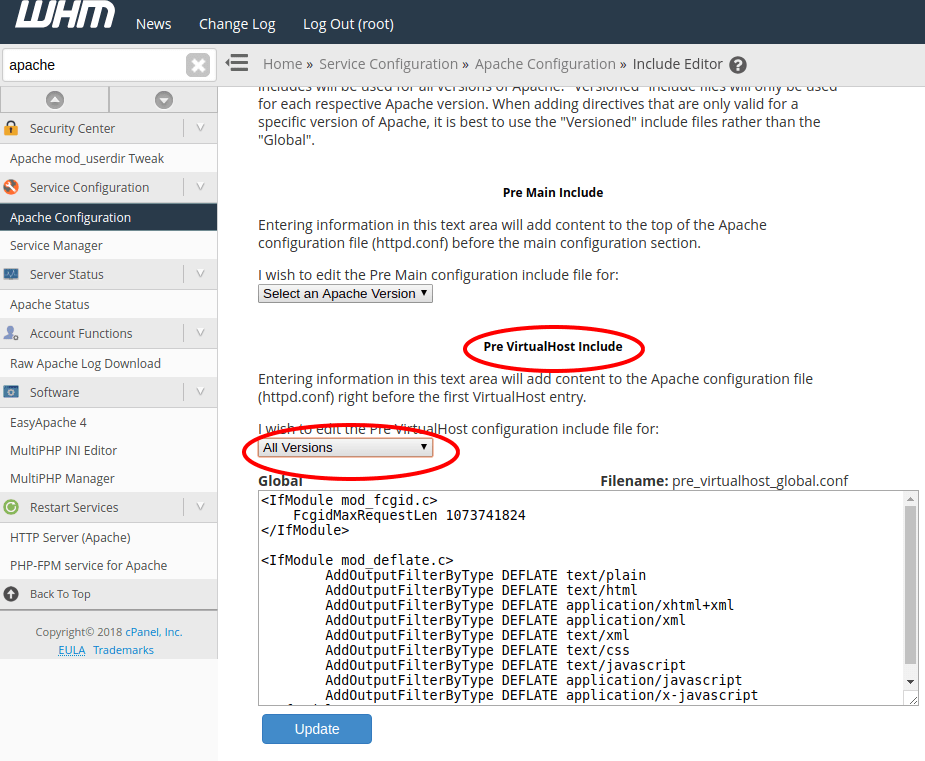
Within the Include Editor, go to the Pre VirtualHost Include area. Select All Versions, and add the following:<IfModule mod_deflate.c> AddOutputFilterByType DEFLATE text/plain AddOutputFilterByType DEFLATE text/html AddOutputFilterByType DEFLATE application/xhtml+xml AddOutputFilterByType DEFLATE application/xml AddOutputFilterByType DEFLATE text/xml AddOutputFilterByType DEFLATE text/css AddOutputFilterByType DEFLATE text/javascript AddOutputFilterByType DEFLATE application/javascript AddOutputFilterByType DEFLATE application/x-javascript </IfModule>
- Save Changes
Remember to save your changes, and then restart Apache. If you are a Liquid Web customer, we can do this for you! Congratulations and happy faster load times!
Have a WordPress site you want to go faster? Check out the articles how your website speed can keep you out of trouble and how to speed up your WordPress site!!!
Related Articles:

About the Author: Helpful Humans of Liquid Web
Our Sales and Support teams are available 24 hours by phone or e-mail to assist.
Latest Articles
How to use kill commands in Linux
Read ArticleChange cPanel password from WebHost Manager (WHM)
Read ArticleChange cPanel password from WebHost Manager (WHM)
Read ArticleChange cPanel password from WebHost Manager (WHM)
Read ArticleChange the root password in WebHost Manager (WHM)
Read Article


