 Dominic Nixon
 Windows roles provide a method to define the utilization types a server has available. These roles are necessary to properly utilize a server for the desired use cases, whether it is to be simply a file server, a print server, or a web server. Typically to act in a specific type of role, a server may require additional features that need to be installed in order to best perform that role. The number of roles available on a Windows Server has grown to the point where the Microsoft Windows’ help pages have gone from reporting what limited roles are deployable, to listing only non-incorporated roles.
Depending on what you require your server to do, the actual roles will determine your hardware needs to operate smoothly. To install or uninstall roles, role services, or features, you are required to log in to an administrator account on to the server. Should you be logged into a local computer on an account lacking administrator rights, simply right-click on the target server in your ‘Servers’ tile, and then click ‘Manage’ as to provide login credentials for administrator rights. Should you wish to mount an offline VHD(Virtual Hard Disks), that server must be added to the ‘Server Manager’ and will not work without administrator account rights on the server.
If you are installing or removing roles from your windows server, you will have several options to add roles to your servers. Both the Windows PowerShell cmdlets and the Server Manager allow for the installment of distinctive roles and features to remote or local servers, and possibly offline virtual hard disks (VHDs).
We are limited to the Roles and Features supported by the OS and other previous versions. For new features and roles released after your OS was published, you must be upgraded to the latest Windows Server OS. It is possible to add multiple roles and features to a single offline VHD, or remote server at the same time through the “Add Roles and Features Wizard” or inside a Windows PowerShell session.
How to Add Roles
Step 1. Open Server Manager
To use the Add Roles and Features Wizard, we will start by opening the Server Manager. There are two ways to accomplish this.
— While on the desktop in Windows, click on the Server Manager in the taskbar to begin.
— From the Windows start screen, click on the tile for the Server Manager.
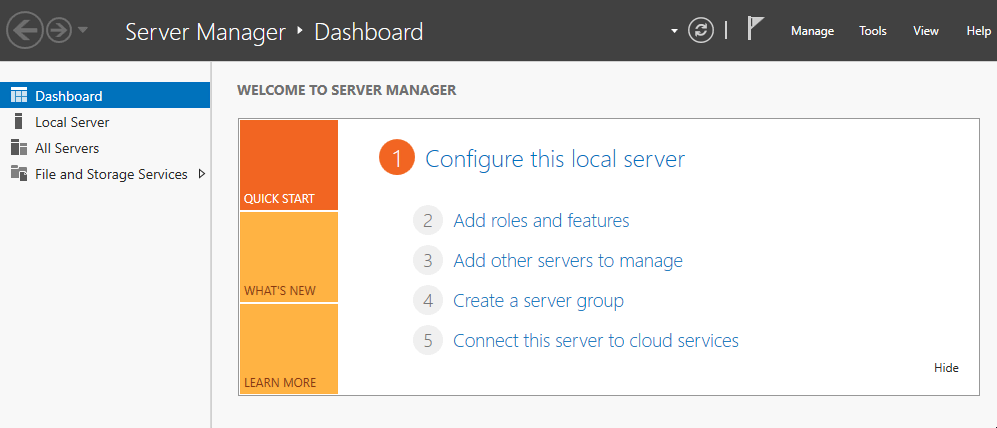
Step 2. Add Roles and Features
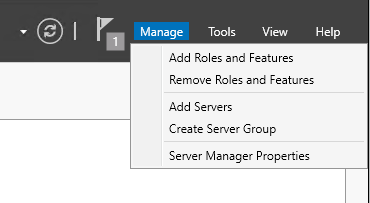
From the Manage menu, you’ll want to click Add Roles and Features.
Step 3. Server and Network Prep
Verify that your destination server and the network environment are prepared for the role and feature you want to install on the before you begin page and then hit Next.

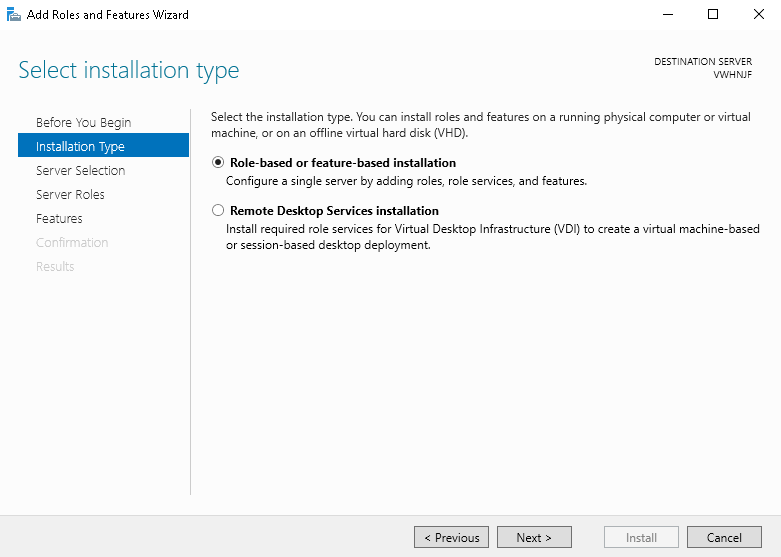
Step 4. Select Installation Type
Select the destination server from the server pool, or select an offline VHD. To be able to select an offline VHD, you must first select the server of which you wish to mount the VHD and then select the file.
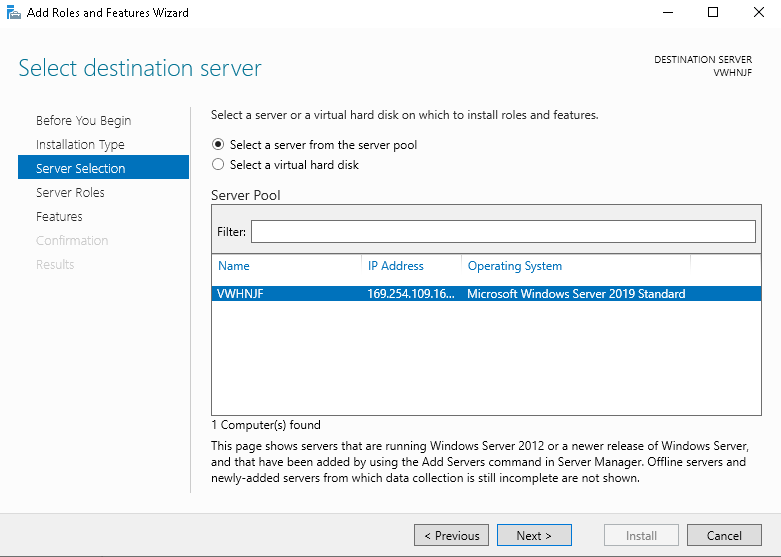
Step 5. Server Selection
Select the destination server, make a selection from the server pool, or select an offline VHD. Should you wish to select an offline VHD as the destination server. First, you must select the server to mount the VHD, and then select the VHD file. Click Next after selecting your destination server.
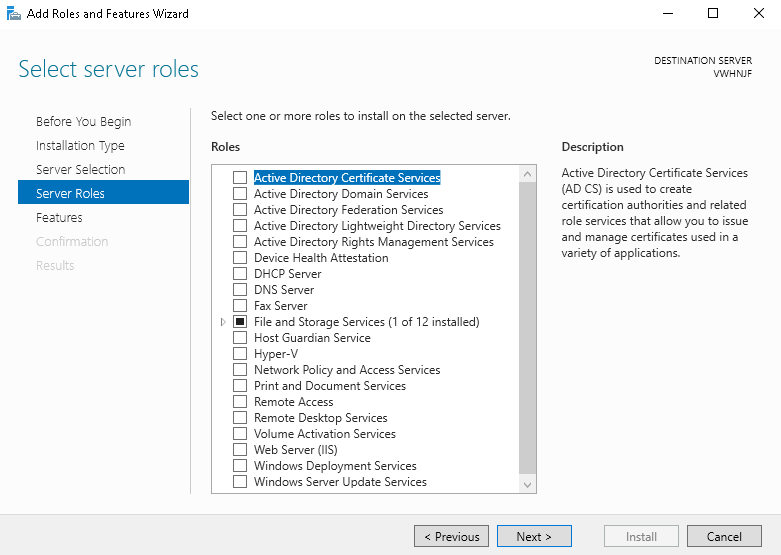
Step 6. Select Roles and Services
Select the desired roles and role services for the role as applicable.
From this point, the wizard informs you if there are any conflicts found that could prevent selected roles and features from being installed. A prompt appears to add any additional roles, role services, or features to installed along with the selected roles or features that belong with your previous selections.
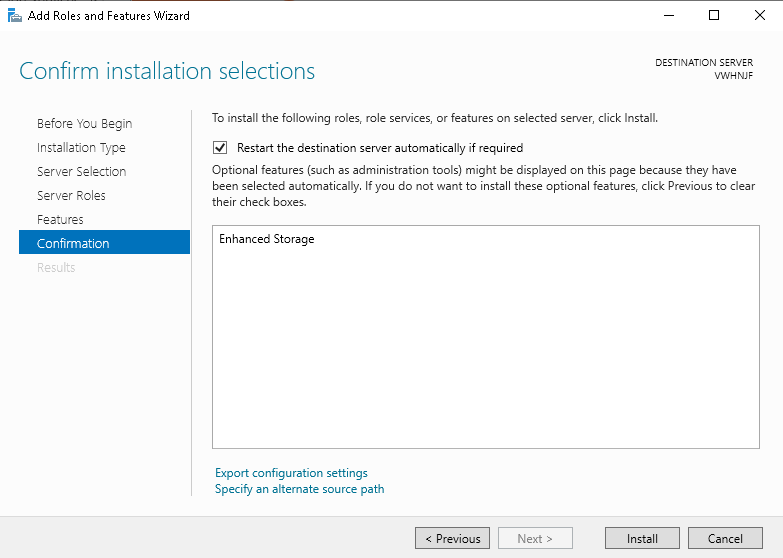
Confirm Selection
When asked to confirm installation selections, review each role, feature, and server selections. If it all looks good, go ahead and click install.
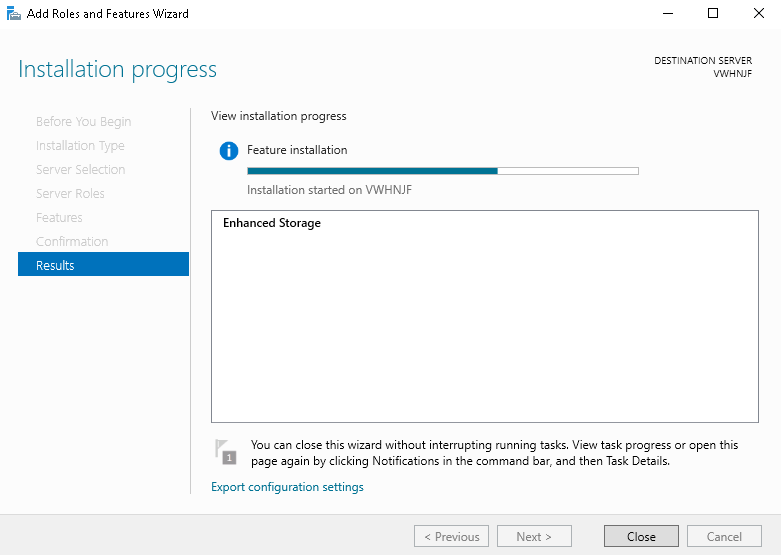
Install Progress
After clicking install, the Installation Progress page displays the progress of the installation, results, and messages. If there were a warning, failure, or post-installation configuration steps required for roles or features to finish installing, they would be shown here.
Within Windows Server 2012 or subsequent releases of Windows Server, the Add Roles and Features Wizard can be closed while the installation is in progress. Messages can also be viewed within the Notifications area of the Server Manager console. You can click on the flag for more detail on notifications, installation, or other tasks currently being performed here.
Windows PowerShell
It is also possible to add roles, role services, and features in the non-GUI environment of a WindowPowerShell. This method does not differ significantly from the previous install procedure other than having to manually type out commands to install the necessary functions. One significant difference between using Windows PowerShell cmdlets is you are not notified of the required services and features for a role. By default, you do not get management tools and snap-ins. We can add the IncludeManagementTools parameter to the cmdlet to have our management tools be included as part of the installation.
The example below installs the Group Policy Management role on the local server from where the command is run and is then rebooted.
Example:
Install-WindowsFeature -Name  -VHD  -computerName  -Restart
Install-WindowsFeature -Name AD-Domain-Services,GPMC -IncludeManagementTools -RestartRemoving Roles and Features
To Remove Roles and Features
Step 1. Open Server Manager
We will begin by opening the Server Manager. There are two ways to accomplish this.
While on the desktop in Windows, click on the Server Manager in the taskbar to begin.
From the Windows start screen, click on the tile for the Server Manager.
Select Remove Roles and Features
Step 2. Select Manage Option
From the Manage menu in the top right corner, click Remove Roles and Features.
Server and Network Prep
Verify that you are prepared to remove roles or features from the server on the ‘Before you begin’ page, and then hit Next.

Select Removal Type
Select the destination server from the server pool, or select an offline VHD. To be able to select an offline VHD, you must first select the server of which you wish to mount the VHD and then select the file.
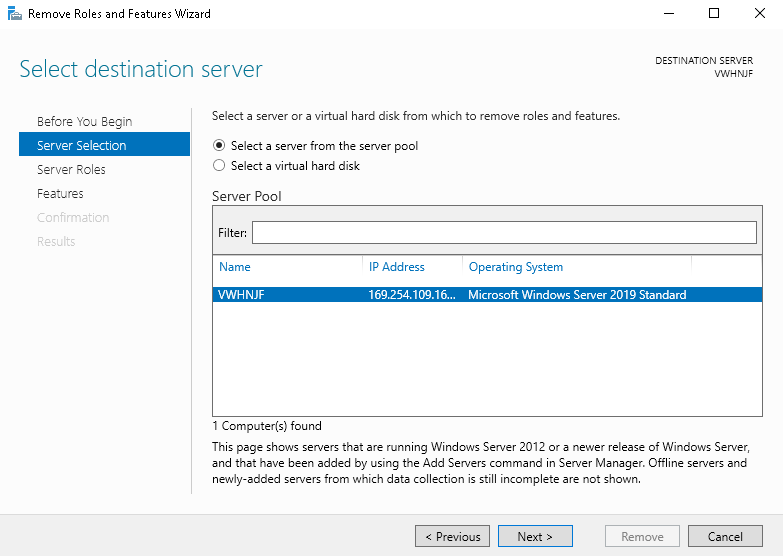
Server Selection
Select the roles or role services (if relevant), and then you may proceed. While continuing the removal of roles and features in the wizard, you may be prompted to remove any roles, role services, or other features that cannot run without the roles or features removed. Management tools and snap-ins can be left alone if there are plans to use the selected server to manage the role on other off-site servers.
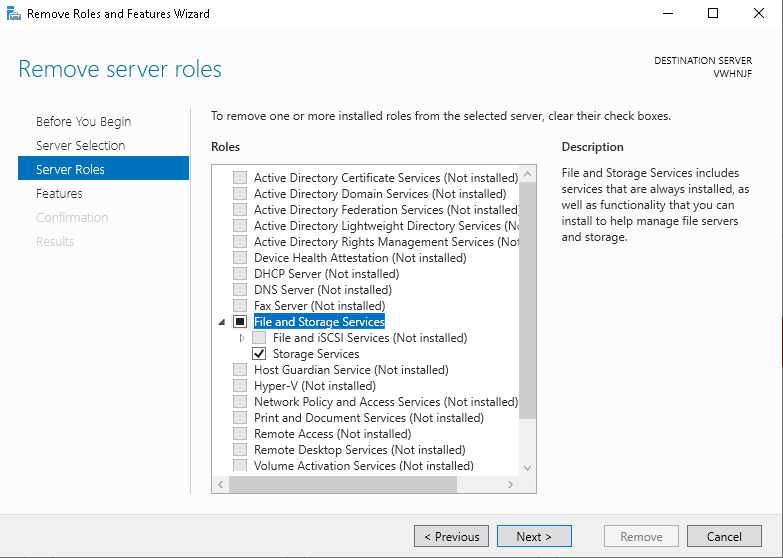
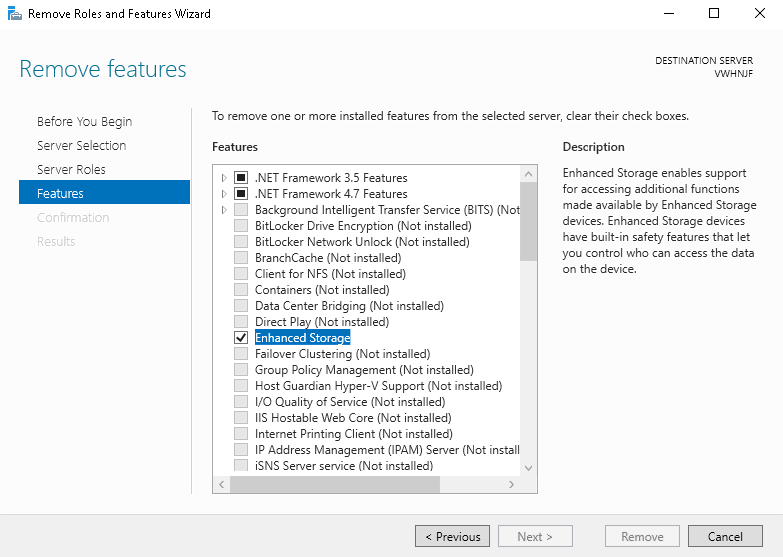
Select Roles and Services
Select and review the role, feature, and server selections before confirming the removal. Once ready, you may click remove.
Confirm Selection
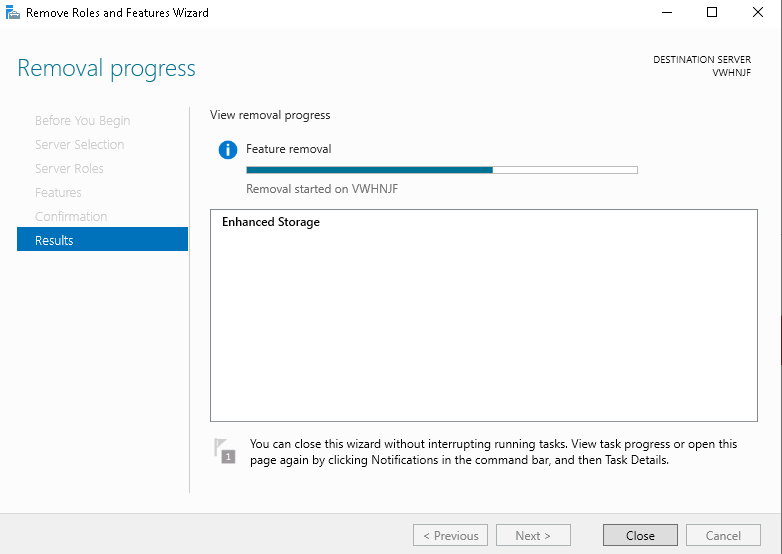
After you select the option to remove, the progress is displayed in a similar fashion to the installation which will show the overall progress of removal, any results, messages, or any error warnings.
Removal Progress
Should any post-removal steps need to be taken, such as the destination server requiring to be restarted, a message is displayed. While using Windows Server 20120 and later releases, the Remove Roles and Features Wizard can be closed and have removal results and messages displayed the Server Manager notification tray.
Windows PowerShell Removal Option
Just as you can install roles and features using the Windows PowerShell cmdlets, you can also remove roles, role services, and features in the same manner. Just as management tools and snap-ins are not included in install without the cmdlet, the “IncludeManagementTools” parameter will be needed to remove any related role services and features to the desired role if you want to remove all its parts.
If you are uninstalling roles and features from a server running the ‘Server Core‘ installation option of Windows Server 2012 or a later release of Windows Server, please note that this parameter removes command-line and Windows PowerShell management tools for the designated roles and features.
Example:
unInstall-WindowsFeature -Name <feature_name> -VHD <path> -computerName <computer_name> -Restart
unInstall-WindowsFeature -Name AD-Domain-Services,GPMC -IncludeManagementTools -RestartThe code examples above will uninstall the Group Policy Management role on the local server when the command is run from and the server reboots.
Learn More Today!
Liquid Web has a wide selection of Windows servers in various versions to choose from — from RDP VPS to ASP.NET virtualized hosting to powerful bare metal . If you have questions regarding the installation or removal of Roles or Features on your server, reach out to us and we will provide reliable and accurate information to ensure you have everything you need to make an informed decision!
Open a chat or ticket with us to speak with one of our knowledgeable Solutions Team or an experienced Hosting Advisors today!