


5 Steps to Create a Robots.txt File for Your Website
A web robot’s primary job is to crawl or scan websites and pages for information; they work tirelessly to collect data for search engines and other applications. For some, there is good reason to keep pages away from search engines. Whether you want to fine-tune access to your site or want to work on a development site without showing up on Google results, once implemented, the robots.txt file lets web crawlers and bots know what information they can collect.
What is a Robots.txt File?
A robots.txt is a plain text website file at the root of your site that follows the Robots Exclusion Standard. For example, www.yourdomain.com would have a robots.txt file at www.yourdomain.com/robots.txt. The file consists of one or more rules that allow or block access to crawlers, constraining them to a specified file path in the website. By default, all files are entirely allowed for crawling unless otherwise specified.
The robots.txt file is one of the first aspects analyzed by crawlers. It is important to note that your site can only have one robots.txt file. The file gets implemented on one or several pages or an entire site to discourage search engines from showing details about your website.
This article will provide five steps to create a robots.txt file and the syntax needed to keep bots at bay.
How to Set up a Robots.txt File
1. Create a Robots.txt File
You must have access to the root of your domain. Your web hosting provider can assist you as to whether or not you have the appropriate access.
The most important part of the file is its creation and location. Use any text editor to create a robots.txt file and can be found on:
- The root of your domain: www.yourdomain.com/robots.txt.
- Your subdomains: page.yourdomain.com/robots.txt.
- Non-standard ports: www.yourdomain.com:881/robots.txt.
Finally, you will need to ensure that your robots.txt file is a UTF-8 encoded text file. Google and other popular search engines and crawlers may ignore characters outside of the UTF-8 range, possibly making your robots.txt rules invalid.
2. Set Your Robots.txt User-agent
The next step in how to create robots.txt files is to set the user-agent. The user-agent pertains to the web crawlers or search engines that you wish to allow or block. Several entities could be the user-agent. We have listed a few crawlers below, as well as their associations.

There are three different ways to establish a user-agent within your robots.txt file.
Creating One User-agent
The syntax that you use to set the user agent is User-agent: NameOfBot. Below, DuckDuckBot is the only user-agent established.
# Example of how to set user-agent
User-agent: DuckDuckBot
Creating More Than One User-agent
If we have to add more than one, follow the same process as you did for the DuckDuckBot user-agent on a subsequent line, inputting the name of the additional user-agent. In this example, we used Facebot.
#Example of how to set more than one user-agent
User-agent: DuckDuckBot
User-agent: Facebot
Setting All Crawlers as the User-agent
To block all bots or crawlers, substitute the name of the bot with an asterisk (*).
#Example of how to set all crawlers as user-agent
User-agent: *3. Set Rules to Your Robots.txt File
A robots.txt file is read in groups. A group will specify who the user-agent is and have one rule or directive to indicate which files or directories the user-agent can or cannot access.
Here are the directives used:
- Disallow: The directive referring to a page or directory relative to your root domain that you do not want the named user-agent to crawl. It will start with a forward slash (/) followed by the full page url. You will end it with a forward slash only if it refers to a directory and not a whole page. You can use one or more disallow settings per rule.
- Allow: The directive refers to a page or directory relative to your root domain that you want the named user-agent to crawl. For example, you would use the allow directive to override the disallow rule. It will also start with a forward slash (/) followed by the full page url. You will end it with a forward slash only if it refers to a directory and not a whole page. You can use one or more allow settings per rule.
- Sitemap: The sitemap directive is optional and gives the location of the sitemap for the website. The only stipulation is that it must be a fully qualified URL. You can use zero or more, depending on what is necessary.
The web crawlers process the groups from top to bottom. As mentioned before, they access any page or directory not explicitly set to disallow. Therefore, add Disallow: / beneath the user-agent information in each group to block those specific user agents from crawling your website.
# Example of how to block DuckDuckBot
User-agent: DuckDuckBot
Disallow: /

#Example of how to block more than one user-agent
User-agent: DuckDuckBot
User-agent: Facebot
Disallow: /

#Example of how to block all crawlers
User-agent: *
Disallow: /
To block a specific subdomain from all crawlers, add a forward slash and the full subdomain URL in your disallow rule.
# Example
User-agent: *
Disallow: /https://page.yourdomain.com/robots.txt
If you want to block a directory, follow the same process by adding a forward slash and your directory name, but then end with another forward slash.
# Example
User-agent: *
Disallow: /images/
Finally, if you would like for all search engines to collect information on all your site pages, you can create either an allow or disallow rule, but make sure to add a forward slash when using the allow rule. Examples of both rules are shown below.
# Allow example to allow all crawlers
User-agent: *
Allow: /

# Disallow example to allow all crawlers
User-agent: *
Disallow:
4. Upload Your Robots.txt File
Websites do not automatically come with a robots.txt file as it is not required. Once you decide to create one, upload the file to your website’s root directory. Uploading depends on your site’s file structure and your web hosting environment. Reach out to your hosting provider for assistance on how to upload your robots.txt file.
5. Verify Your Robots.txt File is Functioning Properly
There are several ways to test and make sure your robots.txt file functions correctly. With any one of these, you can see any errors in your syntax or logic. Here are a few of them:
- Google’s robots.txt Tester in their Search Console.
- The robots.txt Validator and TestingTool from Merkle, Inc.
- Ryte’s robots.txt Test Tool.
Bonus: Using Robots.txt In WordPress
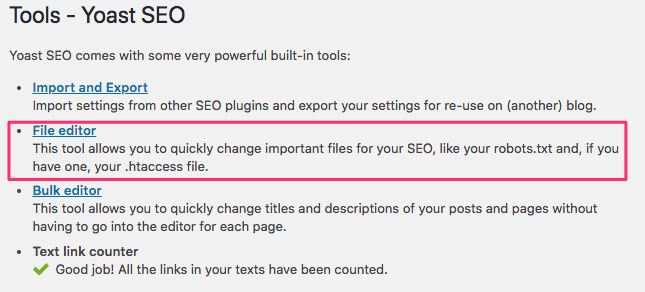
If you use WordPress the Yoast SEO plugin, you’ll see a section within the admin window to create a robots.txt file.
Log into the backend of your WordPress website and access Tools under the SEO section, and then click File editor.
Follow the same sequence as before to establish your user agents and rules. Below, we have blocked web crawlers from the WordPress wp-admin and wp-includes directories while still allowing users and bots to see other site pages. When finished, click Save changes to robots.txt to activate the robots.txt file.

Disable Cart Crawling
Search engines crawling add-to-cart links and unwanted pages can damage your SEO rankings. Add-to-cart links can cause more specific issues since those pages are not cached, increasing your server’s CPU and memory usage as the pages get hit repeatedly.
Fortunately, adapting your site’s robot.txt file is straightforward to ensure search engines only crawl pages you want. Use these lines of code in the site robots.txt file to address the add-to-cart links and tell search engines not to index them.
User-agent: *
Disallow: /*add-to-cart=*
It is also recommended that you adapt your robots.txt file to disallow indexing of the cart, checkout, and my-account pages, which can be done by adding the lines below.
Disallow: /cart/
Disallow: /checkout/
Disallow: /my-account/
Conclusion
We have gone through how to create a robots.txt file. The steps are simple to complete and can save you time and headaches from having content on your site crawled without your permission. Create a robots.txt file to block the unnecessary crawling of search engines and bots.
If you host with Liquid Web and have questions on creating a robots.txt file for your website, reach out to our Support team for assistance.
Related Articles:


About the Author: Ronald Caldwell
Ron is a Technical Writer at Liquid Web working with the Marketing team. He has 9+ years of experience in Technology. He obtained an Associate of Science in Computer Science from Prairie State College in 2015. He is happily married to his high school sweetheart and lives in Michigan with her and their children.


Our Sales and Support teams are available 24 hours by phone or e-mail to assist.
Latest Articles
How to use kill commands in Linux
Read ArticleChange cPanel password from WebHost Manager (WHM)
Read ArticleChange cPanel password from WebHost Manager (WHM)
Read ArticleChange cPanel password from WebHost Manager (WHM)
Read ArticleChange the root password in WebHost Manager (WHM)
Read Article