
 Will Simon
 What is FTP?
You or your developer may want to have access via FTP (File Transfer Protocol) to the folders for the project or domain that is being worked on. FTP is a quick and easy way for someone to connect to their project, without having to have full access to RDP into the server. An FTP user will only have access to the folders that are designated to them, limiting them in their own environment so as not to accidentally change other user’s files and file structure on their project/domain. In this tutorial, we will cover how to utilize FTP on a Core/Self-Managed dedicated server or a VPS server, as well as a Plesk Server. Let’s jump right in!
Enabling FTP Services
The first thing that you need to check before creating an FTP user is to enable FTP on your server. To do that on a Core/Self-Managed server, we need to RDP to the server and open Server Manager.

Once the server manager is open, in the top right corner, there are a few options: Manage, Tools, View, and Help. We want to click on Manage, which will show a drop-down menu. At the top of the menu, click on the option Add Roles and Features.

Once you have the Add Roles and Features Wizard up, click Next until you are at the Server Selection.
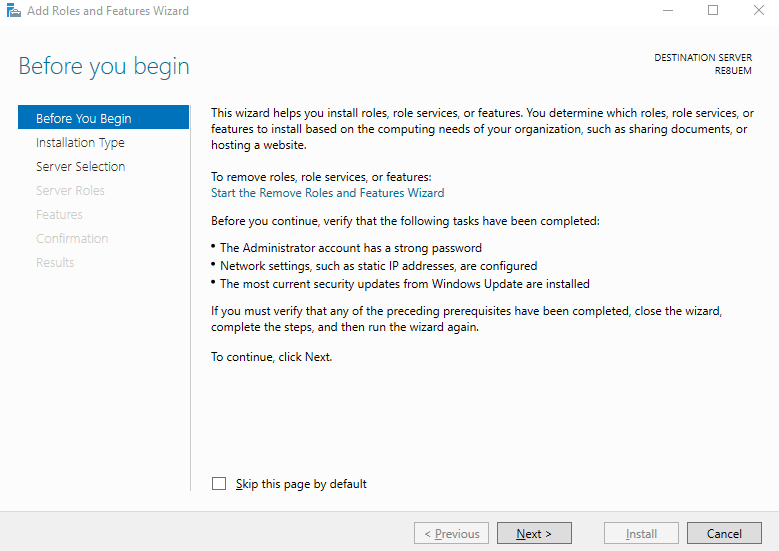
Make sure your server is highlighted, by default, it should be. If so, you can click Next which brings you to Server Roles.

Server Roles are where you will find the features your server can have enabled separately, depending on your needs. We aren’t looking for anything but FTP at this time, so we won’t cover all of the features and services we find here. FTP services are going to be found under the role Web Server. Click on the carrot next to Web Server. There are 3 different options with checkboxes; Web Server, FTP Server, and Management Tools. Dropping down the FTP Feature will show the available FTP features.
If all of these are already checked, you can skip ahead to the Adding and Assigning FTP Users section of this help article. However, if these are not checked, go ahead and check FTP Server and FTP Service. If your users plan on using ASP.NET services or IIS Manager, you will want to make sure you check FTP Extensibility.
Once you have the FTP features selected, click on Next a couple of times until you get to the Confirmation page. At the top, you will see an option to “restart the destination server automatically if needed“. For installing FTP Services, a restart is not needed. We can leave this box unchecked and click on Install. This install process shouldn’t take too long.

Adding an FTP User Account
Before we add an FTP site, we need to set up a user with some credentials. We do this by accessing Computer Management.

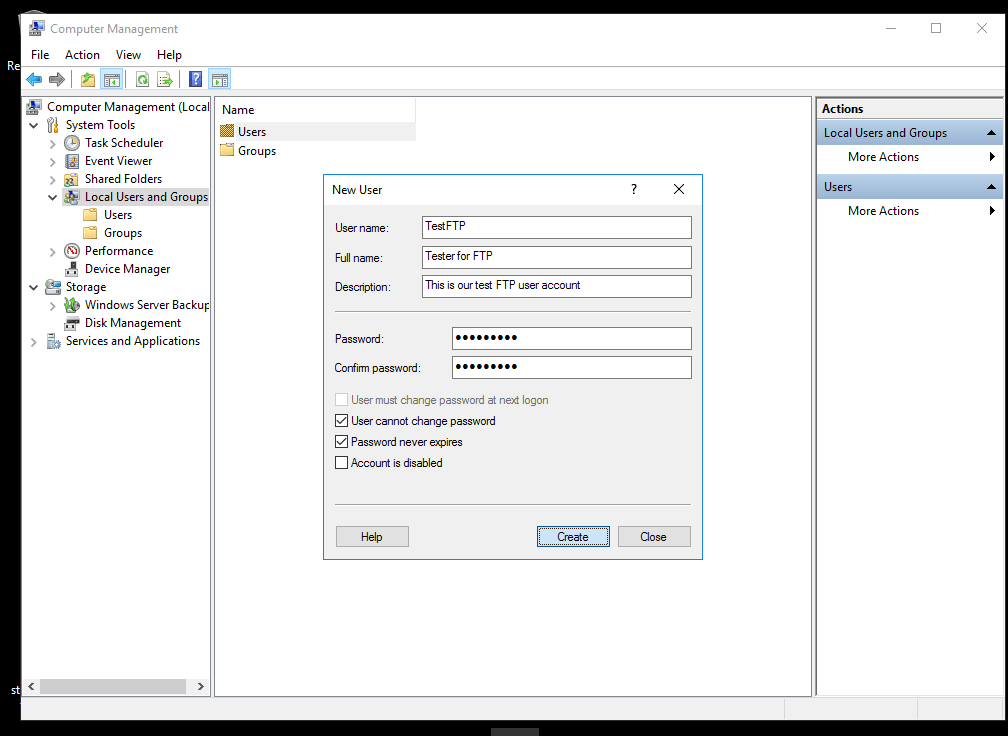
On Windows 2012 and up, we can do this by right-clicking the Start Menu button, and selecting Computer Management. Here, under System Tools, if we click the drop down carrot, we will see the Local Users and Groups section. Double-click on Users and a list of all the Local Users will formulate. On the far right of the Computer Management, once we have navigated to Users, we see a More Actions and will need to click on that to add a New User.

Clicking on New User will pop up a simple interface that asks for the user name, the user’s full name, a description for that user that serves as a description for you, the administrator, to recognize the purpose of this user. Fill out this information accordingly and type in a password for this user. Under Confirm Password, we see that by default “User must change password at next logon” is selected. Because this is strictly for FTP, we will uncheck that and check “User cannot change password” and “Password never expires”. Considering the FTP user will only have access to the destination you allow, it is not necessary to change the password.
Adding an FTP Site
Now that FTP Services are installed and a user is created, we need to head on over to the IIS Manager. This can be found in the Start Menu, or by clicking on Tools in Server Manager as we did before, but clicking on Internet Information Services (IIS) Manager.

Here is the IIS Manager, we need to create the FTP site that you will want this specific user to have access to. We do this by clicking on the drop-down carrot next to the server name, and then right-clicking on the folder that says “Sites“.
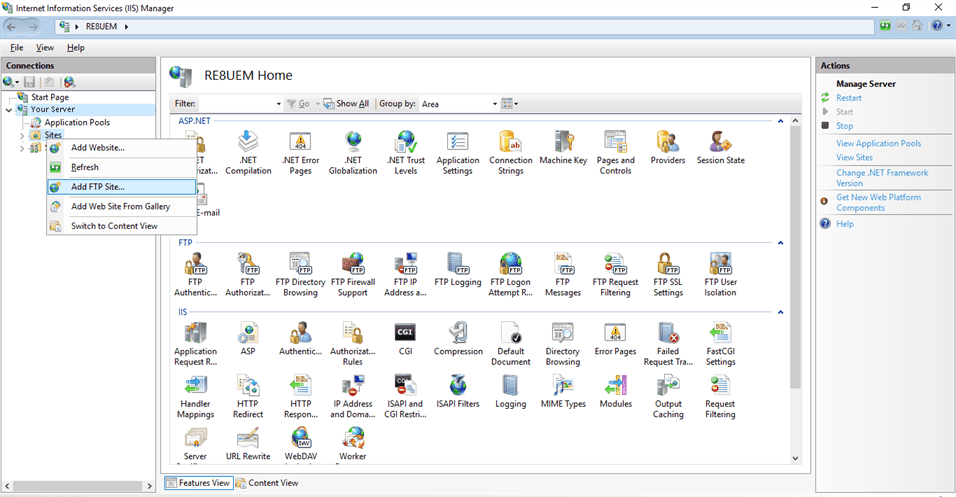
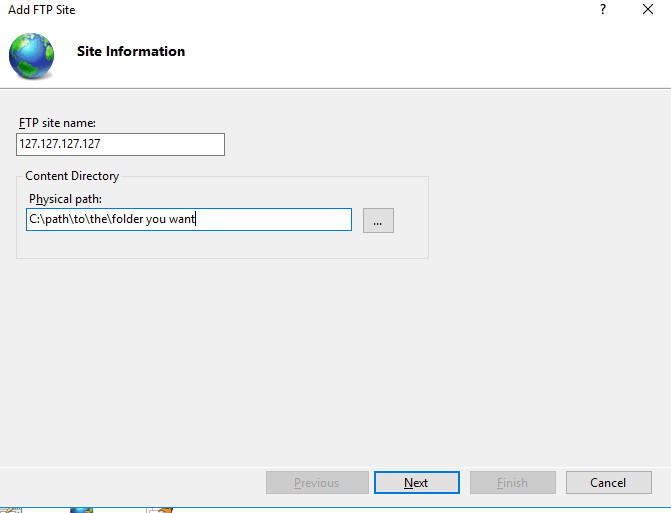
A menu will pop up, with the option to Add FTP Site. Enter the name you wish to give this FTP site. Select a Physical path, where you want the user for this FTP site to have access. Do this by either typing in the direct path, or selecting the 3 dots next to the entry bar and physically selecting the folder you wish to assign this FTP site.
Clicking next will bring you to Bindings and SSL settings. If you have any specific IP address that is assigned to a domain that is being used for this FTP Service, you need to make sure that the IP address is selected by dropping down the bar.
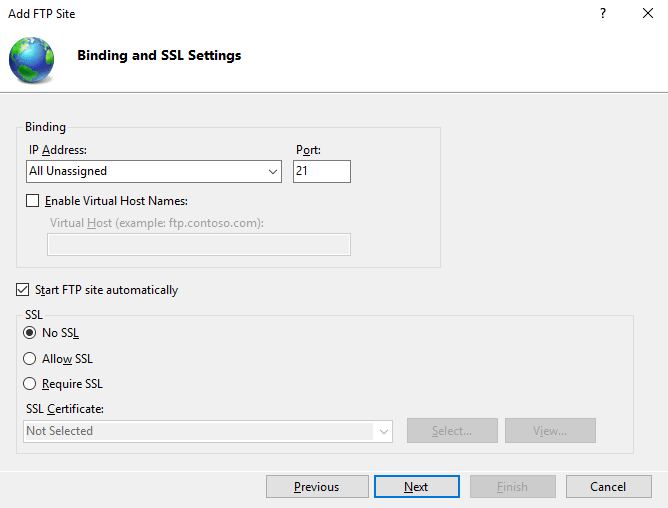
If all sites are taking advantage of Windows SNI (Server Name Identification) than you can leave this set to All Unassigned, if you wish to use a different port than the default FTP port, go ahead and type that in under Port. But if this is just a basic FTP instance for everyday purposes, go ahead and leave that port at the default 21. Next, you want to make sure that “Start FTP Site automatically” is selected. Unless of course, you want to manually allow the user to connect to their FTP site only when you designate by starting the page in IIS. Select No SSL and click Next for this FTP Site. In this tutorial, we will not be covering setting up an SSL for this specific FTP Site. If you do already have an SSL that you have added to the server for this purpose, you need to make sure that Allow or Require under SSL is checked, and select your SSL on the drop down bar labeled SSL Certificate.
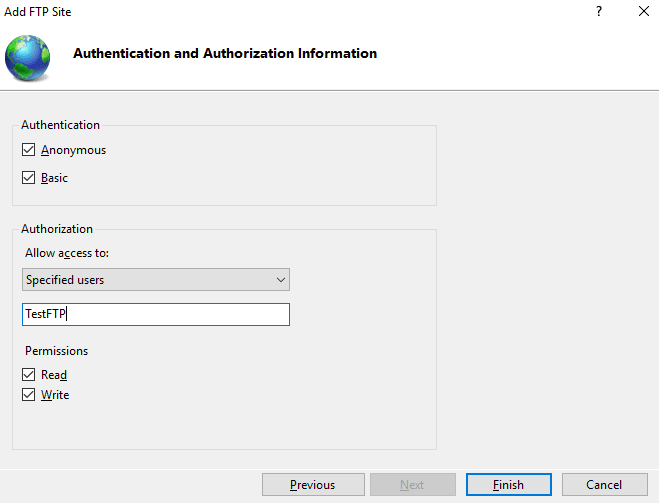
Now we have been brought to the Authentication and Authorization section. Here at the top are two options for Authentication. Make sure that both boxes are checked. Finally, we have the Authorization section where we would select the groups or users we want to allow to be able to log into this FTP Site.
Setting Up the Windows Firewall
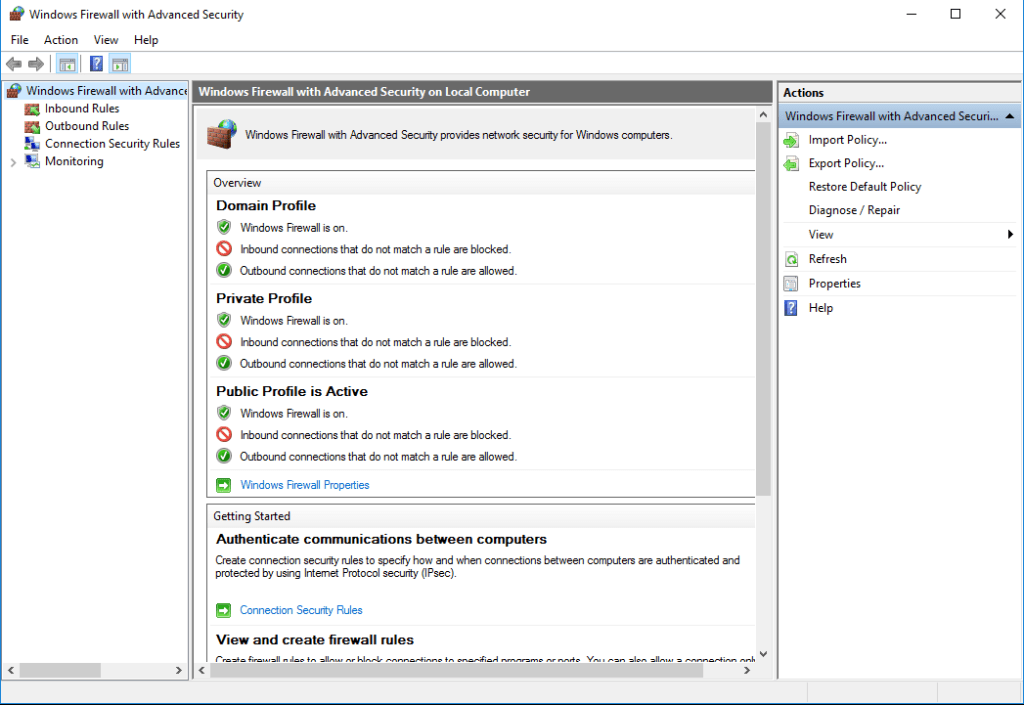
Now that we have the FTP site all set up and ready to go, we do need to set up the firewall rules. Open up your firewall by clicking on Start, scrolling to Windows Administrative Tools, and clicking on Windows Firewall with Advanced Security.

We need to set some rules on the Inbound Rules section, so click on that first. It’s in the top right corner. After clicking on Inbound Rules in the top right corner under Actions, you will see a section called Inbound Rules. Under that category should be New Rule.

You may have to click on the arrow next to Inbound Rules to see this. Click on the New Rule…
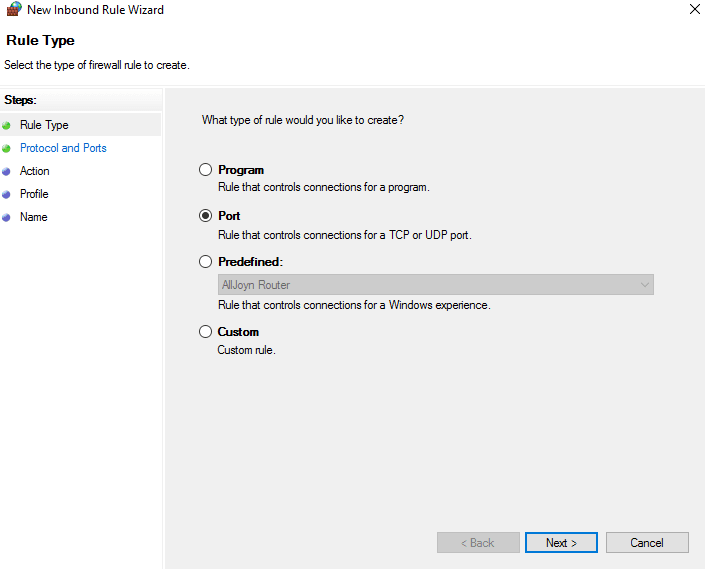
And you will be selecting the Rule Type. For FTP we will be using Port, so click on that and Next. Now you will see Protocol and Ports. For Protocol, use the setting TCP. For Specific local ports type 21, 5001-5051 and click on Next.
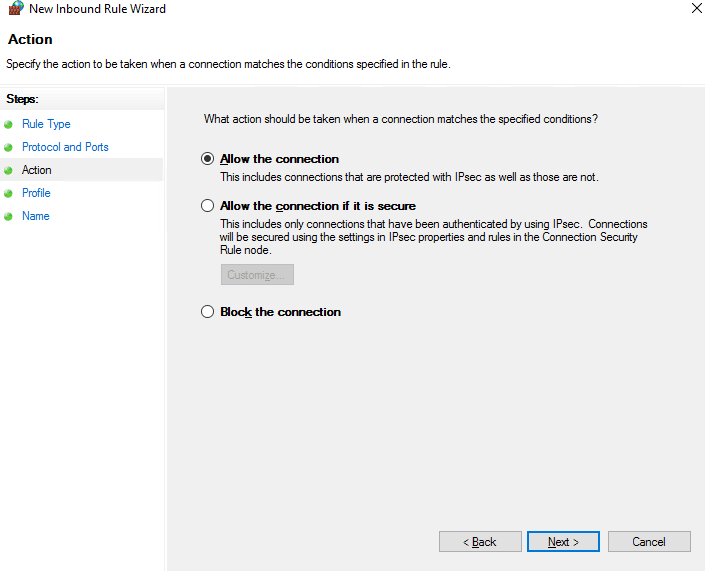
Now we have the Action section. By default, “Allow the connection” is selected. Keep this the way it is and press Next. Now you will be prompted for when this rule will apply.
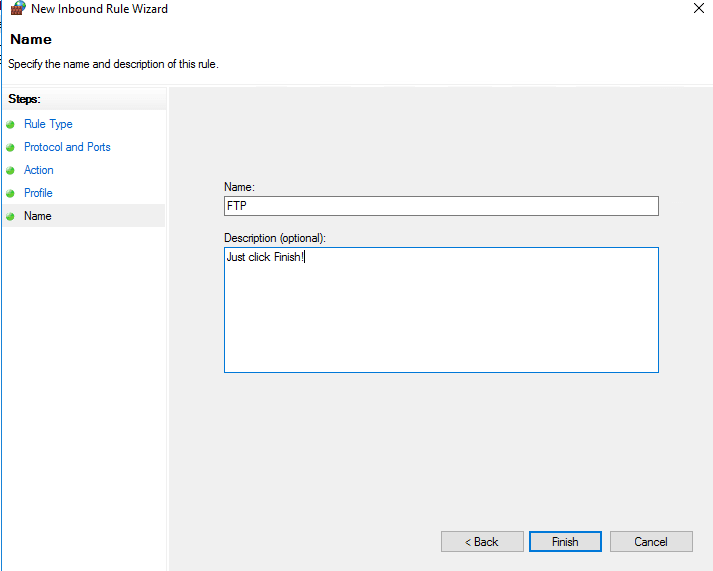
We want it always to apply so keep each network connection type box checked. There are three: Domain, Private, and Public. Click Next, and you will be naming the firewall rule. We suggest just naming it FTP Connection or something of the sort.
You should be all set. Go ahead and log into another computer, use your favorite FTP client (such as Filezilla), enter the IP address as a host, and your newly created username and password, port number, and click connect. You are now connected FTP to your designated pathway on your server.
FTP on a Plesk Server
This process is a lot faster and much simpler. Here are several links regarding setting up FTP users and Uploading Files on a Plesk Windows Server.
You did it! You have successfully set up an FTP site so that you or the developers can now edit, copy, and remove files from their designated folders smoothly.