


Guide to Remote Desktop File Transfers
Transferring small files to your new Windows Server can be a hassle when first setting everything up. Plesk, file transfer protocol (FTP), or network file sharing might not be ready to use, or your Internet service provider (ISP) may block those web ports.
One solution is using the Remote Desktop Connection program to transfer files. This five-step tutorial will teach you how to install and configure Remote Desktop on your Windows PC and use it for your file transfers.
What is Remote Desktop Protocol?
Remote Desktop Protocol (RDP) is Microsoft’s proprietary protocol that provides a graphical interface for connecting to other servers or computers over a network connection. In addition, it gives the ability to redirect one server or workstation's hard drive, making it appear once logged into another server or workstation.
The Remote Desktop Connection program comes with all Windows operating systems. It uses the remote desktop protocol to transfer files.
Opening Remote Desktop Connection
To access Remote Desktop Connection, click the Start button and search for Remote Desktop Connection. Along with the name, you see an icon of a computer monitor with green arrows.

Configuring Remote Desktop
Follow these steps to configure the application to redirect your local workstation’s C: drive.
Step 1:
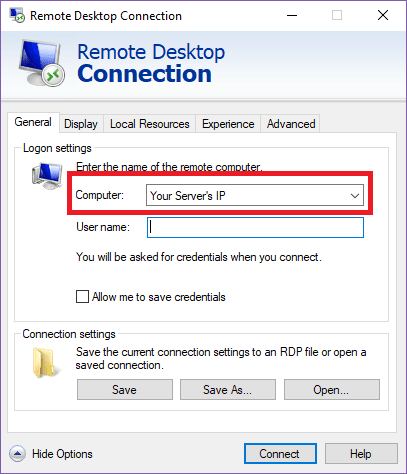
Click Show Options to open the tabbed view.
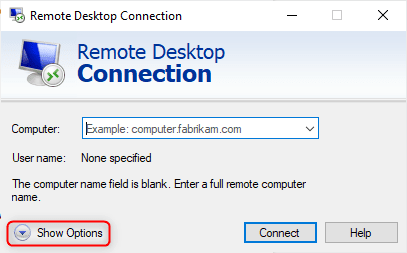
Input your server’s IP address in the Computer field.
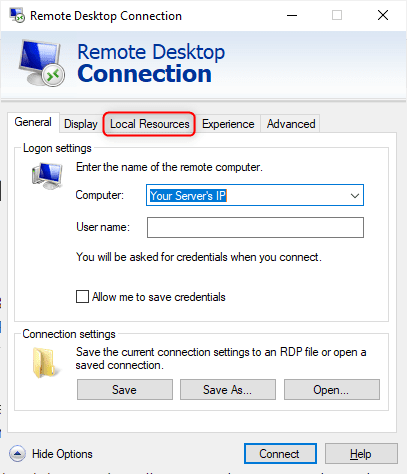
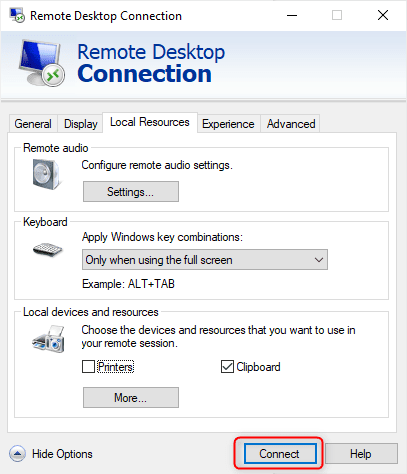
Step 2:
Select the Local Resources tab.
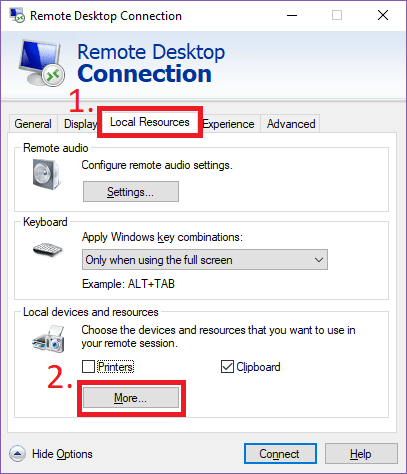
Step 3:
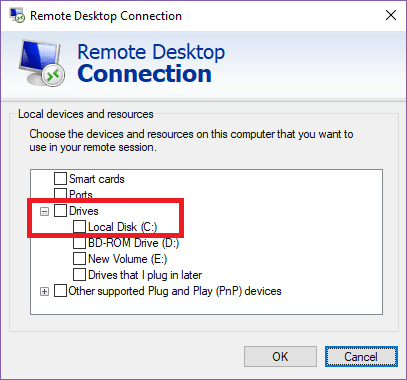
Select the More button under Local devices and resources.
Step 4:
Expand the Drives section and click the checkbox next to Local Disk (C:) or all drive arrays that apply to your setup.
Click OK to return to the tabbed view.
Step 5:
Click Connect.
Accessing Your Files
Once connected to the server, follow the steps below to access the files.
1. Log into the server whose IP address is in RDP.
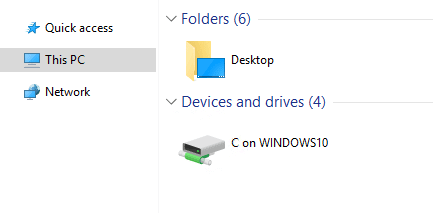
2. Open File Explorer.

3. Select This PC or Computer on the left.
4. Double-click C on WINDOWS10.
How to End the Remote Desktop Session
Once you finish working on the remote session, it's time to disconnect. There are two main ways of doing this, depending on your workflow.
Sign-Out Method
If you want to sign out correctly and close the session, use this method. The consequences of not using this method might be bottlenecking remote desktop resources and preventing others from connecting. Here’s how to sign out and free up resources.
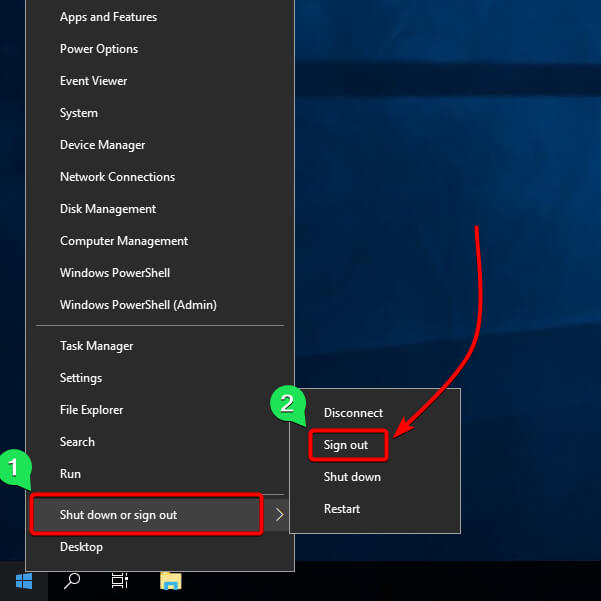
Step 1:
Right-click on the Windows Start button to bring up the menu. You can also do this by pressing Windows key + X.

Step 2:
Hover over Shut down or sign out, and click Sign out.
Alternatively, you can open the Start Menu, right-click the user icon, and click Sign out.
You have now signed out from the remote connection, ending the session and freeing more remote resources for other users.
Disconnect Method
The second option is to end the session using the disconnect method. This option keeps the session open for a length of time until you reconnect.
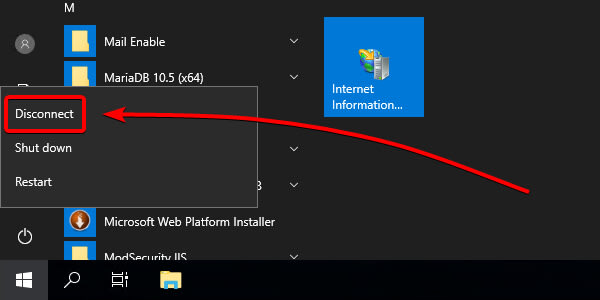
From the Start Menu, click the Power button, then click Disconnect.
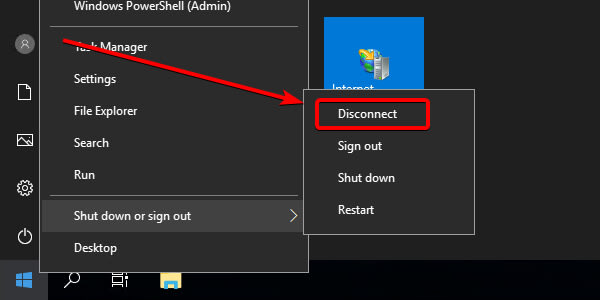
Alternatively, press Windows + X or right-click the Windows Start button to bring up the menu. Then, click Shut down or sign out and select Disconnect.
How to Transfer Files From a Remote Desktop to a Local PC
One of the essential uses of a Remote Desktop connection is transferring files. Transferring files is very simple and intuitive. The interface has common shortcuts allowing seamless transfer of files from one side to another.
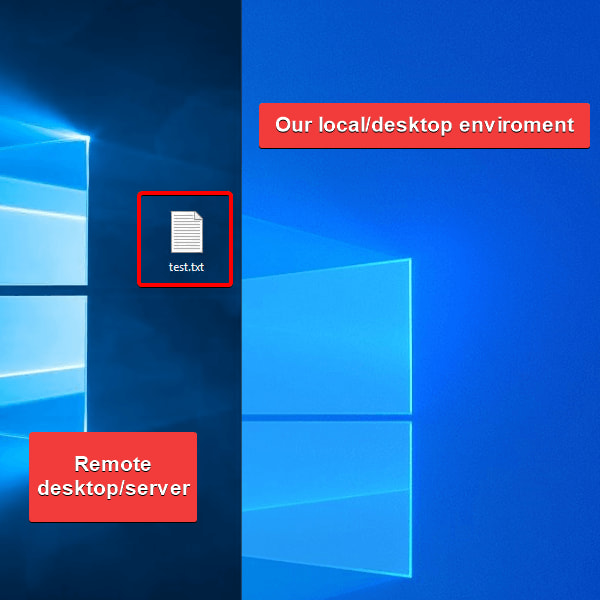
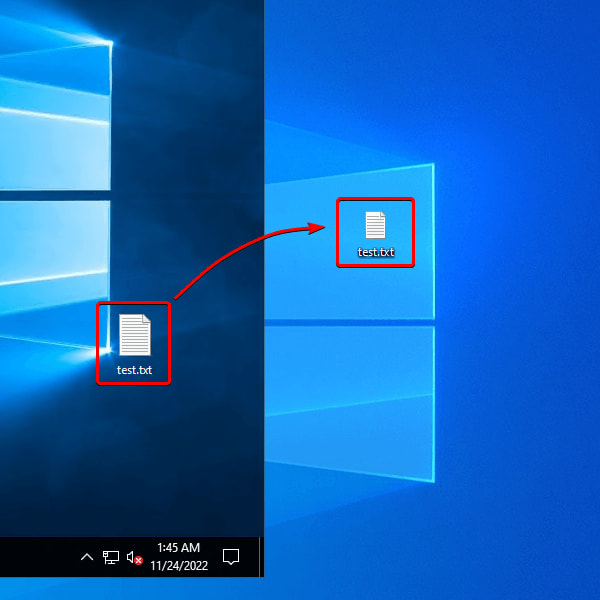
The image below shows the remote connection on the left-hand side and a local desktop session on the right. The test.txt file in the remote connection will transfer to the local desktop session for this tutorial.
Unfortunately, you can’t drag files from one window to another, but you can copy and paste them as you would on your desktop or use File Explorer.
Using Copy Paste to Transfer Files from a Remote Desktop
Step 1:
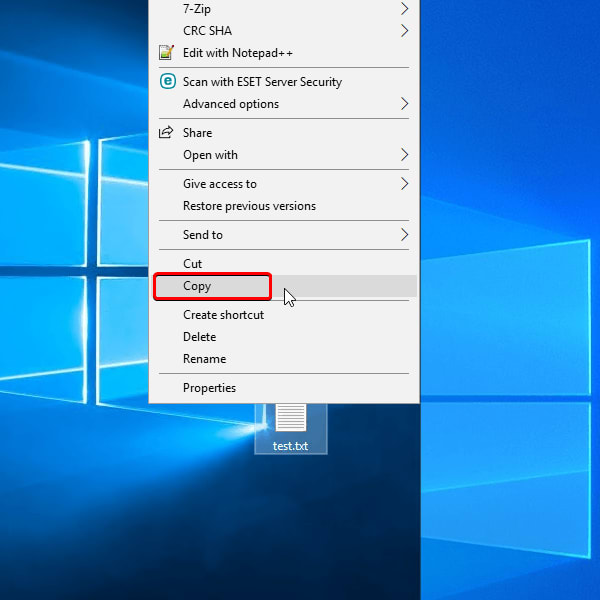
Right-click the file or folder (in this case, it is the test.txt file) and click Copy from the menu. You can also use CTRL + C to copy or CTRL + X to cut the file.
Step 2:
Paste the file on our local desktop by right-clicking and selecting Paste from the menu or CTRL + V.

You will see your file appear on the local desktop.
Using File Explorer to Transfer or Copy Files and Folders
Step 1:
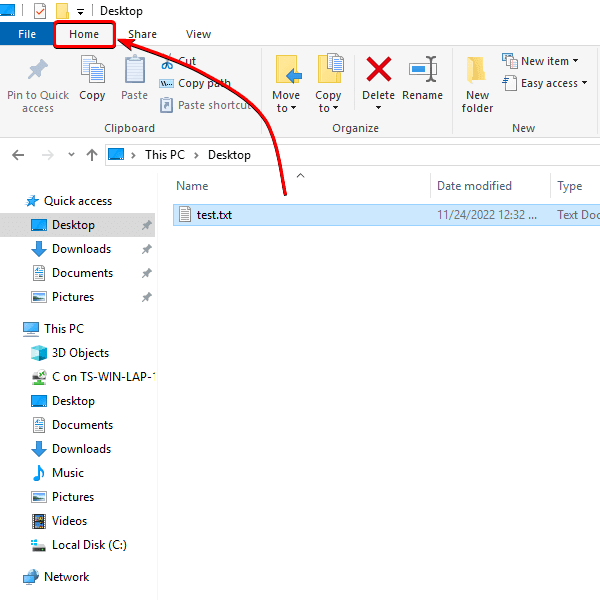
From File Explorer, make sure the file or directory you want to transfer is selected by left-clicking on it once.

Step 2:
If you are not already there, click the Home tab to expand it.
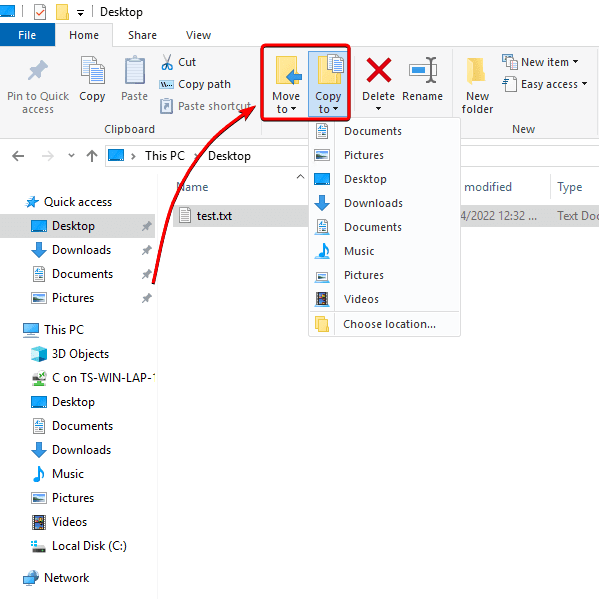
Step 3:
Select either Move to or Copy to. Moving files or directories is the same as the cut option.
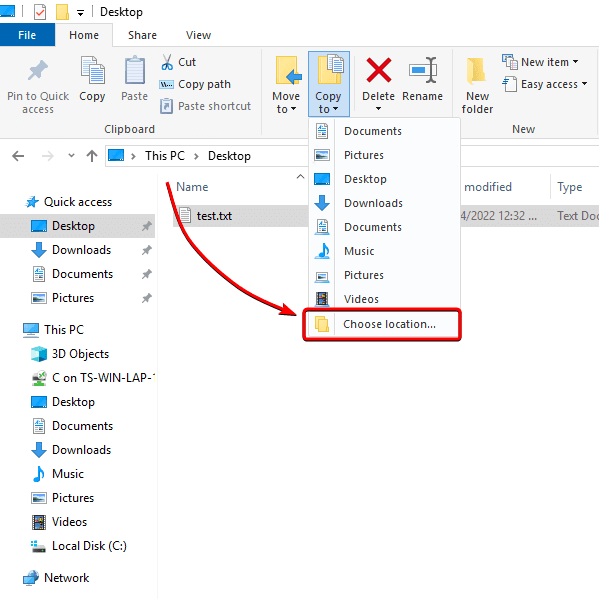
Step 4:
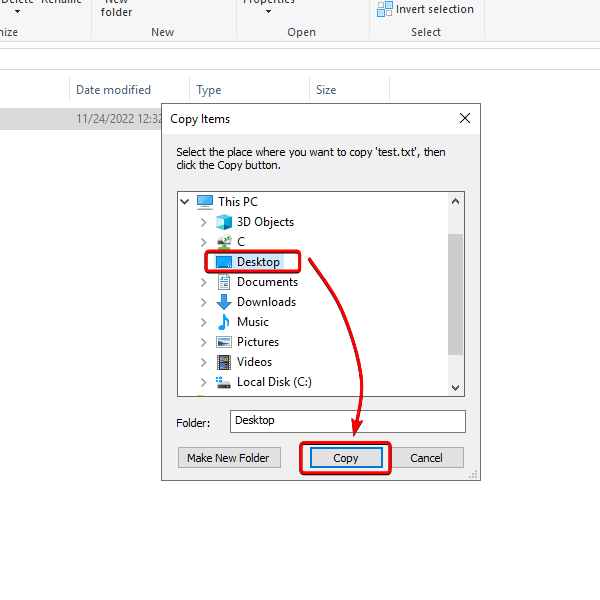
Select the location from the dropdown menu, or click Choose location to select a specific location.
Step 5:
Select the destination you want to copy the file or folder, and click Copy.
FAQ
Can I transfer files through Remote Desktop?
Is Microsoft Remote Desktop file transfer possible only between Windows machines?
What protocol does RDP use to transfer files?
Is Remote Desktop TCP or UDP?
Related Articles:


About the Author: Freddy Reese
Freddy works in the Liquid Web Managed Hosting Support team with a strong passion for all things related to Linux administration, cybersecurity, and aviation. In his free time, he likes to keep up with the latest news on topics ranging from fusion to space technologies. His hobbies include automating all kinds of stuff using Arduino/Raspberry Pi, learning and flying around in flight simulators, playing with his dog Chupko, swimming at nearby beaches, and staying physically and mentally healthy by going to the gym.


Our Sales and Support teams are available 24 hours by phone or e-mail to assist.
Latest Articles
How to use kill commands in Linux
Read ArticleChange cPanel password from WebHost Manager (WHM)
Read ArticleChange cPanel password from WebHost Manager (WHM)
Read ArticleChange cPanel password from WebHost Manager (WHM)
Read ArticleChange the root password in WebHost Manager (WHM)
Read Article