 Michael Flores Feliz
 Linux Malware Detect (LMD), or Maldet, is a malware scanner designed by R-FX Networks that finds and helps deal with malware on Linux machines. It was built to combat the threats faced in shared hosting environments. It uses virus information from different malware detection structures to find currently used malware and generates key factors that allow it to be detected to help others.
Malicious data comes from user suggestions with LMD and thus is driven by the community to ensure it’s successful in the future. The key factors that LMD uses to tag malware are MD5 file hashes and HEX patterns; which match malware from the total 10,822 signatures it has collected and identified as commonly used by hackers.
Requirements
- Root access or Sudo privileges.
- Wget command line utility installed.
- Server running Centos OS 7.
To install Wget on your server, use the following command.
# sudo yum install wgetHow to Install Linux Malware Detect in CentOS 7
Step 1: Access the Linux Malware Detect Directory
Access the secure directory or folder for the downloaded software. Use the cd command to change directories. For this tutorial, /usr/local/src is the directory used.
# cd /usr/local/srcThe pwd command lets you view the current directory location. Use this command to confirm the directory you are in and once you change directories. Here is the output.

Step 2: Download Linux Malware Detect
Once you have a safe place to download the file, obtain the latest Linux Malware Detect files. LMD is not found in the official CentOS repository (also called repo) but is available for download as a .tar file (also called a tarball) from the LMD website.
Use the wget command to download the latest version of LMD with the following syntax.
# wget http://www.rfxn.com/downloads/maldetect-current.tar.gzHere is the output.

The ls -lah command helps ensure the file is in the directory. Here is the output of the command from the current directory.

Step 3: Uncompress the Downloaded File
Use the tar -zxvf command to uncompress a tar.gz file. Here is a breakdown of the command:
- tar: create, extract, or list files contained in a .tar file.
- -z, –gzip: filters the archive through gzip.
- -x, –extract, –get: extracts files from an archive.
- -v, –verbose: verbosely lists files processed.
- -f, –file=ARCHIVE: uses the archive file or device ARCHIVE.
Here is the full syntax of the command.
# tar -zxvf maldetect-current.tar.gzHere is the output.

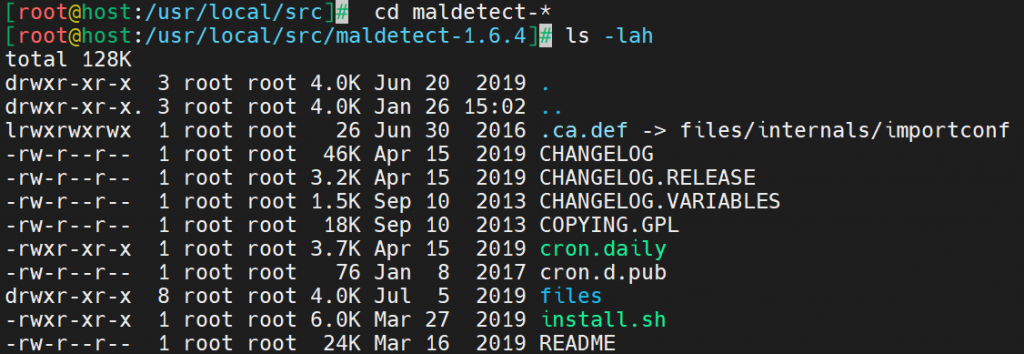
Step 4: Access the LMD Directory
Ensure the file is uncompressed with the ls -lah command. This command will print to the screen the contents of the folder you are currently in.
# ls -lahHere is the output.

Change directories to the LMD file.
# cd maldetect-*Here is the output.
Step 5: Install Linux Malware Detect in CentOS 7
Install Linux Malware Detect using the sh command. This command installs a bash script (LMD in this case). Use the following syntax.
# sh install.shHere is the output.

The following command ensures checks the software version. Use it to verify LMD is properly installed.
# maldet -vHere is the output.

How to Configure Linux Malware Detect
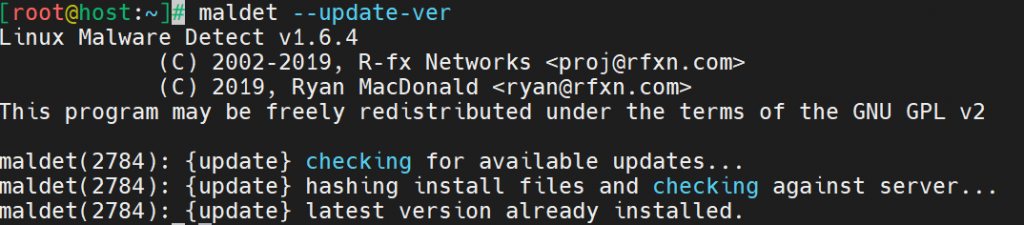
Before using Linux Malware Detect in CentOS 7, ensure it’s updated and configured properly. Use the following command to update the files.
# maldet --update-verHere is the output.
Now that Maldet is installed, you can configure it to your needs. Access the configuration file in the text editor of your choice. This tutorial uses Vim.
# vim /usr/local/maldetect/conf.maldetHere are the contents of the file.

You may edit the following values to configure Maldet to your needs:
- email_alert: Email notification to your email regarding alerts, then it should be set to 1.
- email_subj: Title of the email alert that allows you to know where it came from.
- email_addr: Add your email address to receive LMD alerts.
- email_ignore_clean: This option allows you to receive alerts even when malware is cleaned after. It’s recommended to leave this option at “1” so it doesn’t spam your inbox when malwares are cleaned automatically.
- quar_hits: Should you want the malware isolated, it should be set 1. Affected files will be moved to the quarantine folder.
- quar_clean: Malwares in quarantine allows you to automatically clean then move them back if successful manually, must set to 1.
Using Linux Malware Detect with ClamAV
ClamAV is an open source anti-virus application used for scanning emails to find malware and scan online actively. It includes a multi-threaded, multi-featured daemon that is a malleable command-line scanner and a sophisticated tool for automated database updates.
Using ClamAV with LMD is a powerful tool for finding and dealing with malware. Here is how to install ClamAV and run a scan.
Step 1: Download ClamAV
ClamAV needs to be downloaded from the Extra Packages for Enterprise Linux (EPEL) repository using the following command.
# rpm -ivh https://dl.fedoraproject.org/pub/epel/epel-release-latest-9.noarch.rpmHere is the output.

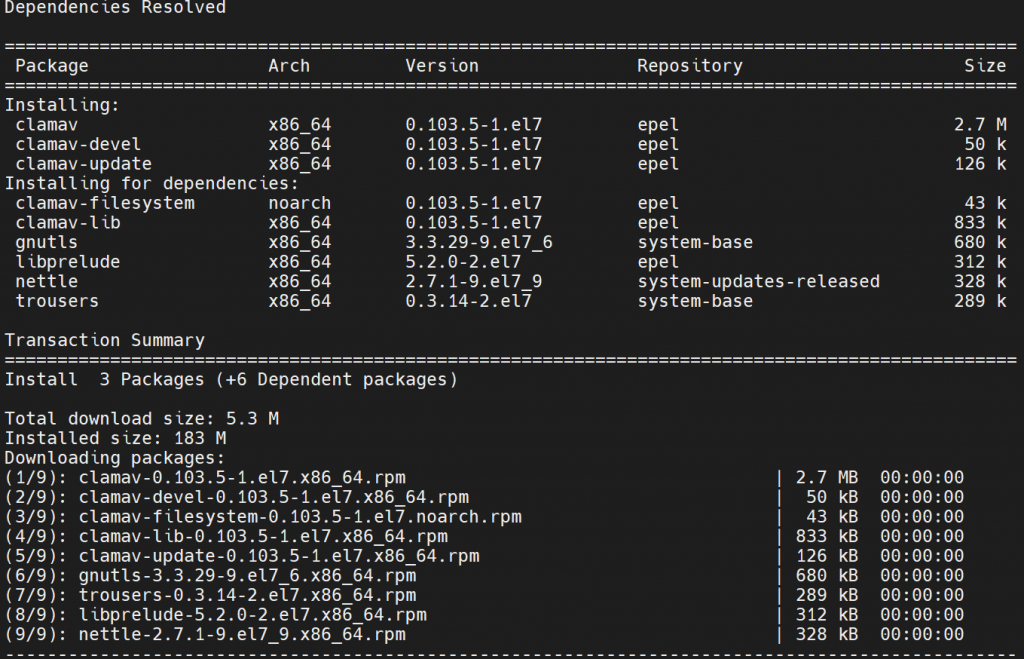
Step 2: Install ClamAV
Use the following syntax to install ClamAV.
# yum -y install clamav clamav-devel clamav-updateHere is the output.
Step 3: Update ClamAV with FreshClam.
FreshClam is the unique database that ClamAV uses to stay up-to-date with all the malware signatures it collects and stay on top of newer malware. Update ClamAV by running the following command.
# freshclamHere is the output.

LMD is now ready to be used. The following command will run a scan.
# maldet --scan-all insert_folder_locationHere is the output.
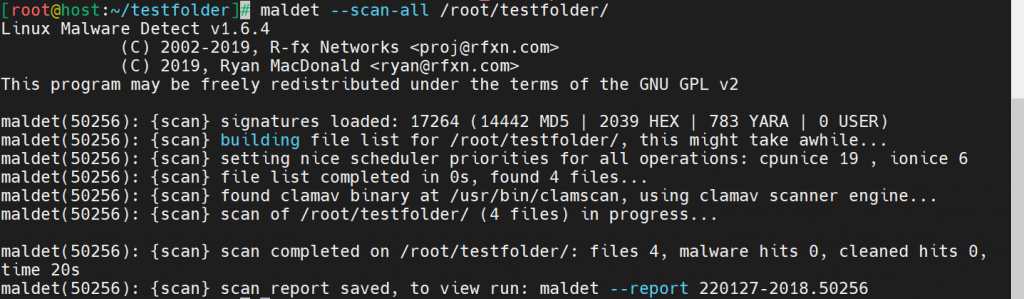
If malware is located, LMD generates a report with a specific command to run for viewing the report. For this example, the report is viewed by running the following command from the end of the scan output.
# maldet --report 220127-2018.50256Here is the report.

Conclusion
Malware is a headache for businesses, costing time and money in the event of compromised data. Knowing how to install and configure Linux Malware Detect secures your CentOS 7 environment, helping you mitigate risk.
Have the system administrator skills but looking for the right hosting? Liquid Web has managed hosting options to fit your needs. Contact our sales team for more information.