


Installing AngularJS
What is Angularjs
AngularJS is a structural framework for dynamic web apps. It lets you use HTML as your template language and lets you extend HTML’s syntax to express your application’s components clearly and succinctly. Out of the box, it eliminates much of the code you currently write through data binding and dependency injection. And it all happens in JavaScript within the browser’s DOM, making it an ideal partner with any server technology.
Prerequisites
Prerequisites will depend on how you plan to install it. There are two main install options
- cPanel Softaculous Installation
- CLI (command line) installation. With the command line option, the manual install of NodeJS and NPM is required.
- Node JS (Node 8.9 or higher)
- NPM (5.5.1 or higher)
cPanel Installation of Angular JS Libraries
There are two main ways to install Angular. Let’s start with the easiest one. This installation is built using the cPanel Softaculous installer.
- Navigate to your cPanel Account https://mydomain.com/cpanel and log in.
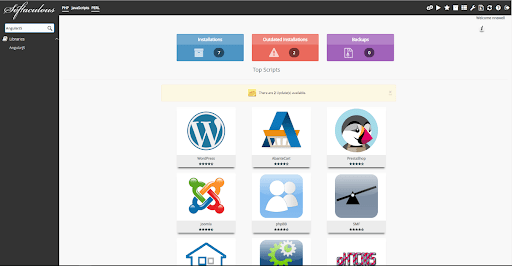
- Next, scroll down to the Software section and click on the Softaculous Apps Installer.

- This will open a new window as seen below.
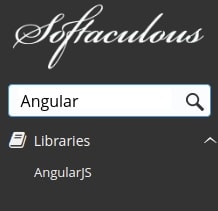
- Next, click on the search box in the upper left-hand corner of the Softaculous screen and start typing in Angular and then, click on the AngularJS option just below Libraries when it appears.
- Click on Install Now button:
- Once you click the install button, you should see the image below:
 (within the screen shown below)
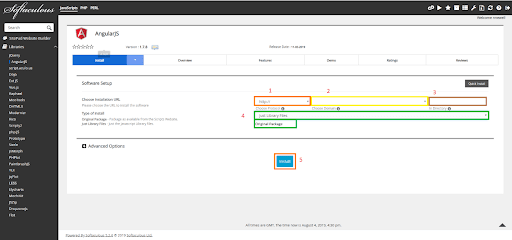
Next, we should:
- Choose which protocol your App should use: HTTP or HTTPS
- Choose the domain on which you want to install the Angular JS Libraries
- In the Directory text box, type in the directory where you want to install the application or, accept the default value. (If you want your domain name to go directly to the application, make sure the Directory text box is blank.)
- Choose what type of installation should it be. To install the complete library, including the documentation files, select the “Original Package”. To install only the code files, select “Just Library” Files.
- Click the “Advanced Options” icon to expand Advanced Options. (If you don’t want to receive e-mail notifications when the application updates are available, select the “Disable Update Notifications” checkbox.)
- Finally, click the Install button once you complete filling in the fields
And that should be it! If there were no errors shown that means your Angular Application should be up and running. Next, navigate to https://mydomain.com and if everything is installed correctly, you will see an image like the one below.

You did it! You have just installed the AngularJS framework via Softaculous Apps Installer.
If you would like more options than noted in the installation type above, we recommend reviewing the install example below.
Command Line Installation
My favorite way of installing Angular JS is via the command line. This installation method offers more options than installing it via the Softaculous User Interface in cPanel. One of the preferences you can choose when using the command line install (which is not supported via the cPanel User Interface) is the version option control. You can choose from any version from the list since angular versions go together with CLI versions.
So, to install the AngularJS app on your server via command line, the easiest way to accomplish this is via Angular’s CLI (the CLI stands for Command Line Interface)
Before we actually install the Angular CLI, we need to install the dependencies and log into the server as the root user :
- Node JS (Node 8.9 or higher)
- NPM (5.5.1 or higher)
- Log into your server via SSH as the root user.
Now, we need to install the latest stable repo with the following command:curl -sL https://rpm.nodesource.com/setup_12.x | sudo -E bash -
## Installing the NodeSource Node.js 12.x repo…
## Inspecting system...
+ rpm -q --whatprovides redhat-release || rpm -q --whatprovides centos-release || rpm -q --whatprovides cloudlinux-release || rpm -q --whatprovides sl-release
+ uname -m
## Confirming "el7-x86_64" is supported...
+ curl -sLf -o /dev/null 'https://rpm.nodesource.com/pub_12.x/el/7/x86_64/nodesource-release-el7-1.noarch.rpm'
## Downloading release setup RPM...
+ mktemp
+ curl -sL -o '/tmp/tmp.AnJitWusNv' 'https://rpm.nodesource.com/pub_12.x/el/7/x86_64/nodesource-release-el7-1.noarch.rpm'
## Installing release setup RPM...
+ rpm -i --nosignature --force '/tmp/tmp.AnJitWusNv'
## Cleaning up...
+ rm -f '/tmp/tmp.AnJitWusNv'
## Checking for existing installations...
+ rpm -qa 'node|npm' | grep -v nodesource
## Run `sudo yum install -y nodejs` to install Node.js 12.x and npm.
## You may also need development tools to build native addons:
sudo yum install gcc-c++ make
## To install the Yarn package manager, run:
curl -sL https://dl.yarnpkg.com/rpm/yarn.repo | sudo tee /etc/yum.repos.d/yarn.repo
sudo yum install yarn
[root@host ~]#
Next, type the following command to install Node JS and NPMyum install -y nodejs
If everything is correct you should get the following output 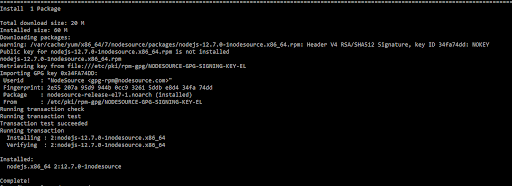
Check the versions of both Node and NPM
npm –version (shows NPM version)
If they are both installed and the output should show similar to this :
[root@host ~]# node --version

v12.7.0

[root@host ~]# npm --version

6.10.0
npm install @angular/clior installing it globally:
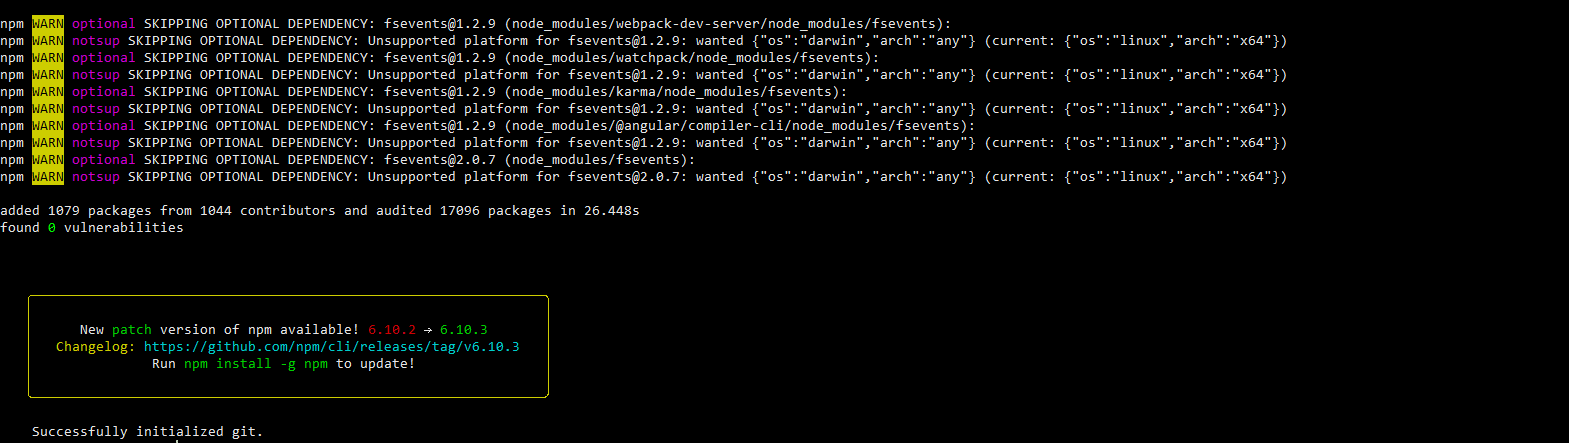
npm install -g @angular/cli
root@host ~]# npm install -g @angular/cli
Once the command is run, a question appears asking if we would like to share anonymous usage data with the Angular Team at Google
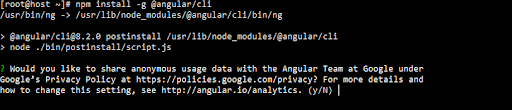
You can type Y or N as it’s not crucial to the installation.
If everything goes well, the command will give the output pictured below
ng --version

This means that everything is installed and ready for use.
Deploy the basic app on a domain
After all the above steps are done we can deploy a demo Angular Site.
- CD to your domain document root. In a cPanel server, by default that would be
cd /home/$user/public_html
Once inside the public_html type the following command to install the angular libraries in the document root.
ng new example-project
- After we issue the command, the first question to be asked is:
“Would you like to add Angular routing? (y/N)”
Just type “Y” on this one and proceed to the next question. - Then, the follow-up question is asked: Which stylesheet format would you like to use? (Use arrow keys)
❯ CSS

SCSS [ https://sass-lang.com/documentation/syntax#scss]
Sass [ https://sass-lang.com/documentation/syntax#the-indented-syntax]
Less [ http://lesscss.org]
Stylus [ http://stylus-lang.com]
Depending on which language styling you choose to use, you can select one by moving the arrow keys on your keyboard.
In this case, let’s choose CSS; just press Enter on your keyboard and wait for the install to finish.
- After the installation completes, we need to open a port in the firewall on which the application will listen; port 4200 is chosen by default.
(To open that port, simply follow the tutorial from our knowledge base website. - After you open the port, navigate to the folder where you added the project name. In our case, that would be:
cd example-projectThis will change us to the project directory. - To start the Node JS server which will serve the application we need to issue the following command:
> ng serve - Issuing this command by default will bind the server to http://localhost:4200.If you want to bind the server to a specific domain then you can issue the following command:
ng serve --host example.com --port 4200 - Then, the link to access the Angular app would be http://example.com:4200 and below picture should show up.
-
This should be fine for a dev environment, but to actually deploy the app, we would need to switch the environment to production. The command to accomplish that is as follows :
ng build --prod
This will create a /dist folder which contains all the files for the app from the test environment. Those files can now be moved to document root of the domain and the app should resolve once you access the link without the port.
Documentation used :
NodeJS Releases
Angular CLI Info
AngularJS Website
Softaculous Angular Libraries
Need more info on AngularJS?
Our Support Teams are staffed with knowledgeable admins who can find an answer to these and other questions about web hosting technologies. If you are uncomfortable walking through the steps outlined above, give us a call at 800.580.4985, or open a chat or ticket with us, and we’ll get you the info you need!.
Related Articles:


About the Author: Nickolas Newell


Our Sales and Support teams are available 24 hours by phone or e-mail to assist.
Latest Articles
How to use kill commands in Linux
Read ArticleChange cPanel password from WebHost Manager (WHM)
Read ArticleChange cPanel password from WebHost Manager (WHM)
Read ArticleChange cPanel password from WebHost Manager (WHM)
Read ArticleChange the root password in WebHost Manager (WHM)
Read Article