
 Ronald Caldwell
 EasyApache 4 installs, configures, updates, and validates your server’s Apache, PHP, and other services. EasyApache 4 also supports multiple versions of PHP, allowing you to assign different versions of PHP to each domain. In addition, there are great tools implemented with EasyApache 4 that simplify managing PHP versions.
MultiPHP Manager and MultiPHP INI Editor are two Web Host Manager tools (WHM) tools. With the addition of these tools in cPanel/WHM, users can complete most of these tasks from the graphical user interface (GUI). However, it is worth mentioning performing these tasks from the command line is recommended for better performance when compiling Apache builds.
Prerequisites
- Running EasyApache 4.
- Use Apache 2.4 or newer.
- Use suPHP as the default PHP handler. Be sure the suPHP_ConfigPath directive is not being used in any .htaccess file as unexpected behavior may occur. You can correct this by removing or commenting this directive out within the .htaccess file. (The .htaccess can be found in /home/$cpaneluser/public_html or /home/$cpaneluser/)
- AlmaLinux 8.5, CentOS 6, CloudLinux 6, Red Hat Linux 6 or higher.
- PHP versions 5.4 or higher. If your site is using PHP 5.3 or older, you will need to update and confirm your site is compatible with PHP Versions 5.4 or higher.
- Legacy versions of MySQL and MariaDB use an incompatible hashing algorithm. Since EasyApache 4 uses mysqlnd, the MySQL native driver, ensure MySQL or MariaDB are on the latest versions compatible with EasyApache 4.
Find any php.ini or .user.ini that will try to reference the old environment variable, extension_dir, and remove or correct the line. The .php.ini/.user.ini file can be found in /home/$cpaneluser/public_html or /home/$cpaneluser/.
Configuring Apache and PHP Using EasyApache 4
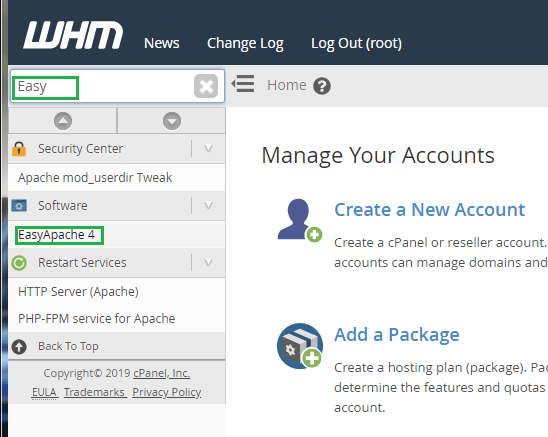
1. Login to WHM and access EasyApache 4 by using the search bar.
WHM >> Software >> EasyApache 4
2. Once you have navigated to EasyApache 4 you can view, customize and provision available EasyApache profiles. Click the button under

Currently Installed Packages.
[su_box title=”Note:” style=”glass” box_color=”#3ac6eb” radius=”20″]By default EasyApache 4 comes with additional profiles that help minimize setup up time as there are a few options tailored to the end users’ needs. If needed you still have the ability to create your own profiles for even further customization. For more information on EasyApache 4 profiles, you can view this documentation from cPanel.[/su_box]
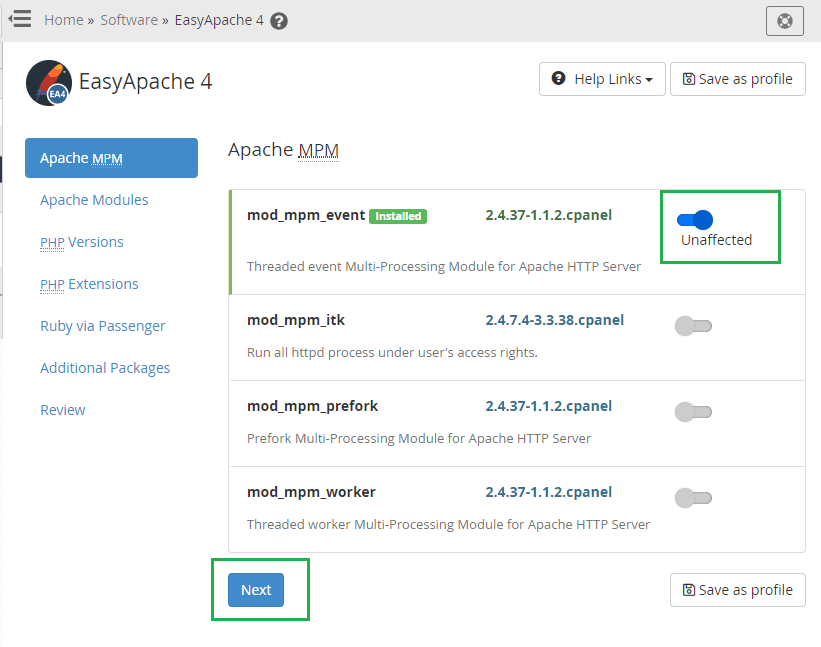
3. From the “Apache MPM” menu you can select which Multi–Processing Module, or “MPM” you would like to use. This will determine how Apache will handle incoming requests and how it processes them. You can select which MPM you would like to use by clicking the toggle button to the right of the module. If you are unsure on which MPM to use, check our tutorial to help you decide. Once selected click Next.
4. The “Apache Modules” section will allow you to select and install needed Apache Modules. Once the needed modules are selected, click Next. Apache Modules can add extra functionality to Apache. For example, the mod_ssl module can be selected from this interface. This allows Apache to process traffic using the Secure Sockets Layer “SSL v2/3” and TLS “Transport Layer Security”. For more Information on Apache Modules visit this link, which details more specific information on Apache Modules.

5. From the PHP Versions menu, you can select which versions of PHP you wish to install. WHM will automatically check for extensions currently being used by other versions of PHP on your server. More than likely these extensions are currently being used by one of your domains, and because of this, we recommend selecting the PHP X.X and Extensions button when selecting a version. After you have selected the versions you want to install, click Next.
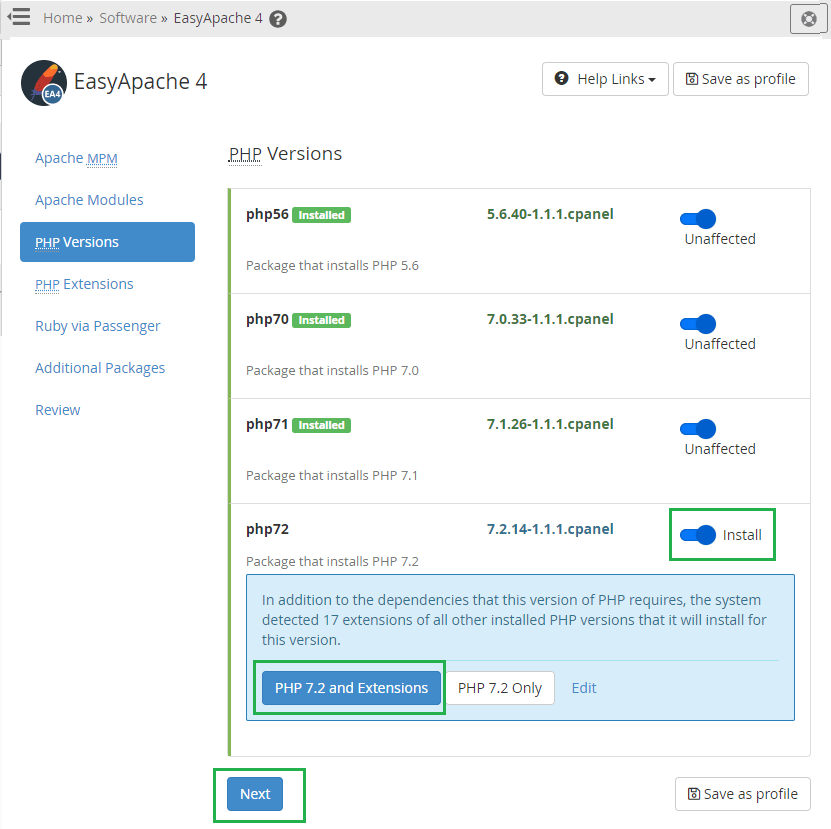
[su_box title=”Note:” style=”glass” box_color=”#3ac6eb” radius=”20″]If possible we would highly recommend using the most recent version of PHP as PHP version 5.6 and 7.0 will no longer have security updates as of January 1, 2019. For more information on supported PHP versions visit this link. [/su_box]
6. From the next menu, the PHP Extensions menu, you can select all PHP extensions you require. PHP extensions enable particular functions used in your PHP code, an example of this would be if your PHP code communicates with MySQL you will need to utilize the “mysqlnd” extension. EasyApache 4 has already selected recommended extensions that existed on previously installed versions of PHP on your server by default. A good tip is to limit the selection view to only the version of PHP you are installing. You can do so at the top of this page by deselecting the boxes next to Filter by PHP Version. Once you have selected your PHP extensions click Next.

7. The next two sections are not commonly used, however, they are included for those that require these functions. Ruby via Passenger allows you to integrate Ruby, Node.js, and Python applications on your server. Within this menu, you can install/select which Ruby modules you would like to use. More information on this can be found in this link.
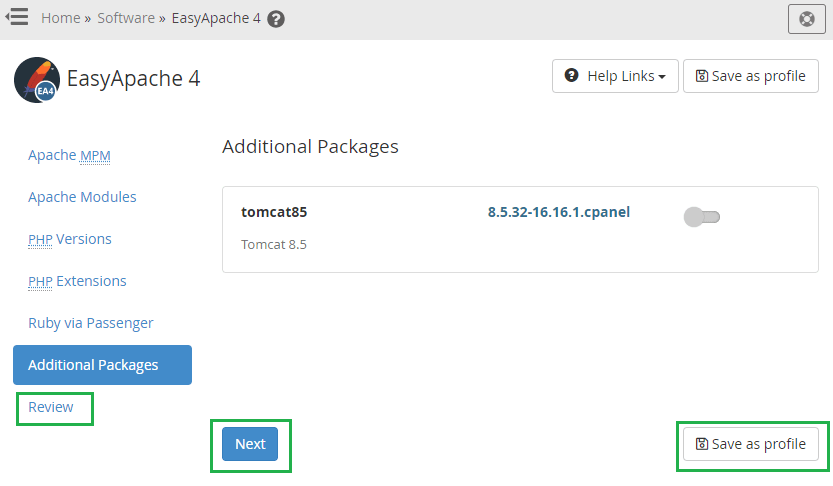
Within the Additional Packages menu, you can select custom packages to be installed on your server. Currently, by default, the only option available is Tomcat 8.5. Tomcat is a Java Servlet Container that allows you to run Java–based application on your server. You can save the profile to be used for later by clicking Save as profile button on the bottom-right corner of the page.
Once you have finished your selections, click Next or Review. You should see a notification like the one we have included below. This can take a few minutes to complete so allow it some time to poll your results.

8. Please be sure to review this next page to make sure you have selected the desired configuration. If you notice anything is missing or should be changed, you may return to the relevant menu to adjust the selections. Once reviewed, scroll down to the bottom of the page and click the “Provision” button.

Once you have begun provisioning, please allow EasyApache some time to finish. You will be prompted once the process has finished.
Congratulations, you have selected an MPM, installed additional Apache Modules, PHP versions, and PHP extensions using EasyApache 4.
Using the MultiPHP Manager from WHM
cPanel’s MultiPHP Manager allows users to manage cPanel accounts PHP configuration on a per domain basis. This feature is only available on EasyApache 4. You can also set the system’s default global PHP version for all accounts, enable PHP-FPM globally or per domain, and adjust PHP-FPM pool options.
Selecting System default PHP Version
- Navigate to the MultiPHP Manager (WHM >> Software >> MultiPHP Manager)

[su_box title=”Note:” style=”glass” box_color=”#3ac6eb” radius=”20″]Setting the system default PHP version will not change the PHP version for all domains. Your cPanel account “if not defined” is set to inherit by default. If the inherit option is enabled, the account will use the system’s default PHP version. [/su_box] - Click Edit under System PHP Versions.

- Select the desired PHP version and click Apply. You should see a Success notification at the top right of the page if the change was successful. It will also display any errors that may have occurred.

Define PHP Versions per Domain
Within the MultiPHP Manager, you also can set the desired PHP version on a per domain basis.
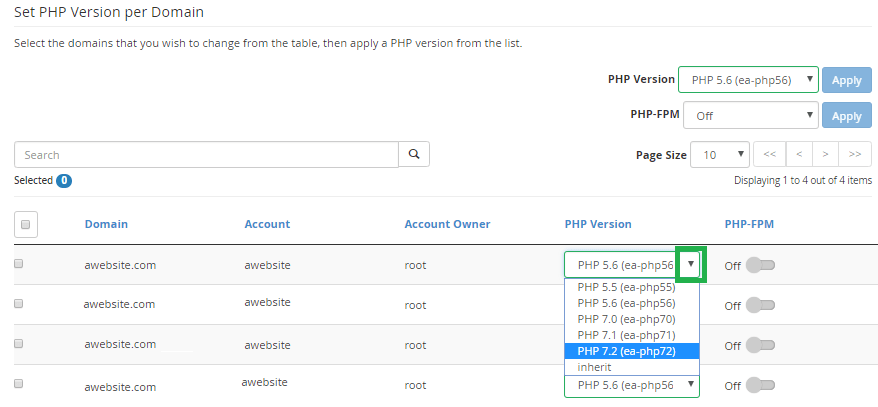
- Select the domain or accounts you wish to alter.
- Click the drop–down menu located in the PHP column.
- Select your desired PHP version. The interface will prompt you once the change has completed.

Changing PHP Versions on Multiple Accounts

- Select which accounts you would like to alter by clicking the check boxes next to the domain.
- Click the drop–down located in the type right.
- Select the desired PHP version and click Apply. The interface will prompt you once the change has completed.

MultiPHP INI Editor
MultiPHP INI Editor is a great tool that allows you to manage PHP settings per version. You can quickly edit the most commonly adjusted PHP directives from within the Basic Mode or for more advanced users you can edit the configuration files directly using the Editor Mode. For information on directives, please read PHP’s documentation.
To access the MultiPHP INI Editor login into WHM. (WHM >> Home >> Software >> MultiPHP INI Editor)

Basic Mode allows you to view and edit directive values for your selected PHP version. WHM will save changes to the PHP configuration file. Also, directives will only show if the version of PHP you are editing supports that directive. With WHM assistance this greatly helps minimize errors as the syntax within these files are sensitive.
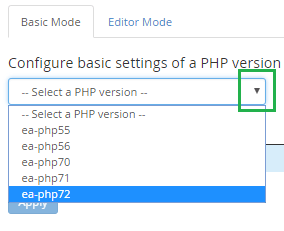
Edit PHP Configuration Using MultiPHP INI Editor in Basic Mode
- Select a PHP version from the drop–down menu.
- Adjust directives as needed. For example, you can increase upload_max_filesize by editing the field to the right of the directive.
- Click Apply to submit changes. If the edit was submitted successfully WHM will notify you at the top right of the page. It will also inform you if any errors have occurred.


Edit PHP Configuration Using MultiPHP INI Editor in Editor Mode
Editor Mode allows you to modify additional directives and PHP configurations that are not available in Basic Mode. Please note, errors within this interface can result in errors causing PHP scripts not to function correctly. Unlike Basic Mode which loads directives available to that version of PHP, Editor Mode loads the contents from the .ini file for the selected PHP version. If the file does not exist then, the interface will load a blank editor. When saving values or configurations to a blank editor, the systems will create a new file.
- From within MultiPHP INI Editor click the Editor Mode tab.
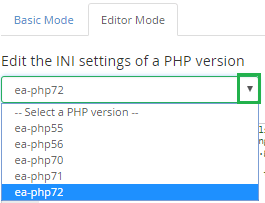
- Click the drop–down menu to select PHP Version.
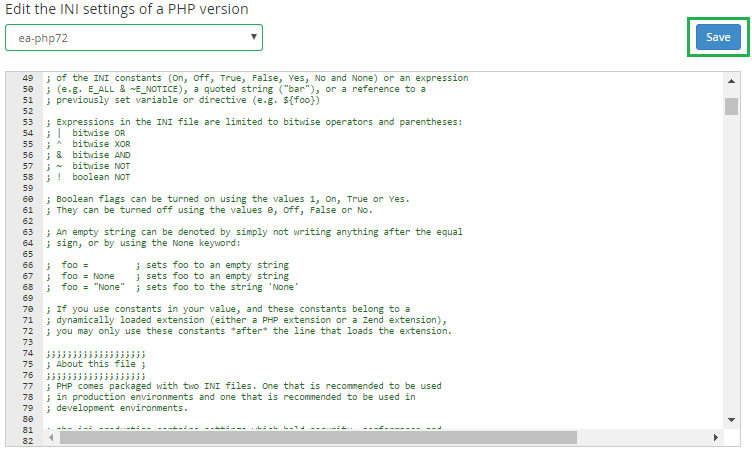
- The Editor will open the file as a text document. From here you can simply edit the configuration to your needs.
- Click Save to submit your changes. If the changes were successful WHM will display a success notification in the top right of the screen as well as any errors that may have occurred.
Final Thoughts
EasyApache 4 makes adjustments and server tuning a breeze. You can install multiple PHP versions without extreme difficulty. If assistance is needed, the Liquid Web support team is available 24/7/365.
Do you need cPanel hosting for your new or existing projects? Liquid Web’s VPS Hosting, Cloud Dedicated Servers, or Dedicated Servers with cPanel are great solutions to elevate your hosting experience. Contact our sales team to get set up.