


Install SSL Certificates in a Windows Server
About SSL
SSL Certificates secure the web today using Transport Layer Security (TLS). This is a network protocol which encrypts the data between the web server and the visitor. Most websites today are using SSL, and you can see this every time a website starts with https:// instead of http://. This indicates the website is securely encrypting data between you and the server so that no attackers can easily sniff the network packets and capture your logins.
SSL protects the web today and is utilized by almost every corporation and business and acts first step in user security. SSL is a way to protect logins and forms that you enter from being intercepted unknowingly by a 3rd party on your network. If your website does not incorporate SSL, we suggest implementing it as soon as possible, and you can use our guide to do it!
Generating the Certificate Request (CSR)
Before ordering your SSL, you will need to create a certificate request for the certificate authority to issue an SSL.
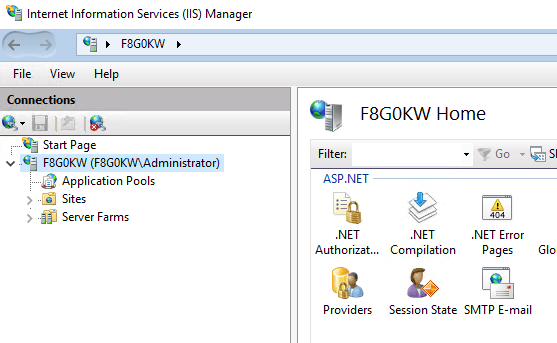
Step 1: To begin, the first thing you need to do is open IIS. If you do not have a shortcut for it, you can search your computer for inetmgr.exe and open it that way. From here you will click on your server name:
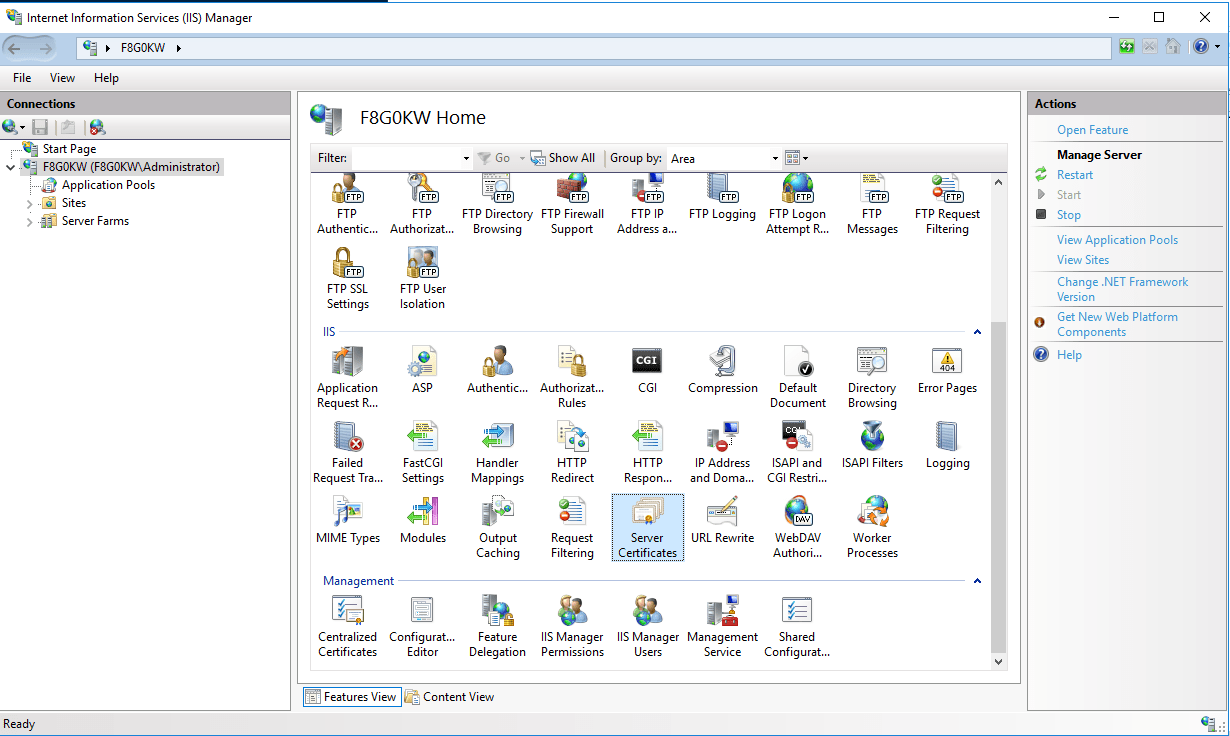
Step 2: Then double-click “Server Certificates“.
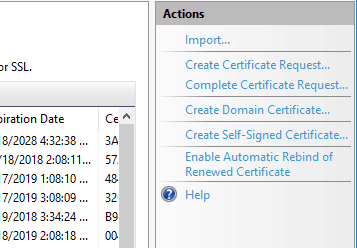
 Step 3: Once you have done that, you are ready to create your certificate request.
On the right-hand side, select ‘Create Certificate Request‘
At this point, you will be asked for information about the certificate and the company requesting the certificate.
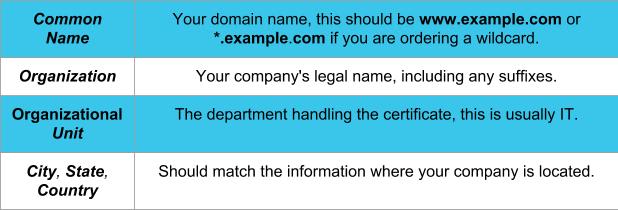
Once you have filled this out, click Next.
It will bring you to the following screen:
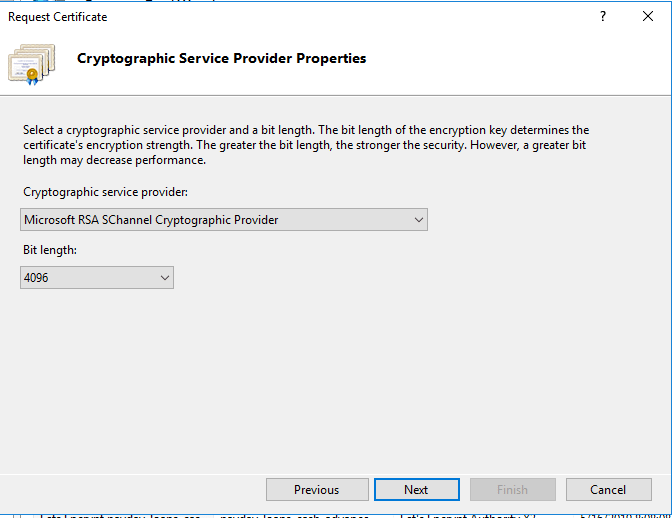
Step 4: We suggest using the settings above, making sure the Bit Length is set to 2048 or higher. We like to go with 4096 and click Next. On the subsequent screen, you need to specify a filename where your Certificate Request or CSR can be exported. For simplicity, we would like to export the CSR to C:\example.com.csr.txt
Ordering the SSL
At this point, you are ready to order your SSL certificate!
Step 1: Go ahead and go to your chosen SSL provider, whether it be GlobalSign, Liquid Web, or any numerous other certificate authorities.
Step 2: When you are signing up for the SSL, it will ask you for the CSR data we saved at C:\example.com.csr.txt – Copy and paste the contents into the certificate authorities website, and it will generate all the same fields we entered via the previous steps.
Step 3: Finish your order, and they will provide you with a .crt certificate file. Download this file and copy it to your web server. For simplicity, copy it to C:\example.com.cer
Great! Now you have created a certificate request and completed it with the certificate authority and have your new SSL certificate ready to be installed.
Installing the Certificate in IIS
Step 1: Open up IIS/inetmgr.exe and navigate to the server as we did in the beginning.
Step 2: Navigate to Server Certificates. Now, instead of selecting ‘Create Certificate Request’ you will select ‘Complete Certificate Request‘
Step 3: It will prompt you for the location of the new certificate, which we saved at C:\example.com.cer and to make things easier on ourselves later, we will name the friendly name example.com-01 so that we know this is the first SSL for this domain in case we want to renew it later. Once you hit OK, you should see your certificate in the list of server certificates in IIS.
Great! Now you have generated the certificate request, completed it, and installed your certificate on your web server. Now you need to bind the certificate to your website.
Binding the SSL Certificate to a Website
Step 1: In IIS, browse to Sites > example.com (where you want the SSL certificate installed).
Step 2: Right-click on your site and select ‘Edit Bindings‘ or if you click on the site, you will see Bindings on the right-hand side.
This will open a window that looks like the following:
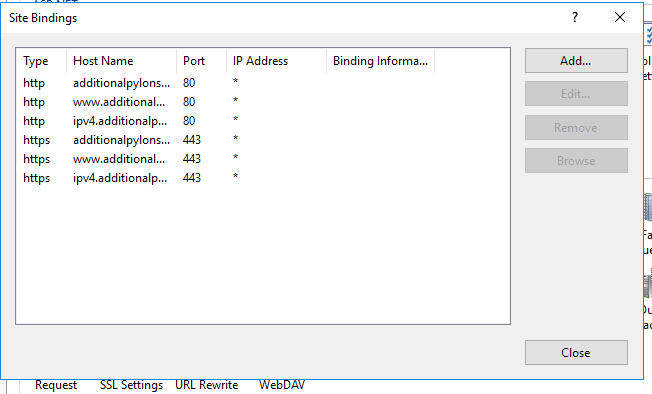
Step 3: If you already have the https binding setup for your site, you will simply double-click on the https bindings and select the desired SSL certificate from the drop-down. If you haven’t created a https entry in your bindings, click Add. On the right-hand side and you will see the following window:
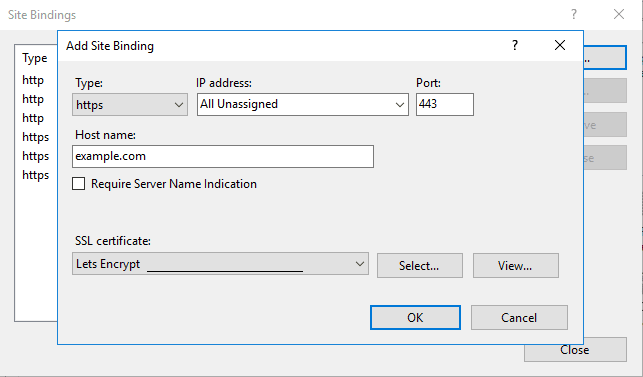
Step 4: First, set the Type to https so your website knows the request is for a secured URL.
You will want to set the IP Address on your host. In my case, All Unassigned.
Port should be automatically set to 443, if not, do so. (This is the port defined for secured communications.)
Step 5: Set the Host Name to example.com (your domain). In most cases, you will want to check Require Server Name Indication. In our case, we do not need it because this is the only certificate on this IP address. Select your SSL certificate from the drop-down!
Select OK and do it all again, this time instead of setting the hostname to example.com, you will want to set it to www.example.com. This is because we only set it up for requests from https://example.com, but https://www.example won’t register as secured until we add the second binding entry.
Testing Your New SSL
First, you will want to access your domain at https://example.com and https://www.example.com to see if there are any errors. An easy way to tell if the certificate is functioning properly is to input your domain into SSL Shopper. Try it with and without the “www” to confirm both work. If everything is working, you should see several green checks and no errors. The certificate expiration date will be at least one year from the day you ordered the SSL originally.
That’s it! You have successfully installed a brand new SSL for your website that works both with www and without it. Congratulations! Now you can follow these steps to secure all of your websites and applications.
Liquid Web makes it easy to purchase new SSL’s. Simply log in to manage.liquidweb.com, clicking Add, and select SSL Certificate. Here you can simply input the CSR you generated in Step 1, and it will order an SSL and give you back the certificate file needed to complete the installation.
If you have a Managed Windows VPS server at Liquid Web, we can help you through this process and diagnose any issues you may have run into. We also assist with SSL on Self-Managed if they buy the SSL from Liquid Web.
Related Articles:


About the Author: Mike Sherman
Mike Sherman was formerly one of our Helpful Humans at Liquid Web and worked on the Windows Enterprise Department. He has over 10 years of technology experience and a wealth of SEO and online marketing knowledge. He now supports IT infrastructures for mid-range companies as a Mid-West MSP.


Our Sales and Support teams are available 24 hours by phone or e-mail to assist.
Latest Articles
How to use kill commands in Linux
Read ArticleChange cPanel password from WebHost Manager (WHM)
Read ArticleChange cPanel password from WebHost Manager (WHM)
Read ArticleChange cPanel password from WebHost Manager (WHM)
Read ArticleChange the root password in WebHost Manager (WHM)
Read Article