
 Joseph Molloy
 PostgreSQL, previously Postgres, is an advanced open-source relational database. It is also one of the most popular database solutions used today. In fact, many companies use PostgreSQL as their primary data store for various mobile and web applications.
That shouldn’t come as a surprise because this software has been continually developed by its expert, open-source community since 1996. Fast forward to today, and PostgreSQL has already reached version 15.2, which was released on February 9th, 2023.
PostgreSQL is highly versatile and expandable due to its powerful extension support. Furthermore, it can run on any popular operating system, such as Linux, macOS, and Windows.
In this article, you will learn how to install PostgreSQL on AlmaLinux. So, read on to learn more.
Requirements
If you want to be able to follow this guide and learn how to install PostgreSQL on AlmaLinux, you should first make sure that you meet the following requirements:
- You have a computer or server that is running AlmaLinux 9.
- You have root or sudo privileges on your AlmaLinux machine.
- You have access to an internet connection to download PostgreSQL for Linux.
Once you ensure the above requirements are met, feel free to proceed with the following guide.
Install PostgreSQL on AlmaLinux
If you have never installed PostgreSQL on Linux before, or this is your first time using AlmaLinux, don’t worry. Just follow our easy five-step guide to get PostgreSQL running in no time.
Step #1: Update AlmaLinux
Before you install PostgreSQL on Linux, you should first make sure that your distribution has the latest packages installed. To do this, you need to use the dnf command, which will automatically update any outdated packages.
dnf update -yHere is the output.

Step #2: Install PostgreSQL
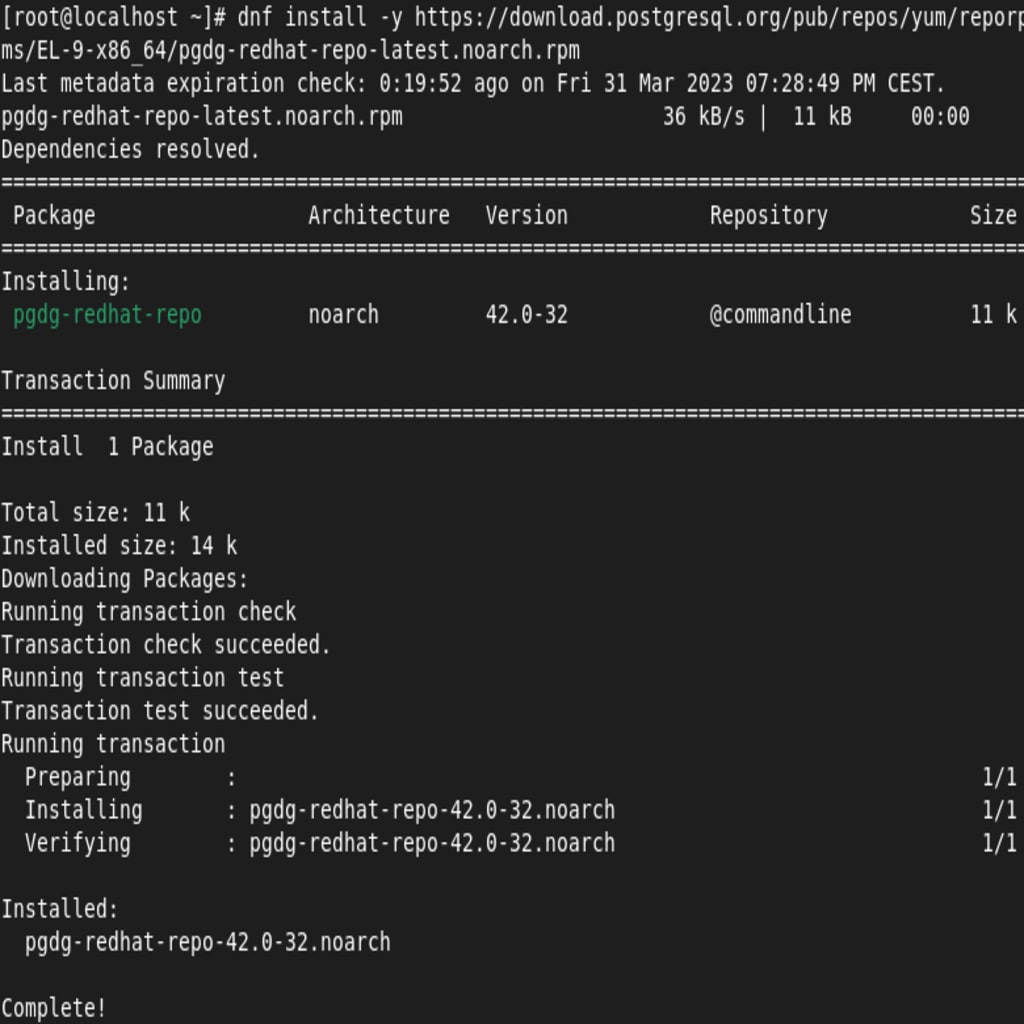
The latest version of PostgreSQL is not available in the AlmaLinux default repository. That’s why, in order to install the latest version of PostgreSQL, you will need to manually download PostgreSQL for Linux from its official repository. Use the following command to achieve this.
dnf install -y https://download.postgresql.org/pub/repos/yum/reporpms/EL-9-x86_64/pgdg-redhat-repo-latest.noarch.rpmHere is the output.
[su_box title=”Note:” style=”glass” box_color=”#3ac6eb” radius=”20″]For users on AlmaLinux 8, please be aware that postgresql15 and postgresql15-server are not accessible by default. To enable their availability, it is necessary to first disable the built-in module of PostgreSQL. Execute the following command to achieve this: dnf -qy module disable postgresql.[/su_box]
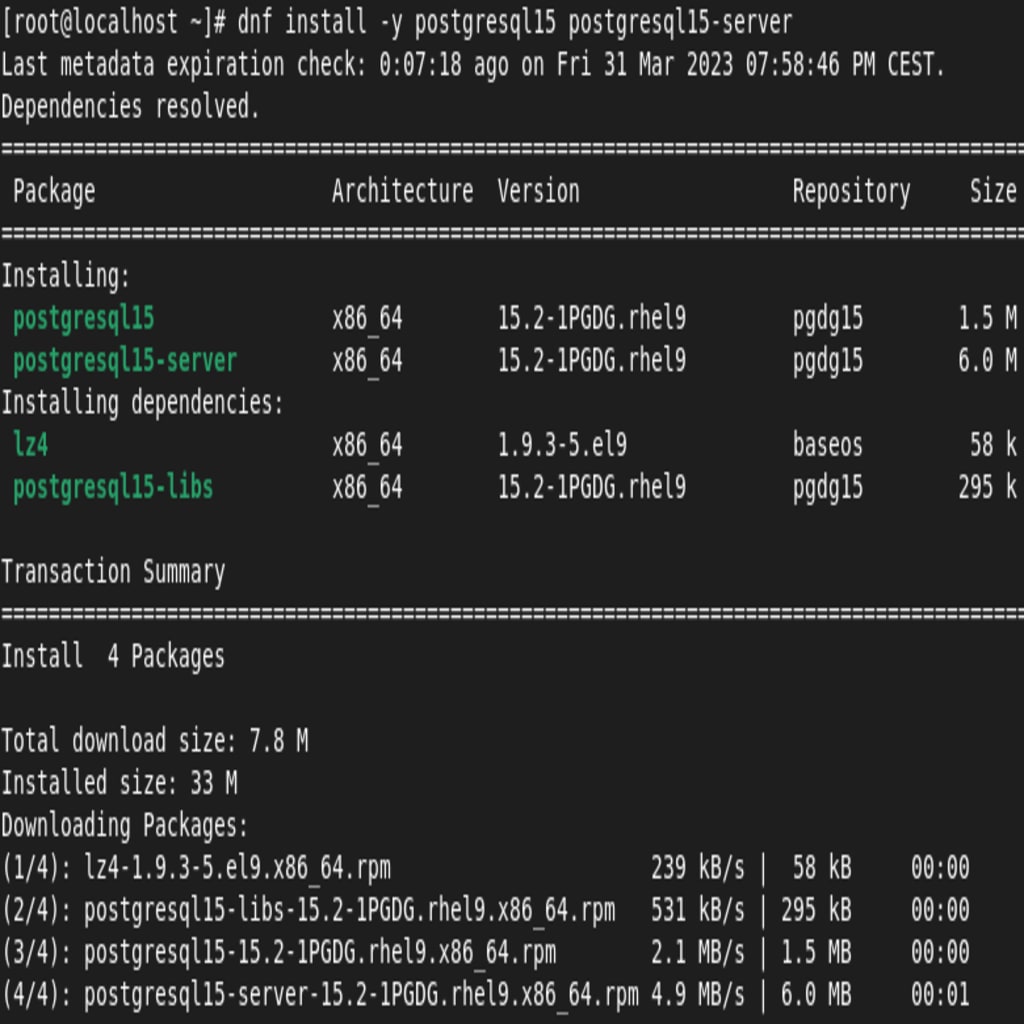
Now install the PostgreSQL 15 client and server with the following command.
dnf install -y postgresql15 postgresql15-serverHere is the output.
Once the installation is complete, you can initialize the PostgreSQL database. Use the following command to achieve this.
/usr/pgsql-15/bin/postgresql-15-setup initdbHere is the output.

Finally, you should start and enable the PostgreSQL service with the following command. This command will run PostgreSQL and set it to load at boot.
systemctl enable postgresql-15 && systemctl start postgresql-15Here is the output. Note that successfully running the command gives the message Created symlink along with the file paths.

Step #3: Set a Password
You can now set a password for the default postgres user. For maximum security, make sure to use a long string of uppercase letters, lowercase letters, numbers, and symbols. Securing the database server is critical for your application’s or website’s overall security.
Use the command below to set the password. You will be asked to retype it one more time.
passwd postgresHere is the output.

After you have set the password for the Postgres user, you will have to use it every time you need to access PostgreSQL.
Step #4: Enable Remote Access
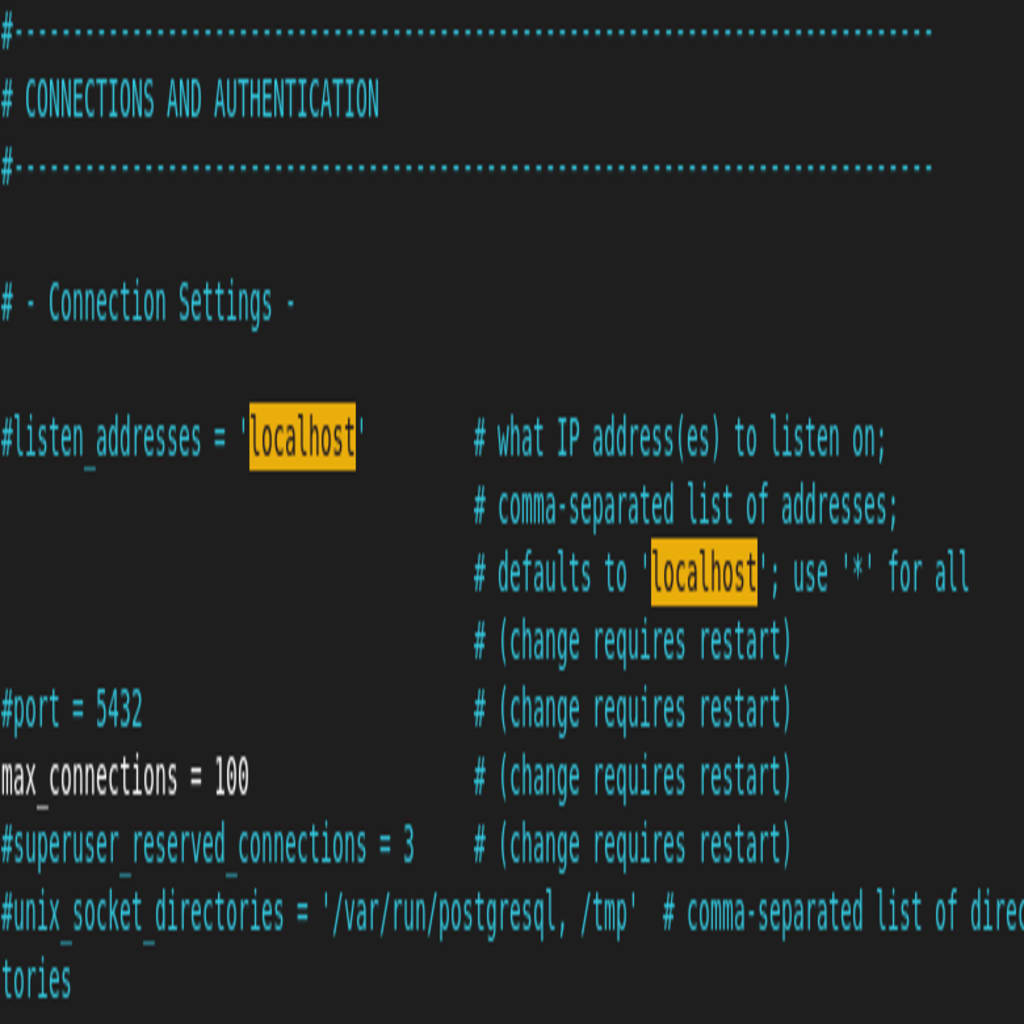
Since you will likely be using PostgreSQL as a server, you will need to enable remote access for it. This is because it is set to localhost by default. To enable remote access, follow these next steps.
First, open the /var/lib/pgsql/15/data/postgresql.conf file and replace listen_addresses = ‘localhost’ with listen_addresses = ‘*’.
Here you see the unchanged file.
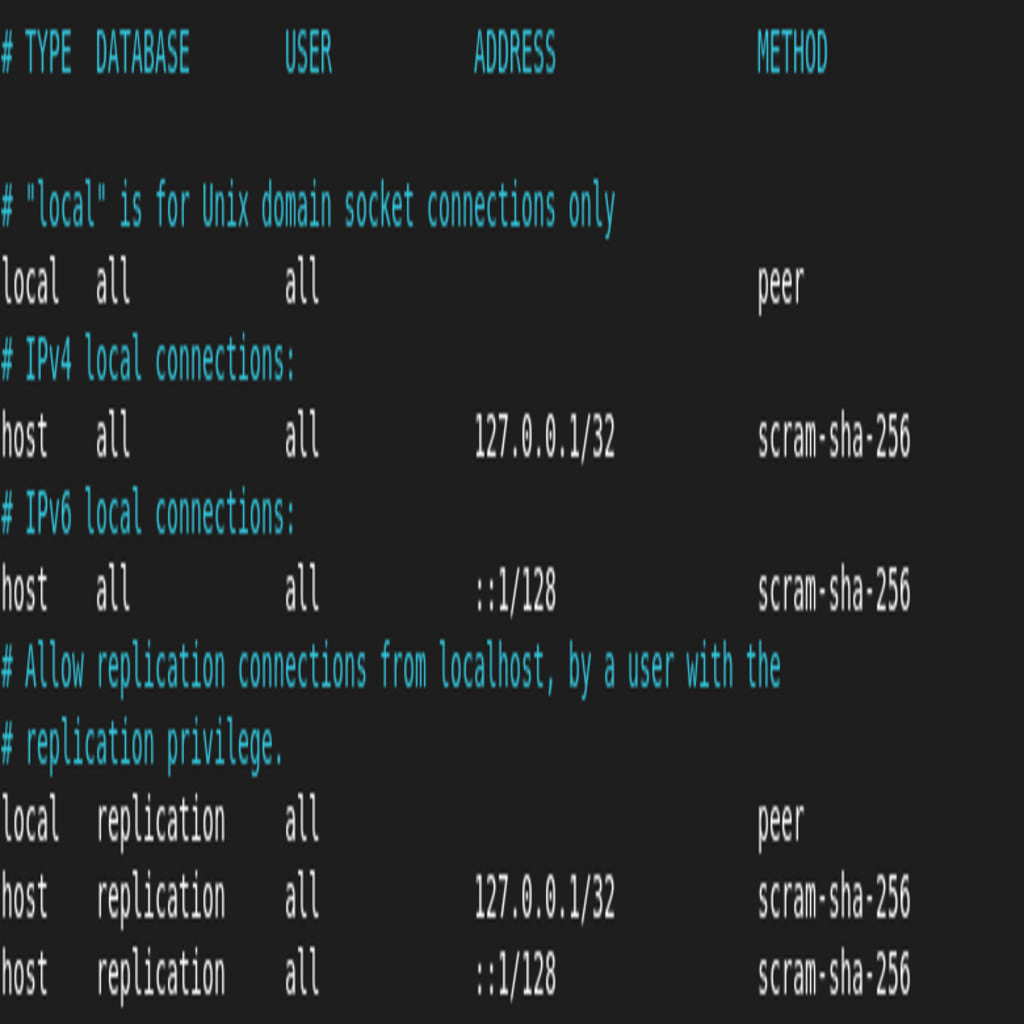
Then, open the /var/lib/pgsql/15/data/pg_hba.conf file and add the following entry to the end of it.
host all all 0.0.0.0/0 md5Again, here is the unchanged file you will add this line to.
Finally, restart the postgreSQL service to apply the changes. Use the following command to achieve this.
systemctl restart postgresql-15Step #5: Open the Console
To open the PostgreSQL console, use the following command.
sudo -u postgres psqlHere is the output.

You managed to install PostgreSQL on AlmaLinux.
Final Thoughts
Installing PostgreSQL on AlmaLinux does not have to be difficult. This guide walks through the installation requirements as well as installing and running PostgreSQL on Almalinux.
Liquid Web Can Meet All of Your Hosting Needs
Are you ready to host your websites and apps with AlmaLinux? Liquid Web offers you the AlmaLinux OS with VPS hosting, dedicated servers, and cloud servers. You can also take advantage of our fully managed images with the cPanel and Plesk control panels. Contact the sales team to get started today.