
 Paige Vasudevan
 MySQL is a free-to-download, open source database that is widely in use. It is one of the most popular relational database management systems. Even though it is more popular with Linux servers, it is equally compatible with Windows Servers.

Using a very simple tool called MySQL Installer, you can swiftly install MySQL on a Windows 2019 server. It has a user-friendly graphical user interface (GUI).
What is MySQL Installer for Windows?
MySQL Installer is a standalone application designed to ease the complexity of installing and configuring MySQL products that run on Microsoft Windows. It also guides you through the steps needed to configure MySQL.
Prerequisites
- Administrator privileges on Windows server.
- MySQL Installer requires .NET Framework 4.5.2. (If you have an older version of the .NET framework, then update that in order to begin the installation process.)
- MySQL requires Visual C++ 2019.
How Do I Install MySQL on Windows Server 2019?
Step 1:
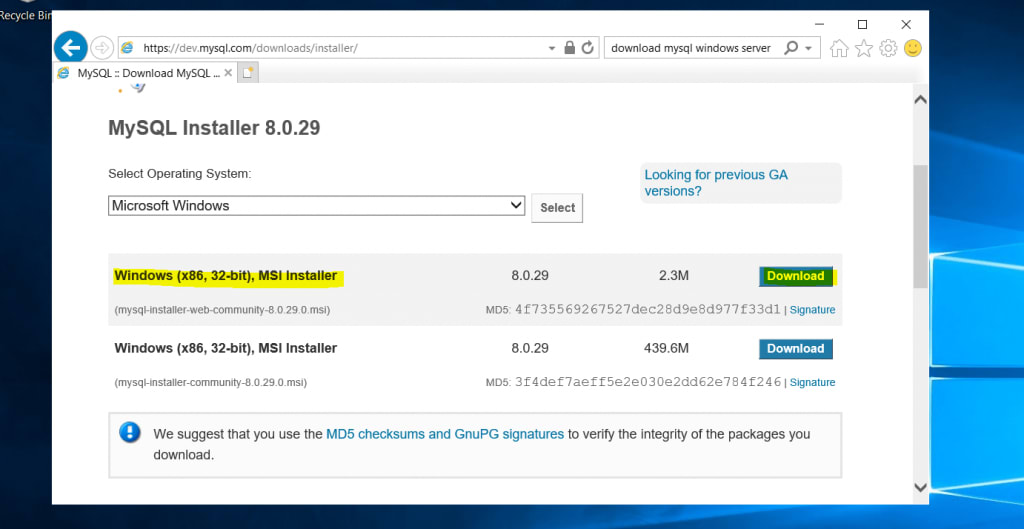
Start by downloading MySQL Installer in Windows Server 2019. Choose the appropriate version for your server and click Download.
Step 2:
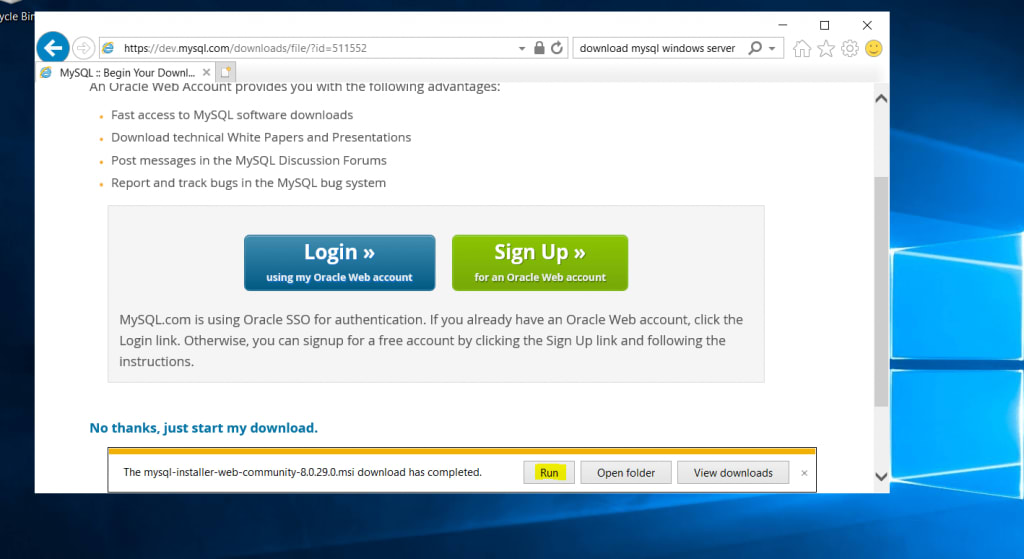
After downloading the MySQL file to perform the installation, run the program from the pop-up window at the bottom of your browser.
MySQL Installer Setup for Windows
Step 1:
Running the program in the previous step causes a new window with the MySQL Installer setup to appear. It prompts you to select the MySQL products to install on the host.
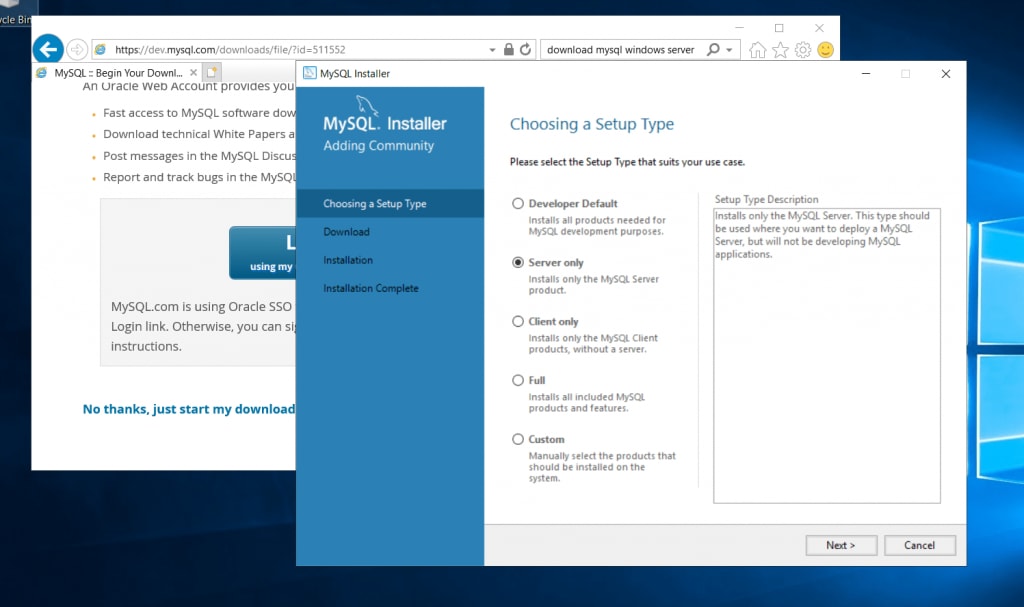
One option is to choose the predetermined setup type that matches your setup requirements. Here is a brief explanation of each mode:
- Developer Default: Installs the products that complement application development with MySQL, such as MySQL Server, Shell, Router, Workbench, MySQL for Visual Studio, MySQL Connectors (for .NET, Python, ODBC, Java, and C++), MySQL Documentation, and MySQL Samples and Examples.
- Server only: Only installs the MySQL server. This setup type installs the general availability (GA) or development release server you selected when you downloaded MySQL Installer. It uses the default installation and data paths.
- Client only: Only installs the most recent MySQL applications and MySQL connectors. This setup type is similar to the Developer Default type, except it does not include the MySQL server or the client programs typically bundled with it, such as MySQL or mysqladmin.
- Full: Installs all available MySQL products.
- Custom: The custom setup type lets you filter and select individual MySQL products from the MySQL Installer catalog.
Select Server only for this tutorial.
Step 2:
MySQL Installer uses entries in the package-rules.xml file to determine whether the prerequisite software for each product is installed on the host. MySQL Installer displays the Check Requirements screen when the requirement check fails to help you update the host. In addition, it evaluates the requirements each time you download MySQL as new product (or version) for installation.
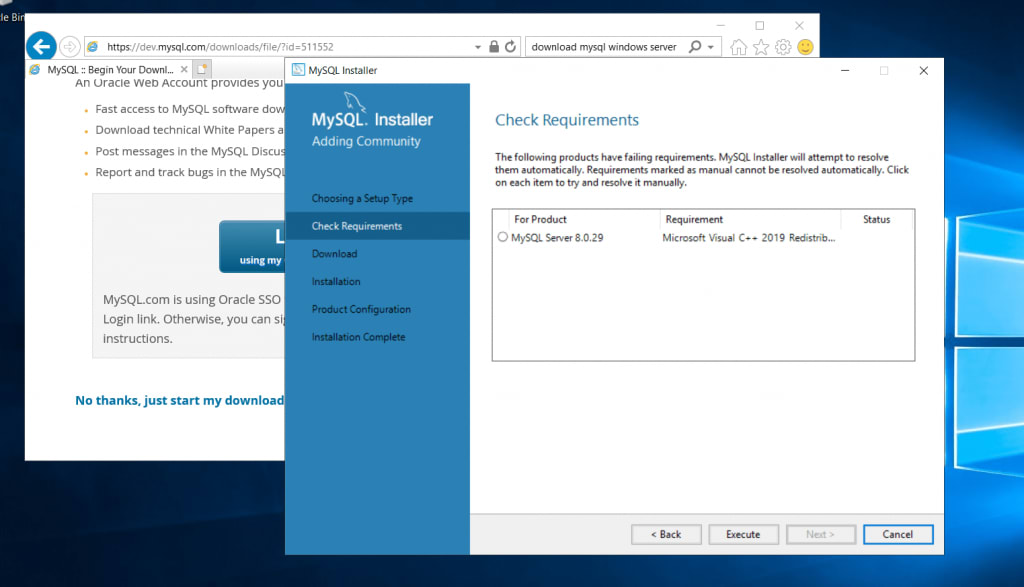
For this tutorial, you have to install Microsoft Visual C++ 2019.
Step 3:
Download the appropriate version for your server requirements and execute the file to run the installation of Microsoft Visual C++.

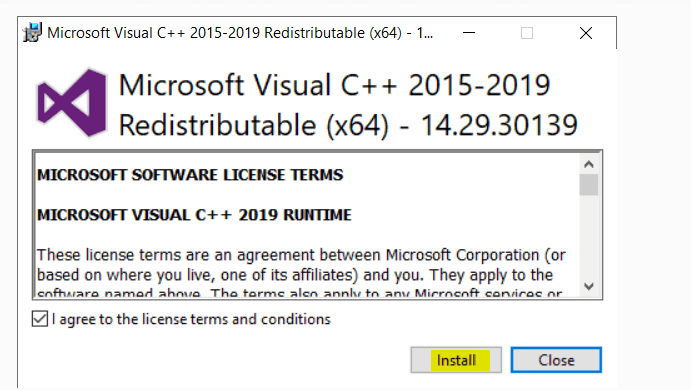
Click the checkbox to agree to the license agreement and click Install.
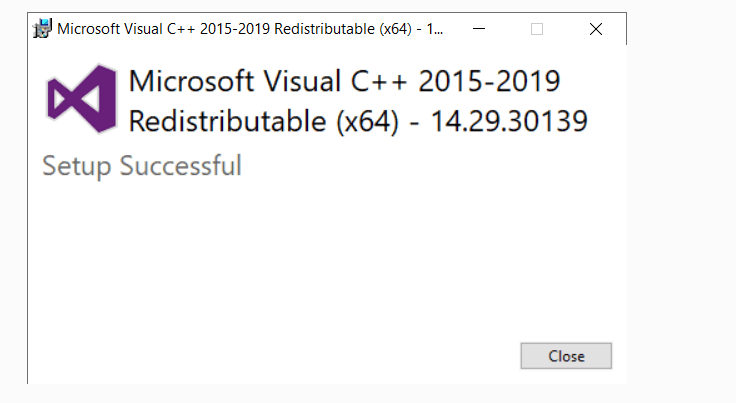
Once the setup is complete, it will show the successful installation message below. Click Close.
Step 4:
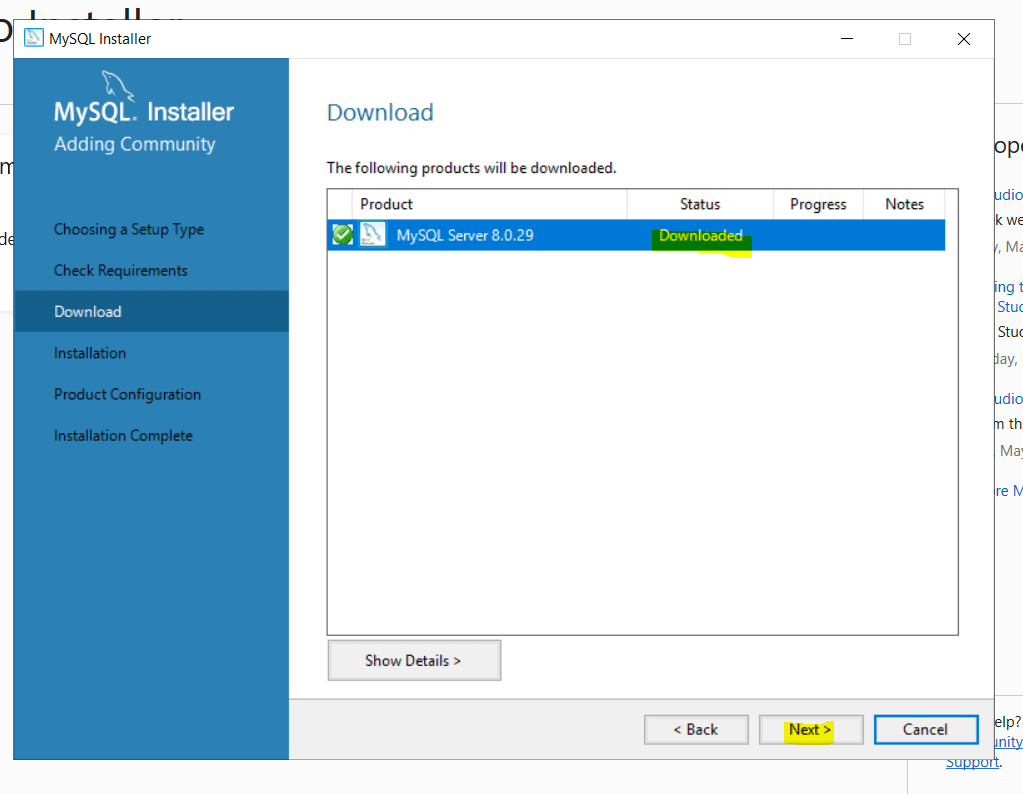
Once you’ve verified the successful Microsoft Visual C++ installation, return to the MySQL installer and click Next. You will continue with the Download screen seen below. Click Execute to download MySQL Server 8.0.29.

Once the download of MySQL is complete, click Next, which will take you to install MySQL Server.
Step 5:
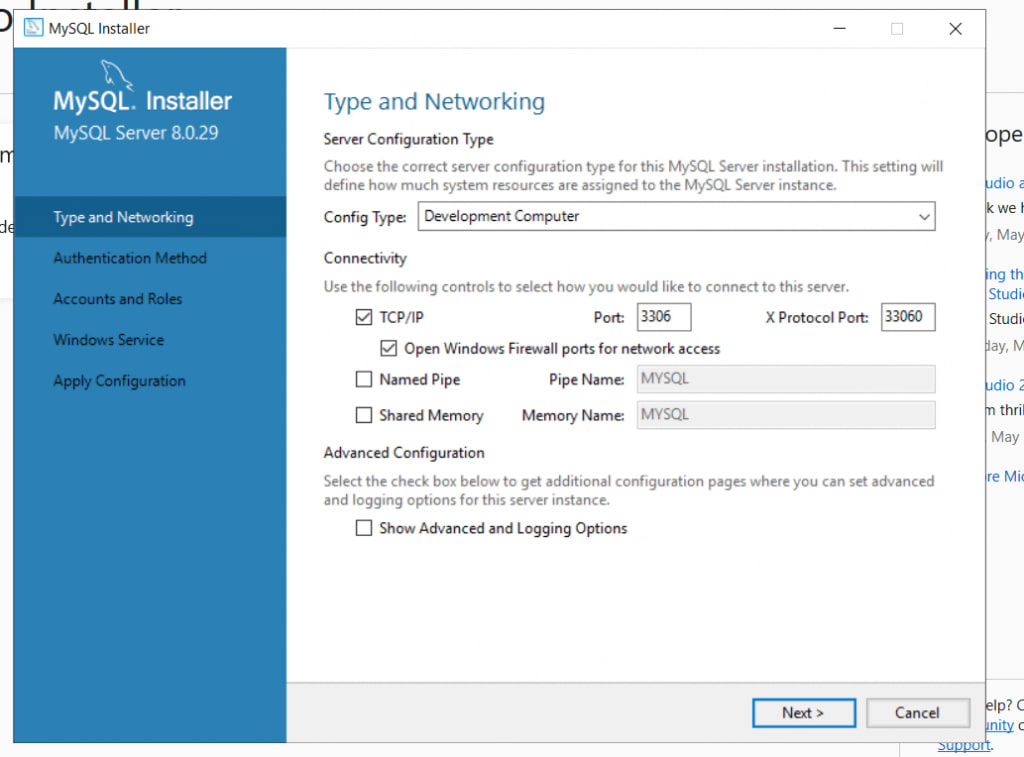
Once installation is complete, you are taken to the Product Configuration window, starting with Type and Networking. Choose the appropriate setting for your requirements and click Next.
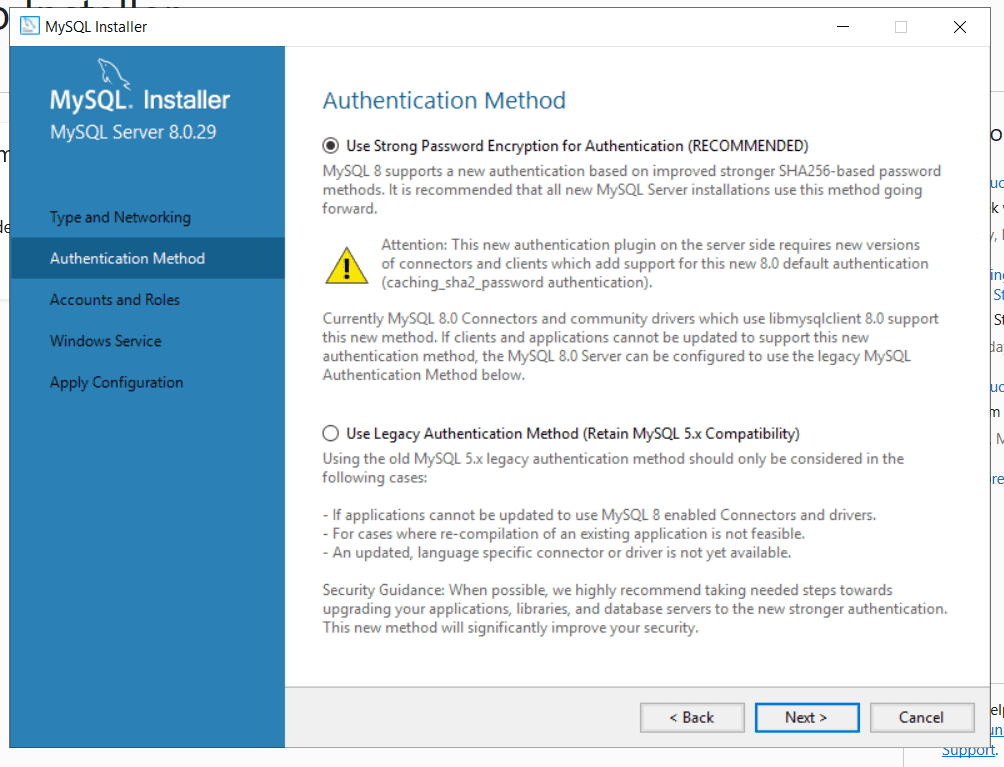
Step 6:
From the Authentication Method section, select the radio button for Use Strong Password Encryption for Authentication, and click Next.
Step 7:
The next screen is the Accounts and Role window, where you can set your MySQL Root Password. Complete this section and click Next.

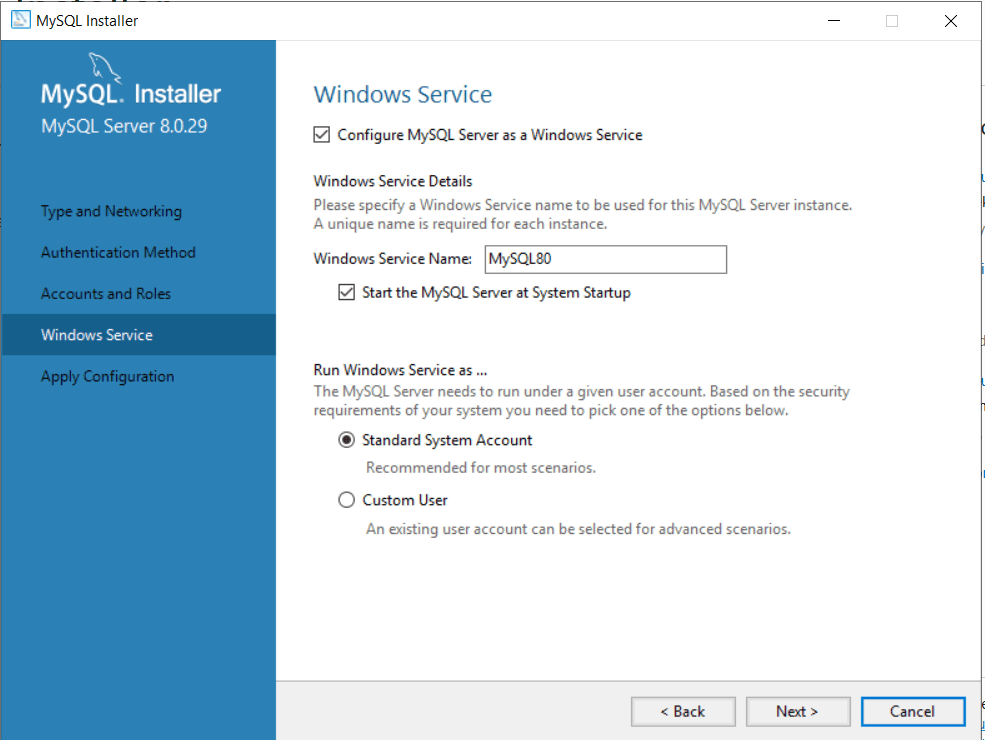
The Windows Service screen allows you to configure MySQL Server as a Windows service and name the MySQL service. For this tutorial, the given name is MySQL8.0. You can also start the service at System Startup and run it via the standard system account or a custom user. Make your selections and click Next.
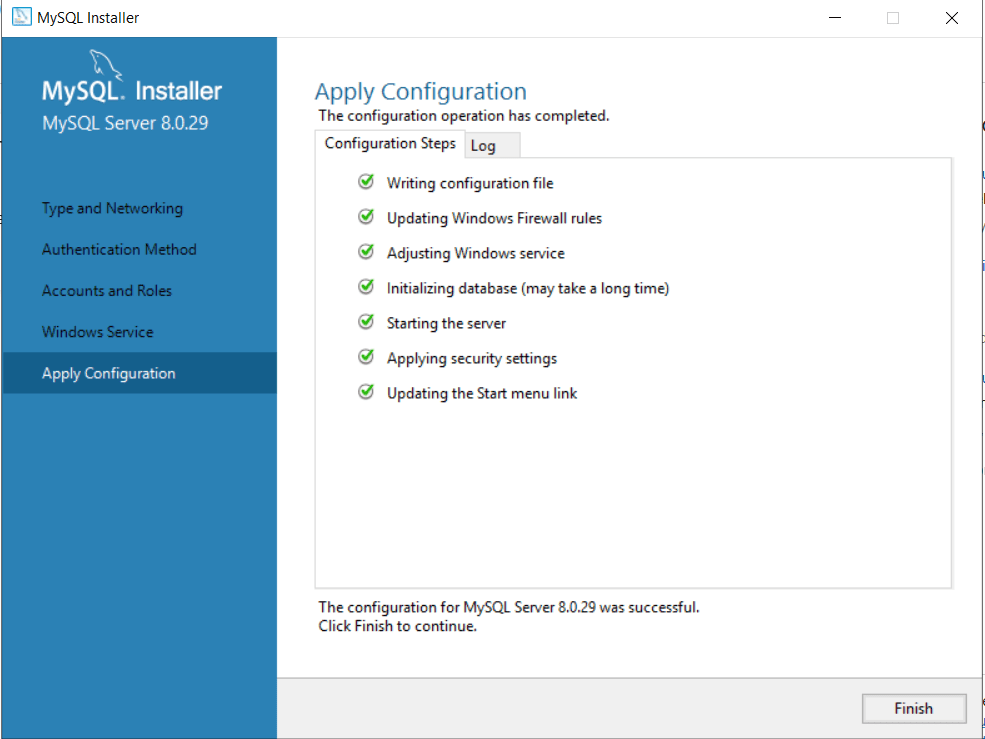
Click Finish on the Apply Configuration screen to apply all the settings and selections.
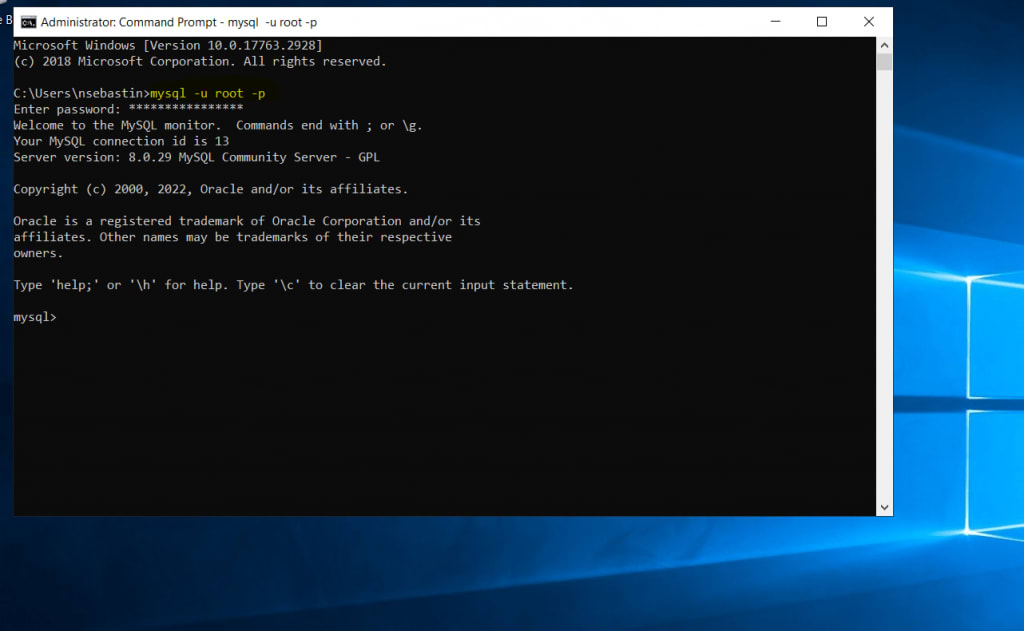
Accessing MySQL via Command Prompt
When you run Command Prompt from the Windows Start Menu and execute the mysql command, you may encounter the error below.
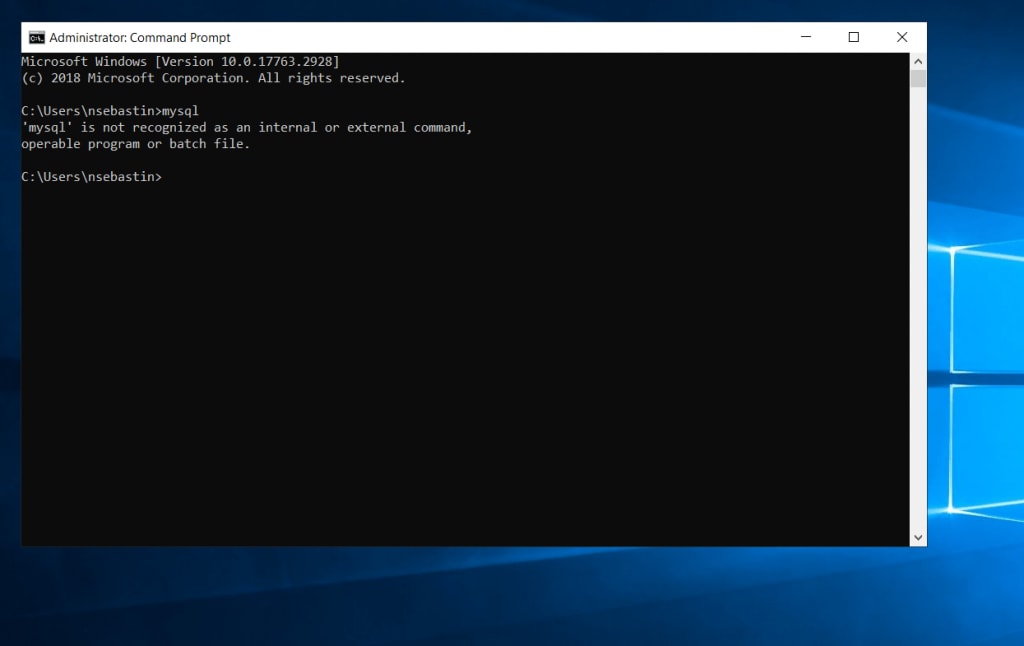
This error occurs since there is no MySQL Bin added to the path. To find the MySQL Bin location, navigate to your This PC from the File Manager. Then navigate to C drive > Program Files > MySQL > MySQL Server 8.0 > bin. Right-click on bin in the top bar and select Copy address.
Use the cd command and paste the address in the Command Prompt to navigate to that location. Then, rerun the mysql command to see the result.

Changing Environment Variables in Windows for your installation of MySQL
To run MySQL as a normal command without navigating the folder, you must specify the bin path in environment variables. Search the keyword Environment in the Windows Search and open the program Edit System Environment Variables. Click Environment Variables.
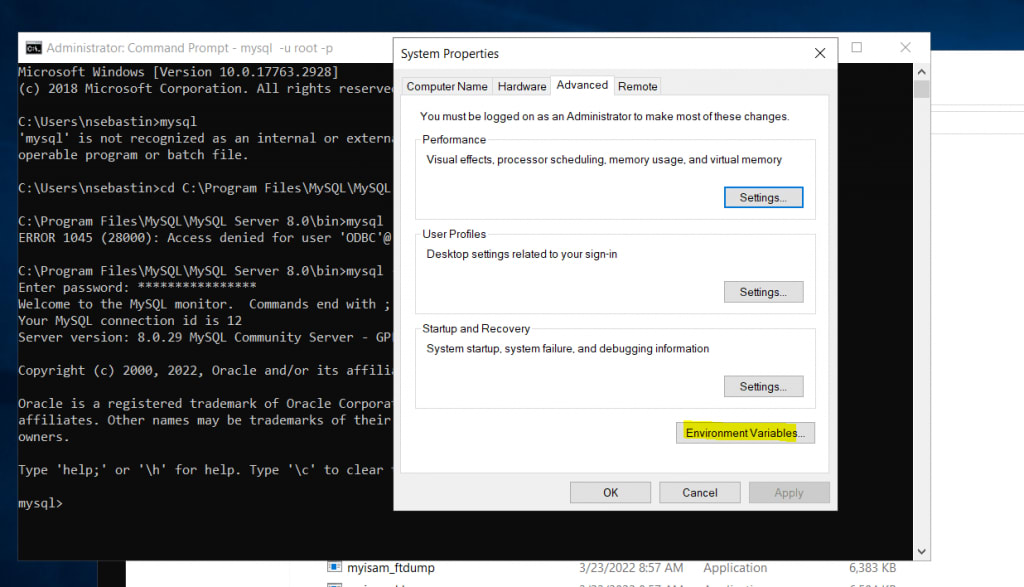
Click New under System Variables to add a new path. Add the path to the MySQL bin you copied previously. Click OK on all windows, and close the window.

You can then go to the Command Prompt and run the mysql command from any directory location on the server.
Final Thoughts — Install of MySQL on Windows
By following this guide, you can install MySQL on Windows Server 2019 with the help of MySQL Installer, which is a very user-friendly interface. This tool is excellent for those that need MySQL in their Windows environment, offering easy installation and configuration.
Liquid Web has managed and unmanaged Windows server options for VPS hosting, cloud servers, dedicated servers, and ASP.NET VPS. If you’re ready to start, contact our sales team immediately.